A few things to take care of:
- Uninstalling WP STAGING will not delete any staging site. If you already uninstalled WP STAGING before deleting your staging site, install WP STAGING again and delete the staging site by following this article.
- Before you delete a staging site, it’s recommended to create a full backup of your production website first!
- If you get an error message and can not delete the staging site, try to delete it manually.
Contents
Delete a Staging Site the Regular Way
To delete a staging site, log in to
WordPress Production Site > WP Staging > Staging Sites
There you find a list of available staging sites and an “Actions” button on every list element:
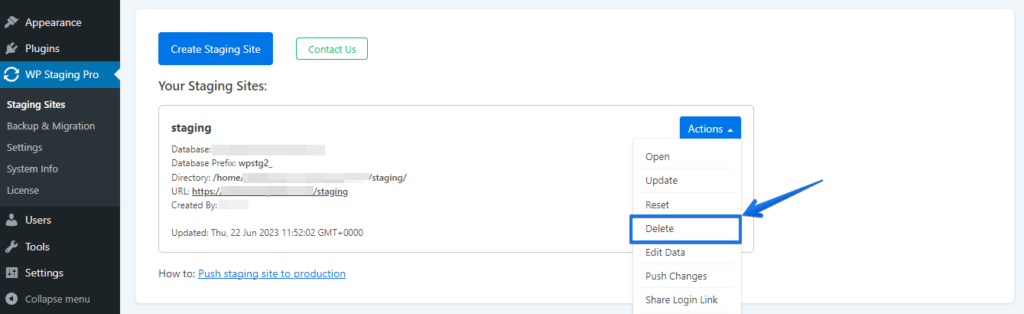
Clicking on the Actions > Delete button will open a confirmation menu that allows you to double-check the database tables before deleting:
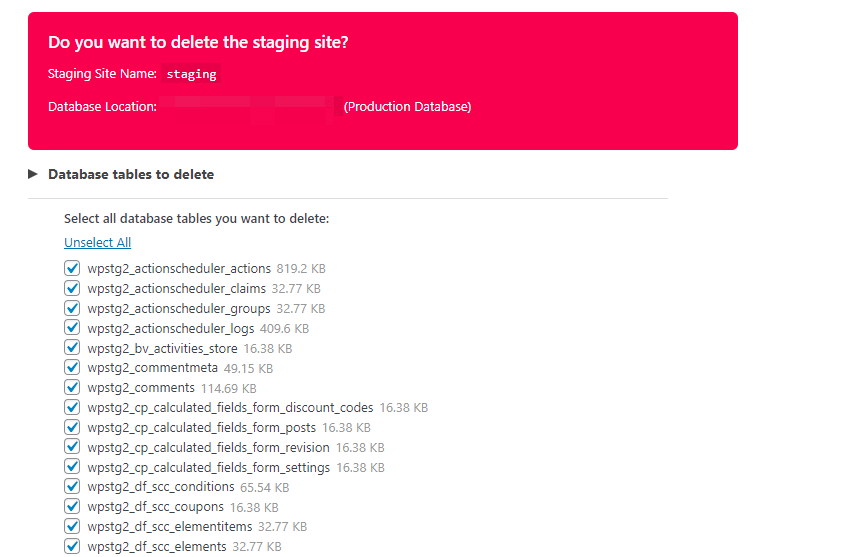
It will also show you the exact directory which is going to be deleted:

Click on the button “Delete,” and WP Staging will delete the entire staging website without touching your production website.

Delete Staging Website Manually (Delete Orphaned WordPress Database Tables & Files)
Even after deleting all staging sites, it’s possible that you still see some WP Staging tables in the database or some files left in the file directories.
This can happen if a cloning process has been interrupted and did not go to end successfully.
Read this article to find out how to delete a staging website manually.
Related Articles
- Unused Tables in The Database After Delete Process
- Cleanup and Delete Staging Sites
- How to fix Page not Found Error 404 after Pushing