TL;DR: Install WP Staging Pro on both the source and destination sites. Create a full backup on the source, transfer the
.wpstgbackup file to the destination (via backup URL or direct upload), then click Restore. For a typical site the whole process takes under 30 minutes.
Use Remote Sync to migrate sites directly between servers in minutes. → Pull a WordPress site from one server to another
This article explains how to back up and migrate your WordPress website with WP Staging Pro.
This backup feature can migrate and copy your entire WordPress website to another domain, new host, or new server, often faster and more reliably than other plugins.
You can use the WP Staging backup feature to migrate your staging site to a production website as well. The backup and restore flow handles large sites reliably through chunked transfers that survive slow connections and shared-hosting time limits.
Contents
- Before You Migrate: Pre-Flight Checklist
- Which Migration Method Should I Use?
- How to Migrate WordPress to a New Host
- Create a Backup of Your WordPress Website
- Upload the Backup File to the Remote Website
- Restore the Backup File
- After the Restore: Verify Your Migration
- What to Do If the Migration Fails
- Related Articles
Before You Migrate: Pre-Flight Checklist
Running through this checklist before you start avoids the most common migration failures:
- New host is ready. WordPress must be installed on the destination server before you can run a restore. If WordPress is not yet installed, the WP Staging Restore standalone tool can install WordPress and restore a backup in a single step.
- PHP and MySQL version compatibility. Confirm the destination host runs a PHP version and MySQL version at least equal to the source. A version mismatch is a common cause of post-restore white screens.
- Note your current table prefix. The default is
wp_, but many sites use a custom prefix. Record it now — you may need it during troubleshooting. - Disable caching and CDN plugins. Caching plugins such as LiteSpeed Cache, W3 Total Cache, or WP Rocket, and any active CDN proxy, can embed stale asset paths or incorrect base URLs in the backup. Deactivate them before creating the backup and reactivate only after the restore is verified on the new host.
- Record your DNS TTL. Log in to your domain registrar and note the current TTL on your A record. If it is longer than 300 seconds, reduce it 24 hours before the DNS cutover so propagation completes quickly.
- Plan the cutover window. Schedule the migration during a low-traffic period. Keep the old host running until the new site is verified and DNS has fully propagated.
Which Migration Method Should I Use?
| Method | Best for | Requires plugin? | Handles large sites? |
|---|---|---|---|
| WP Staging Pro backup/restore | Full-site migration to a new host or domain | Yes (WP Staging Pro) | Yes — chunked transfer handles multi-GB sites |
| Manual FTP + phpMyAdmin | Simple sites with no plugin access | No | Fragile above a few hundred megabytes |
| All-in-One WP Migration | One-click export/import | Yes (third-party) | Free tier capped at 512 MB |
| Managed host migration | Handing the move to your new host | No | Yes, but scheduling depends on the host |
In our support queue, failures on manual FTP migrations are significantly more frequent than failures on the WP Staging backup/restore path. For any site above a few hundred megabytes — or with a custom database prefix, multisite, or non-standard table structure — the WP Staging chunked backup is the most reliable option.
How to Migrate WordPress to a New Host
Check out the video below if you’d rather watch a video than read the article. It explains all the steps on how to migrate WordPress to a new host:
Create a Backup of Your WordPress Website
Important: If you want to migrate a WordPress multisite to another host that has a different domain structure, e.g. Domain versus Subdomain, you need to customize the target domains with filters. This is explained in this article!
Let’s start.
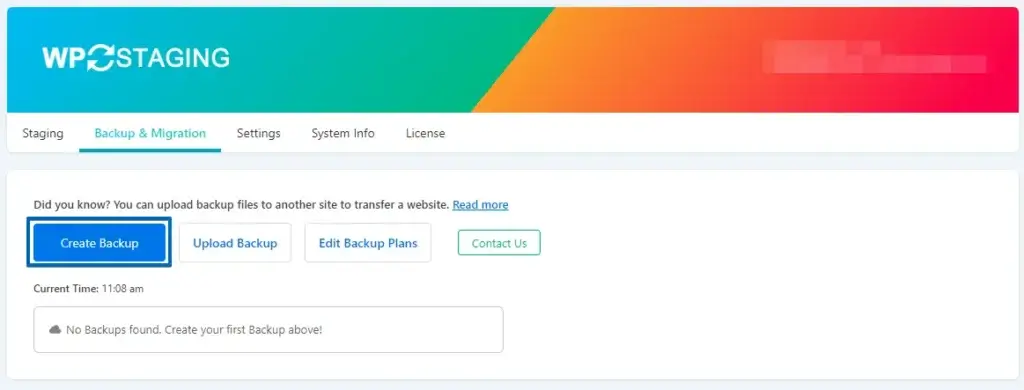
First, open the WP Staging Pro plugin and click the "Backup & Restore" button.

Click on "Create new Backup."
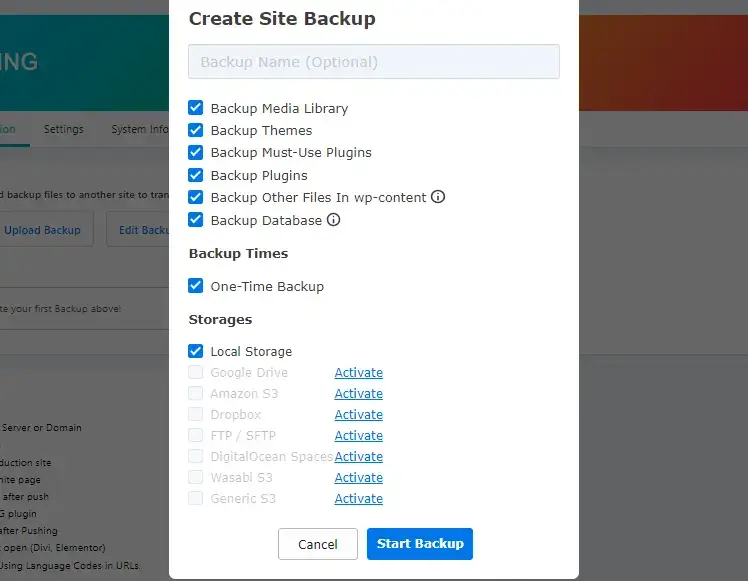
Optionally, you can set up here a name for the backup. Keep all checkboxes selected to make a full site backup.
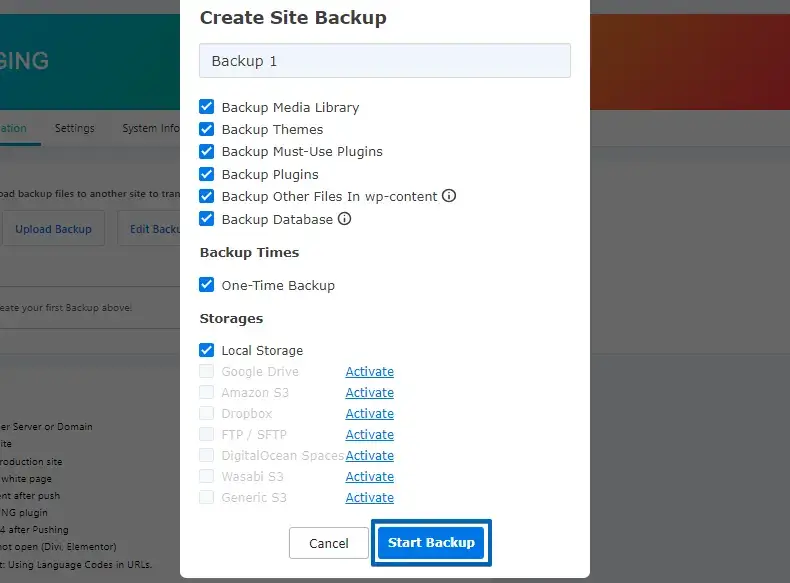
Now click on "Start Backup."
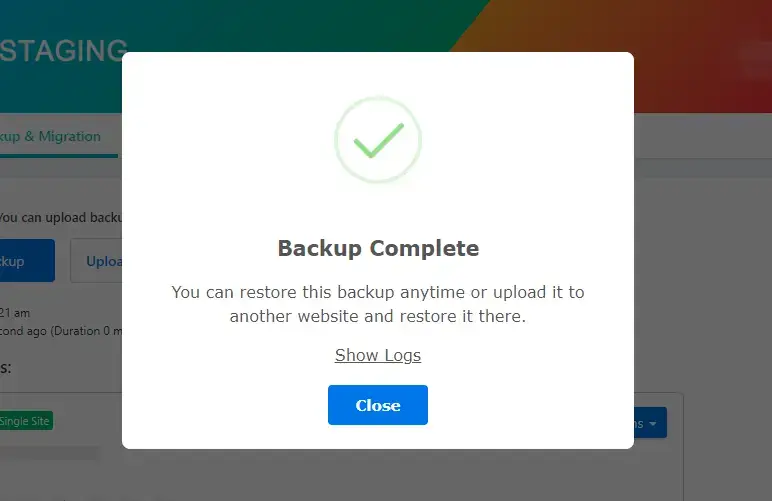
Once the backup is ready, you’ll see the message Backup Complete.
Upload the Backup File to the Remote Website
You have two options to upload the backup file to the remote destination website:
- Upload directly by using the link to the backup file. (Fastest solution)
- Downloading first and then uploading the backup to the destination server via an upload form or sFTP. (Slower, but useful if you have the backup file on your local computer)
Option 1: Upload directly by using the Backup URL
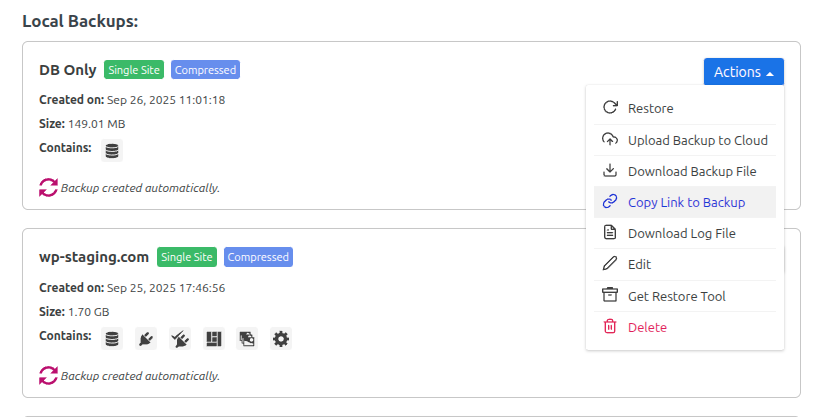
Go to WP Staging -> Backup & Migration. Select a backup and click on Actions -> Copy Link to Backup
Open WP Staging -> Backup & Migration on the destination remote server. Click on Upload Backup and paste the link to the backup file by using Ctrl+V (Win|Linux) or Cmd + V (Mac). The link contains a unique hash, making it unguessable by unauthorized parties to access it.
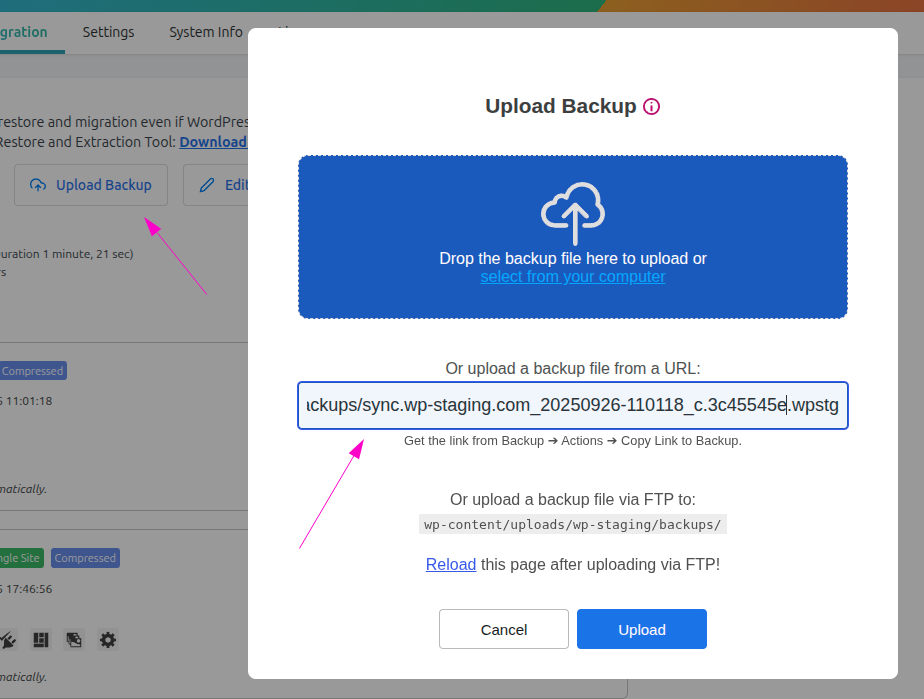
Click on Upload and the file will be transferred from the source website to the remote one.
After uploading it you can access it from the list of backups to restore that backup file in the next step.
Option 2: Download first and Upload then to the Destination Server
Click on Actions and Download.

That will download the entire website packed in one file with the extension ".wpstg."
Upload the Backup File to the New Host
The only requirement for the next step is to have WordPress already installed on the destination host to migrate your website. That can be a new WordPress site from scratch or another website you want to make identical to the source website.
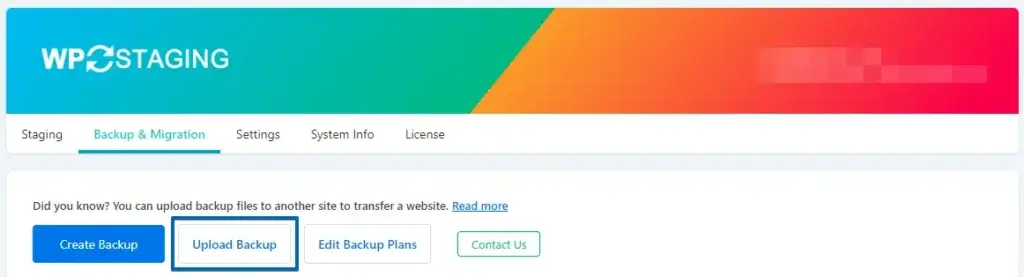
Go to WP Staging Pro and click the "Backup" menu.
Click on "Upload Backup."
Select the backup from your local computer and upload it.
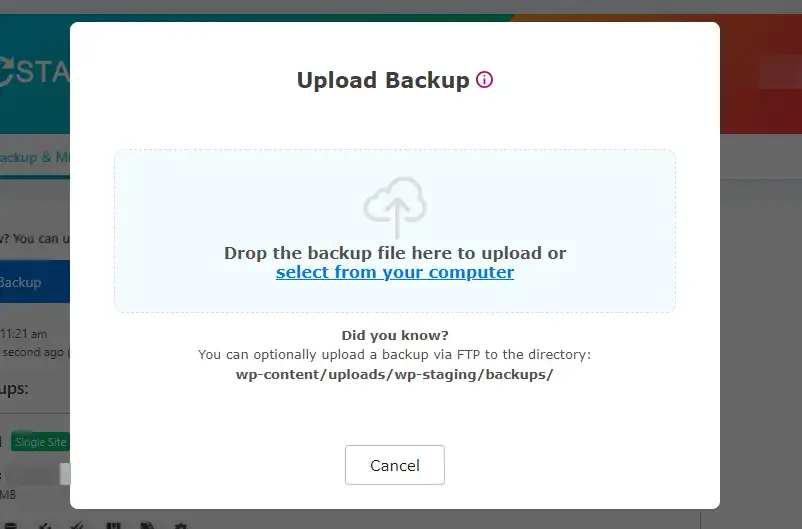
Optionally you can upload the backup file via FTP by uploading the backup to the folder
/wp-content/uploads/wp-staging/backups/
Restore the Backup File
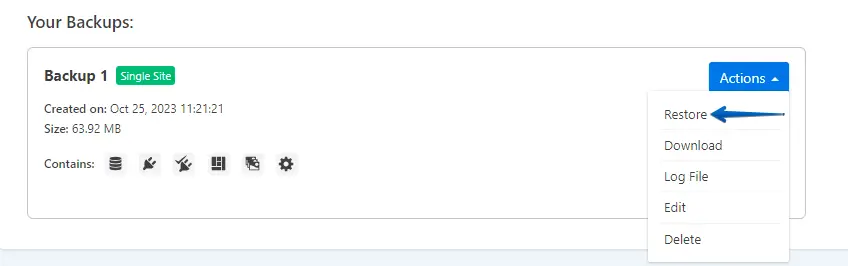
Once the backup is uploaded, click Actions > Restore, Next, and Restore.
The restore process will take a few minutes, depending on the backup file size. Once it is ready, you will see the finished modal.
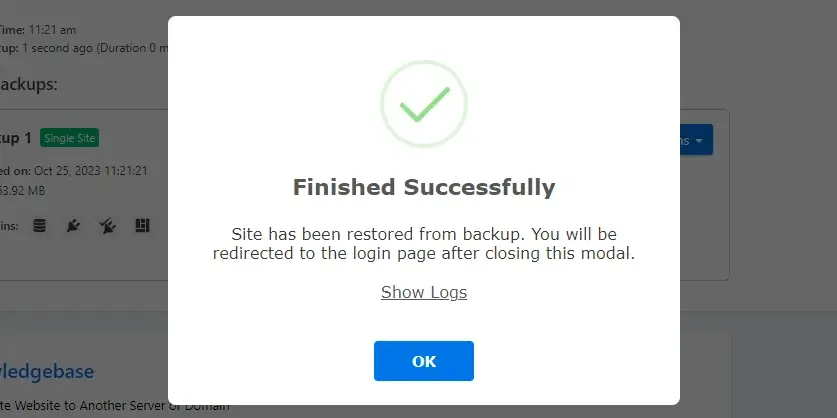
After clicking on OK, WordPress redirects you to the login screen. Enter the username and password of the source website.
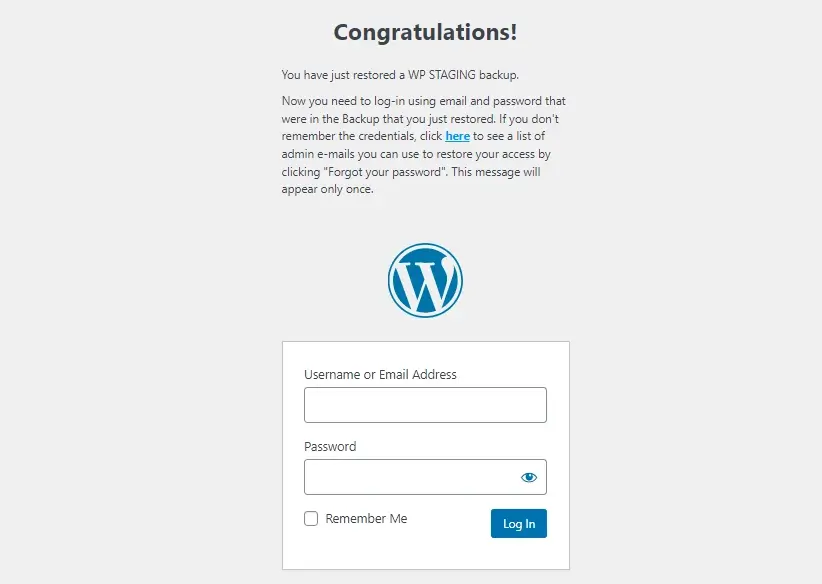
That’s it. With the help of WP Staging Pro, you have migrated the entire website to another server.
After the Restore: Verify Your Migration
Once the restore completes and you can log in, work through this checklist before updating your DNS to point at the new host:
- Update
siteurlandhome. Go to Settings → General and confirm both the WordPress Address and Site Address reflect the new domain. If you are migrating to the same domain on a different server, these should already be correct. - Run a domain search-and-replace. Serialized data in the database can hold hardcoded references to the old host. Use a search-and-replace plugin or WP-CLI’s
wp search-replacecommand to swap the old domain for the new one across all tables. - Flush permalinks. Go to Settings → Permalinks and click Save Changes without modifying the structure. This regenerates the
.htaccessrewrite rules on the new server. - Test forms and REST API endpoints. Submit a contact form and confirm the confirmation email arrives. Check that
https://your-new-domain.com/wp-json/wp/v2/postsreturns valid JSON. If it returns an error, the issue is likely at the server level — confirm thatmod_rewrite(Apache) or the nginx equivalent is active. If REST API errors persist, see How to Fix REST API Errors in WordPress. - Scan
wp_optionsfor stale references. Use WP-CLI to list any rows still containing the old domain:
wp option list --search="*old-domain.com*" --fields=option_name,option_value- Request re-indexing in Search Console. After DNS has propagated, paste the new canonical URL into Search Console → URL Inspection and click Request Indexing.
What to Do If the Migration Fails
In our support queue, the most common causes of a failed restore are:
MySQL max_allowed_packet error
When restoring a large database, MySQL may reject a packet that exceeds its max_allowed_packet limit. The restore log shows an error such as Got a packet bigger than 'max_allowed_packet' bytes. See Increase max_allowed_packet Size in MySQL for step-by-step instructions covering shared hosting, VPS, and managed database environments.
PHP execution timeout on large sites
Shared hosts that impose a short PHP execution time limit will terminate the restore mid-process on large sites. We’ve seen this most often on sites with large databases where the restore script stalls partway through the database import phase. The WP-CLI restore path bypasses browser-based timeouts entirely — use wp staging:restore from an SSH session instead. For guidance on adjusting PHP configuration values on common hosting panels, see Increase PHP max_input_vars Limit in WordPress.
File permission errors after restore
If the restore completes but the site shows a blank page or file-not-found errors, check that wp-content/ and its subdirectories are writable by the web server user. On most Linux hosts this means 755 for directories and 644 for files, with ownership matching the server’s process user.
Redirect loops caused by a stale siteurl
If siteurl in wp_options still contains the old domain, WordPress redirects every request back to the old host, creating an infinite loop. Fix it via WP-CLI:
wp option update siteurl 'https://your-new-domain.com'
wp option update home 'https://your-new-domain.com'
If you are locked out of the admin area entirely after a migration, see How to Create an Admin User with MySQL in WordPress for recovery steps.