Backing up your WordPress website is a crucial step in maintaining the security and stability of your site. A backup ensures that you can quickly restore your site in case of any data loss, corruption, hacking, or server crashes. While many plugins can help you create automatic backups, it is also possible to create a manual backup of your WordPress site. This article will show you how to create a manual backup of your WordPress site, including the database and files.
Contents
Laying The Groundwork
Before we start, it’s important to note that this is somewhat of a technical process, and having some technical skills would be very useful.
When it comes to the backup, there are two things that you need to backup:
- The Files: these tend to constitute things such as images, videos, scripts, themes, and plugins and function as the main content of your website
- The Database: usually a MySQL database, which stores the actual blog posts, comments, and settings of your WordPress site.
Since we have two different sets of files to back up, the best thing to do is to create a main backup folder titled ”WordPress Backup” or something to that effect and then two sub-folders titled “files” and “database.” Doing it this way will ensure you don’t mix the files incorrectly and cause an issue with restoring down the line.
Also, backups are generally a prerequisite for migrating WordPress to a new server or host.
Backup Your WordPress Files
Once you have your backup folders in place, we’ll need the files to be backed up.
- Access Your Website Files: To back up your WordPress files, you need to access the file manager of your website’s hosting account. This will allow you to download a copy of all the files on your site.
- Select and Download the Files: In the file manager, select all the files and folders of your WordPress site. Right-click on the selection and choose “Download” or “Compress” to download a zip file containing all the files.
It is important to note that some hosting providers may limit the size of files you can download, so you may need to download the files in several smaller parts.
Using cPanel
Doing a backup through cPanel is probably the easiest way to do the backup, so let’s start with this one.

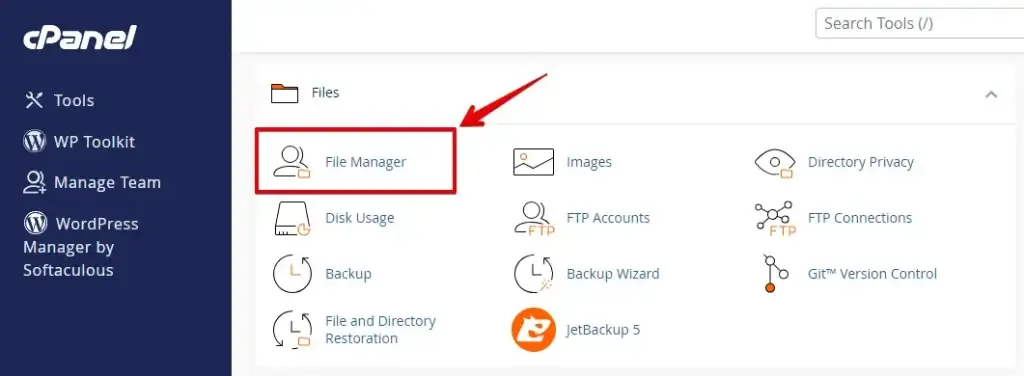
The first thing you need to do is log in to your account and navigate to your cPanel. Once there, access the File Manager, and look for your WordPress directory, which will usually be under a Home’ or ‘public_html’ path.
Next, you’ll need to download it; to do that, you’ll have to compress it. Thankfully, the process is relatively simple as you can right-click on the directory and choose ‘Compress’. If you don’t find that option in the drop-down menu, you’ll undoubtedly find it in the top bar menu, so look around!
At this point, you’ll have to choose the compression type, which will depend on your compression software, and then click on ‘Compress File(s)’ to put them through the compressor. Once it’s done, you’ll have created a new file, known as an archive. You need to download that, and you’re done!
Using SFTP
This one is a bit more complicated and will require file-managing software like FileZilla. Once you install them on your computer, you can create a secure tunnel to download the files directly between your machine and the server.
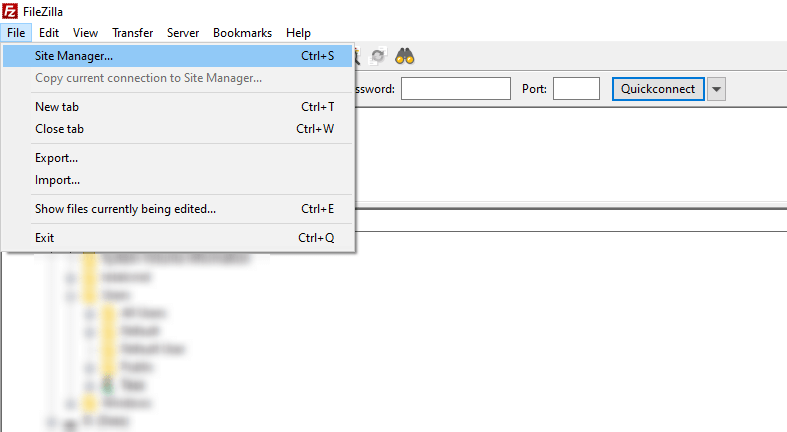
After installing, open up the application and create a new server connection. This will include entering your server’s information, such as the hostname and port number. Usually, this information is provided by the server host, and you can find that info through the cPanel.
After you’ve entered the information and started the session, you should immediately see all your WordPress files, but if not, navigate to the WordPress folder like in the section above.
Once there, select all the items, right-click, and choose ‘download selected items’ or ‘download’, depending on which SFTP file manager you use. A new window will pop up asking you where you want to download the files, so direct them to the ‘Files’ sub-folder you created earlier and click download and that’s pretty much it.
Backup Your WordPress Database
Now that we have your files backed up let us move to the database.
- Access the phpMyAdmin Panel: To back up your WordPress database, you need to access the phpMyAdmin panel of your website’s hosting account. This panel allows you to manage and export your WordPress database.
- Select Your WordPress Database: In the phpMyAdmin panel, you must select the database you want to back up. You can find the name of your WordPress database in the wp-config.php file of your site.
- Export the Database: Once you have selected your WordPress database, click the “Export” tab from the top menu. You will be presented with several options for exporting your database.
- Choose the Format and Save the Backup: You can choose between SQL, CSV, or other formats for your backup. We recommend choosing the SQL format, which is the most comprehensive and compatible format for a WordPress backup. Once you choose the format, click the “Go” button to start the export process. Your browser will prompt you to save the backup file to your computer.
For this, you’ll have to find phpMyAdmin, which can vary where it depends on the host. If you’re using a cPanel, it should be under ‘Database tools, but you may also just find it in the dashboard of the cPanel.
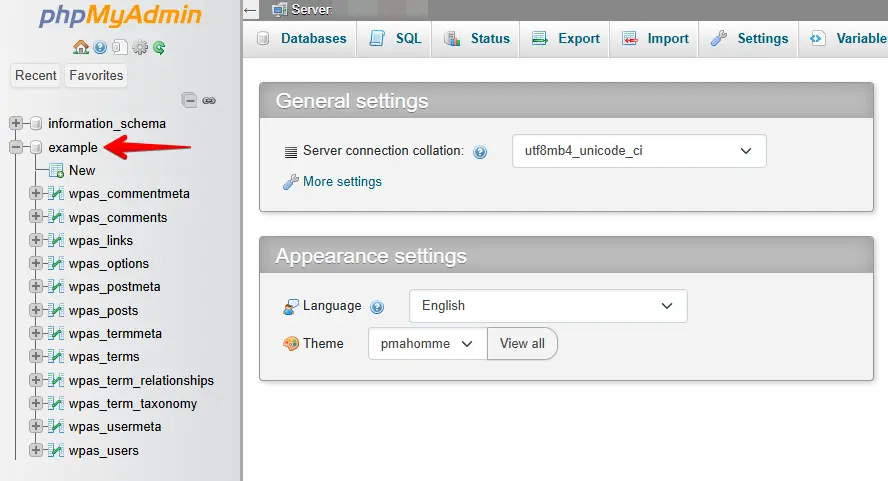
After you find it, log in and select the ‘Database’ tab, which will show you all your databases. If you aren’t sure which database you are using because you used a third-party tool to install it, there’s an easy way to find out.
Load up the file manager from the step above, log in to your server, and then find the wp-config.php file. Open it up by right-clicking on it and picking ‘view’ and try looking for something that looks like this:
define('DB_NAME', 'database_name');
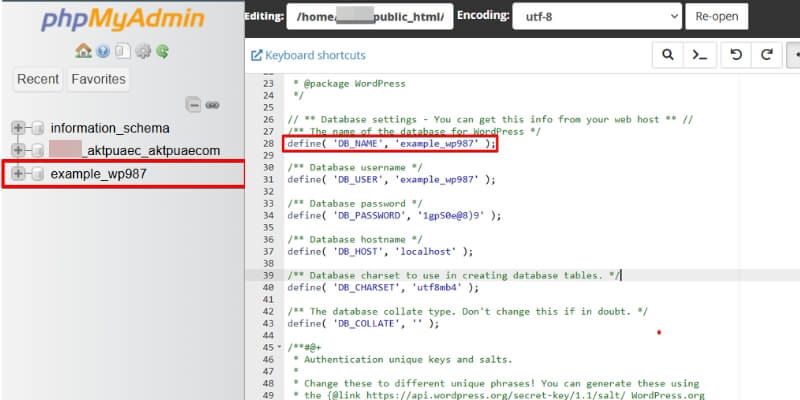
The name for your database will be the second name in the brackets, so once you have that information, go back to phpMyAdmin and look for that database name, and open it. After you do, several new files will pop up. These will all be tables for your database.
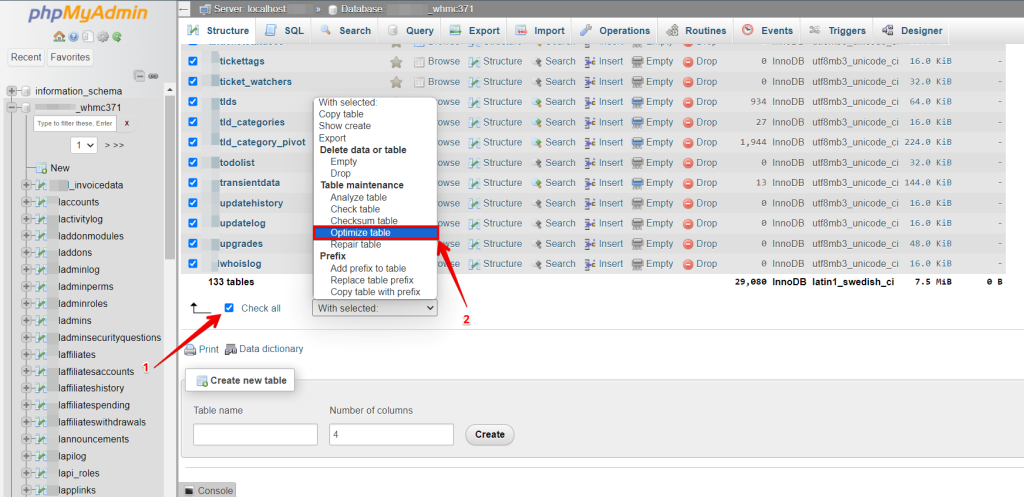
You’ll now want to select all these tables by shift-clicking on the first and last one or if there’s a ‘Check all’ box at the top. Then, choose “Optimize table” from the dropdown menu labeled “With selected”.
Then, click on the ‘export’ tab, which will allow you to choose the export settings, and in this case, that means setting the export format to ‘SQL’.
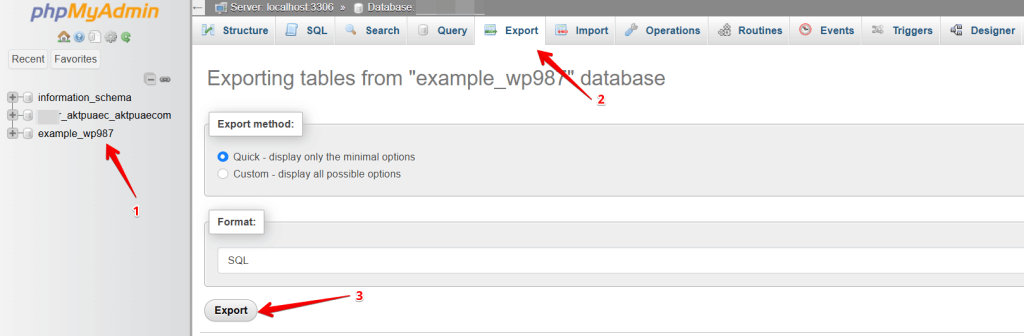
Click the "Export" tab from the top menu. Select “Quick – display only the minimal options on the next page.” The format should be SQL. Then Click on the Go button to download the backup of the WordPress database.
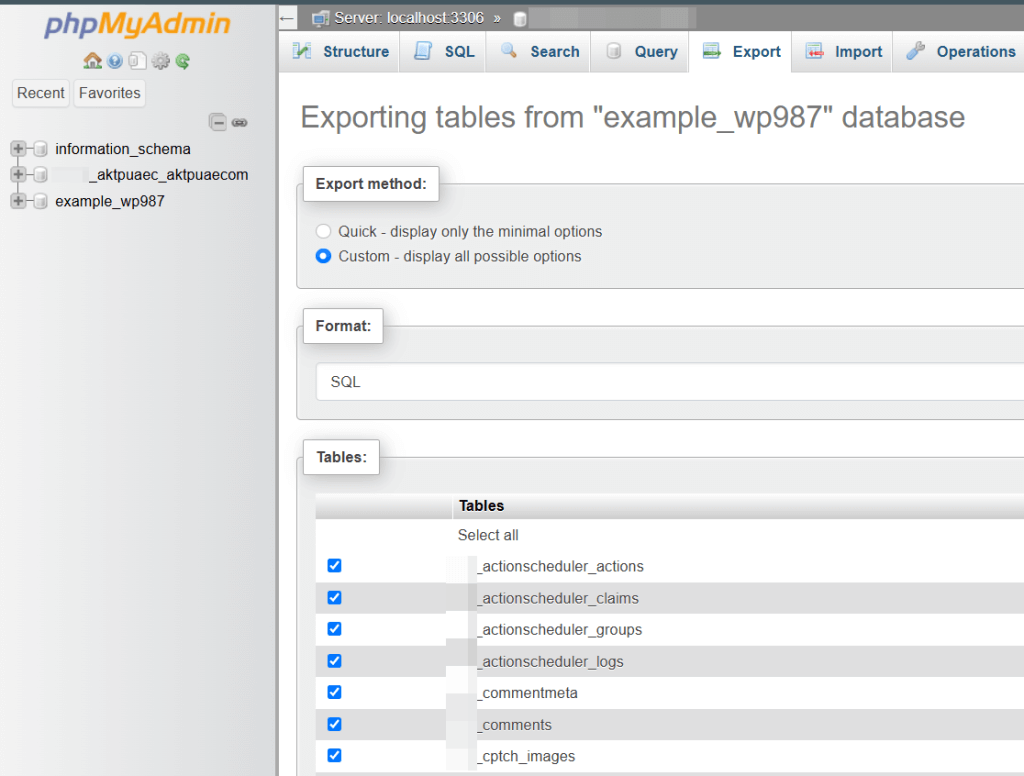
Pro Tip: If your database size is massive. Click on the option “Custom – display all possible options” and select all the tables:
We recommend compressing the database in gzip format:
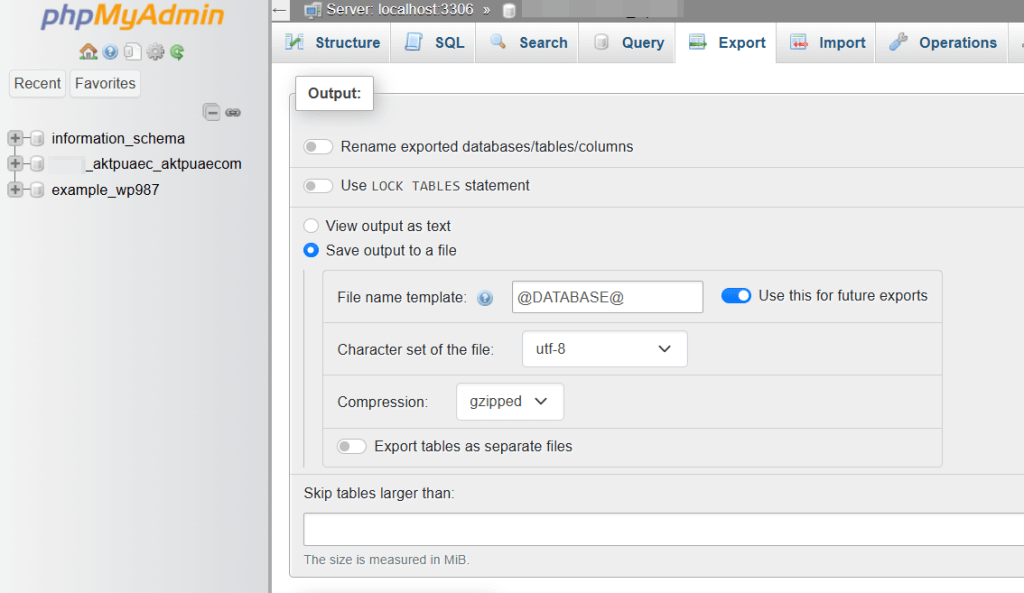
Then scroll down and click on the Export button to start the database file.
Move it to the database backup folder on your local system, where you already stored your initial file backup.
Restoring Your Backup
- Restore the Database Backup: To restore your database backup, you need to access the phpMyAdmin panel of your hosting account. Select your WordPress database and click the “Import” tab from the top menu. Choose the SQL file you saved earlier and click the “Go” button to start the import process. This process may take several minutes, depending on the size of your database.
- Restore the Files Backup: To restore your files backup, you need to access the file manager of your hosting account. Delete all the files and folders of your WordPress site and upload the zip file containing your backup files.
Once the upload is complete, unzip the file to restore all the files and folders of your WordPress site.
Tips for Backing Up Your WordPress Site
- Regular Backups: Creating a backup of your WordPress site regularly is recommended, such as once a week or once a month. This will ensure that you always have a recent site backup in case anything goes wrong.
- Store Backups in Multiple Locations: You should store your backups in multiple locations, such as on your local computer, an external hard drive, or a cloud storage service. This will provide an extra layer of protection in case one of your backup sources fails.
- Test Your Backups: It is essential to test your backups regularly to ensure they work as expected. You can restore a backup on a test site or a local development environment.
- Consider a Backup Plugin: While creating a manual backup is a good option, a backup plugin can make the process much easier and more automated. Many free and premium backup plugins are available for WordPress, such as WP Staging, UpdraftPlus, BackupBuddy, and VaultPress.
Conclusion
Creating a manual backup of your WordPress site is a simple process that can be done in minutes. By backing up your database and files, you can protect your site in case of any unexpected events. Regular backups and storing backups in multiple locations will provide your site with an extra layer of protection. Consider using a backup plugin to make the process even more accessible and more automated.
If you want to prefer an automatic solution to create a complete WordPress backup,
try out WP STAGING | PRO
Related Articles
- How to Backup and Restore Your WordPress Website
- How to Migrate WordPress to a New Server (Step-By-Step-Guide)
- What is the Best WordPress Backup Plugin? A Review
- How to Create a WordPress Backup Manually: A Step-by-Step Guide
- Migrate WordPress Staging Site to Production Site