We have a quick start guide for creating a WordPress clone if you want to get started faster.
TL;DR: WP Staging creates a complete, isolated copy of your WordPress site — files and database — so you can test changes without risking the live site. The fastest path is a one-click subfolder clone, available in the free version. In our testing, the subfolder clone completes in under a few minutes on a typical shared-hosting account.
Contents
- What Is a WordPress Staging Site (and Why You Need One)
- Before You Begin: Install WP Staging
- Create a Staging Site With One Click (Subfolder — Free)
- Create a Staging Site on a Subdomain or External Host (Pro)
- Working With WordPress Multisite
- Advanced Database Options
- Troubleshooting: What to Do if Cloning Fails
What Is a WordPress Staging Site (and Why You Need One)
A staging site is a private copy of your WordPress site where you can safely test plugin updates, theme changes, or code edits before they go live. When something breaks on staging, visitors never see it.
WP Staging creates this copy by duplicating all WordPress database tables and files to a new location — a subfolder, a subdomain, or an entirely separate host. The staging site is isolated: changes there do not affect your production site until you deliberately push them to the live site.
Before You Begin: Install WP Staging
Install the WP Staging plugin from the WordPress plugin directory. The free version supports subfolder cloning on any standard WordPress host. WP Staging Pro adds subdomain cloning, external host migration, multisite support, and a separate-database option.
Before starting, decide where you want the staging site hosted:
Staging site in a subfolder:
https://example.com/staging
Staging site in a subdomain:
https://subdomain.example.com
Staging site on another domain:
https://newdomain.com
Staging site on a local computer (Docker-based):
https://localsite.local
See: Create Local Staging Sites
The subdomain, external domain, and local-environment options require WP STAGING | PRO.
Create a Staging Site With One Click (Subfolder — Free)
This is the fastest and simplest way to create a WordPress staging environment, and it works with the free version.
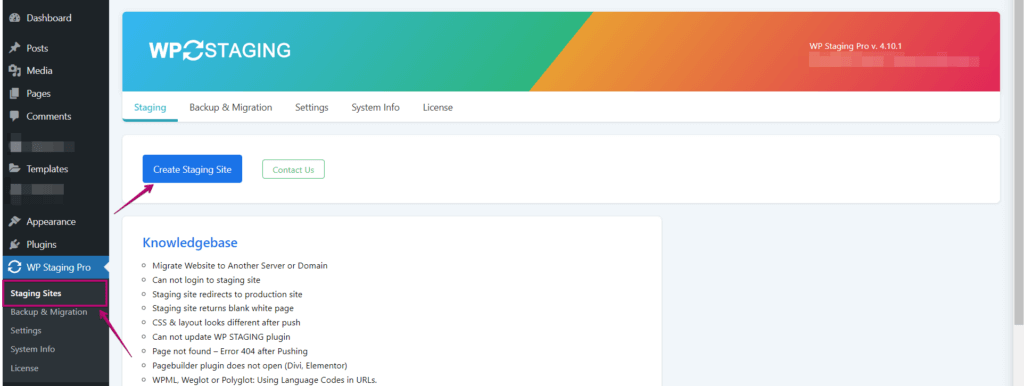
Go to WP Staging > Staging Sites and click CREATE NEW STAGING SITE.
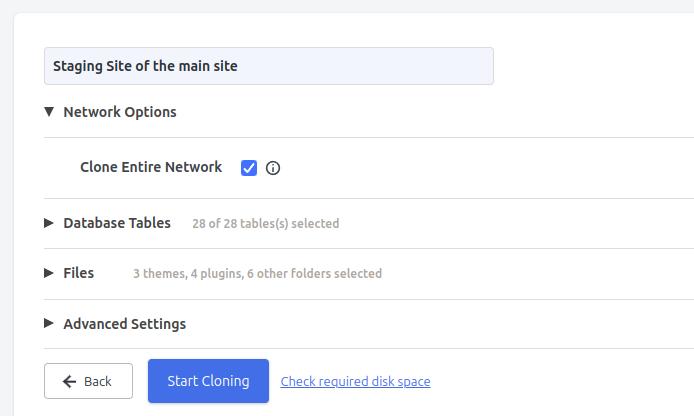
Add a name for the staging site (for example, development) and leave Advanced Settings at their defaults for a standard subfolder setup:
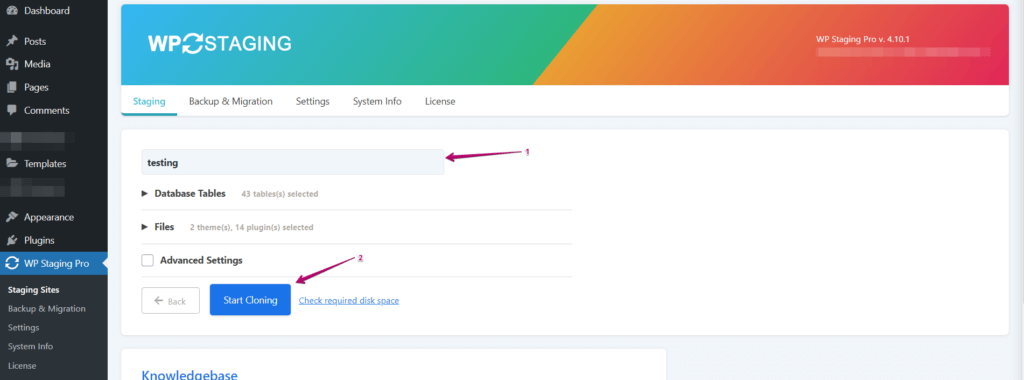
The staging site becomes available at a URL like https://example.com/development. Once your staging site is created, you can log in to your staging site using your regular WordPress credentials.
Note: The user interface may look slightly different depending on your WP Staging version.
Exclude Plugins and Tables
Under DB Tables and Files, you can include or exclude individual database tables and folders from the cloning process.
This is most useful when large tables — created by analytics plugins, security plugins, or mailing list plugins — contain millions of rows such as IP addresses, login attempts, or subscriber data. Excluding those tables speeds up cloning significantly.
If unsure, leave the default values untouched.
Create a Staging Site on a Subdomain or External Host (Pro)
You can clone the production site to a subdomain or a different domain, as long as the destination path is on the same server and the live site can write to it.
Steps:
- Create a subdomain such as
dev.example.comfrom your hosting panel (cPanel or similar). - Create a new folder on your server and map the subdomain to that directory. The folder must be writable by the PHP and web server process (
www-dataor similar, permissions 755). - Open WP STAGING | PRO and click Create New Staging Site.
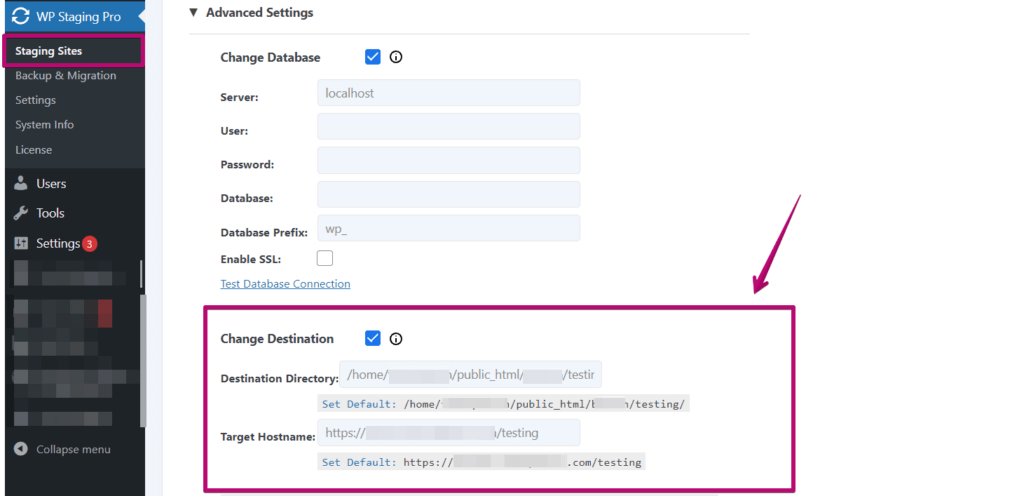
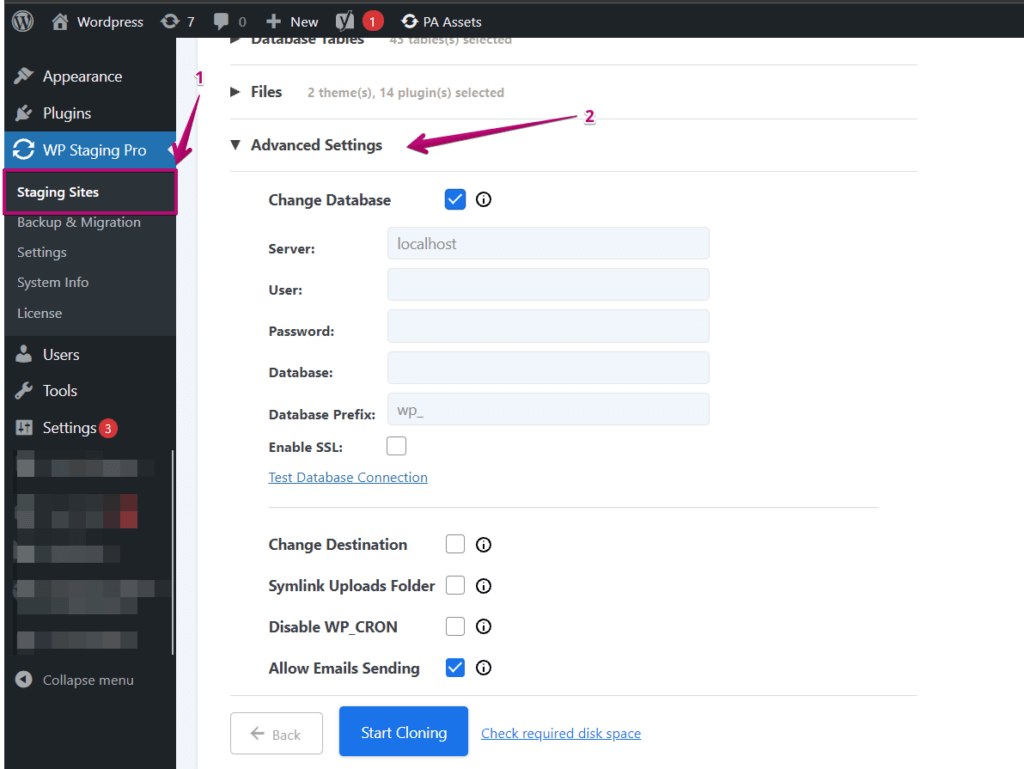
- Open Advanced Settings and enter the new target hostname and directory.
Bonus: If you are not sure if the subdomain points to the correct path, you can use that little trick:
- Create a text file and name it test.txt.
- Add some content into that file, such as “
test text.” Use a file manager plugin or FTP to do so. - Copy that file into the path you think is correct.
- Open the file from URL example.com/test.txt. If the path is correct, You can see the text “test text” in your browser.
To migrate your WordPress site to a completely different host, use WP Staging’s backup and migration feature — the same clone workflow applies.
Change the Destination of the Staging Site
This option lets you select a custom destination folder instead of the default subfolder in the production site’s root directory. It is particularly useful when cloning to a subdomain.
In that case, WP STAGING will create a staging site in a subfolder of your production site.
For example, if your production site is in /public_html and you name the staging site development, copy the staging files to /public_html/development to make it accessible.
If you set a custom Target Directory, update the Target Hostname to match. For instance, if the target directory is /public_html/wordpress/development, the target hostname should be https://domain.com/wordpress/development.
No Permissions to Write to Root Folder (ABSPATH)
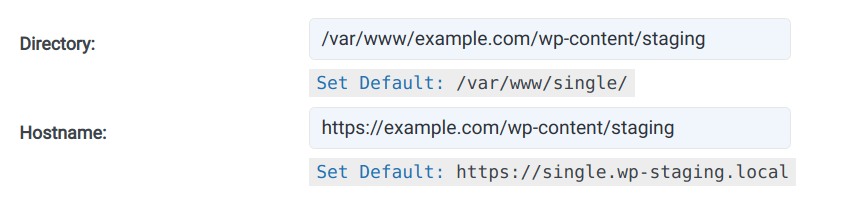
If your site is on Flywheel, WordPress.com, or another host that keeps WordPress core files outside the web root, change the destination directory to ./wp-content/. That folder is always writable.
For example, with a staging site named "staging":
Working With WordPress Multisite
Multisites are only supported by WP STAGING | PRO.
When cloning a multisite, you have two options:
Option 1: Go to the primary site and clone the entire multisite — including all network sites — by enabling the "Clone entire multisite" checkbox.
Option 2: Uncheck "Clone entire multisite." WP Staging will clone only the current site and convert it from a network site to a standalone site. This works well in most cases, but some multisite-specific plugins may not be compatible — in that case, use Option 1.
WP STAGING supports the following domain-based multisite structure:
example.comsubsite1.comsubsite2.comsubsite3.com
When cloning into the subdirectory staging, the URLs become:
example.com/stagingsubsite1.com/stagingsubsite2.com/stagingsubsite3.com/staging
When cloning into a subdomain, the results are:
staging.example.comstaging.subsite1.comstaging.subsite2.comstaging.subsite3.com
To give each network site a completely different destination, use this filter.
You can optional use WP Staging backup & migration feature to backup a network site and clone it to another (sub)domain. To do so, create a new multisite from scratch on a subdomain of your choice and then use the WP Staging Backup & Migration feature to download the whole multisite backup and then upload and restore the backup on the new multisite.
Advanced Database Options
By default, WP Staging creates extra tables in the existing WordPress database, prefixed with a string like wpstg[id]_. This prefix keeps production and staging tables separate within the same database. You can also direct the clone to an entirely separate database.
Clone to Another Database
Use these settings to connect the staging site to an external database you created beforehand, instead of adding prefixed tables to the main production database.
Cloning to a Separate Database
If you do not specify a separate database, all cloned tables go into the main database with the wpstg[id]_ prefix. That prefix ensures complete isolation: WordPress’s wpdb object on the production side has no access to the staging tables, and vice versa.
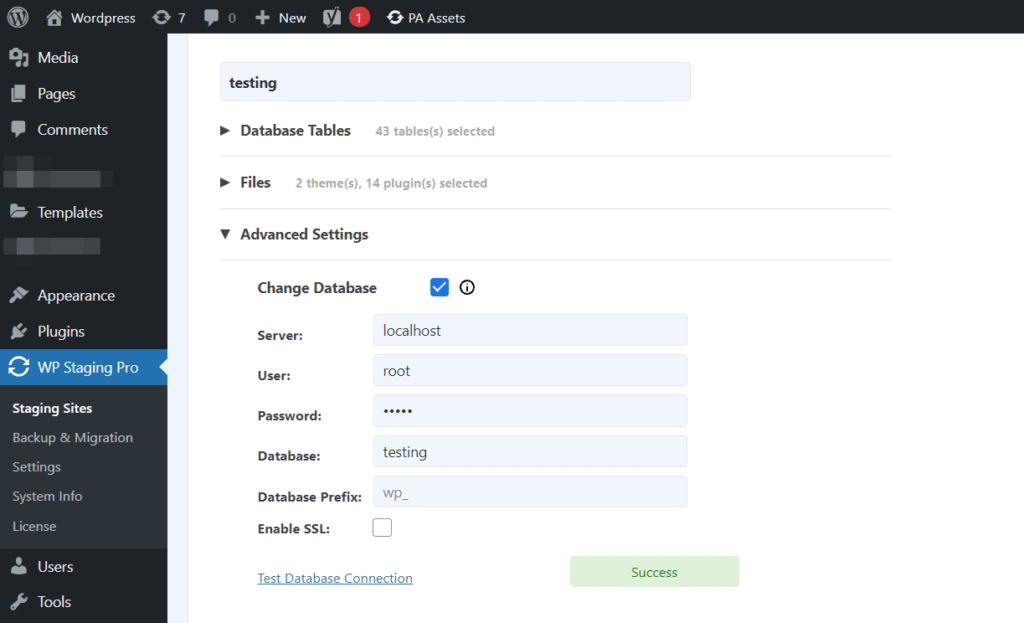
For an extra layer of separation, activate Copy Staging Site to Separate Database and enter the credentials for a database you have already created. WP Staging cannot create the database for you due to permission restrictions — create it first from your hosting dashboard (cPanel > Databases section).
When done, verify credentials with Test Database Connection:
Start Cloning Process
Click START CLONING and WP Staging will clone your WordPress site automatically. You can restore a previous staging snapshot at any time if you need to roll back.
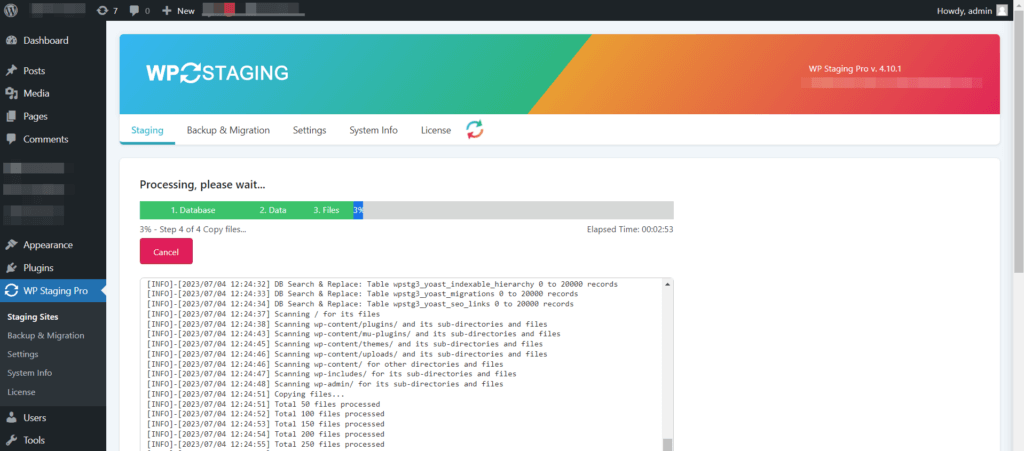
Depending on the size of your site, cloning takes a few minutes or a little longer. When complete, you see:
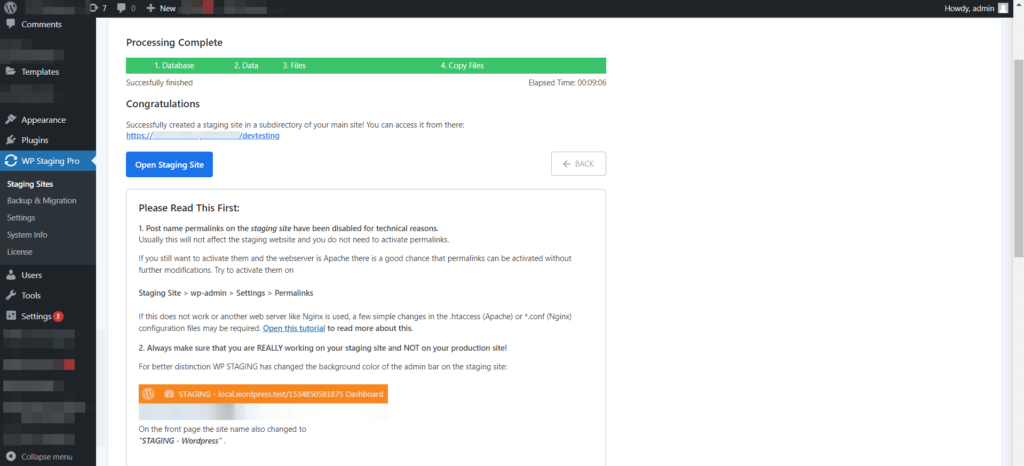
Click Open to access the staging site directly. Permalinks on the staging site are disabled by default for technical reasons.
Tip: If you run an Apache web server, you can re-enable permalinks from Settings > Permalinks > Save Changes on the staging site.
To access your staging sites later, go to WP Staging > Staging Sites:
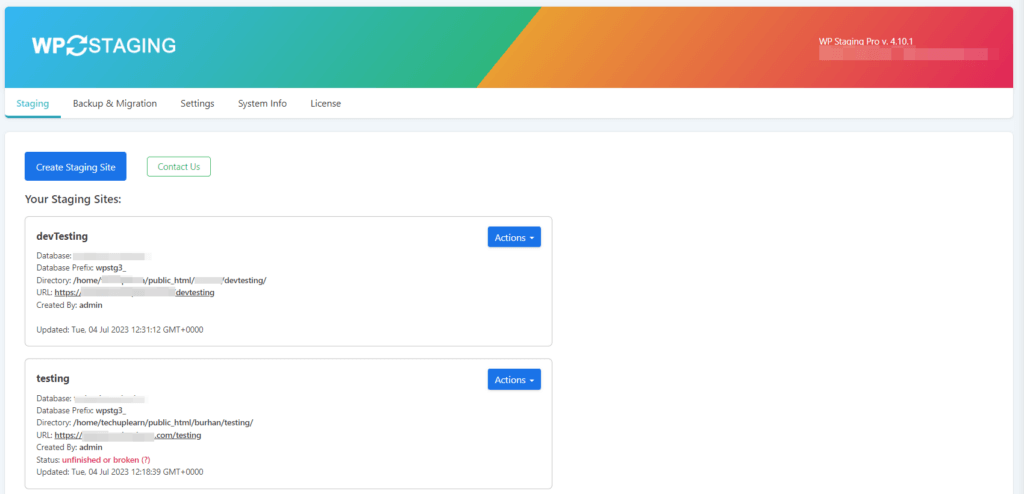
All previously created staging sites are listed there. You can create as many staging sites as your available disk space allows.
Troubleshooting: What to Do if Cloning Fails
From WP Staging support, the most common causes of a failed or stalled clone are server time-outs, file permission errors, and database conflicts. Work through the steps below based on what you see.
Clone stops mid-progress or shows a time-out error
The server’s PHP max_execution_time is too short for the size of your site. Ask your host to increase it, or use WP Staging’s built-in chunked processing — the plugin automatically retries in smaller batches on most hosts.
Large tables (WooCommerce orders, analytics logs) are also a common cause. Exclude them under DB Tables before starting a new clone attempt.
"Permission denied" or files missing from the clone
The destination folder is not writable. Confirm it has permissions 755 and is owned by the web server user (www-data or similar). On managed hosts (Flywheel, WordPress.com), switch the destination directory to ./wp-content/ as described above.
Database connection error
Double-check the credentials in the separate-database fields and run Test Database Connection before starting. Confirm the target database exists and the database user holds CREATE, INSERT, and ALTER privileges.
Staging site shows a white screen or WP REST API errors during staging after cloning
Re-save permalinks on the staging site (Settings > Permalinks > Save Changes). Also deactivate any caching plugins on the staging site — they often conflict after the URL changes from the clone.
If none of the above resolves the issue, enable WordPress debug logging and share the debug.log output with WP Staging support.
More useful links: