This article explains how you can backup WordPress with the free backup plugin WP STAGING.
WP STAGING is one of the fastest and best-tested WordPress backup plugins.
You can create a backup of your entire WordPress website with one click, download the backup, and even migrate it to another website.
So, If your website breaks due to an updated plugin or a hacking attack, you can restore it and bring it back to its previous working state.
Contents
Step by Step Instructions
Video: How to Back up and Restore WordPress
This video shows all the stages of how to back up and restore WordPress:
Create a Backup of your WordPress Website
Let’s start.
Go to WordPress > Plugins > Add New and search for "WP STAGING"
If you are unsure how to install the plugin, look at our "How to install WP STAGING | PRO" article.
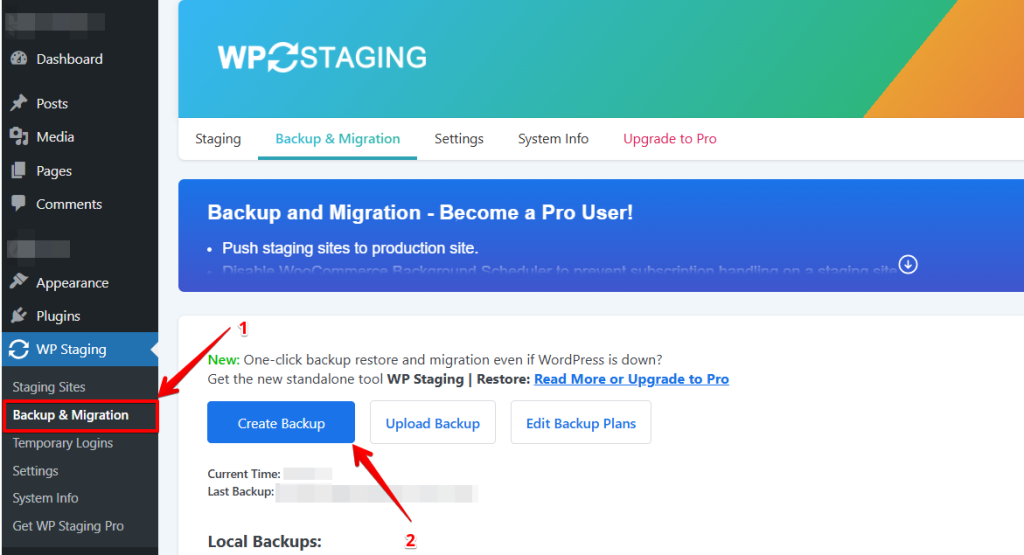
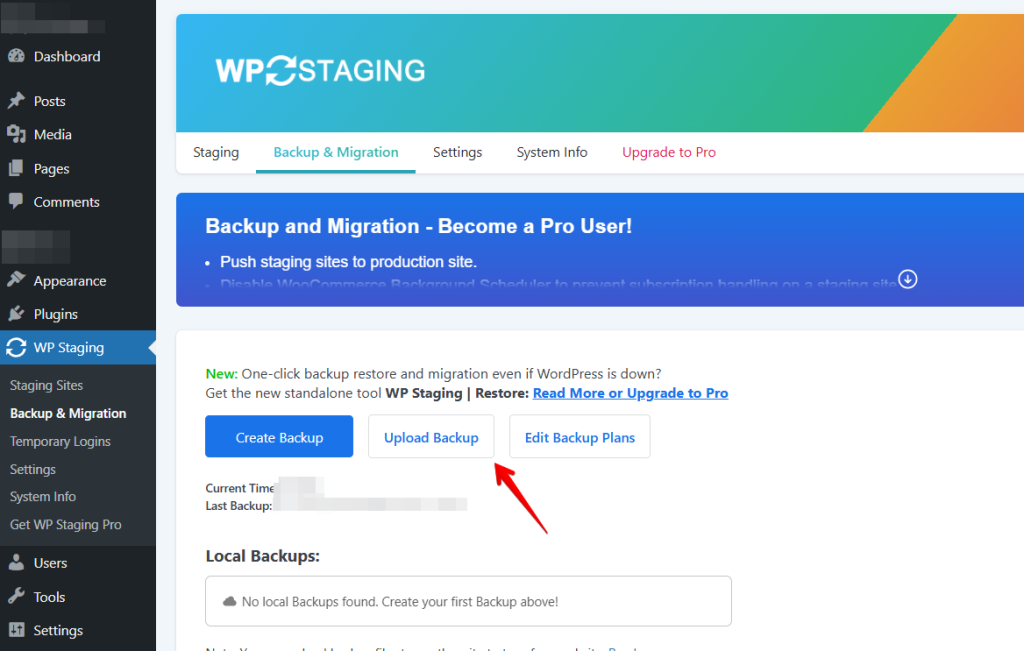
Now click on the "Backup & Migration" button. WP STAGING | PRO will search for existing backups.
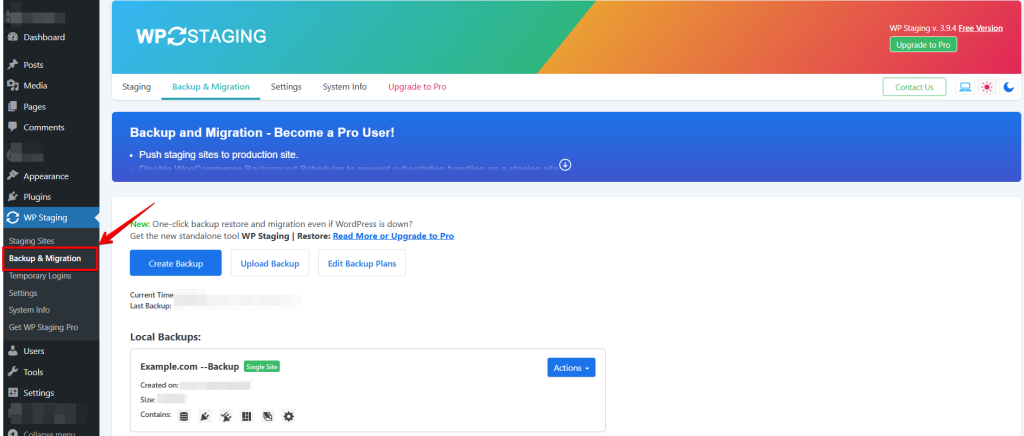
The options are "Create Backup" and "Upload Backup."
Click on "Create a backup."
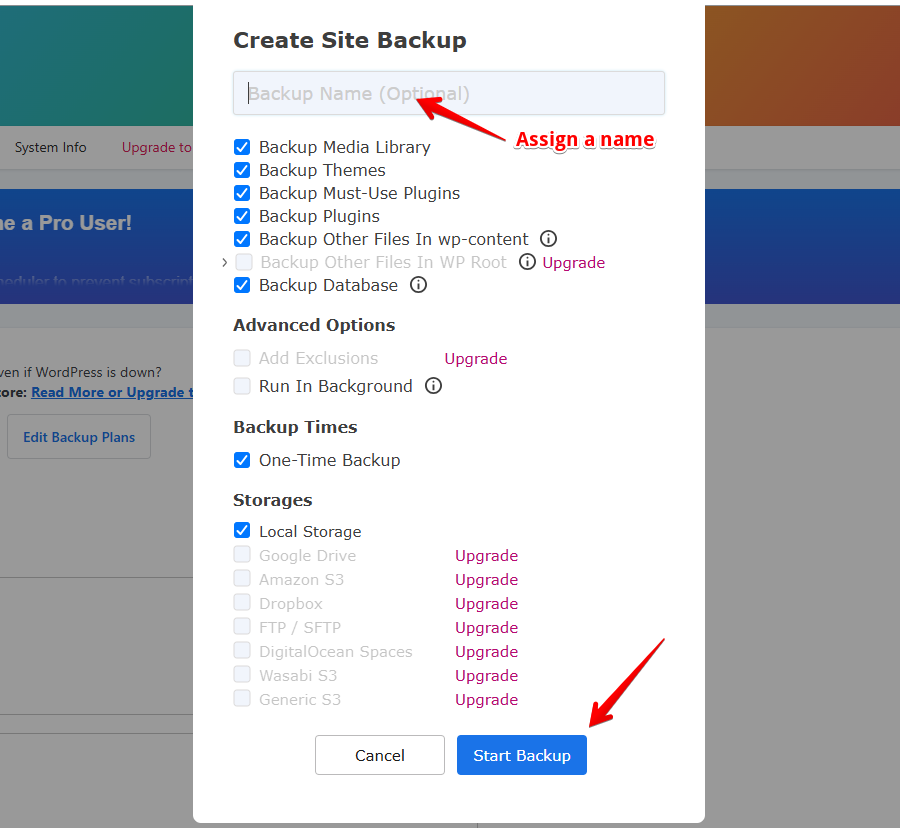
You can optionally assign a name with which you can identify the backup.
So, for instance, if you plan to update WooCommerce or any other plugin, you can name your backup "Backup before installing WooCommerce."
Then select the components of your website that WP STAGING | PRO should include in the backup. Leave all the boxes checked unless you want to carry out a particular test. Now click on "Start Backup."
The time it takes to create a backup differs and depends on the size of your website, but the WP STAGING backup function is pretty fast and usually much faster than other backup tools. So, especially for massive sites, you will notice a considerable performance advantage compared to other tools.
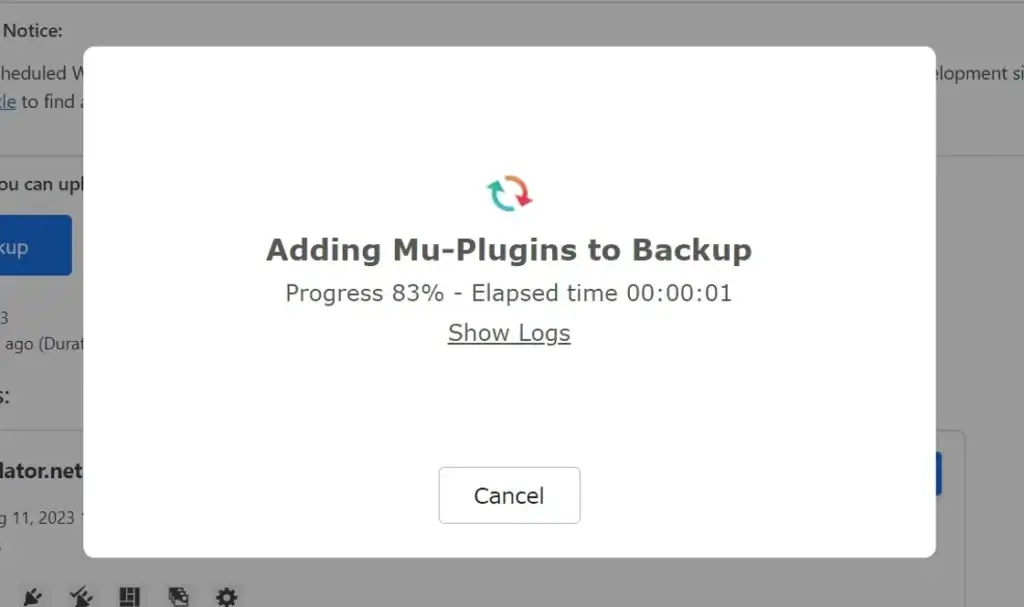
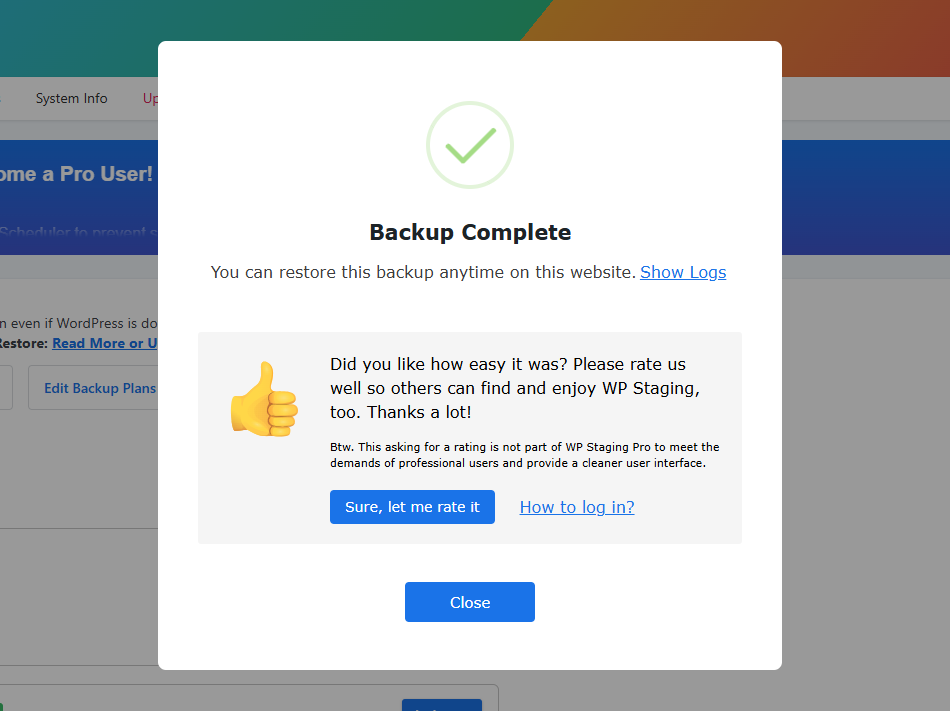
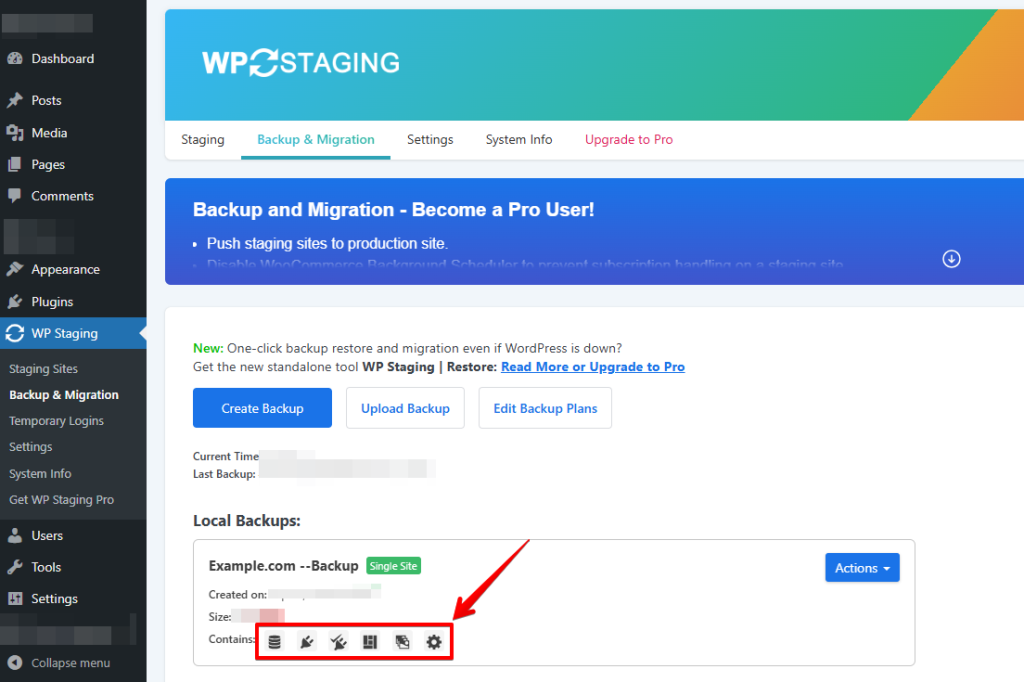
You will find the newly created backup in the "Your Backups" list when the backup is ready. The icons indicate which components the backup includes.
Download the Backup File
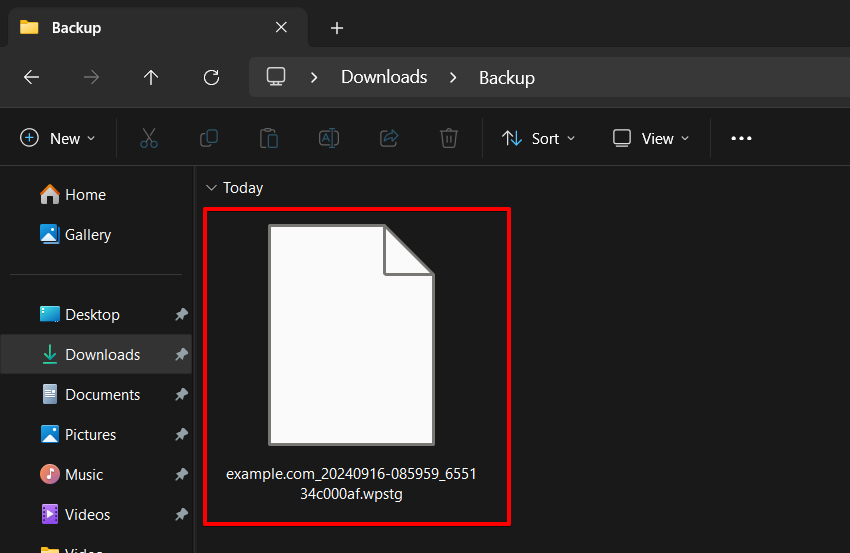
To download the backup, click Actions and Download. That will download a file with the extension ".wpstg."
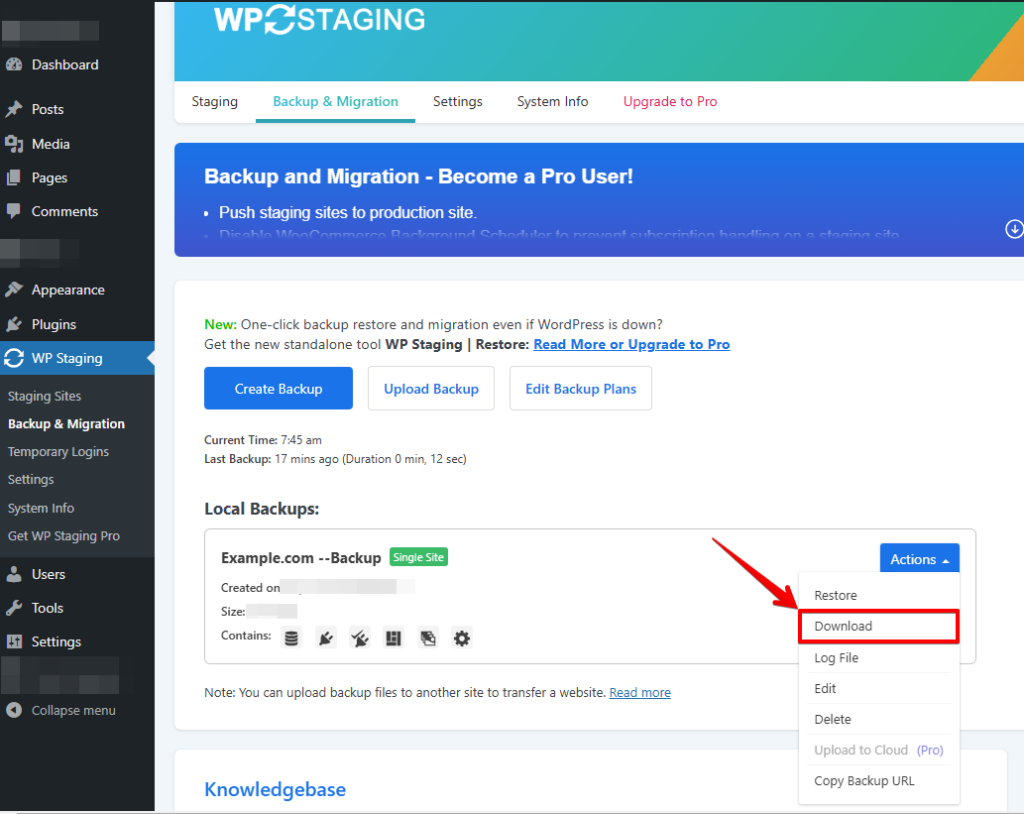
Downloading the backup file to a local computer is always recommended because you want to ensure that you always have access to the backup file. For instance, If an attacker hacks your website, he could delete the backup file from there, and you would not be able to restore the site anymore.
Restore the Backup File
So, to restore the backup in the event of a broken website, you can either select the backup from the list of existing ones or, as recommended, upload the backup file from your local computer.
A great feature is that You can even upload the backup file to any other existing WordPress website and use that backup file to clone your website to another server or your site.
Go back to WP STAGING and click the "Upload Backup" button.
Select the downloaded backup from the file explorer and upload it.
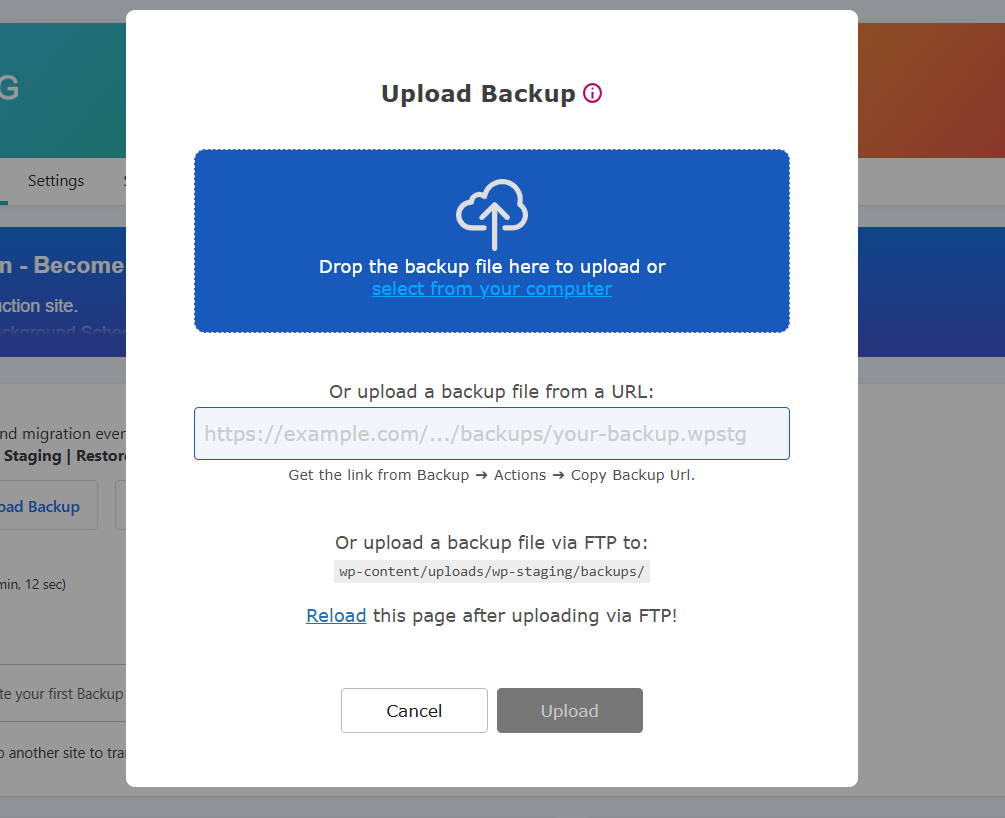
Once the backup is uploaded, click on Actions and "Restore" button, and a popup will appear. "Upload" your backup file by dragging and dropping it, entering a "URL", or uploading via "FTP" to the provided directory. Inside, you’ll see two buttons: “Cancel” and “Next”. Click on “Next” to proceed.
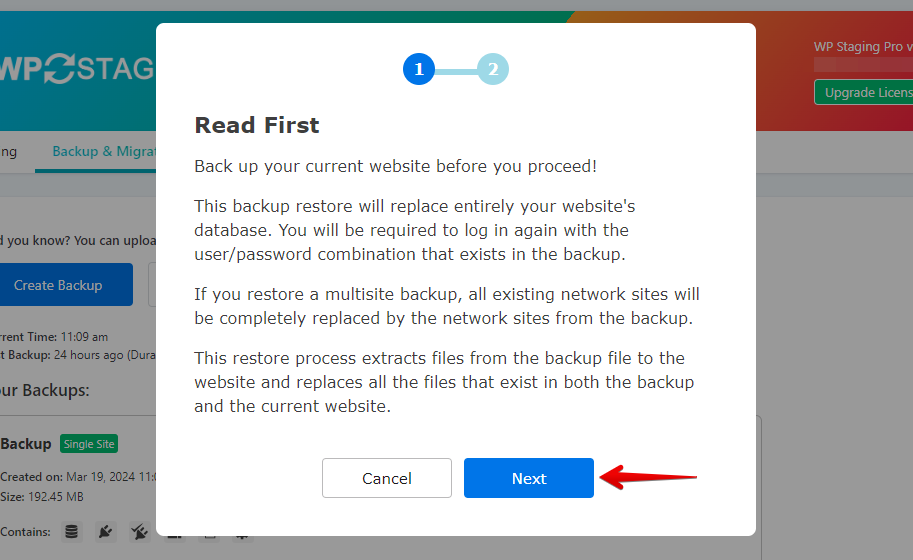
After you click “Next,” a new box will pop up. Then, click “Restore” to start restoring.
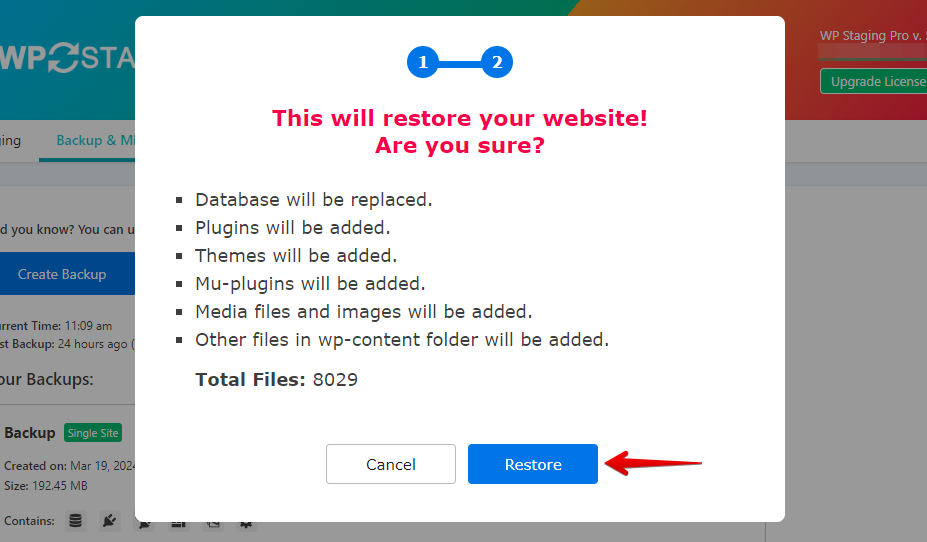
If the restore succeeds, you will see the "Finished Successfully" modal.
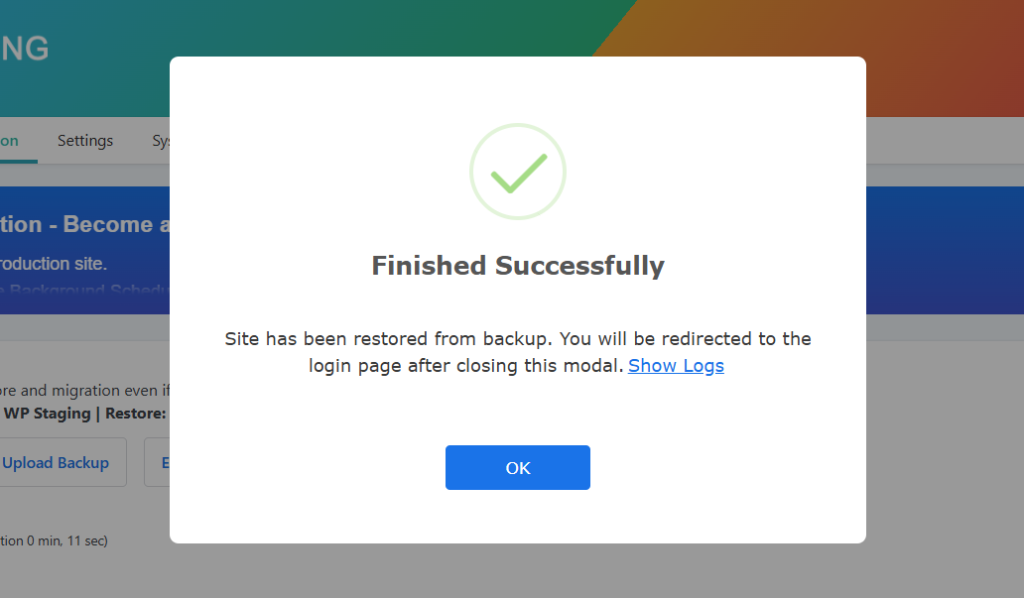
Open your website and test whether the website works as intended and is entirely functional.
Scheduling Automatic Backups
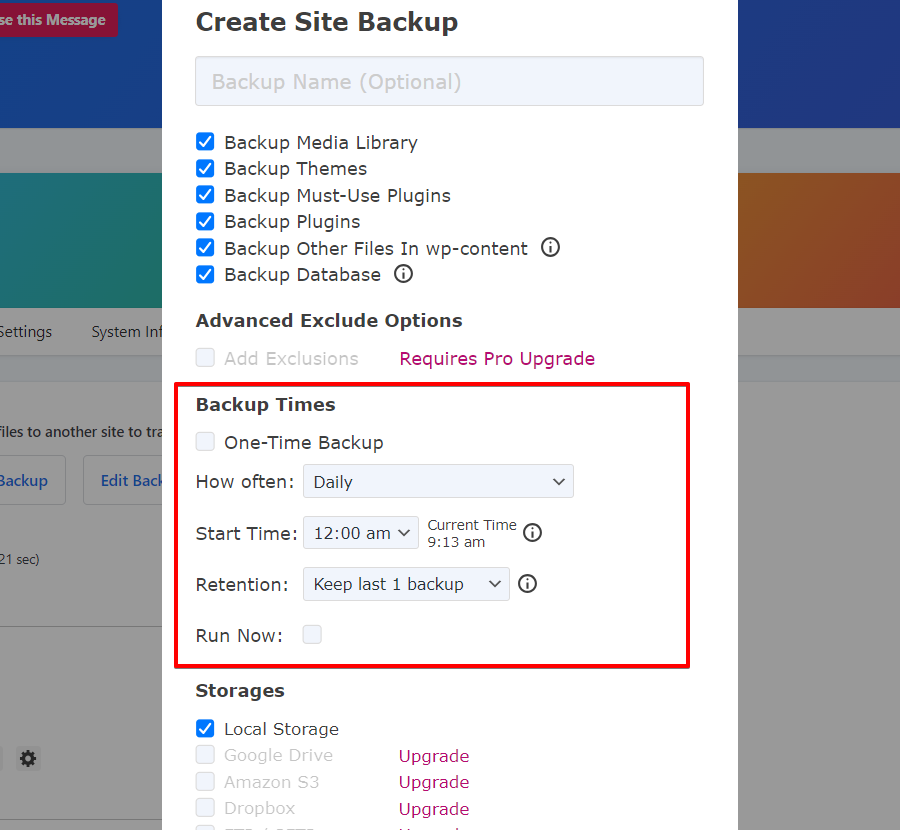
With WP STAGING, you can save time and hassle by setting backups to run automatically. No more having to remember to back up your site every time you make a change. You can chill, knowing your website is always backed up and safe.
Backup “Create Backup,” uncheck “One-Time-Only,” and then choose from the options displayed how often backups happen, when they start, and how many backups to keep.
That’s it. With the help of WP Staging Pro, you have created and restored a backup of your entire WordPress website.
Related Articles
- How to back up a WordPress Website in Multiple Locations.
- How to Prevent Downtime on Your WordPress Website
- How to Repair & Optimize the WordPress Database
- How to Create and Modify WordPress Cron Jobs
- How to fix the “Sorry, You Are Not Allowed to Access This Page” Error in WordPress?