Amazon S3 is a popular cloud storage service offered by Amazon Web Services (AWS), known for its scalability, reliability, and cost-effectiveness. By leveraging its robust features, you can effortlessly create a backup system for your WordPress website, ensuring the safety of your valuable content, media files, and databases.
In this blog post, we will provide a step-by-step guide for backing up your WordPress website to Amazon S3.
Whether you’re a beginner or a seasoned WordPress user, this guide will equip you with the knowledge and tools to implement a reliable backup solution.
Contents
Why Amazon S3?
Amazon S3 offers several compelling reasons why it is an excellent choice for backing up your WordPress website. Here are some key advantages:
- Scalability and Reliability: Amazon S3 is designed to handle large amounts of data and traffic, making it an ideal solution for websites of any size.
- Cost-Effectiveness: Amazon S3 has a pay-as-you-go pricing model, allowing you to pay only for the storage space you use.
- Security and Compliance: Amazon S3 prioritizes data security and privacy. It provides robust access controls and encryption options and integrates with other AWS services for enhanced security.
- Easy Integration with WordPress: Integrating Amazon S3 with your WordPress website is straightforward.
- Offsite Backup Solution: Storing your WordPress backups on Amazon S3 provides an offsite backup solution.
Backing Up WordPress in Amazon S3
Step 1: Set Up an Amazon S3 Account
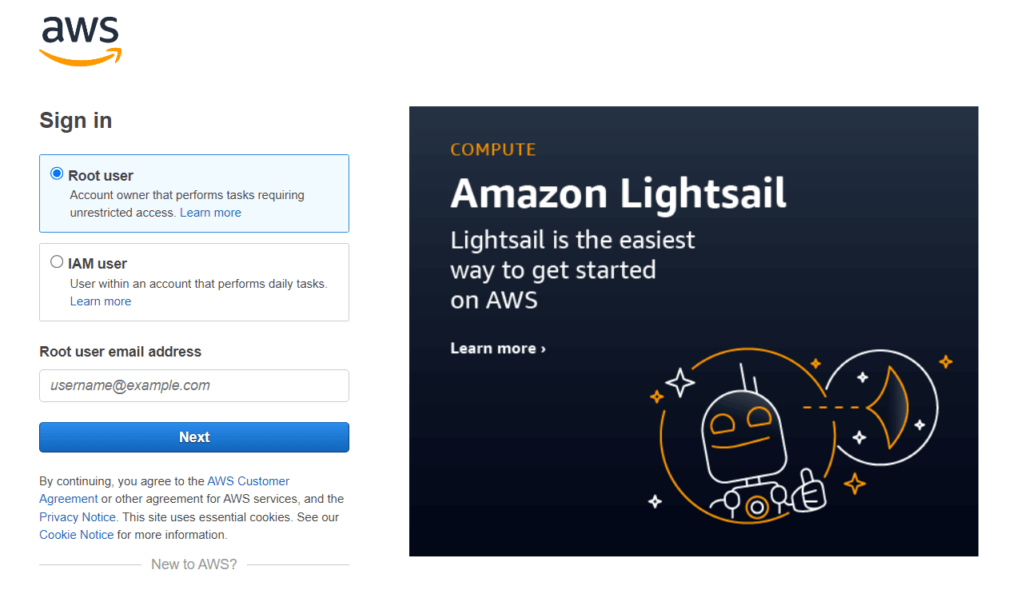
To get started, you must have an Amazon Web Services (AWS) account. If you don’t have one, visit the AWS website (aws.amazon.com), click "Sign In to the Console," and create a new account. Once you set up your account, navigate to the Amazon S3 service.
Step 2: Create an Amazon S3 Bucket
- Log in to your Amazon Web Services (AWS) account.
- Navigate to the Amazon S3 service in the AWS Management Console.

- Click on "Create Bucket" to start the bucket creation process.

- Provide a unique name for your bucket. Note that bucket names must be globally unique. Based on your needs, choose the appropriate region for your bucket. Configure optional settings such as versioning, logging, and encryption if desired.
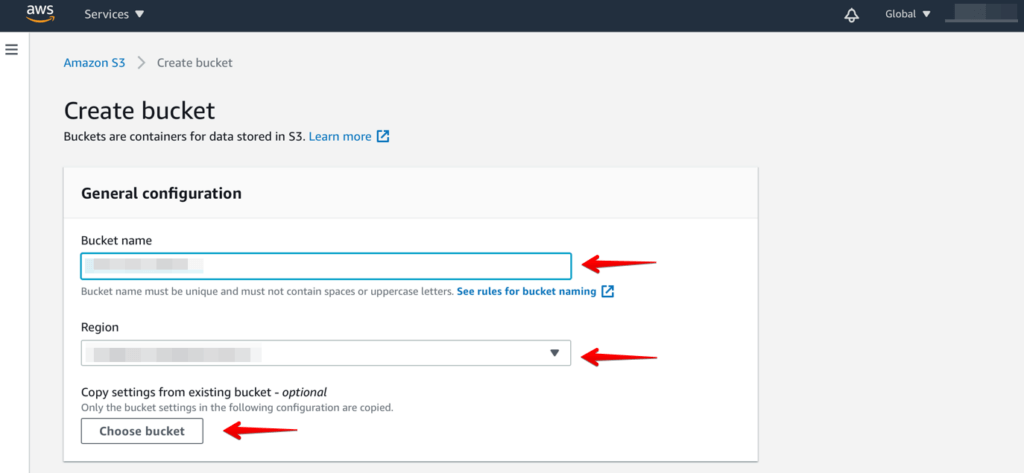
- Review the bucket configuration and click "Create Bucket" to complete the process.
Your Amazon S3 bucket is now created and ready for WordPress backups.
Remember, to take note of the bucket name and region as you will need this information when configuring your WordPress backup plugin to connect to Amazon S3.
Step 3: Install and Activate the Plugin
Next, you must install and configure a backup plugin on your WordPress website—several reliable plugins, such as WP Staging Pro.
- First, go to your WordPress Dashboard.
- Navigate to the "Plugin" section and click the "Add New" button.
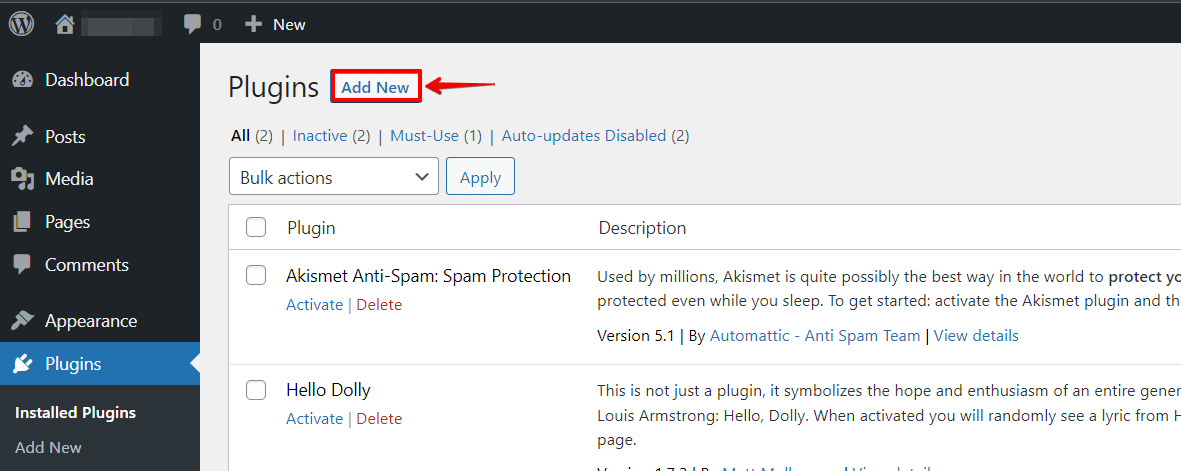
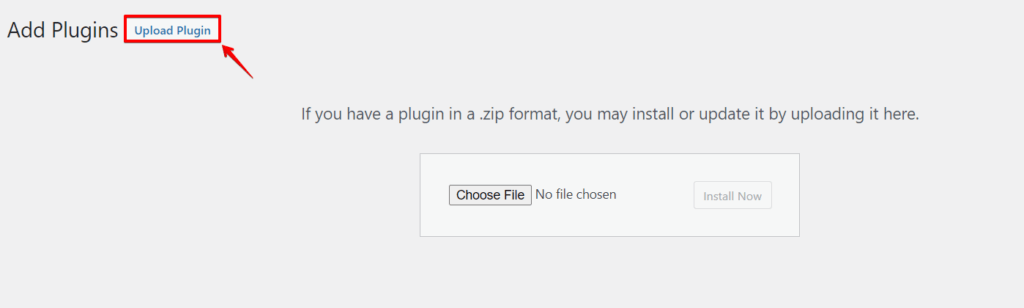
- Click on the "Upload Plugin" button next to the page title.
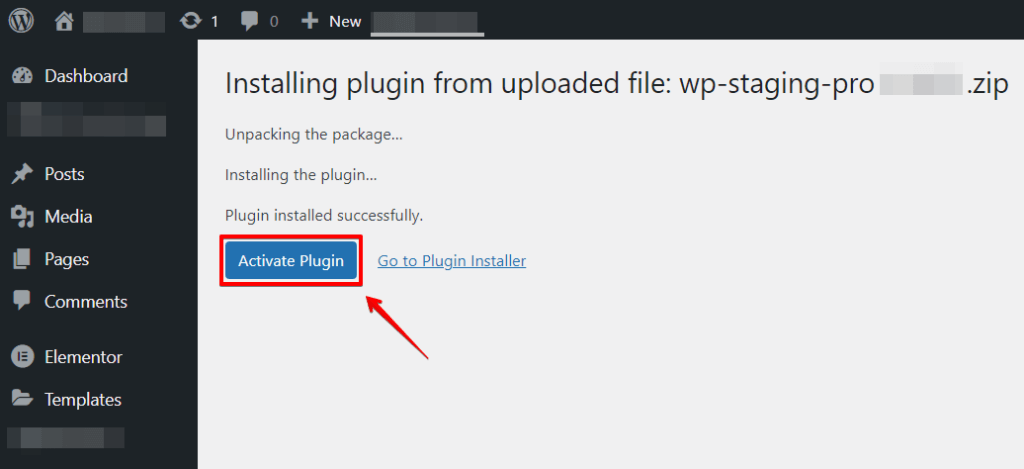
- Choose the WP Staging Pro plugin file you downloaded and click "Install Now".
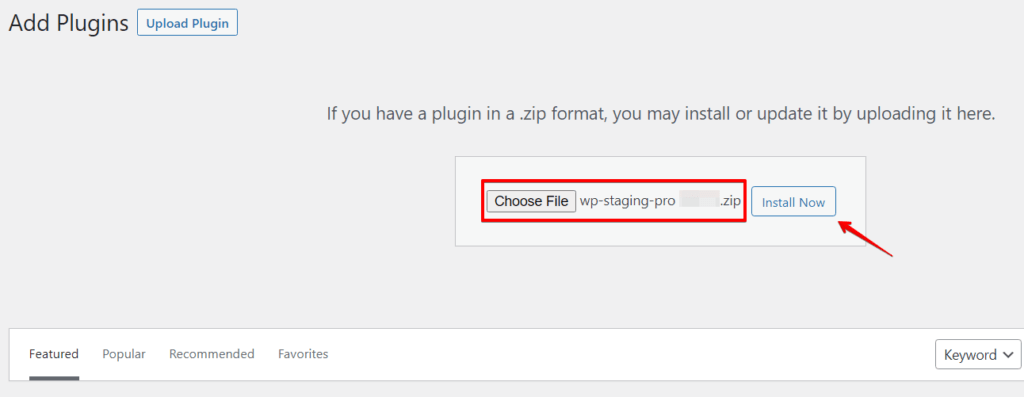
- Once the installation is complete, click "Activate" to activate the WP Staging Pro plugin.
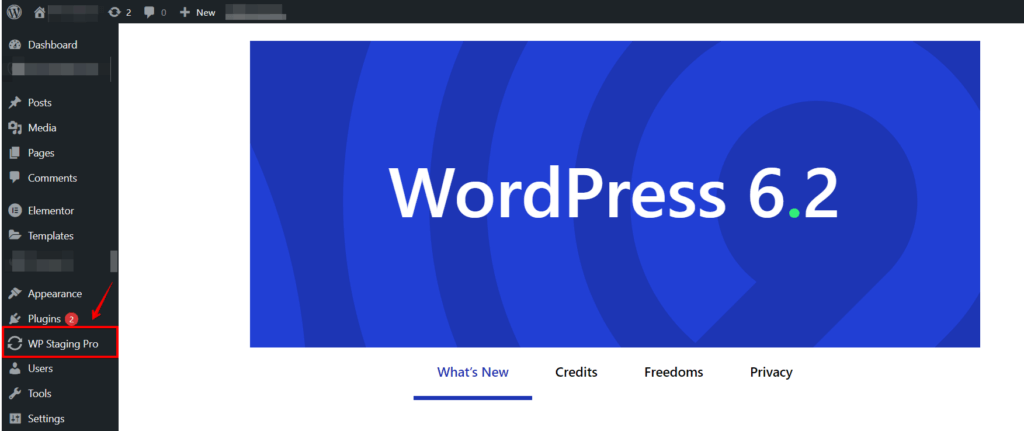
- You will see the WP Staging Pro menu in your WordPress admin sidebar.
Step 4: Configure WP Staging Pro to Backup to Amazon S3
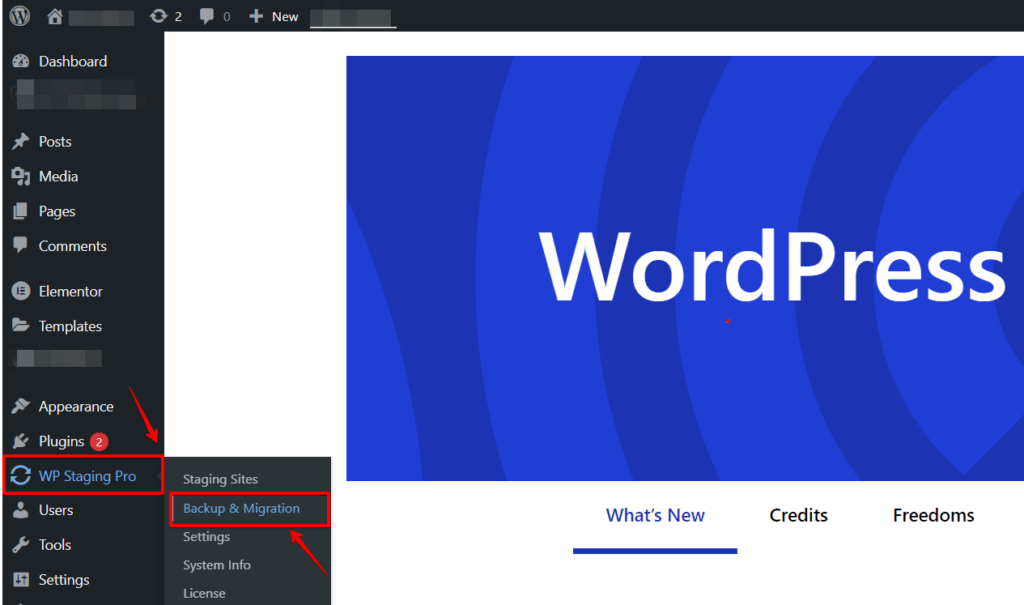
- After activating the plugin, click the "WP Staging Pro" option in the left-hand menu and click the "Backup & Migration" option.
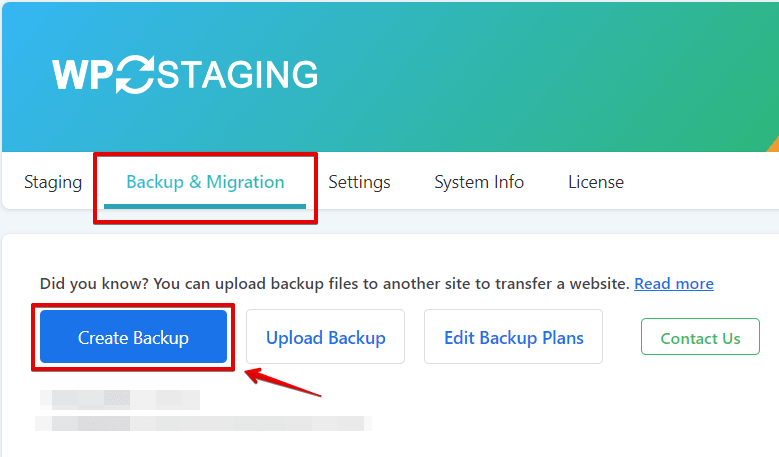
- After clicking the "Backup & Migration" option, you will see the menu of the "Backup & Migration" options. Then, click the "Create New Backup" option.
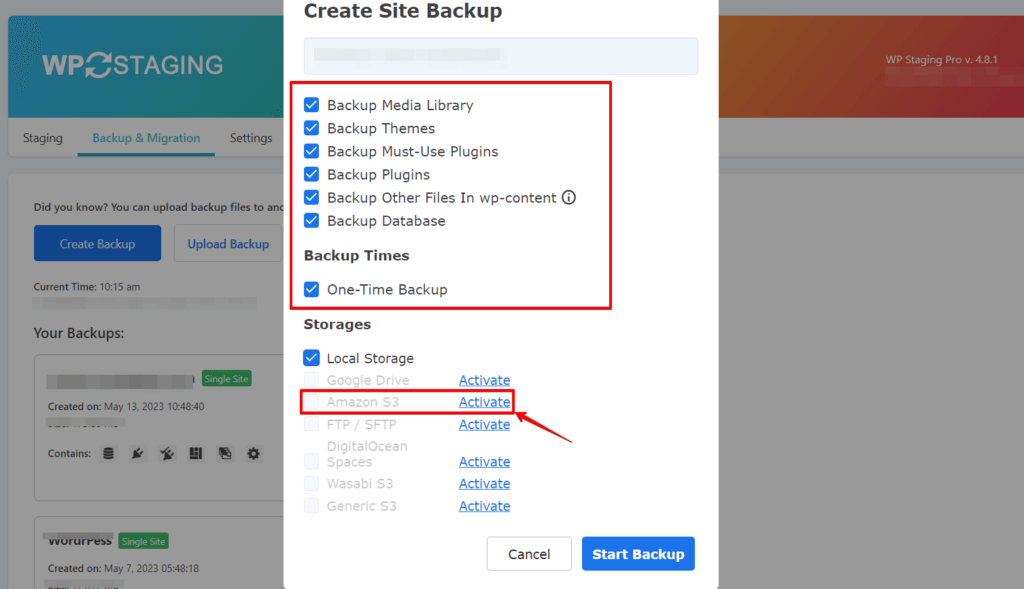
- Once you click the "Create Backup" option, a new section will appear. Choose the backup options you prefer, such as including files, databases, or both. Scroll down to the "Storage" section, select "Amazon S3" as the storage provider, and click the "Activate" button.
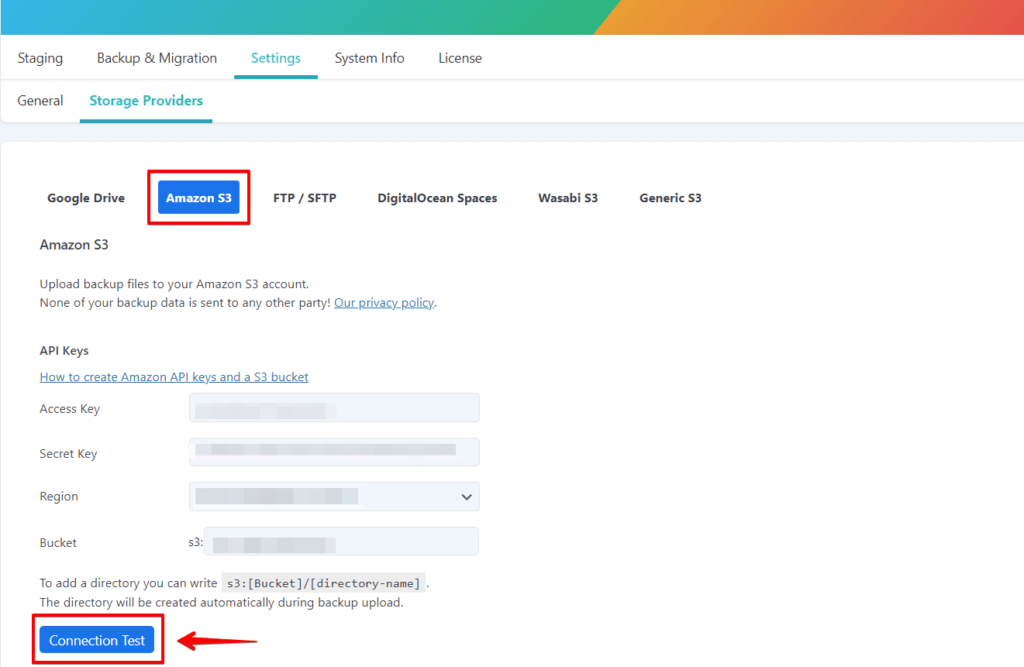
- Enter your Amazon S3 access key, secret access key, and the bucket name where you want to store the backup. You can obtain these details from your Amazon Web Services (AWS) account. If you enter your Amazon S3 API keys, click "Connection Test".
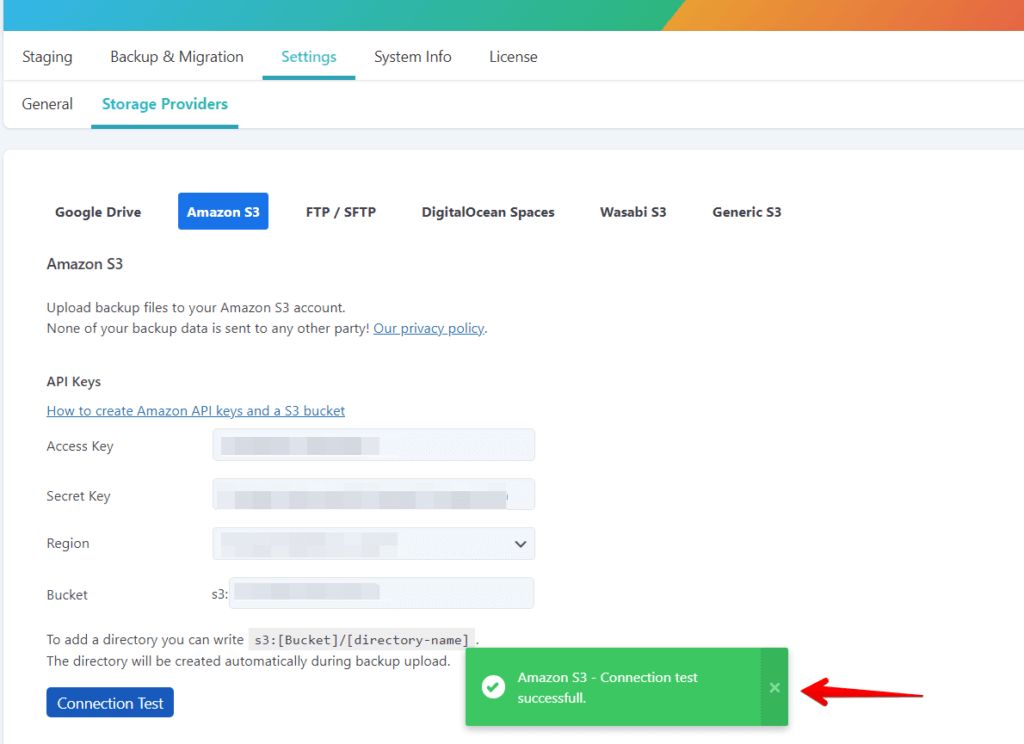
If Connection is successfully connected to your Amazon S3 Account, the pop-up message will appear on your screen.
Step 5: Initiate the Backup Process
You can initiate your first backup once you have configured WP Staging Pro.
- Go to the WP Staging "Backup & Migration" page and click the "Create Backup" button.
- Once you click the "Create Backup" option, a new section will appear. Choose the backup options you prefer, such as including files, databases, or both. Scroll down to the "Storage" section, select "Amazon S3" as the storage provider, and then click the "Start Backup" button.
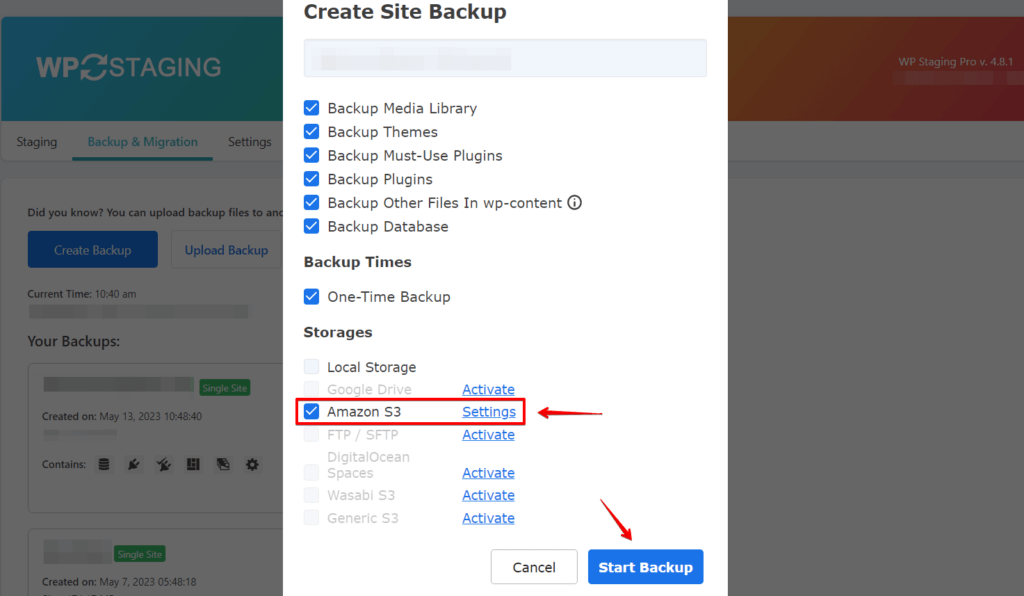
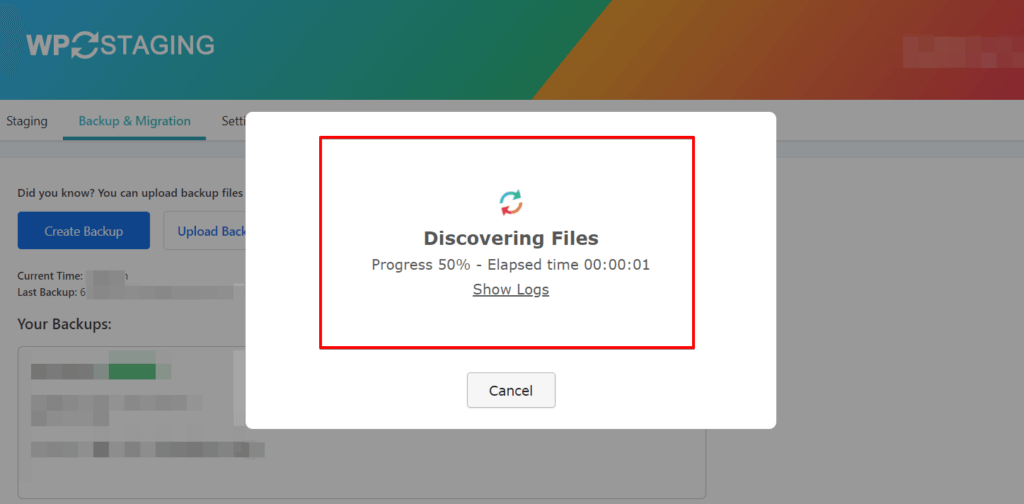
- WP Staging Pro will start the backup process and upload your website’s files and databases to Amazon S3. The time will depend on your website’s size and internet connection speed.
Step 6: Verify your Backups
After completing the backup process, you should verify that the backup files have been successfully stored in your Amazon S3 bucket.
You can do this by logging into your AWS account, navigating to the S3 service, and locating the bucket you created. Inside the bucket, you should find the backup files organized by WP Staging.
Conclusion
Backing up your WordPress website to Amazon S3 provides a reliable and secure storage solution, ensuring the safety of your valuable data. Establish a robust backup strategy to protect against data loss and ensure effortless disaster recovery.
🔥GET STARTED WITH WP STAGING TO EFFICIENTLY MANAGE BACKUPS & CREATE STAGING ENVIRONMENTS.