The 414 Request-URI Too Large error appears when your browser sends a URL that exceeds your server’s maximum URI length limit. On WordPress sites this most often happens when a plugin passes product filter values, IDs, or query parameters as GET variables until the URL grows beyond what Apache or Nginx will accept.
TL;DR: The 414 error means your browser sent a URL that exceeds your server’s length limit. On Apache, increase
LimitRequestLine; on Nginx, raiselarge_client_header_buffers. If you manage a WordPress plugin that generates long URLs, switch its data submission to POST.
What Causes the 414 Error?
A 414 error occurs when the URI — the URL path plus query string — in an HTTP request exceeds the server’s configured maximum. Common triggers on WordPress sites:
- Long query strings: WooCommerce filter plugins or faceted search that encode every active filter value in the URL.
- GET-heavy plugins: Plugins that pass large payloads (product IDs, user data) as GET parameters instead of POST.
- Low server limit: A
LimitRequestLine(Apache) orlarge_client_header_buffers(Nginx) value set lower than your site’s URL length. - Large form submissions: Forms that encode data into the URL rather than the request body.
Which Fix Do I Need?
| Symptom | Likely cause | Recommended fix |
|---|---|---|
| Error appears only on pages with many active filters | Plugin is passing too many GET params | Switch GET requests to POST |
| Error appears even after shortening the URL | Server URI limit is too low | Raise Apache or Nginx limit |
| Error appears on all pages, regardless of content | Server limit is globally too low | Raise Apache or Nginx limit |
| On shared hosting with no SSH access | No direct config access | Contact host support with the directive |
Fix: Raise Apache or Nginx Server Limits
If the 414 error affects multiple pages or persists after URL shortening, your server’s URI length limit needs to be increased. The change is a single directive in your server configuration file.
Locate Your Server Configuration File
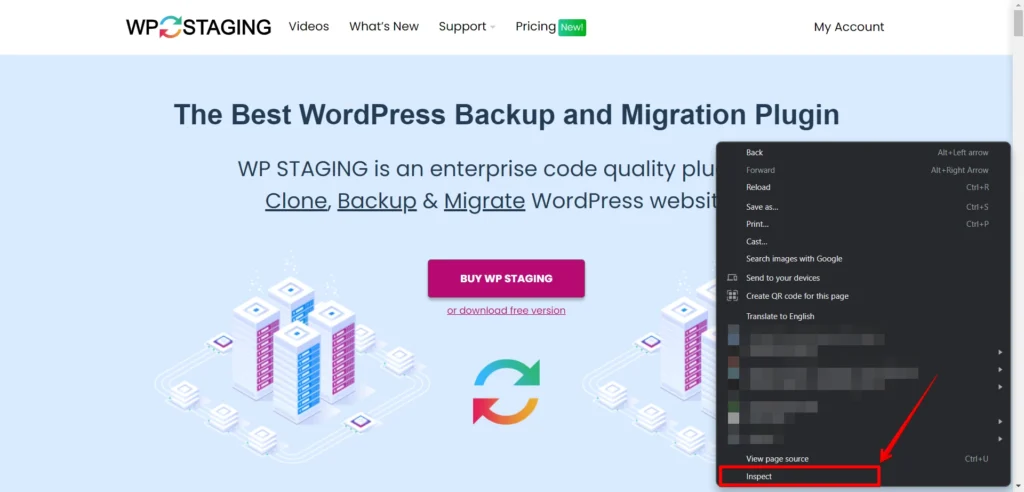
Open your WordPress site in a browser, right-click the homepage, and select Inspect.
In the developer tools, go to the Network tab. Click on the first request (your homepage URL) to expand its headers.
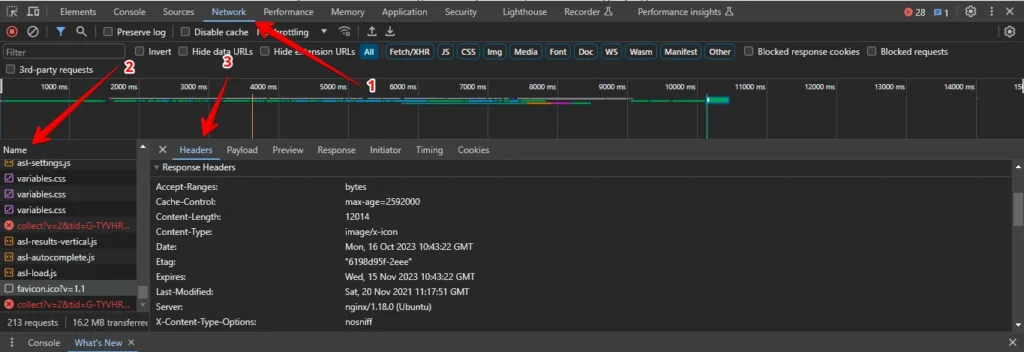
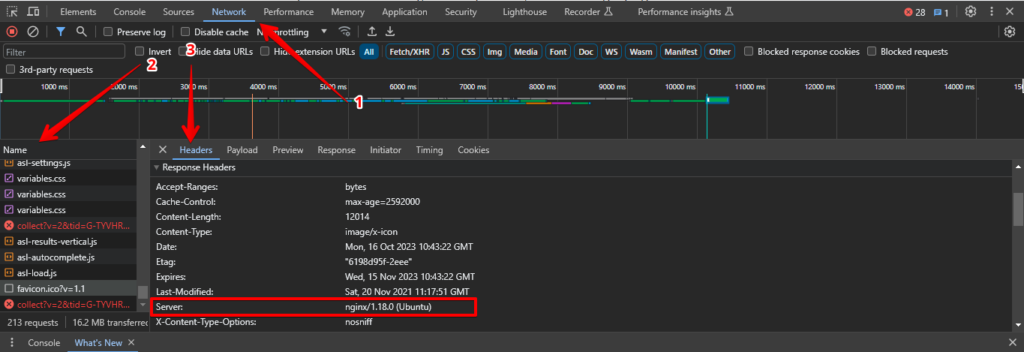
Look at the Response Headers for the Server: line — it will read Apache, nginx, or a CDN name.
The standard configuration file locations are:
- Apache 2.4:
/etc/apache2/apache2.conf - Nginx 1.24+:
/etc/nginx/nginx.conf
For Nginx Servers
Navigate to /etc/nginx/nginx.conf in your file manager or via SSH.
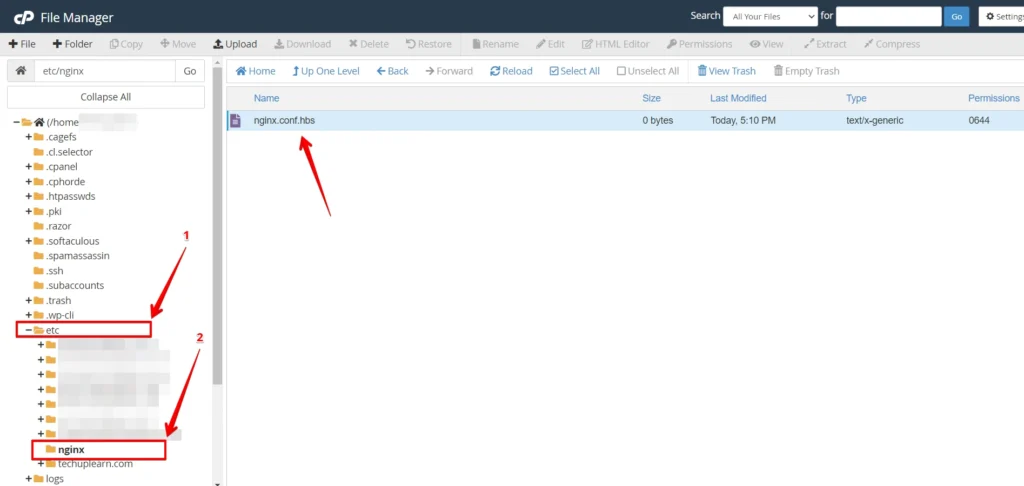
Find the large_client_header_buffers directive inside the http { } block. The directive takes two values: the number of buffers and their individual size. A value between 8k and 128k should cover most WordPress setups — use multiples of 4k:
large_client_header_buffers 4 16k;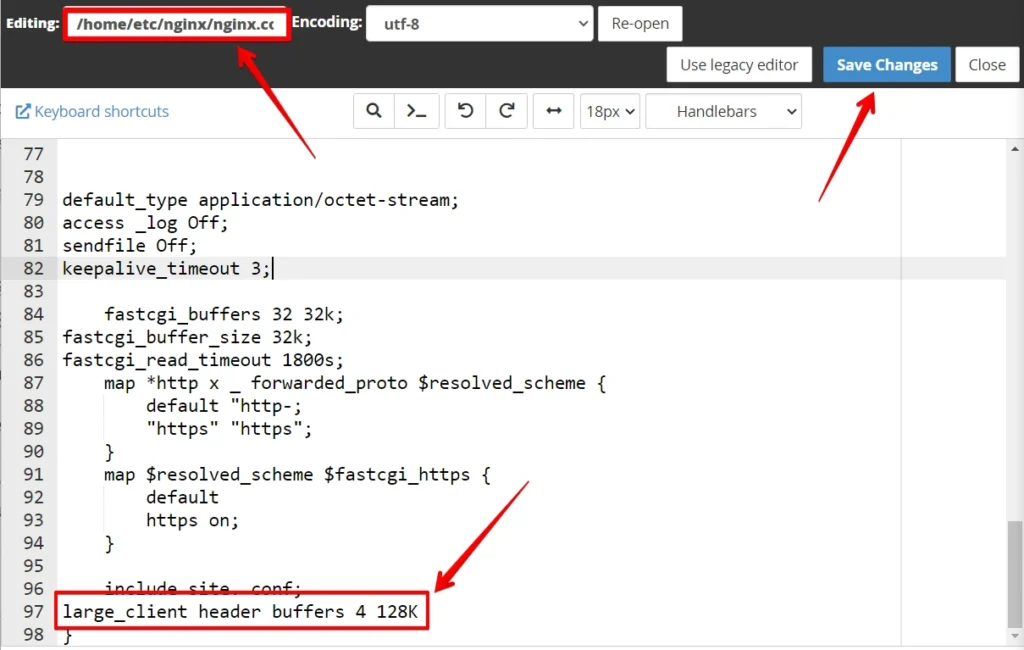
After saving, test and reload Nginx:
sudo nginx -t && sudo systemctl reload nginxSee the Nginx large_client_header_buffers documentation for the full parameter syntax.
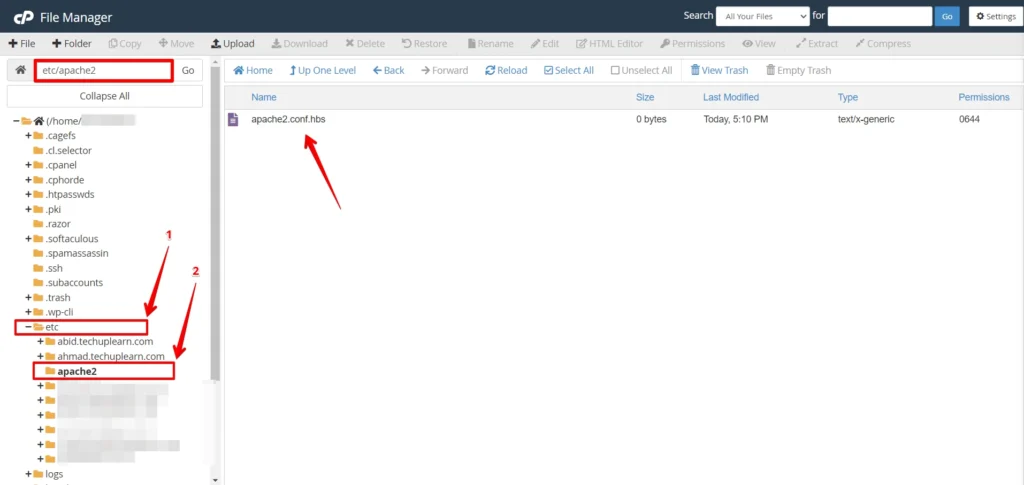
For Apache Servers
Open /etc/apache2/apache2.conf.
Search for the LimitRequestLine directive. If it is not present, add it to the bottom of the file. In our testing, Apache’s default LimitRequestLine of 8,190 bytes is enough for most sites; you’ll typically only hit the limit when WooCommerce filter plugins stack more than ~50 active filter values in the URL. You can elevate it to 256,000 or beyond to eliminate the 414 error — ensure the value is a multiple of 2:
LimitRequestLine 256000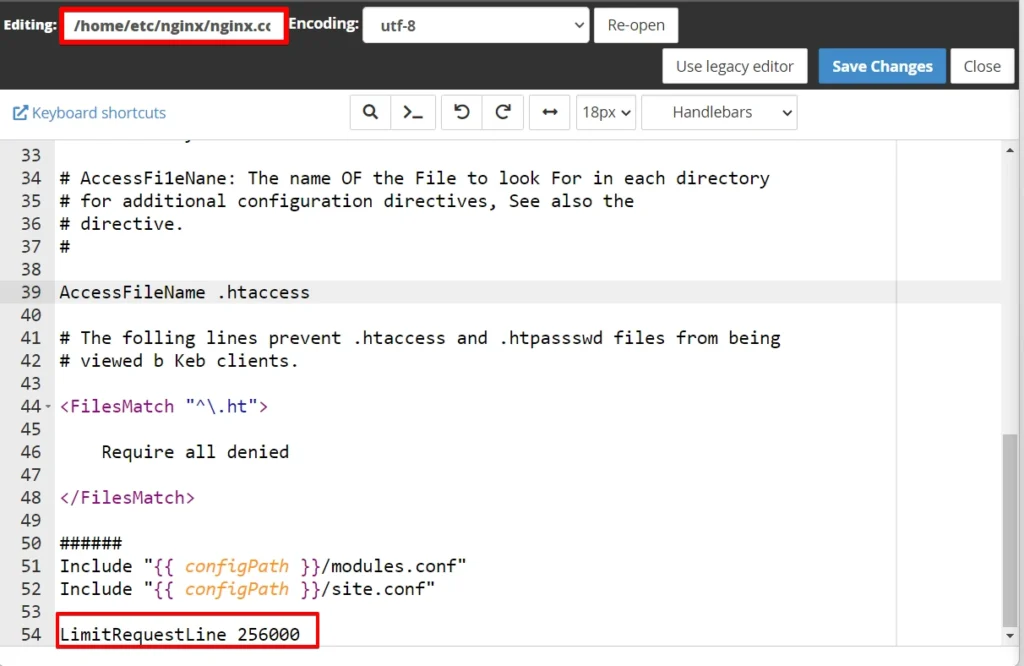
Test your config and restart Apache:
sudo apachectl configtest && sudo systemctl restart apache2See the Apache LimitRequestLine documentation for the full range of allowed values.
Fix: Switch GET Requests to POST
From WP STAGING support tickets, the most common trigger on shared hosting is a plugin that passes product IDs or filter parameters in a GET URL — switching to POST resolves it immediately.
If the 414 error appears only on specific plugin pages — WooCommerce category filters, faceted search results, or REST API endpoints — the plugin is encoding too many parameters into the query string. POST requests send their payload in the request body, bypassing the URI length limit entirely.
Check the plugin’s settings for an option labeled "URL-based filters", "GET filters", or "query string mode". If a POST or AJAX mode exists, enable it. If there is no such setting, open a support ticket with the plugin author and include the specific URL that triggers the 414.
For developers building custom integrations against the WordPress REST API, use wp_remote_post() for large payloads instead of wp_remote_get(). The REST API accepts POST requests for all write operations and for custom endpoints that expose a POST method.
Fix: Use a URL Shortener as a Diagnostic Step
URL shortening confirms whether the 414 is caused by URL length alone. When a user accesses the shortened URL, the shortener redirects them to the original long URL without the browser ever sending the full URI to your server. If the shortened URL loads correctly, the issue is confirmed as URI length. Once confirmed, apply a permanent fix above rather than relying on a shortened URL in production.
Before making any server configuration changes, we recommend taking a full site backup via WP Staging. CLICK HERE TO INSTALL
Note: Shortened URLs obscure the destination, may expire if the shortener’s service changes, and provide no SEO value. Use URL shortening only for diagnosis — not as the live fix.
What to Do If the Fix Doesn’t Work
Work through this checklist if the 414 error persists after applying a server configuration change.
Config file changed but value didn’t take effect?
- Apache: run
apachectl -t -D DUMP_VHOSTSto confirm which config file is active for your virtual host. The globalapache2.confdirective can be overridden by aLimitRequestLinein a<VirtualHost>block inside/etc/apache2/sites-enabled/. - Nginx: run
nginx -T | grep large_client_headerto see the effective merged configuration. A value in aserver { }block overrides the globalhttp { }block.
On shared hosting with no SSH access?
Contact your host’s support team and provide the exact directive. For Apache, request LimitRequestLine 256000; for Nginx, large_client_header_buffers 4 16k. Most managed WordPress hosts can apply the change to your account without server-wide impact.
Using Cloudflare or another CDN? CDNs and reverse proxies enforce their own URI length limits independently of your origin server. If the CDN is returning the 414 before the request reaches Apache or Nginx, changing your server config won’t help. In that case, switching the plugin from GET to POST is the only viable option — check the CDN’s documentation for its maximum URL length.
Conclusion
The 414 Request-URI Too Large error is caused by a URL that exceeds your server’s configured limit. On most WordPress sites the fix is either increasing the limit in apache2.conf or nginx.conf, or switching a plugin’s request method from GET to POST. Use the decision table above to identify the right fix for your setup, then follow the steps for your server type.