
Redirecting a page or URL in WordPress is essential for any website owner or administrator. Whether managing broken links, migrating content, or optimizing your site’s structure for SEO, knowing how to set up redirects can save you from losing valuable traffic.
This guide explores redirects, why they’re important, and step-by-step instructions on implementing them in WordPress.
Contents
What is a Redirect?
A redirect is a way to send users and search engines to a different URL from the one they initially requested. The most common types of redirects are 301 and 302 redirects.
A 301 redirect indicates a permanent move and transfers the SEO history to the new page. On the other hand, a 302 redirect is used for temporary changes, and it does not pass on link equity.
Why Redirect URLs in WordPress?
- Avoiding Broken Links: When you delete a page or change a URL, any links pointing to the original URL will lead to a 404 error page. Redirects prevent this by guiding users to a new or relevant page.
- SEO Benefits: Redirects help preserve your site’s SEO value by ensuring that any authority the old URL had is passed on to the new URL.
- User Experience: Redirects improve user experience by preventing frustration associated with landing on error pages, thus keeping users engaged on your site.
2 Quick Ways to Redirect URLs and Pages in WordPress
- Using Plugins
- Editing the .htaccess File
1. Using Plugins
Using plugins to manage redirects in WordPress is popular because it offers simplicity and accessibility to users of all experience levels. Here’s how this method works:
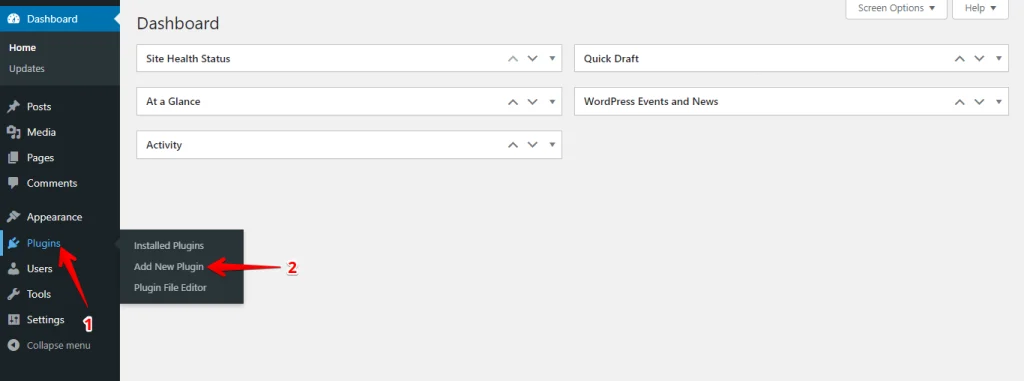
Navigate to the ‘Plugins’ section in your WordPress dashboard, then click ‘Add New Plugin’ to add a new plugin.
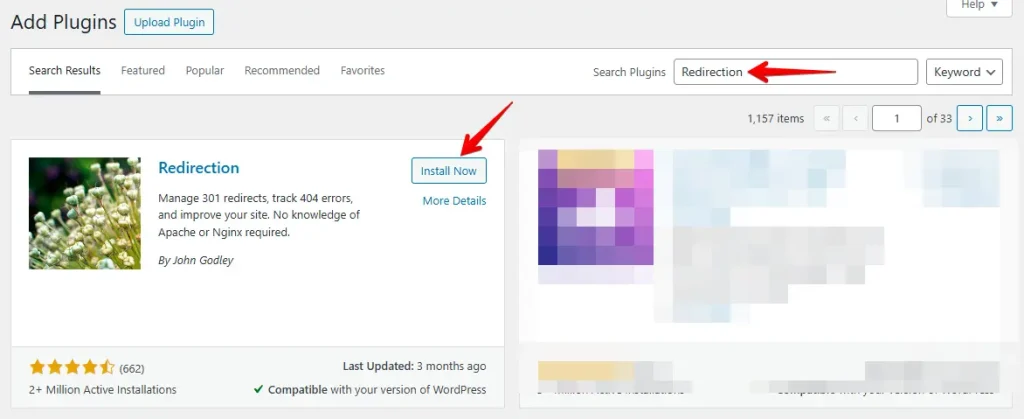
In the top search bar, enter ‘Redirection’ to locate the plugin. Once found, click ‘Install’ and then ‘Activate’ to begin using the plugin.
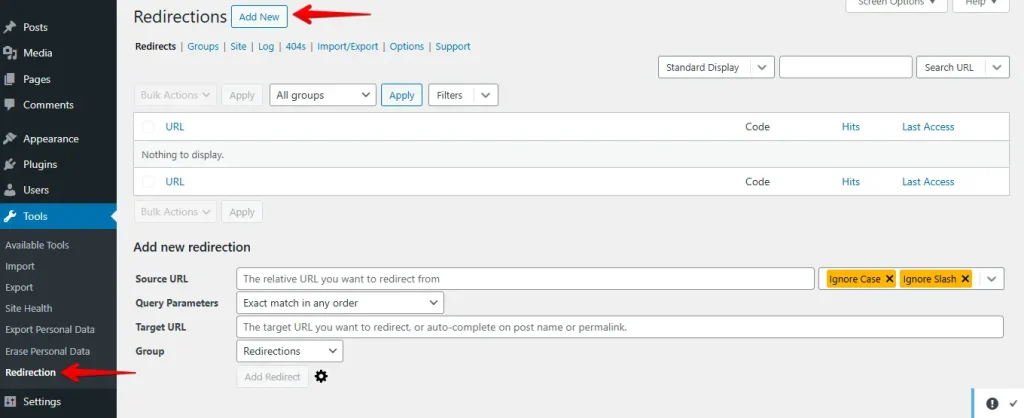
Once activated, navigate to ‘Tools’ > ‘Redirection’ to access the plugin’s settings. Here, you will find options to add a new redirection. Click to proceed.
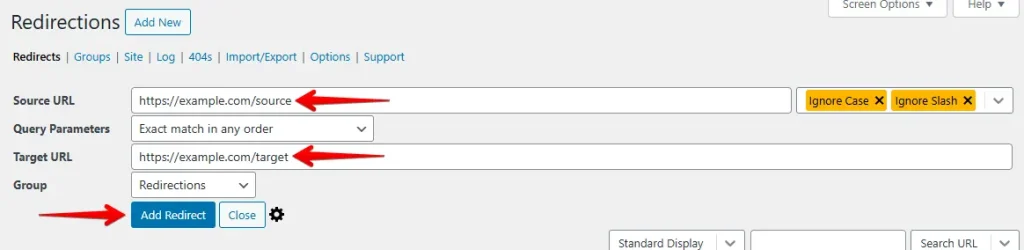
Enter the ‘Source URL’ (the URL you wish to redirect from) and the ‘Target URL’ (the URL you want to redirect to), then click the ‘Add Redirect’ button to finalize the setup.
Using a plugin is generally the easiest and safest way to manage redirects, making it a great choice for most WordPress users.
2. Editing the .htaccess File
For a hands-on approach or complex needs, editing the .htaccess file provides direct control over server behavior and powerful redirection capabilities in WordPress. Here’s how to proceed:
Connect to your hosting account via FTP or use the file manager provided in your hosting control panel.
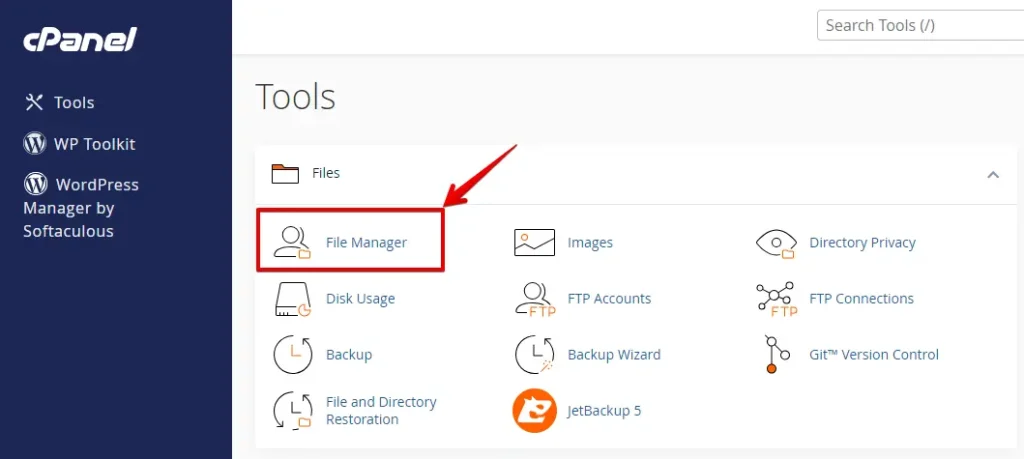
Navigate to the root directory of your WordPress installation, where you’ll typically find the .htaccess file.
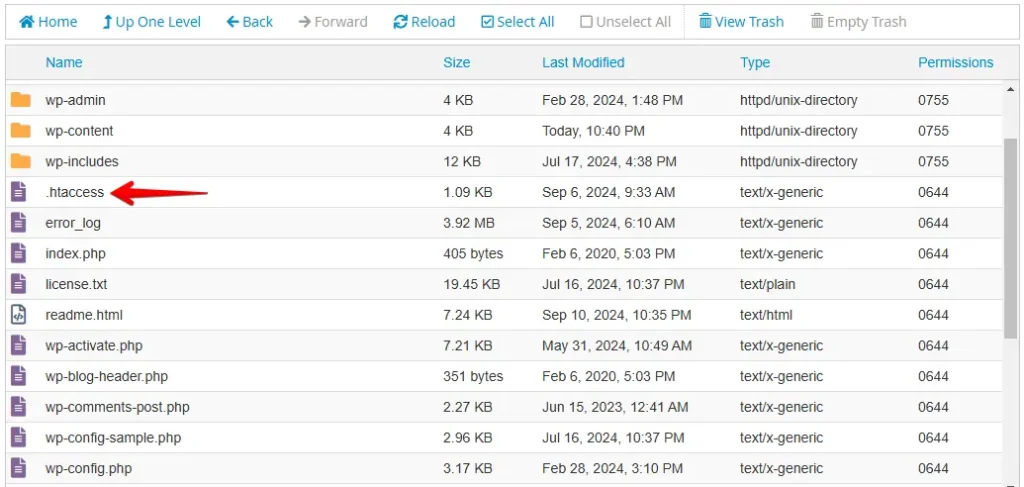
Before making any changes, it’s crucial to back up your .htaccess file. This allows you to restore the original settings if something goes wrong. Right-click on the file and select “Download” to save a copy.

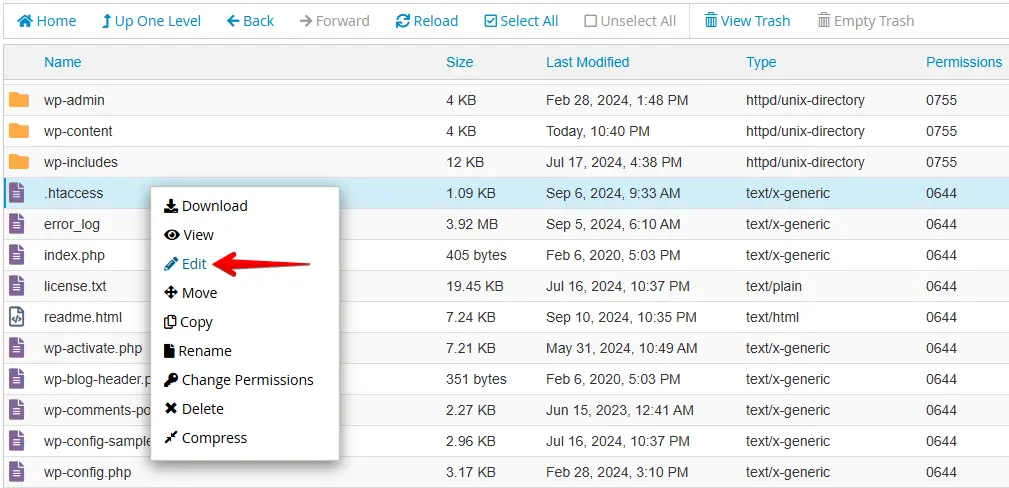
Right-click on the .htaccess file again and select the “Edit” option to begin making your changes.
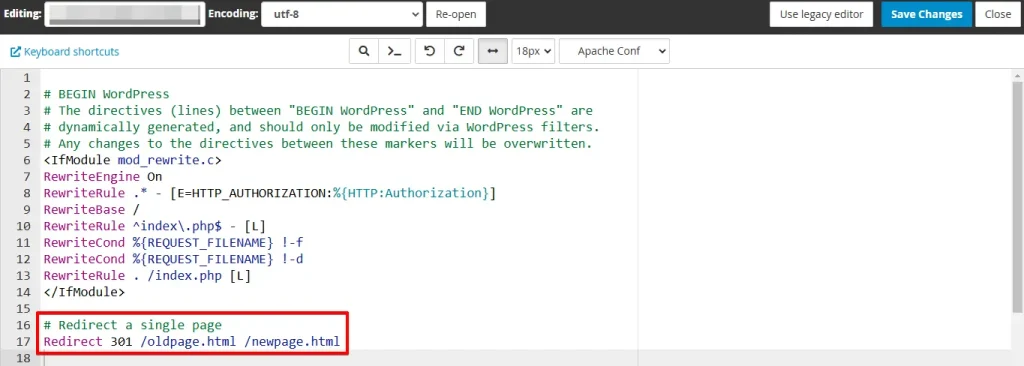
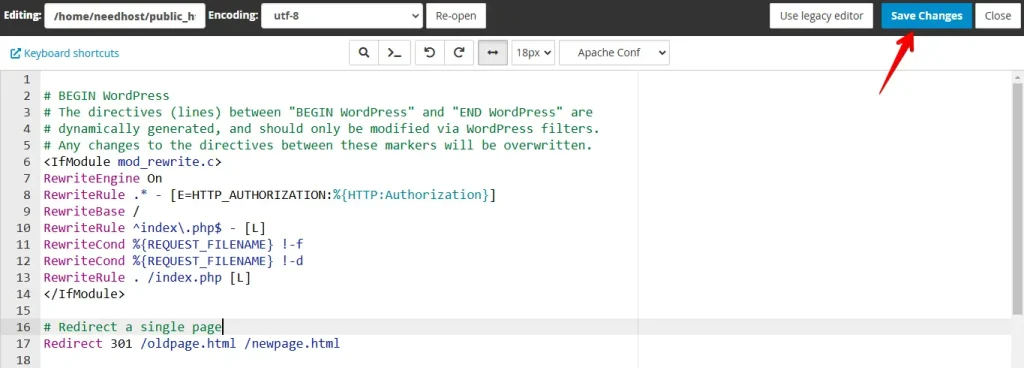
To create a redirect, add the following lines to the file, adjusting the paths to suit your needs:
# Redirect a single page
Redirect 301 /oldpage.html /newpage.html
Here, 301 indicates a permanent redirect, /oldpage.html is the old path, and /newpage.html is the new path to which traffic should be redirected.
After editing, save your changes. If you’re using FTP, upload the modified .htaccess file back to the server.
After updating the .htaccess file, test the redirects by visiting the old URLs to see if they properly redirect to the new locations.
Conclusion
Redirecting URLs in WordPress offers several key benefits, including improved user experience by guiding visitors to the correct pages, even if URLs change. It helps maintain SEO rankings by preserving link equity from old links, preventing 404 errors that can harm your site’s credibility.
Redirects also streamline website migrations, product updates, or content restructuring without losing traffic or search engine authority. Additionally, they enhance security by controlling broken or outdated links, reducing bounce rates, and keeping users engaged.
Proper redirects ensure smooth navigation, better search performance, and a seamless experience for users and search engines.