If you moved your website to another server or database and the paths to the production and staging site have been changed, WP STAGING lost its connection to the staging site, and you can no longer push the staging site to the production site.
Instead, you’ll get a fatal error telling you that WP STAGING cannot find the staging site or the folder. wp-content:
Fatal error! Path /public_html/staging/wp-content does not exist.

The staging site "staging" seems to be broken.

Create another staging site and try again.
Contents
Reconnect Existing Staging Site with Production Site
The easiest way to solve this is to reconnect the existing staging site to the production site by using the “Edit Data” function:
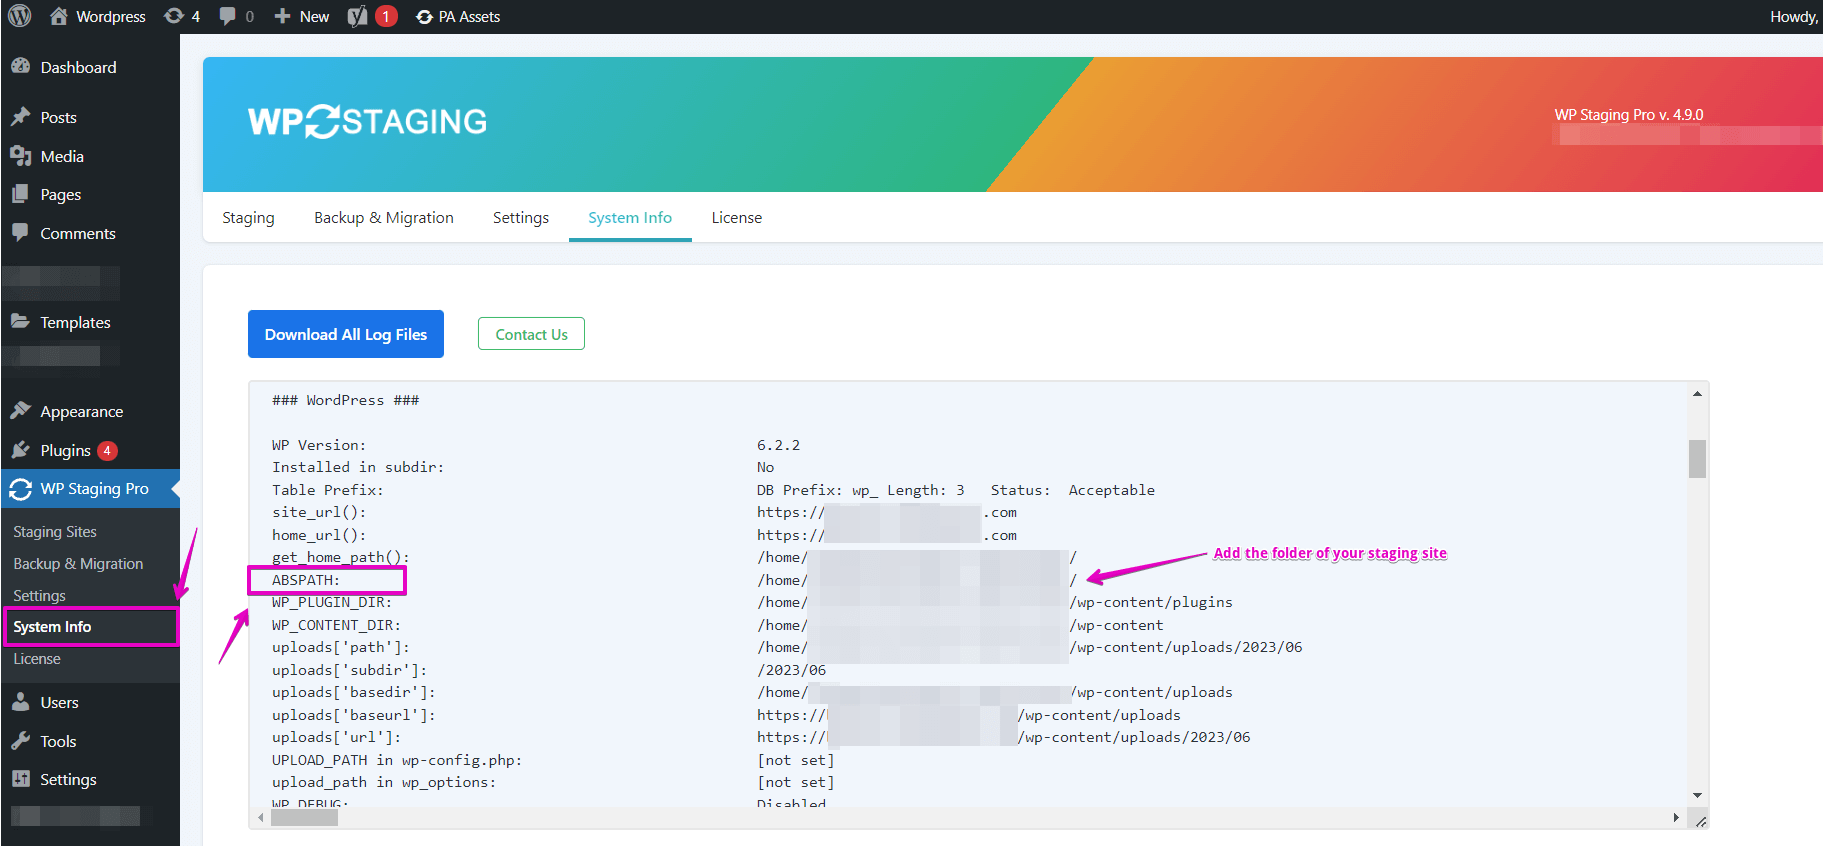
Go to WP STAGING Pro > system info and search for ABSPATH.
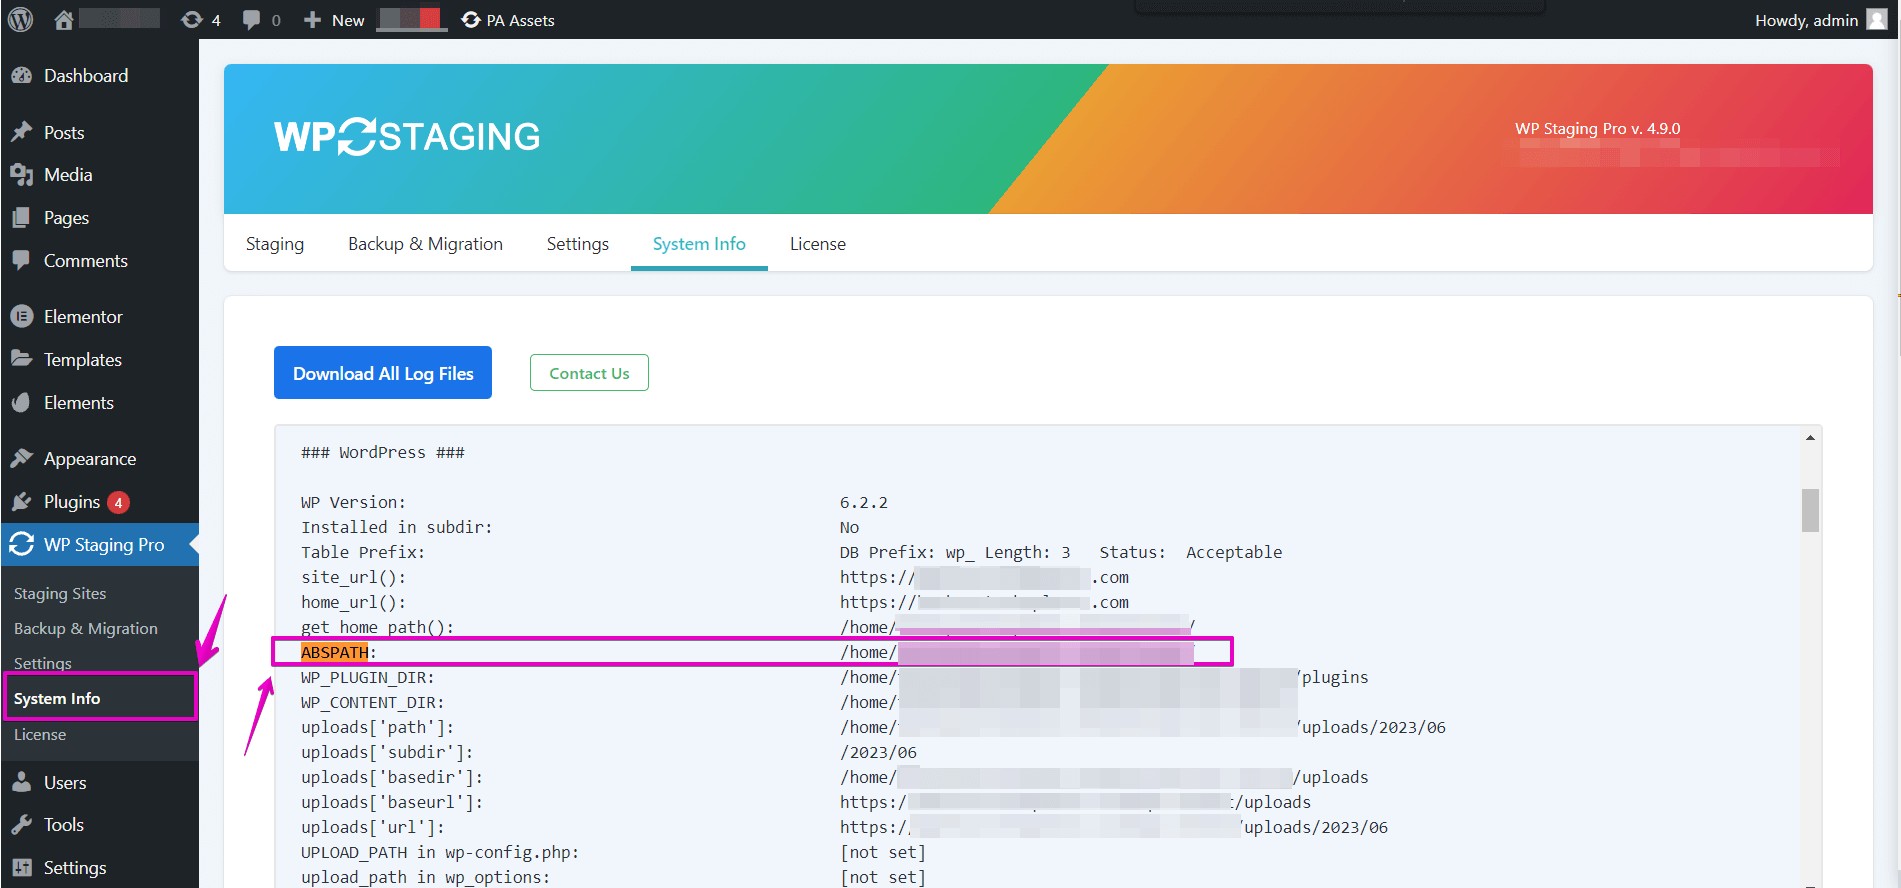
Copy the ABSPATH value and go to WP STAGING Pro > Sites.
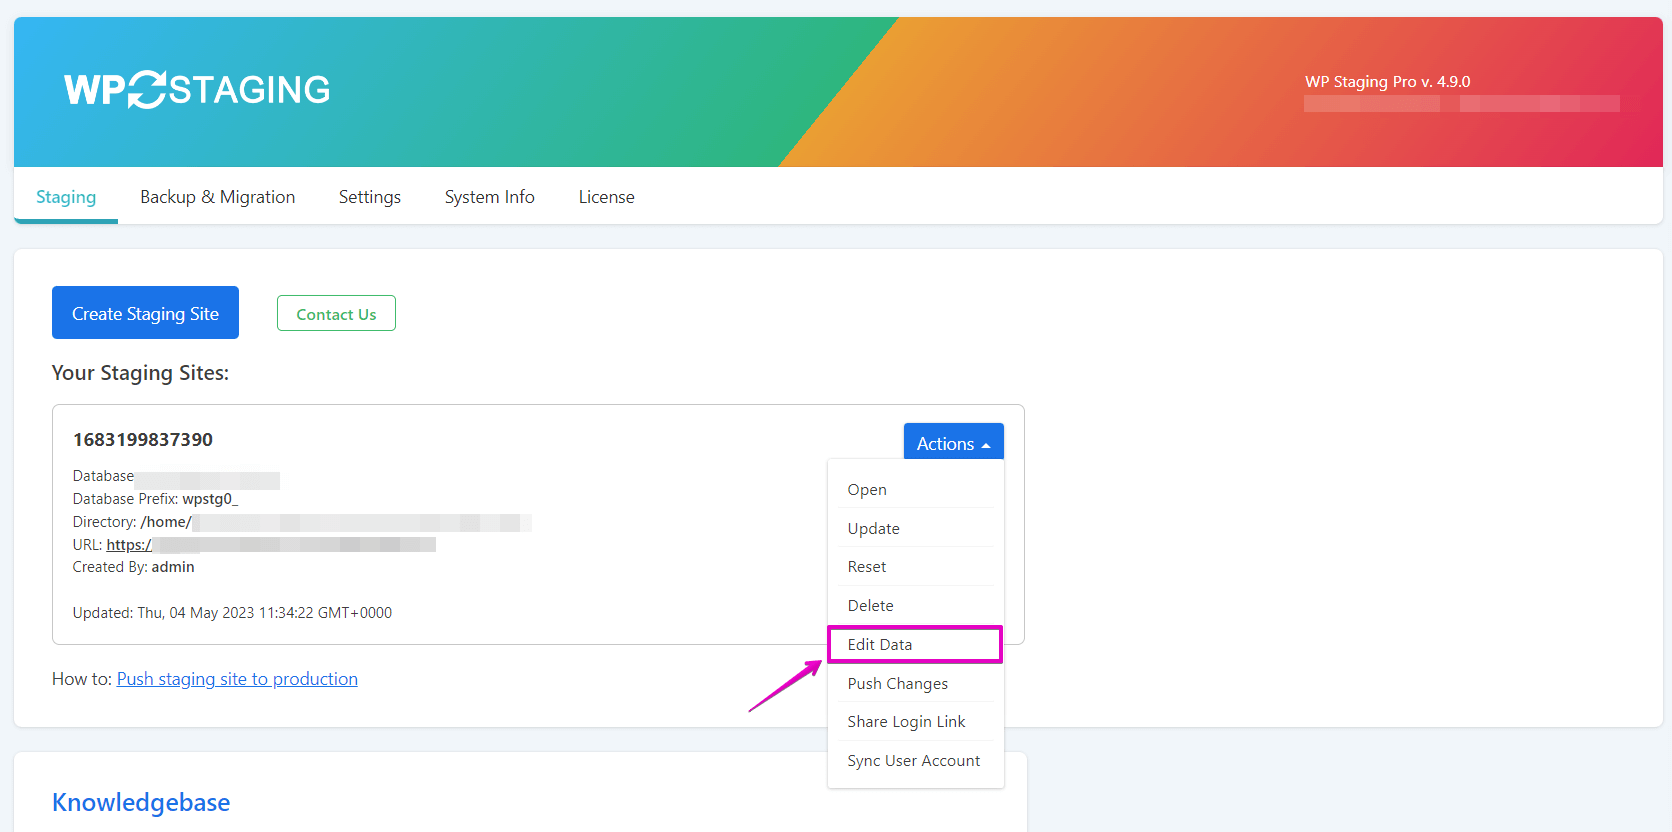
Find your targeted staging site and click on Edit Data:
Enter the target directory path ending with the name of your staging site in lowercase:
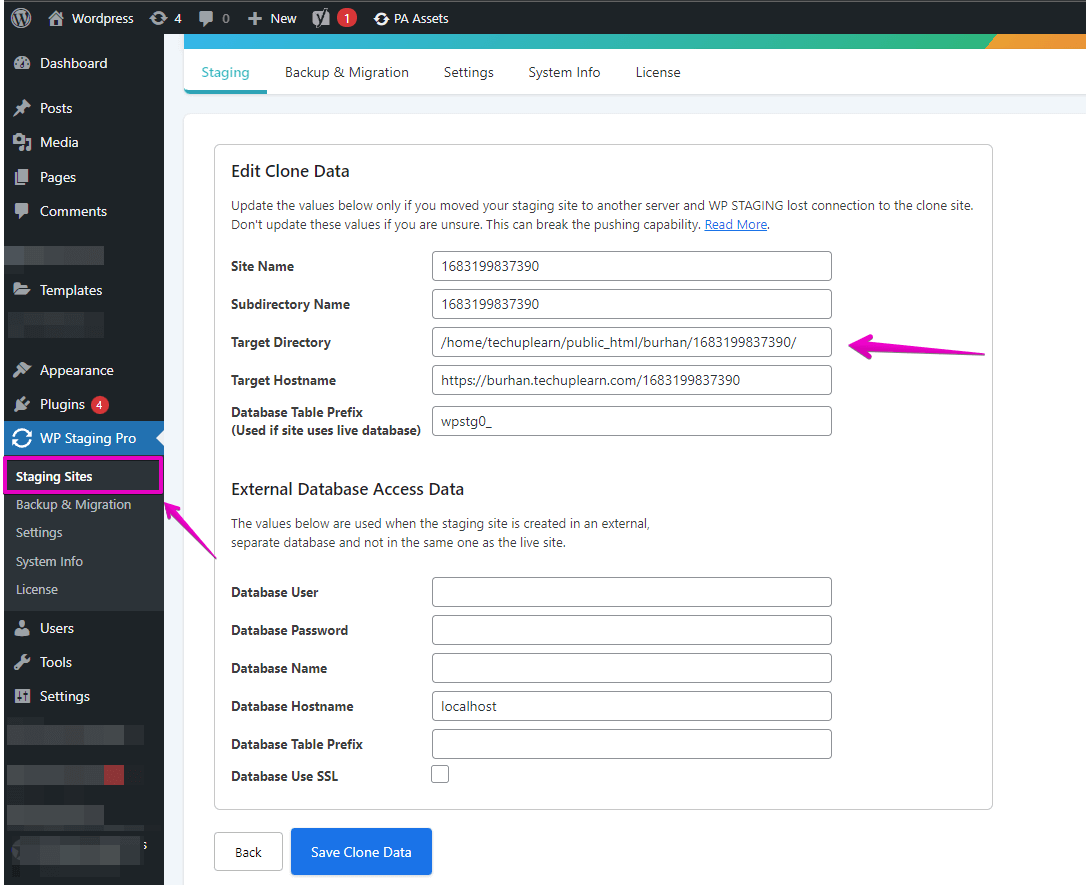
Don’t change the Database Access Data!
Click on “Save Clone Data”
Now you should be able to push your staging site properly.
That’s it!
Reconnect a Staging Site Manually By Editing the Database
Suppose you are familiar with PHPMyAdmin and are not scared by slightly modifying the production database. In that case, you can optionally solve this by changing the path to the staging site in the WP STAGING database settings.
You cannot break anything if you change only the mentioned data. It’s still a good idea to have a backup, though!
WP Staging stores its settings as serialized data, so you can not do a simple search & replace, and you need to follow the instructions below carefully:
- Open PHPMyAdmin and look for the
option_namewpstg_staging_siteswpstg_existing_clones_betawp_options. - Get the value of that column and copy it into an empty text file for backup purposes.
Since 2.8.7 wpstg_existing_clones_beta has been renamed to wpstg_staging_sites.
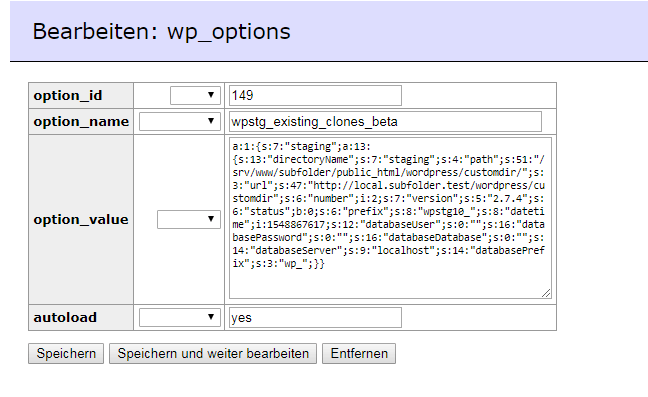
- The next step is to open the PHP serialized data online editor from the link below and paste the data into the input-form number one with the title “Paste in serialized PHP here.” http://sciactive.com/phpserialeditor.php.
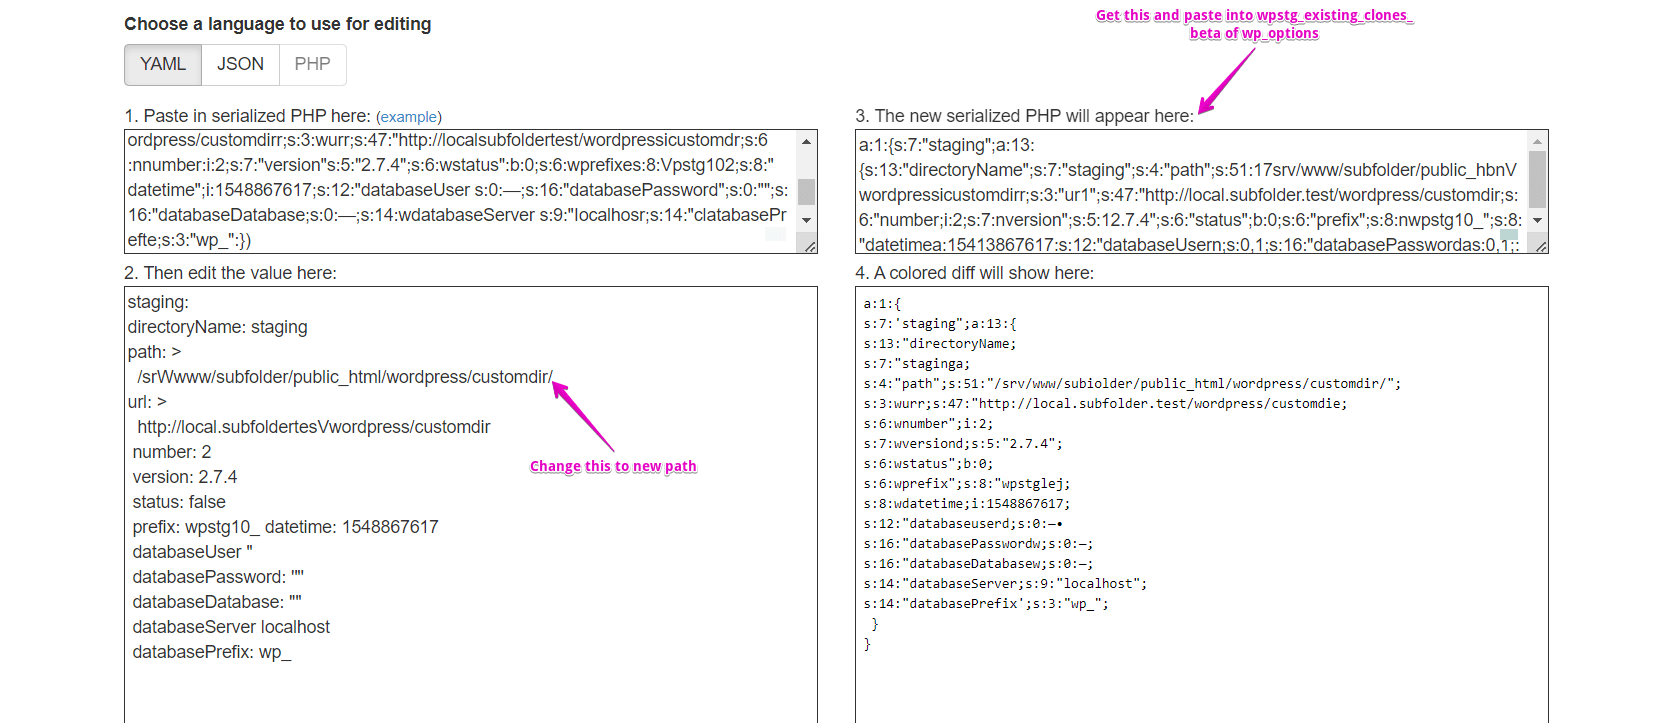
- Change the path to the staging site in the input form number two to your staging site’s new location!
You can get the destination by looking into the system info at
WP Staging > system info and finding the value ABSPATH.
- This value contains the absolute path to the root folder of your WordPress website.
Just add the staging site’s subfolder name, and you’ll get the full path to your staging site.
- Go back to PhpMyAdmin, paste the modified serialized PHP data into the field,
wpstg_staging_siteswpstg_existing_clones_beta,
After that, your staging site connects to the live site, and you can migrate your staging site to live without getting the error message any longer.
If you need help with this, please get in contact with us.
