Read these two articles instead:
– How to transfer Woocommerce Products and Customers from the live site to the staging site
– How to exclude WooCommerce orders from being copied to the live site with HPOS
How to Prevent WooCommerce Orders and Products from Being Overwritten During Pushing
Whenever you use WP STAGING to push data from the staging site to the live website, you need to ensure that WooCommerce orders, customers, and products on the live site are not affected in any way and remain untouched.
Contents
So what is the best way to prevent those data from being overwritten during the pushing process?
The short answer is: you can’t rule out this data being copied to your staging site, and you can’t automatically merge WooCommerce orders and products from the live and staging sites. But fortunately, there is a way not to lose your orders and products on the production site, but it requires manual work.
Even worse, some plugins claim to be able to perform such a merge, only to find that orders and products have been overwritten without any warning. So, this can destroy data integrity, and you won’t even notice it if you don’t check every order and product after such a merge.
First, we need to understand where WooCommerce and WordPress store orders, product, user data like customer addresses, and all other data like posts and pages:
- Orders and products are stored in the tables
wp_postsandwp_postmetaseparated by a custom post type field named ‘orders.’ - WordPress itself also stores most of its data like pages, posts, and even menu entries and everything else in the same tables
wp_postsandwp_postmeta - Users are stored in
wp_usersandwp_usermeta
Many other WooCommerce custom tables contain data like tax rates, order items, and general WooCommerce settings.
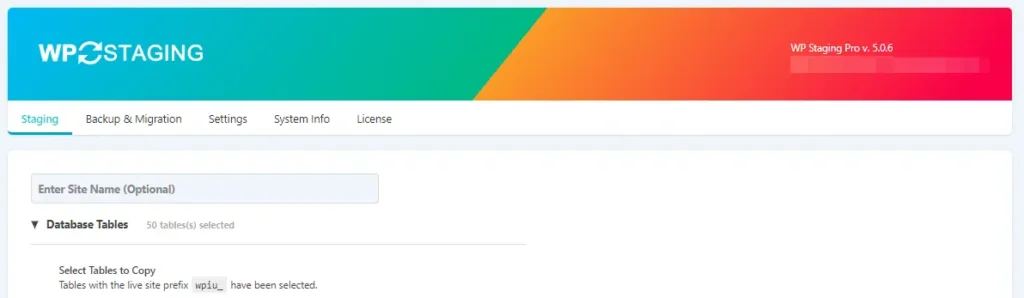
Each staging site table name begins with the prefix wpstg(x)_
The WooCommerce Table names begin with the same table prefix, but they also start with _woocommerce like wpstg(x)_woocommerce_
The x in the table prefix is the number of your staging site. So if you have multiple staging sites, that number will be counted up like wpstg1_, wpstg2_ And so on.
If you want to migrate specific data from your staging site to the production site without affecting any of the transactional data, you have three options:
Option 1) Export orders, user data, and other transactional data from the live site and import them into the staging site before migrating the staging site to live.
That allows you to copy the entire staging site.
That is the recommended way if you have no knowledge about the internal database structure. We explain below how this can be done.
Option 2) Exclude all database tables except the table _options and select only the plugins and themes folder you want to push to the staging site. Going this route ensures that you never overwrite or lose data on the production site generated after creating the staging site. Most of the plugins also store their plugin settings in the table _options. So this will also migrate the plugin settings to the live site as well.
Important: Any other missing data which is included in the tables _posts and _postmeta the table needs to be created again on the live site by yourself manually after pushing.
Option 3) Exclude all modified database tables from the push process. If you go that route, you will not migrate the entire staging site, including its data!
Depending on the excluded tables (e.g., _posts, _postmeta), this can lead to missing images and even layout elements on your production website. This happens mainly if you use a visual editor like WPBakery (formerly known as the visual composer) or Elementor because these editors store their designs in the database tables _posts and _postmeta.
Note: Option 1 is the recommended way.
Export & Import WooCommerce Orders (Recommended Option)
The best option is to export your orders and product data by using a separate export/import plugin on the production site and then import the data back into the staging site before you do the push.
Before you export and import any orders from your live site to live, it’s strongly recommended creating another staging site to test the whole process before you do the import and export on the primary staging website!
Quick guide:
- Put your website in maintenance mode.
- Install the “WooCommerce Sequential Order Numbers” plugin on the production and staging sites.
- Install the plugin “Order Export & Order Import for WooCommerce” on the production and staging sites.
- Export WooCommerce orders from the production site.
- Delete all orders on the staging site.
- Import orders into the staging site.
- Push the staging site to the production site.
Step-by-Step Guide
Before you proceed, You’ll need to install two third-party plugins:
You’ll need to install the “WooCommerce Sequential Order Numbers” plugin to ensure the order numbers do not change on an import.
Exporting and importing orders could change the order ID of imported orders because the WooCommerce order ID is based on the WordPress post ID, a unique number on WordPress. So if the post ID on your staging site is already used by a post or any other item, the imported order would get a new ID. So this could result in a new order ID for an imported order.
So, to keep the order ID intact as it is, you’ll need to use the plugin “WooCommerce Sequential Order Numbers.”
This plugin adds a new database entry to store the order id in a separate field. That allows your site to keep the order id separated and independent of the post id.
- Login to your production site
- Go to WebToffee Import Export > Export
- Select “Order” as in this screenshot:
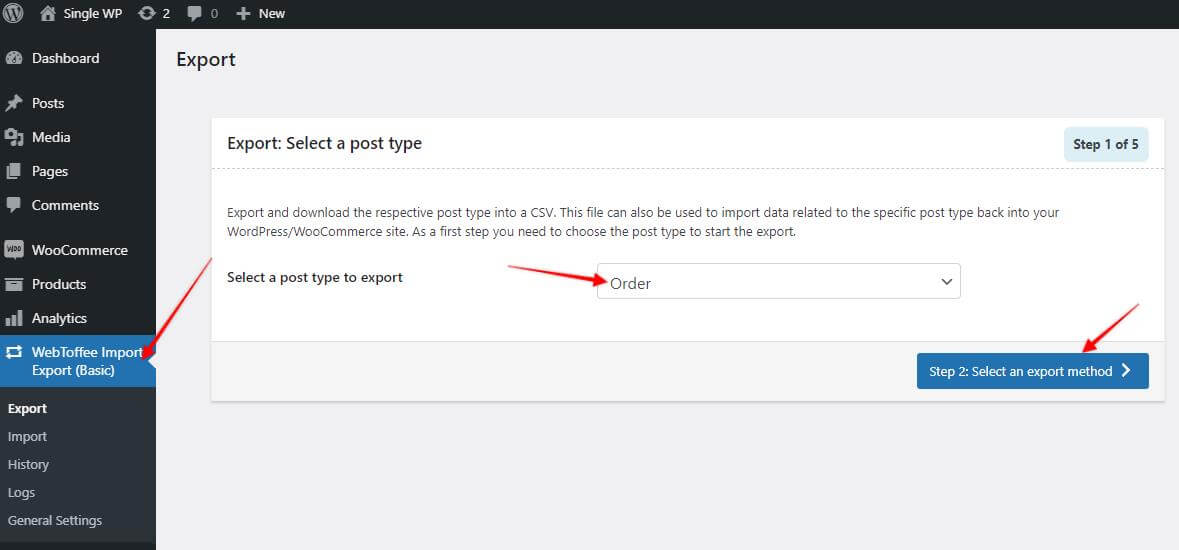
Then choose “Quick” in the next step and click on “Export”. This will generate a CSV file that you can store on your computer.
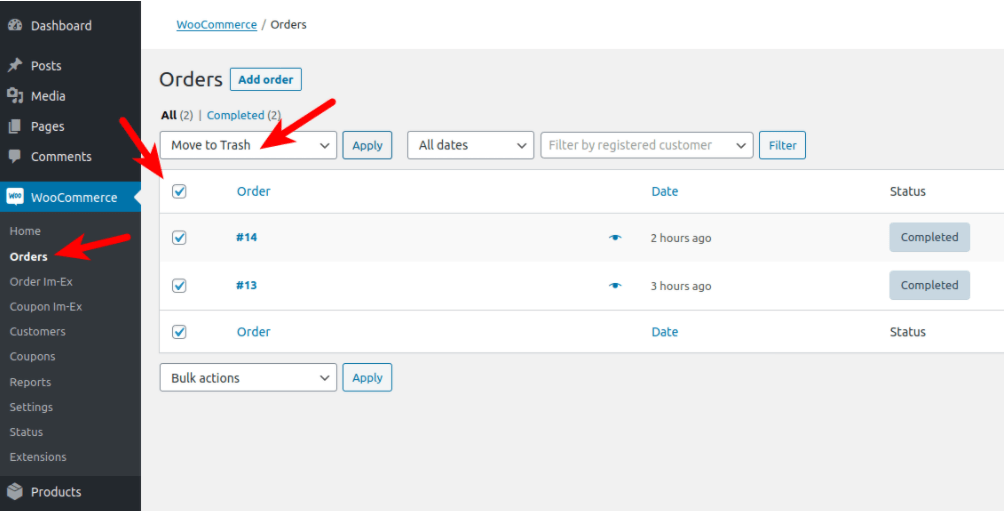
- Go to Your Staging Site > WooCommerce > Orders.
- Select all the orders there, then move them to the trash. (This is important, as you will import all of them again in the next step, from the file you have exported above from the live site).
- Go to Your staging site.
- Open WebToffee Import Export > Import
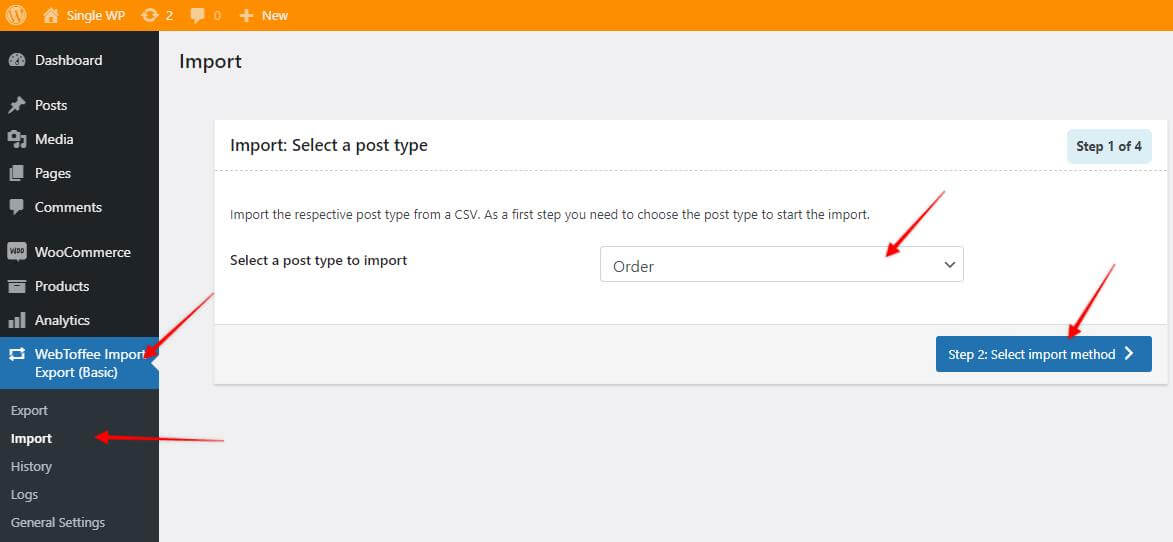
- Then choose “Quick,” and upload the .csv file you exported above, and click “Import,” as shown in this screenshot:
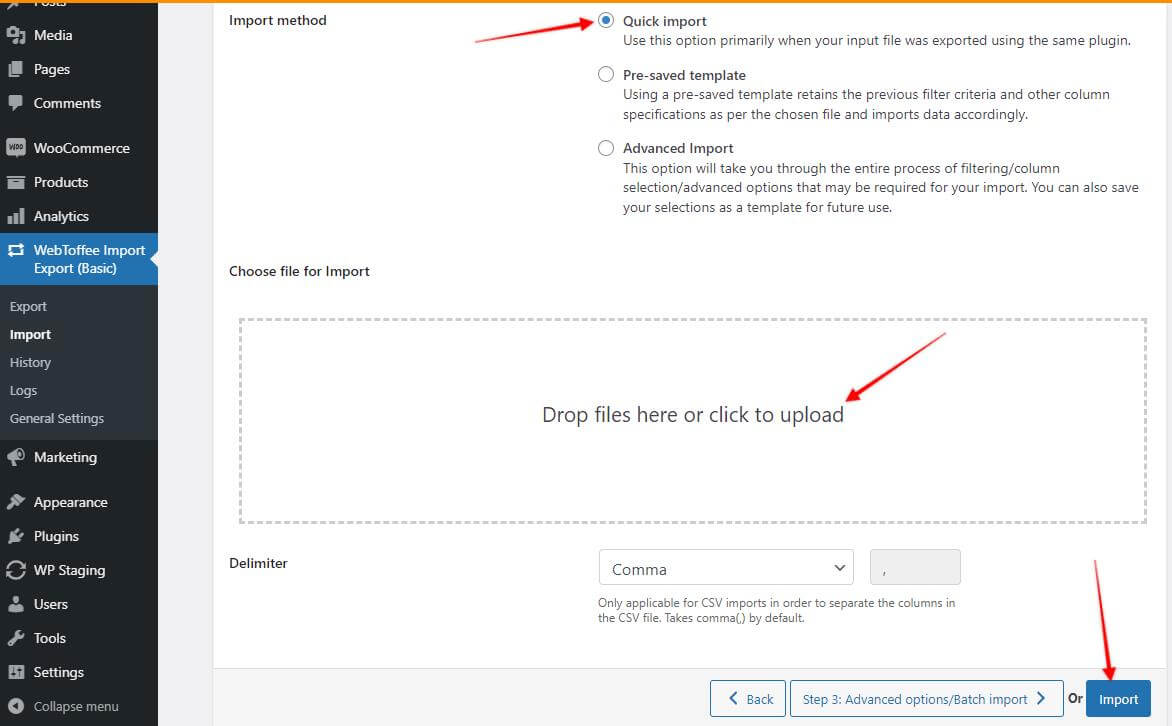
After this step, all the orders should be imported into the staging site, and your staging site is ready to be pushed to the live site following this guide.
IMPORTANT: Sometimes, when you import orders into the staging site, a conflict might happen between order IDs and posts/pages/attachments IDs. This happens because you added new posts/pages or any other content on the staging site.
If that happened, you would see something like in this screenshot during the import process:
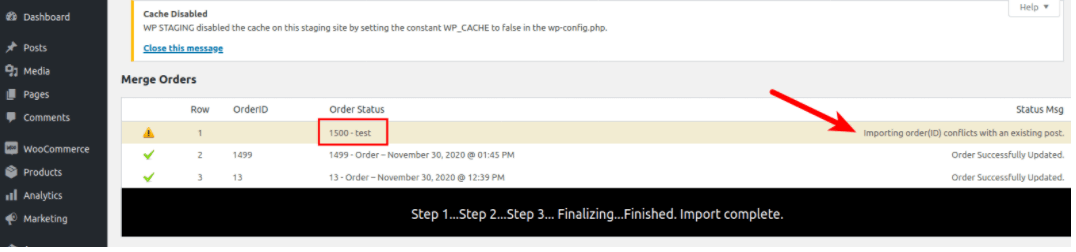
In that case, you must edit the exported .csv file using Excel or LibreOffice spreadsheet software calc. It’s worth mentioning that LibreOffice Calc handles these files better, but make sure to select UTF-8 encoding while opening and saving the file. Once you open the file, you can either modify the conflicting order IDs to any higher number that is not already in use by the post IDs of your WordPress website, or delete their values, and they will get new ones during the importing:
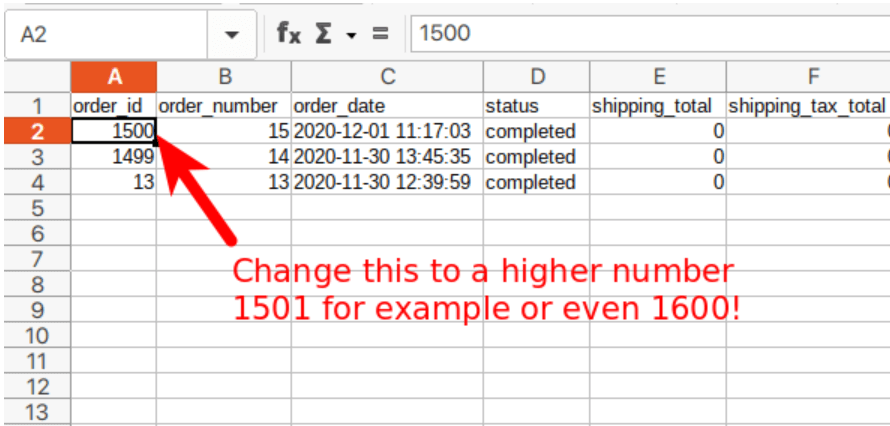
Then, re-import the file, and all the orders should be imported successfully.
Hint: You might need to do the same thing with WooCommerce Products or Users. For doing this, we recommend using these plugins:
- Product Import Export for WooCommerce. (The free version doesn’t support Variable Products export/import)
- Import Export WordPress Users.
Skip and Exclude WooCommerce Data from Pushing (Not Recommended)
Another option to exclude orders from being overwritten is to skip all the tables that contain WooCommerce orders and products from pushing. You would at least need to exclude the tables below before you push the staging site to the production site:
wpstg1_postswpstg1_postmetawpstg1_userswpstg1_usermeta
All tables beginning with:wpstg1_woocommerce_
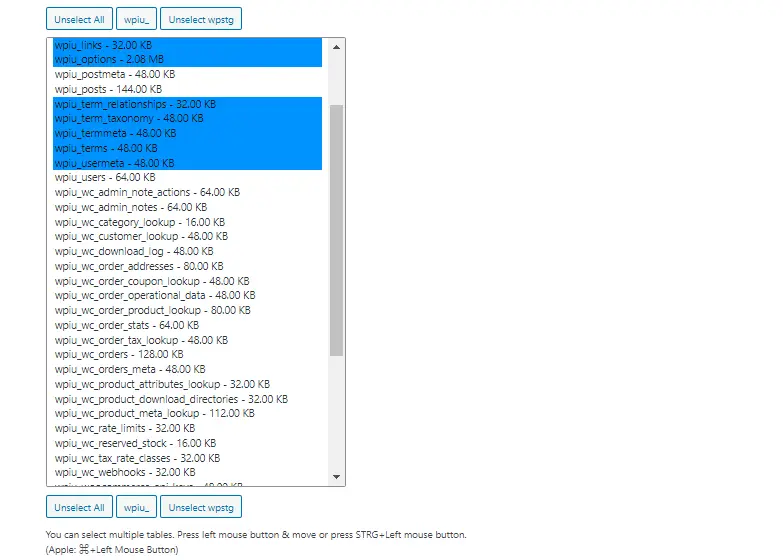
Unfortunately, this table selection would exclude posts, articles, and any other data stored in the tables _posts and _postmeta on our WordPress site. For instance, pages, posts, menu entries, and other post-related data would be excluded and not copied to the production site.
So, follow this step only when you do not change any data on your staging site that you need to migrate to the production site.
See also: WooCommerce database table reference.
Keywords: WooCommerce, Exclude WooCommerce Orders, Exclude WooCommerce Products
Related Articles
- How to Migrate WooCommerce Products and Customers from the Live Site to the Staging Site
- How to Exclude WooCommerce Orders from Being Copied to the Live Site with “HPOS
- WooCommerce Custom Tables Initial Implementation Ready for Testing HPOS
- How to Delete All WooCommerce Orders and Client Data on Staging Site | Delete WooCommerce Transactions
- How to Export and Import WordPress Users
- Increase database max_allowed_packet_size