
Exporting and importing WordPress users can be useful if you need to move users from one WordPress site to another, or if you want to create a backup of your user data. This can also be useful when migrating user accounts from a development site to a production site or transferring users between different WordPress installations. WordPress provides several methods to export and import user accounts.
Why Export and Import WordPress Users?
You might want to import and export WordPress users for several reasons. For instance:
- You are migrating your website and want to ensure that all user data is retained.
- You need to create a backup of user data in case of website downtime or other issues.
- You want to share user data with other sites or applications.
- You need to manage user data more efficiently and streamline processes.
- Importing and exporting users ensures that your WordPress website runs smoothly.
Using one of the methods discussed in this guide, you can easily import and export WordPress users, saving time and effort.
Top Methods to “Import & Export WordPress Users“
Contents
- Why Export and Import WordPress Users?
- Top Methods to “Import & Export WordPress Users“
- Method 1. Import and Export WordPress users by using WordPress Core Functions
- Method 2: Import and Export User Accounts with a WordPress Plugin
- Method 3: Import Export WordPress Users and WooCommerce Customers
- Conclusion
- Related Articles
Method 1. Import and Export WordPress users by using WordPress Core Functions
Exporting User Accounts
To export user accounts from your WordPress site, follow these steps:
- Log in to your WordPress admin dashboard.
- Navigate to the "Users" section in the left-hand menu.
- Click the "All Users" option to view your site’s registered users.
- By default, you will see a table with user details. You can use filters, such as roles or usernames, to narrow the user selection.
- At the top of the user table, you will find an "Export" button. Click on it to initiate the export process.
- A new page will appear with export options. Here, you can choose the desired file format for the export. WordPress provides two options: "CSV" (Comma-Separated Values) and "JSON" (JavaScript Object Notation). Select the format that suits your needs.
- Once you’ve selected the export format, click the "Download Export File" button. This will save the file to your local computer.
Congratulations! You have successfully exported your WordPress user accounts.
Importing User Accounts
To import user accounts into another WordPress installation, follow these steps:
- Log in to the WordPress admin dashboard of the target site where you want to import the user accounts.
- Navigate to the "Users" section in the left-hand menu.
- Click on the "Import" button at the user table’s top. This will open the WordPress import tool.
- You will see a list of available import options in the import tool. Look for "WordPress" and click the corresponding "Install Now" link if it’s not already installed. This will install the WordPress importer plugin.
- After installing, click the "Run Importer" link to access the WordPress import screen.
- Click the "Choose File" button on the import screen to select the exported user account file from your local computer.
- Once you’ve selected the file, click the "Upload file and import" button to start the import process.
- WordPress will prompt you to assign the imported users to existing or new authors on the target site. Choose the appropriate option based on your requirements.
- Finally, click the "Submit" button to initiate the import process.
WordPress will now import the user accounts from the file and create the corresponding user records on the target site.
Note: The import process may take some time, depending on the number of user accounts imported. Once completed, you can verify the imported users by navigating to the "All Users" section in the WordPress admin dashboard.
That’s it! You have successfully imported the user accounts into your WordPress installation.
Remember to exercise caution when exporting and importing user accounts, especially when merging data from different sites. It is recommended to take a backup of your WordPress site before performing any import operations to ensure data integrity.
Method 2: Import and Export User Accounts with a WordPress Plugin
There is a great WordPress plugin that allows you to export and import WordPress users easily.
Here’s how to use it:
Exporting WordPress Users
- Install and activate the WordPress plugin "Import and Export users and customers."
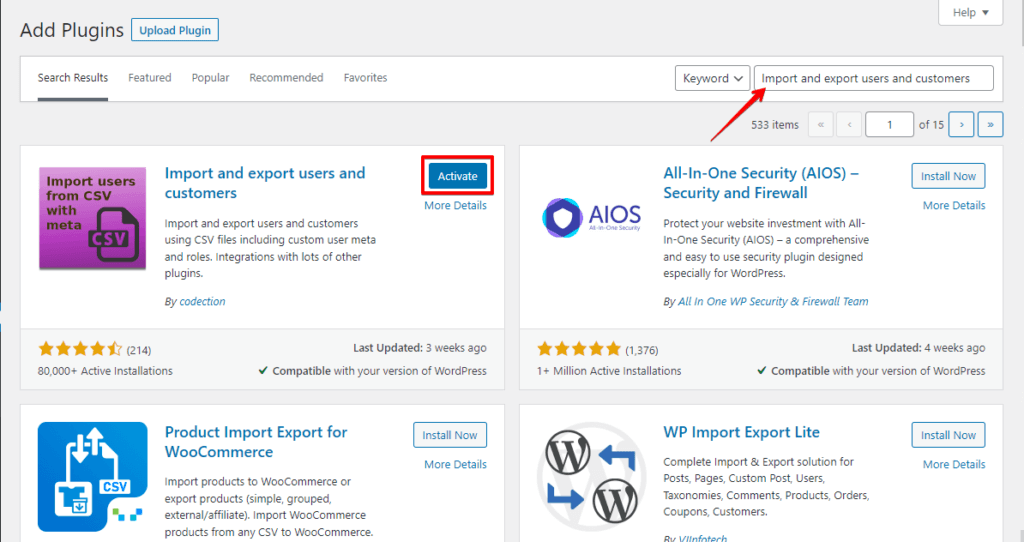
- Go to "Tools" > "Import and Export Users and Customers" and Click the "Export Tab."
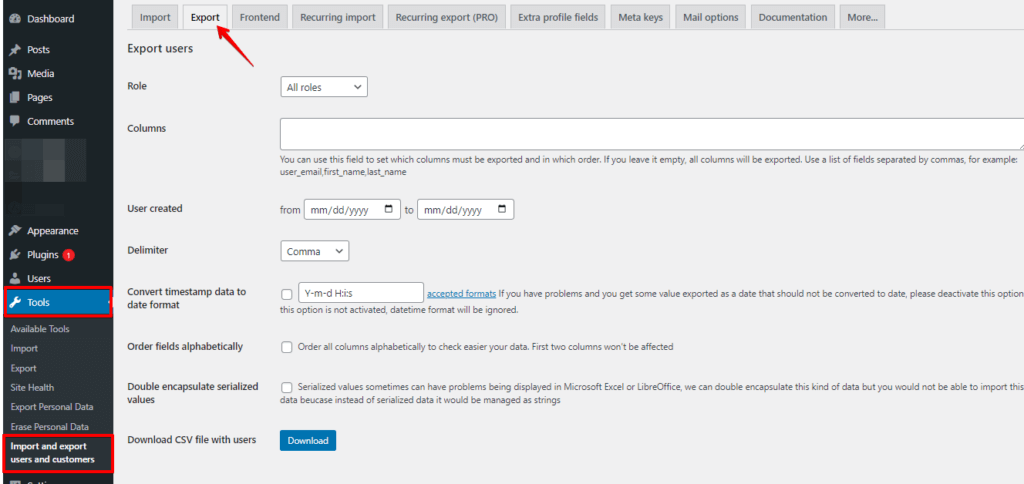
- Choose the users roll you want to export and Click the "Download" button.
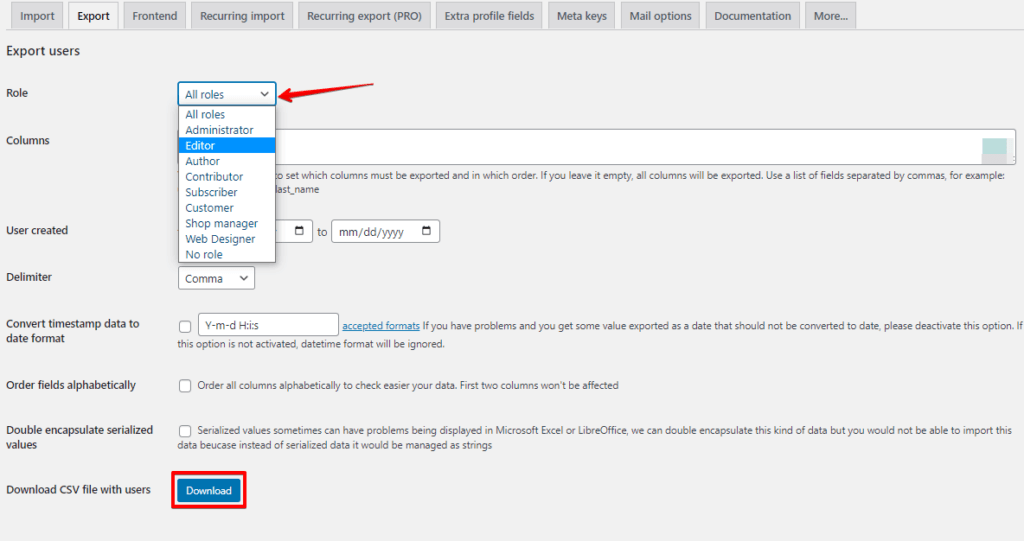
- Save the CSV file to your computer.
Importing WordPress Users
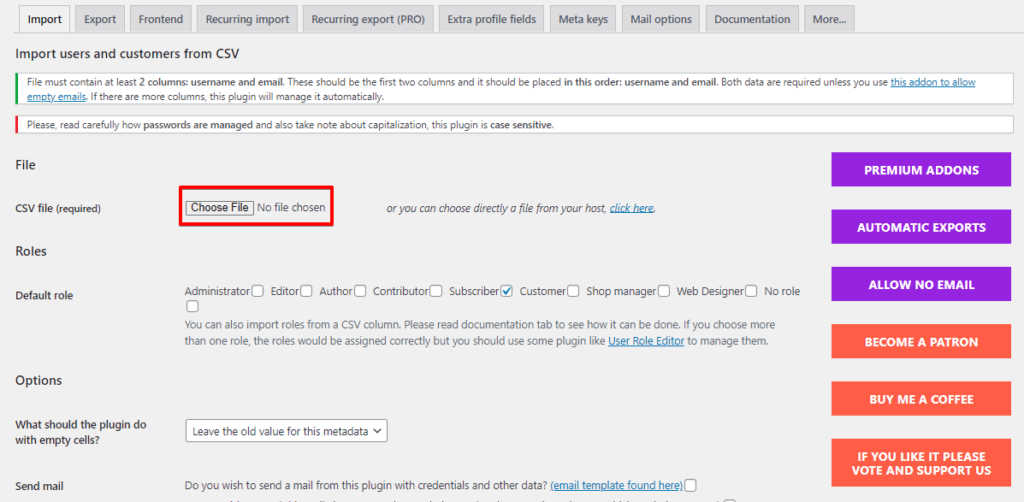
- Go to "Tools" > "Import and Export Users and Customers" and Click the "Import Tab."

- Click the Choose File button and Choose the CSV file you want to import.
- Click the "Start Importing" button and wait for the import to complete.
The "Import and Export Users and Customers" plugin also allows you to import and export other types of data, such as customer data for WooCommerce or user data for other plugins.
Additionally, it offers more advanced features, such as the ability to schedule automatic imports or exports, filter users by role or status, and import or export custom user metadata.
Method 3: Import Export WordPress Users and WooCommerce Customers
Here’s a step-by-step guide on how to use the "Import Export WordPress Users and WooCommerce Customers" plugin for importing and exporting users in WordPress:
Exporting Users
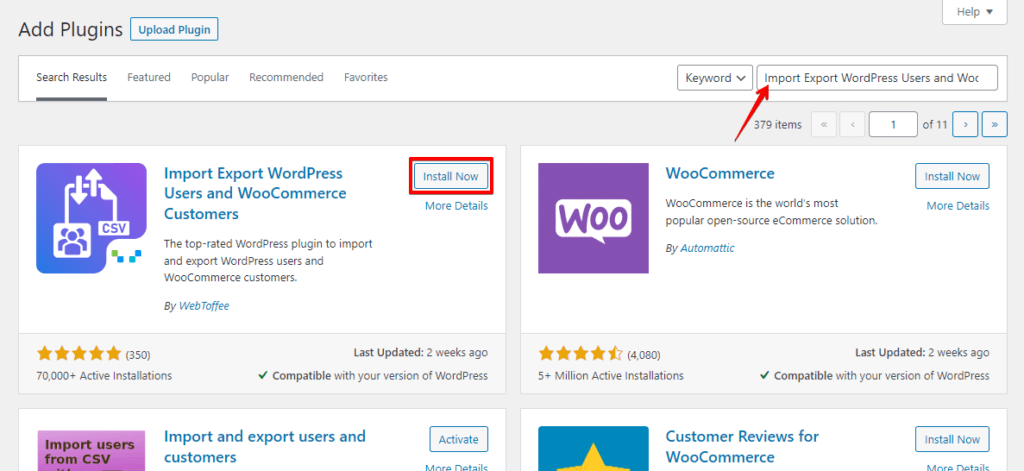
- Install and activate the "Import Export WordPress Users and WooCommerce Customers" plugin.
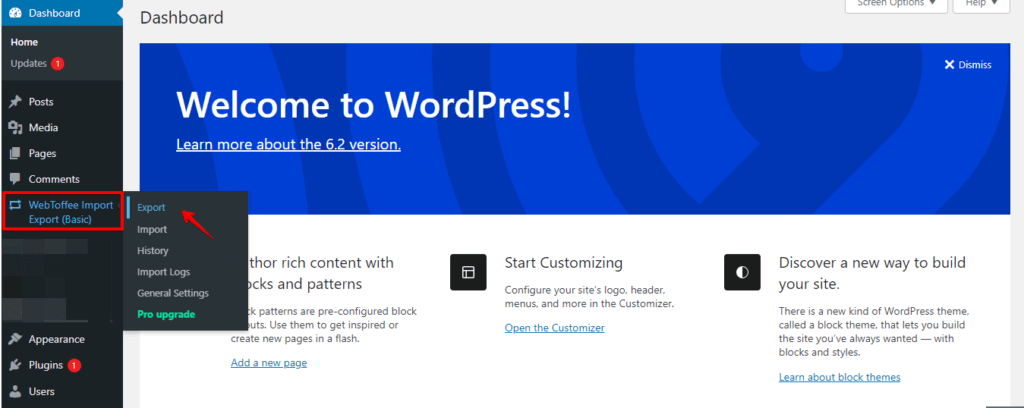
- In the WordPress dashboard, go to "WebToffee Import Export (Basic)" > "Export"
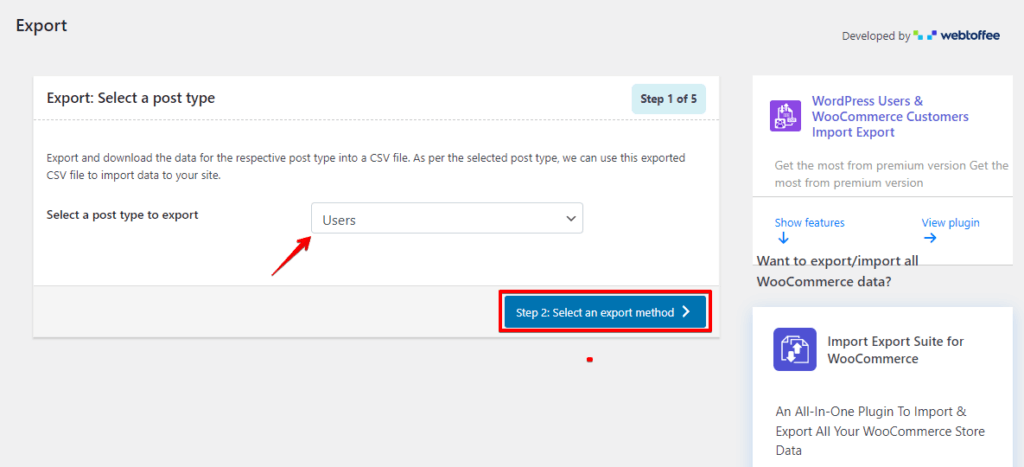
- Select "Users" and click the Step 2 button.
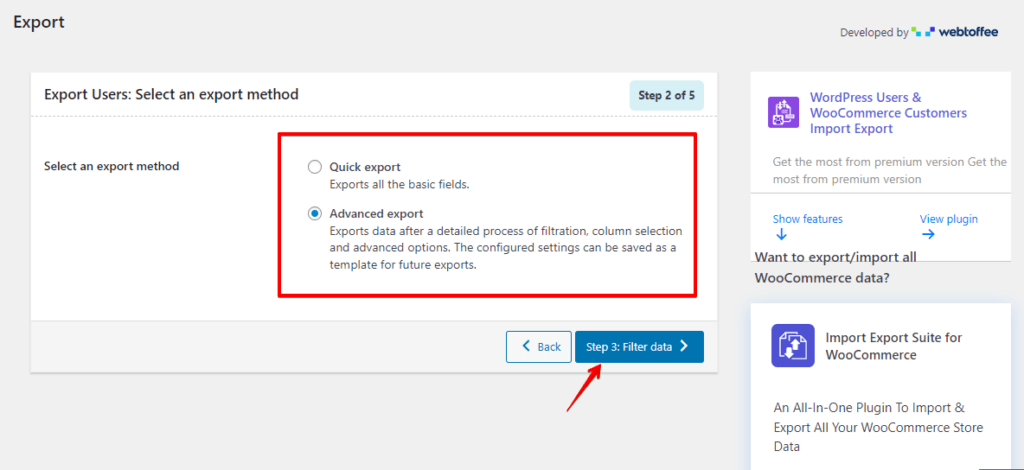
- Select an export method that you want to use and click the Step 3 button.
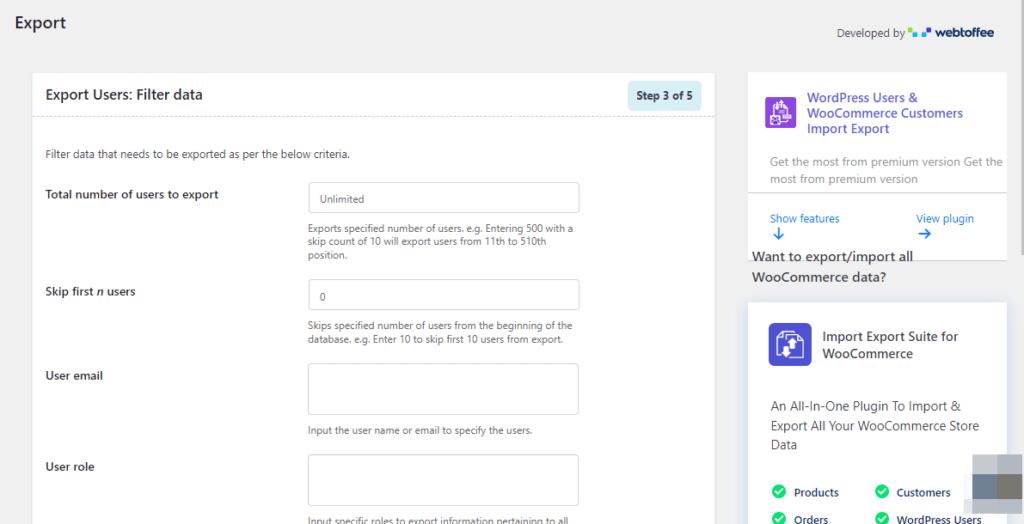
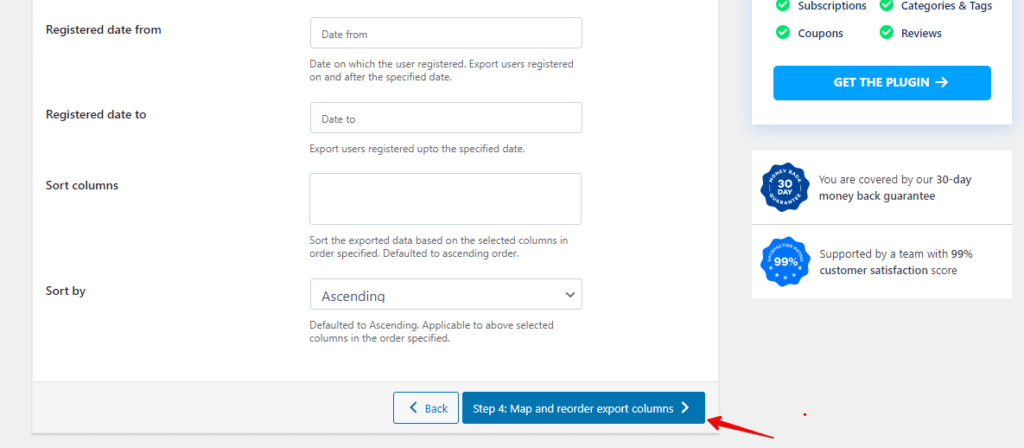
- Filter data that needs to be exported as per the below criteria.
- Click the Step 4 button.
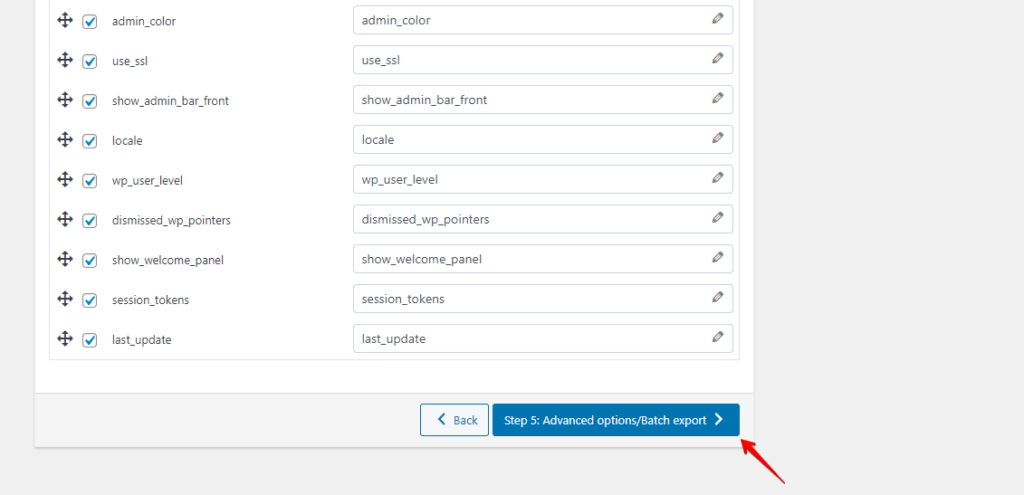
- Choose the user columns you want to export, such as username, email, first name, last name, and any custom user meta fields.

- Click the Step 5 button.
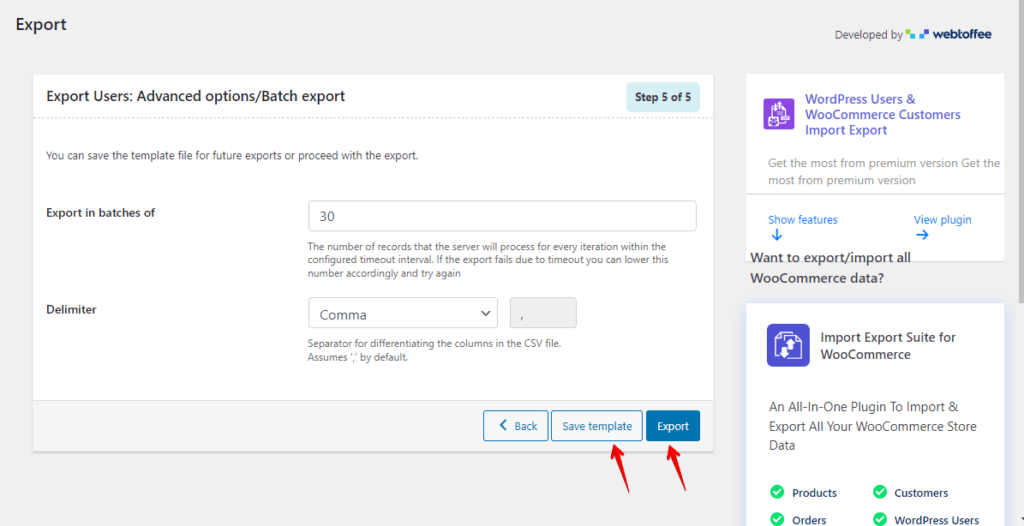
- You can save the template file for future exports or proceed with the export.
Importing Users:
- Install and activate the "Import Export WordPress Users and WooCommerce Customers" plugin.
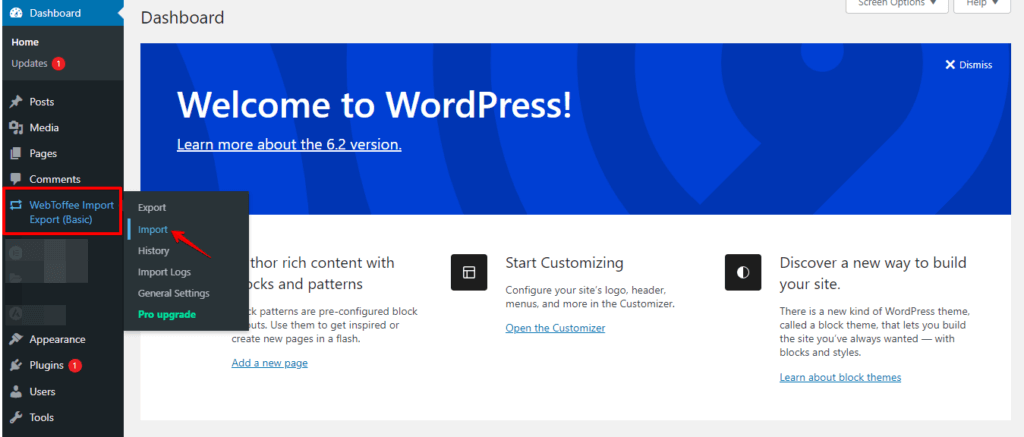
- In the WordPress dashboard, go to "WebToffee Import Export (Basic)" > "Import"
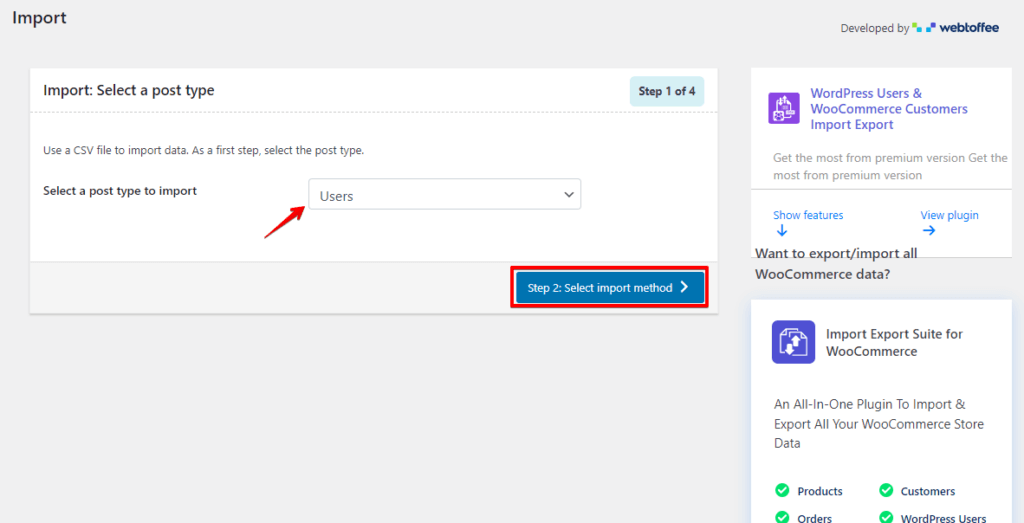
- Select "Users" and click the Step 2 button.
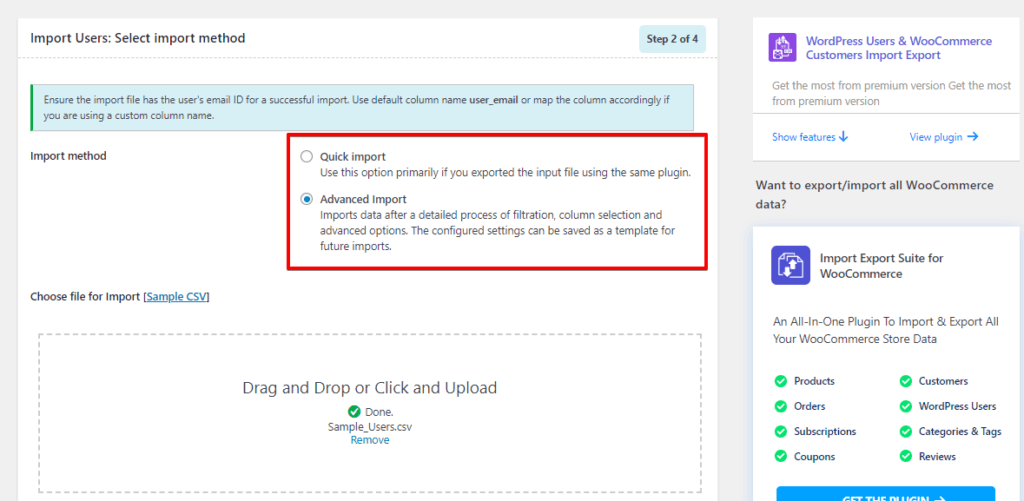
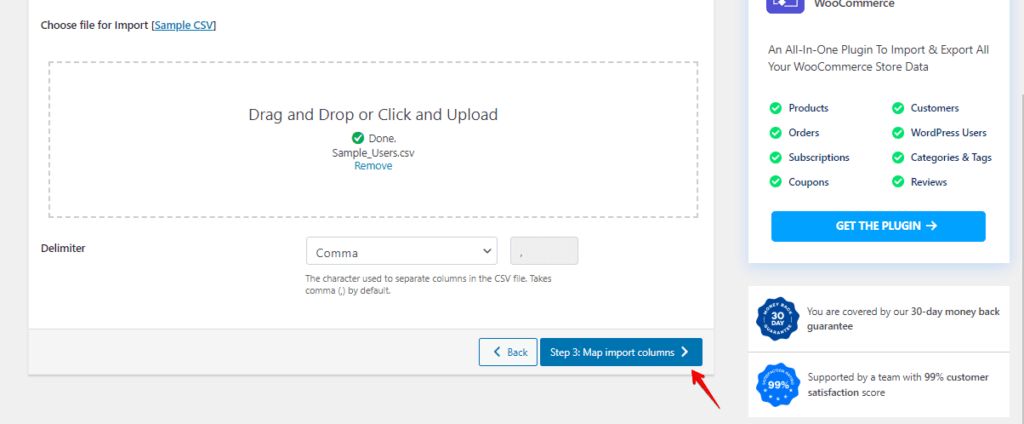
- Select an import method you want to use and choose the file for Import.
- Click the Step 3 button.
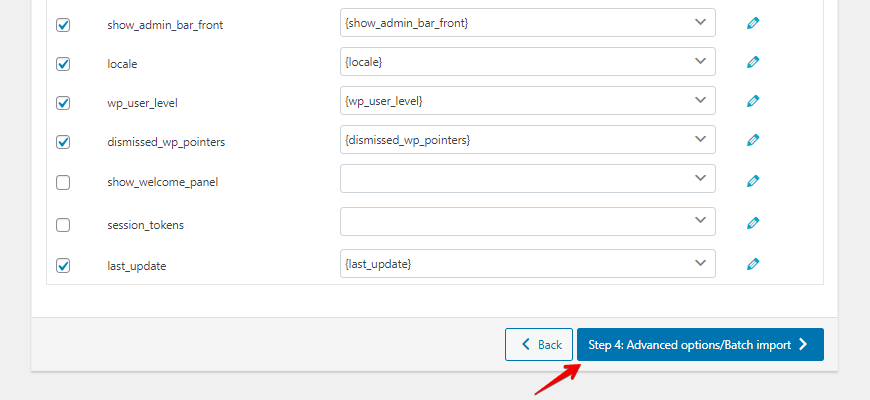
- Map the standard columns with your CSV column names.
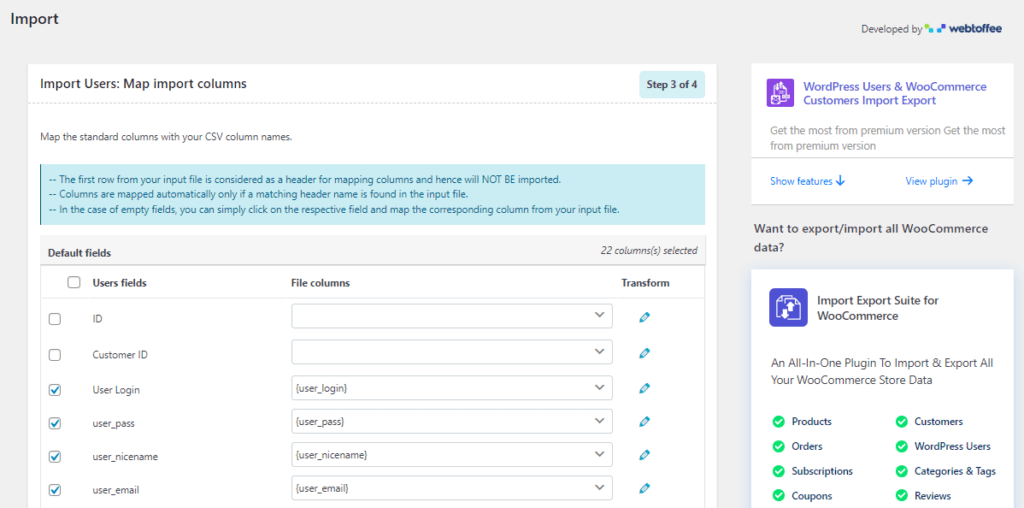
- Click the Step 4 button.
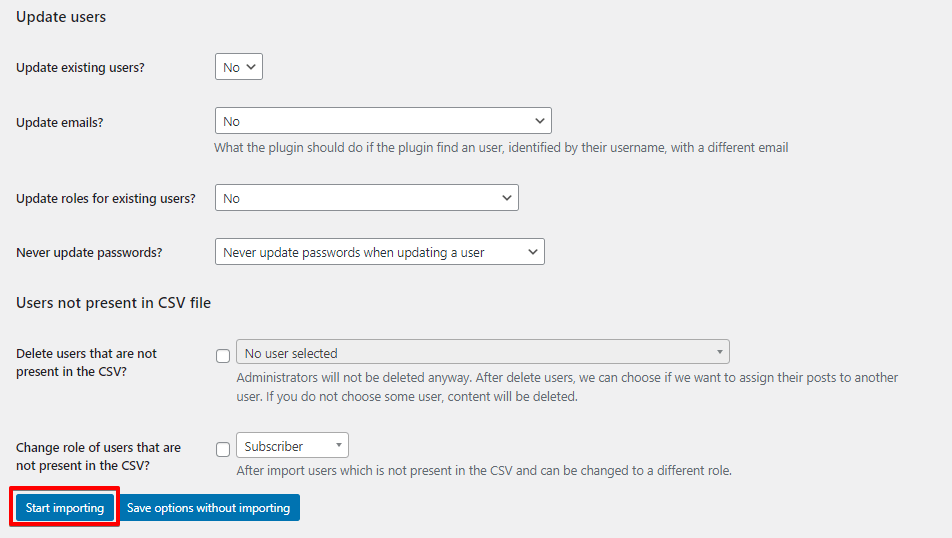
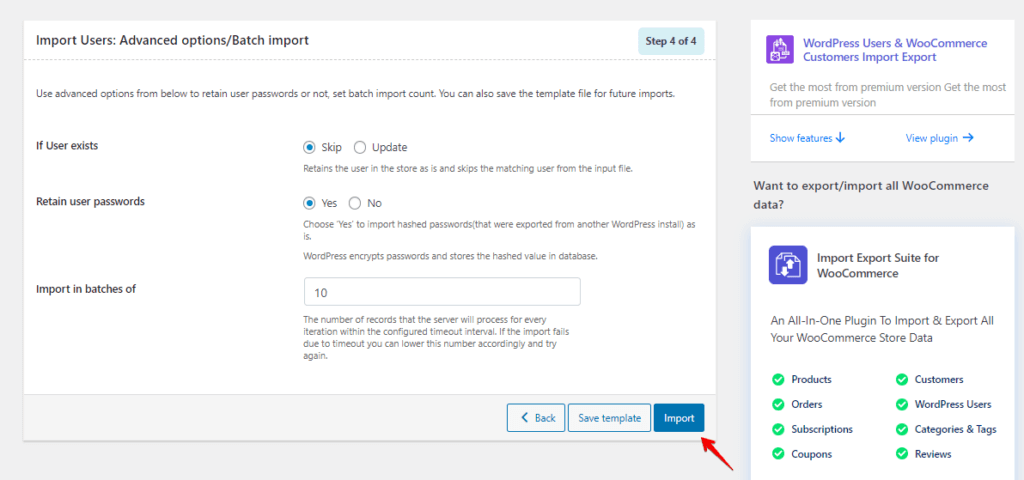
- Use the advanced options below to retain user passwords or not and set batch import count. You can also save the template file for future imports.
Conclusion
Exporting and importing WordPress users is crucial for managing user data efficiently. It can be done using various methods like plugins and WordPress Importer.
You can easily export and import users by choosing a suitable method and following the steps. This will help streamline your user management process and ensure a smooth WordPress website experience.