When you create a default staging site that is located in a subfolder, WP STAGING sets the “Permalinks” option of the staging site to “Plain” and disables the “Post name permalinks” option. This is to ensure that the staging site opens correctly on all types of servers.
Contents
The Pro version of WP STAGING has the option “Keep permalinks“. Whenever you create a new staging site and enable this option, the staging site will use exactly the same permalink structure as the live site. You find this option under WP STAGING > Settings > Keep Permalinks.
If you enable this option and the staging website redirects you to the live website or displays a 404 error, follow this article!
Generally, it is fine to use simple permalinks on a staging website. Often, there is no technical need to enable custom permalinks to benefit from a staging site.
Nevertheless, if you want to enable custom permalinks on your staging site to have the same link structure, you will first need to determine which web server is running on your server or hosting plan.
You need to access the admin dashboard of your WordPress staging site to activate post name permalinks.
If you try to access your staging site’s admin dashboard and the staging site redirects you to the live site, add the slug wp-admin to the end of the URL like https://example.com/stagingsite/wp-admin
That allows you to access the wp-admin of your website.
(Such redirect can happen if you use language plugins like WPML or Polylang, which add a language slug to the URL. These plugins often need the permalinks activated)
Apache Web Server
If the Apache webserver serves your website, the chances are good that search-friendly permalinks work without any additional work.
Just activate the permalinks on the page:
Staging Site > wp-admin > Settings > Permalinks
It’s very likely working well from the beginning.
If this does not give the expected result and the links on the staging site are throwing an error 400, create a new .htaccess file and paste it into the root of the staging site by using an FTP client or a file manager plugin.
The content of that file should look like this:
# BEGIN WordPress
RewriteEngine On
RewriteBase /staging/
RewriteRule ^index\.php$ - [L]
RewriteCond %{REQUEST_FILENAME} !-f
RewriteCond %{REQUEST_FILENAME} !-d
RewriteRule . /staging/index.php [L]
# END WordPressReplace the highlighted text staging with the subfolder name where the staging site is located!
Apache Web Server | Multisites
Usually, WP STAGING takes care and makes the necessary adjustments to the .htaccess if you clone a WordPress multisite.
The following rules will be placed in a .htaccess file in the root of the staging site for multisite in a subdomain and a subfolder:
Multisite in subdomain, e.g., staging.example.com
RewriteEngine On
RewriteBase /
RewriteRule ^index\.php$ - [L]

# add a trailing slash to /wp-admin
RewriteRule ^([_0-9a-zA-Z-]+/)?wp-admin$ $1wp-admin/ [R=301,L]

RewriteCond %{REQUEST_FILENAME} -f [OR]
RewriteCond %{REQUEST_FILENAME} -d
RewriteRule ^ - [L]
RewriteRule ^([_0-9a-zA-Z-]+/)?(wp-(content|admin|includes).*) $2 [L]
RewriteRule ^([_0-9a-zA-Z-]+/)?(.*\.php)$ $2 [L]
RewriteRule . index.php [L]Multisite in subfolder, e.g., example.com/staging
RewriteEngine On
RewriteBase /staging/
RewriteRule ^index\.php$ - [L]

# add a trailing slash to /wp-admin
RewriteRule ^([_0-9a-zA-Z-]+/)?wp-admin$ $1wp-admin/ [R=301,L]

RewriteCond %{REQUEST_FILENAME} -f [OR]
RewriteCond %{REQUEST_FILENAME} -d
RewriteRule ^ - [L]
RewriteRule ^([_0-9a-zA-Z-]+/)?(wp-(content|admin|includes).*) $2 [L]
RewriteRule ^([_0-9a-zA-Z-]+/)?(.*\.php)$ $2 [L]
RewriteRule . index.php [L]Replace the highlighted text staging with the sub folder name where the staging site is located!
Nginx Web Server
If your website uses Nginx, try enabling search-friendly permalinks on the staging site first. If that does not work, follow the steps below to activate permalinks in Nginx.
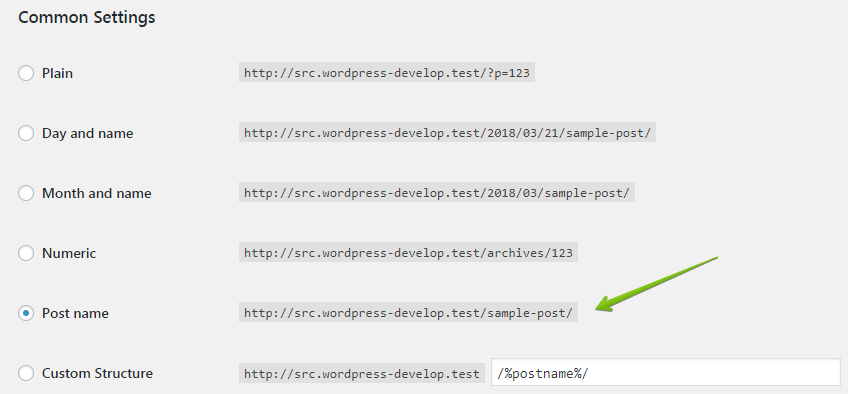
Open wp-admin and go to Settings > Permalinks, then select Post name.
To test, open your site’s front page and click any link.
If the page opens as expected, you are done. If it returns a 404 error, use the advanced steps below:
Create a new server block in nginx.conf similar to the following snippet:
location /staging{
        try_files $uri $uri/ /staging/index.php?$args;
}Replace the highlighted text staging with the subfolder name where the staging site is located!
Also, change the path to the PHP socket file if it is different in your system. That should give you only an idea of what to change. Do not use these values word by word without checking if your NGINX configuration is different.
Be aware that you need full access to your server to follow the steps above. If you have no clue what these lines do, it might be best to ask someone to assist you with the modifications or keep the permalinks disabled.
After doing that, the Nginx server needs to be restarted, and you can enjoy your staging site with enabled custom permalinks.
This will always require you to setup a specific Nginx block with the folder name of the staging site.
Another optional approach is to create a server block and let Nginx do an automatic rewrite whenever WordPress is loaded from a sub folder:
# Matches /<folder>/... – except for WP core folders
location ~ ^/(?!wp-admin|wp-content|wp-includes)([a-zA-Z0-9_-]+)(?:/|$) {
    set $first_seg $1;
    # First try static files/folders …
    try_files $uri $uri/ @maybe_staging;
}

# Checks whether /<folder>/index.php exists; if so, rewrite there,
# otherwise fall back to the live front controller.
location @maybe_staging {
    if (-f $document_root/$first_seg/index.php) {
        rewrite ^ /$first_seg/index.php?$args last;
    }
    rewrite ^ /index.php?$args last;
}NGINX Web Server Multisites
WordPress Multisites need a slightly different configuration.
Below, you’ll find a sample nginx.conf for staging multisite in a subfolder.
We’ve highlighted the relevant parts. After adding this configuration to your nginx.conf you need to restart the NGINX server.
If your server uses NGINX and you don’t know where to add this configuration, please ask your hosting provider.
Staging Site in Subfolder, e.g., example.com/staging
server {
listen 80; listen [::]:80;
server_name example.com/staging;

root /var/www/multi; # This is the path to your multisite website

if (!-e $request_filename) {
rewrite /wp-admin$ $scheme://$host$request_uri/ permanent;
rewrite ^/staging(/[^/]+)?(/wp-.*) /staging$2 last;
rewrite ^/staging(/[^/]+)?(/.*\.php)$ /staging$2 last;
}

location / {
try_files $uri $uri/ /index.php?$args;
}

location /staging/ {
try_files $uri $uri/ /staging/index.php?$args ;
}

location ~ \.php$ {
include fastcgi_params;
fastcgi_intercept_errors on;
fastcgi_pass php7-fpm;
fastcgi_index index.php;
fastcgi_param SCRIPT_FILENAME $realpath_root$fastcgi_script_name;
fastcgi_param DOCUMENT_ROOT $realpath_root;
}
}Replace the highlighted text staging with the subfolder name where the staging site is located!
Staging Site in subdomain, e.g., staging.example.com
If your staging site is located in a subdomain, you can use the same configuration as above but need a little modification:
server {
listen 80; listen [::]:80;
server_name staging.example.com;

# Below should be the path to your staging site
root /var/www/multi/staging;

if (!-e $request_filename) {
rewrite /wp-admin$ $scheme://$host$request_uri/ permanent;
rewrite ^/(/[^/]+)?(/wp-.*) /$2 last;
rewrite ^/(/[^/]+)?(/.*\.php)$ /$2 last;
}

location / {
try_files $uri $uri/ /staging/index.php?$args ;
}

location ~ \.php$ {
include fastcgi_params;
fastcgi_intercept_errors on;
fastcgi_pass php7-fpm;
fastcgi_index index.php;
fastcgi_param SCRIPT_FILENAME $realpath_root$fastcgi_script_name;
fastcgi_param DOCUMENT_ROOT $realpath_root;
}
}Replace the highlighted text staging with the subfolder name where the staging site is located.
Bitnami (Apache)
You need to take extra steps if you use WordPress in a Bitnami instance.
Post-name permalinks are not supported out of the box on WordPress Bitnami instances because Bitnami does not use .htaccess in the website’s root folder. It ignores any .htaccess file there.
Bitnami does not use the default .htaccess file in the root of your website; instead, all the htaccess configurations are added to a file called: /opt/bitnami/apps/APPNAME/conf/htaccess.conf.
So if you want to make permalinks work, you will need to modify the htaccess.conf
Go to that file and add the following to it:
<Directory /opt/bitnami/apps/wordpress/htdocs/STAGING>
 <IfModule mod_rewrite.c>
 RewriteEngine On
 RewriteBase /STAGING/
 RewriteRule ^index\.php$ - [L]
 RewriteCond %{REQUEST_FILENAME} !-f
 RewriteCond %{REQUEST_FILENAME} !-d
 RewriteRule . /STAGING/index.php [L]
 </IfModule>
</Directory>Another option would be to keep the permalinks on the plain settings, and then you do not need to change the htaccess.conf at all.
Microsoft Azure
Azure uses the Microsoft IIS server and requires a custom web.config in the root of the staging site web directory.
First, you need to view web.config file on the “live” site and make a note of the rule name from this line:
<rule name="WordPress: http://wordpress-arc.azurewebsites.net" patternSyntax="Wildcard">It’s WordPress: http://wordpress-arc.azurewebsites.net in this example.
Then create a new web.config file in the “staging” site’s directory with the following:
<?xml version="1.0" encoding="UTF-8"?>
<configuration>
  <system.webServer>
    <rewrite>
      <rules>
      <remove name="WordPress: http://wordpress-arc.azurewebsites.net"/>
      <rule name="staging" patternSyntax="Wildcard">
        <match url="*"/>
          <conditions>
            <add input="{REQUEST_FILENAME}" matchType="IsFile" negate="true"/>
            <add input="{REQUEST_FILENAME}" matchType="IsDirectory" negate="true"/>
          </conditions>
        <action type="Rewrite" url="index.php"/>
      </rule></rules>
    </rewrite>
  </system.webServer>
</configuration>Make sure that this line:
<remove name="WordPress: http://wordpress-arc.azurewebsites.net"/>has the same rule name as defined in the live site’s web.config file, which was WordPress: http://wordpress-arc.azurewebsites.net in our example.
Microsoft IIS
- First, open the
web.configfile at the root directory of the live site to take note of this line:
<rule name=”WordPress: https://example.com/” patternSyntax=”Wildcard”>
Especially the name of the rule:WordPress: https://example.com/ - Then create a new
web.configfile at the staging site’s directory with this code snippet:
<?xml version="1.0" encoding="UTF-8"?>
<configuration>
   <system.webServer>
     <rewrite>
      <rules>
        <remove name="WordPress: https://example.com/" />
        <rule name="WordPress: https://example.com/staging" patternSyntax="Wildcard">
         <match url="*"/>
          <conditions>
           <add input="{REQUEST_FILENAME}" matchType="IsFile" negate="true"/>
           <add input="{REQUEST_FILENAME}" matchType="IsDirectory" negate="true"/>
          </conditions>
         <action type="Rewrite" url="index.php"/>
        </rule></rules>
       </rewrite>
   </system.webServer>
</configuration>Make sure that the line of <remove name="WordPress: https://example.com/" /> has the same “name” as the one you have in the web.config on the live site.
And make sure this line <rule name="WordPress: https://example.com/staging" patternSyntax="Wildcard"> has the correct staging site’s directory name.