The Google Chrome or Firefox browser alert "The site ahead contains harmful programs" is activated when you access a website compromised by malware.
This indicates that your WordPress site has been infiltrated and infected with malware, resulting in a compromised security posture.
In this article, we will guide you through resolving the "The site ahead contains harmful programs" warning in WordPress and provide preventative measures to safeguard your WordPress site.
Contents
Understanding the Warning "This site ahead contains harmful programs."

Why does it Appear?
Some common causes of the Warning reasons:
- Malware Infections – Malicious software, or malware, can infect your website and trigger this warning.
- Compromised Code – This warning can lead to vulnerabilities or compromised code in your website’s files.
- Unsafe Downloads – Offering unsafe downloads, such as executable files, can trigger the warning.
- Phishing Attempts – Websites engaged in phishing activities may receive this warning.
Now that we understand the warning, let’s explore how to fix it and ensure a safe browsing experience.
Fixing the Issue
Now that we understand the warning, let’s explore how to fix it.
1. BackUp your Website
To back up your website using WP Staging, access the plugin from your WordPress dashboard, create a staging site, and then utilize its built-in functionality or other backup plugins to secure your website’s data.
Staging sites ensure that your backup replicates your live site, providing a reliable snapshot of your content and configurations for safekeeping.
2. Scanning for Malware
To address the issue, use reputable security tools to scan your website for malware. Remove any malicious code or files detected during the scan.
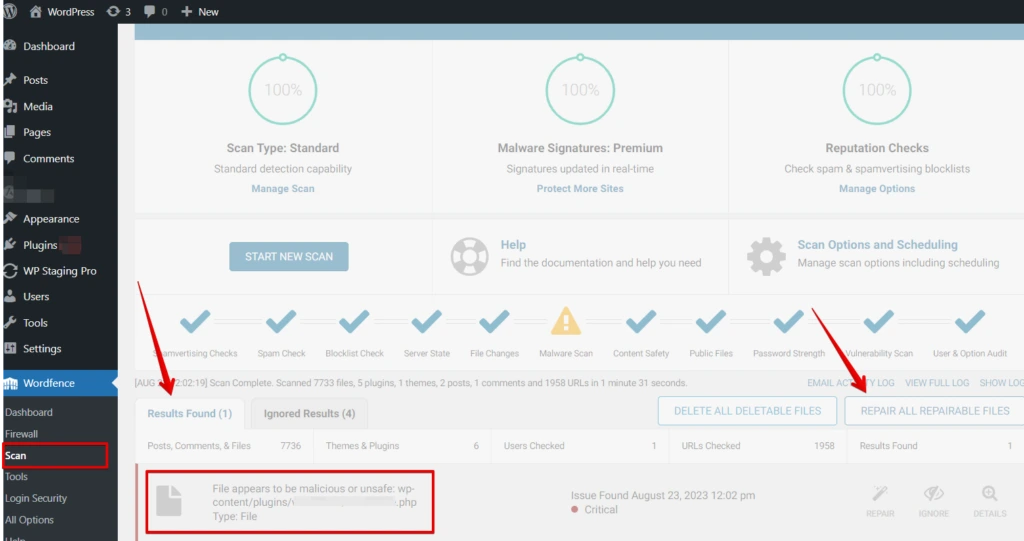
I am using the Wordfence Security plugin to scan my website for malware. Upon detecting any malicious code, I followed the plugin’s instructions to swiftly remove the threats, ensuring my website remains safe and free from potential security risks.
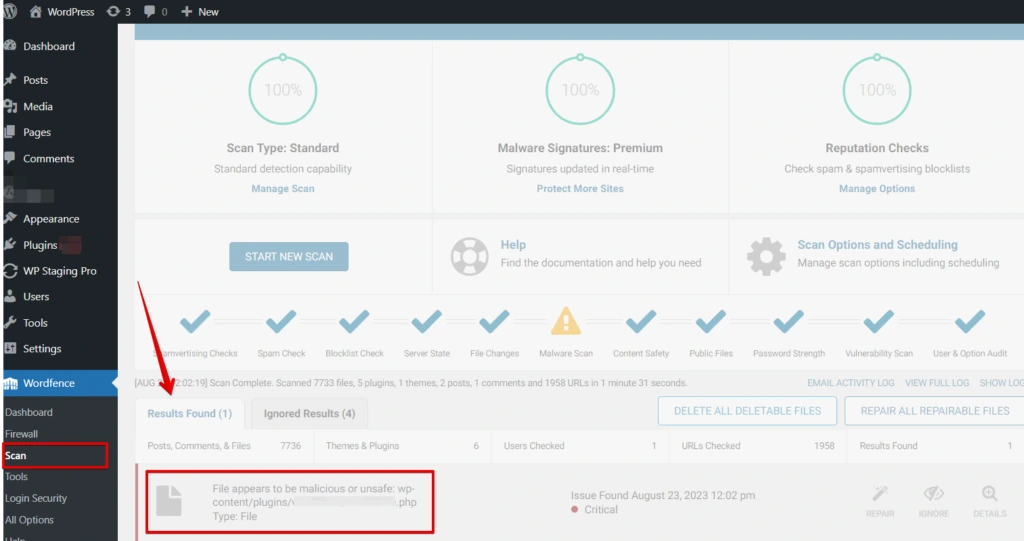
Here, you see the file has malicious code in it. Then click the "Repair All Repairable Files" option.
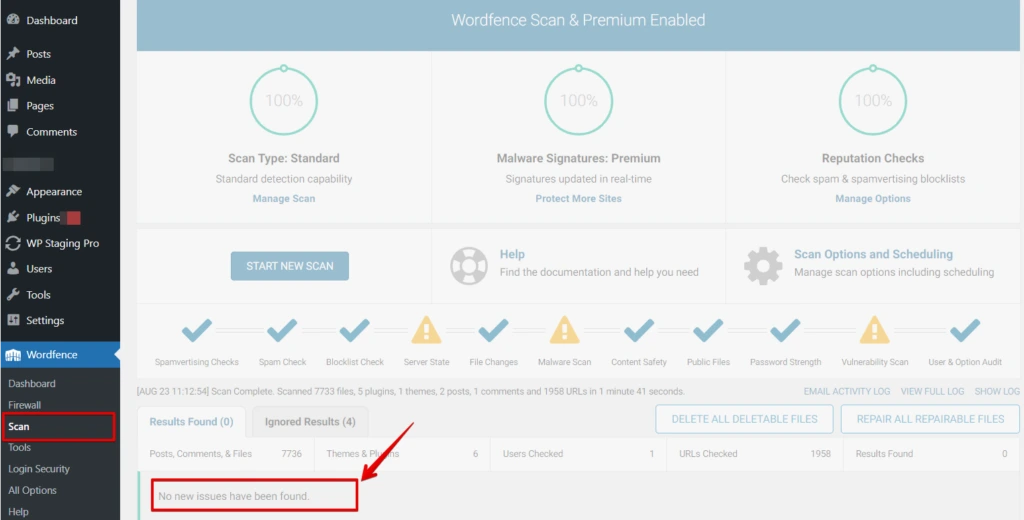
Now, your WordPress site is safe and clean with no malicious files.
3. Exploring the Detection of Malicious Code on Your WordPress Site
In the pursuit of identifying any malevolent script embedded within your WordPress website, you have two distinct avenues to explore:
- Employ Google’s vigilance analysis tool for web security.
- Append your website’s domain name as the query parameter within the URL, as illustrated below:
https://www.google.com/safebrowsing/diagnostic?site=yourdomain.com
Alternatively, you may seek guidance from a tutorial or compendium that delves into the same subject matter.
4. Secure Socket Layer (SSL) Encryption
SSL encryption is a must-have for any website. Not only does it encrypt data transmission, but it also authenticates your website’s identity. Visitors will feel safer knowing their data is protected, and Google often rewards SSL-secured websites with higher rankings.
Verifying SSL settings in WordPress involves checking and ensuring that the website is configured correctly to use HTTPS (secure) URLs for all its content and communications.
Here’s an explanation of the steps involved:
- Log in to your WordPress admin area by entering your username and password.
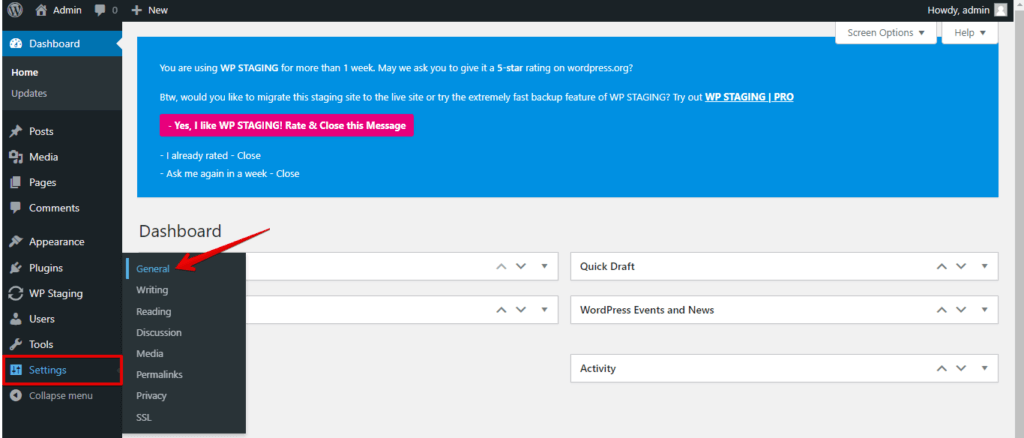
- Once logged in, click "Settings" in the left-hand menu and select "General" from the submenu.
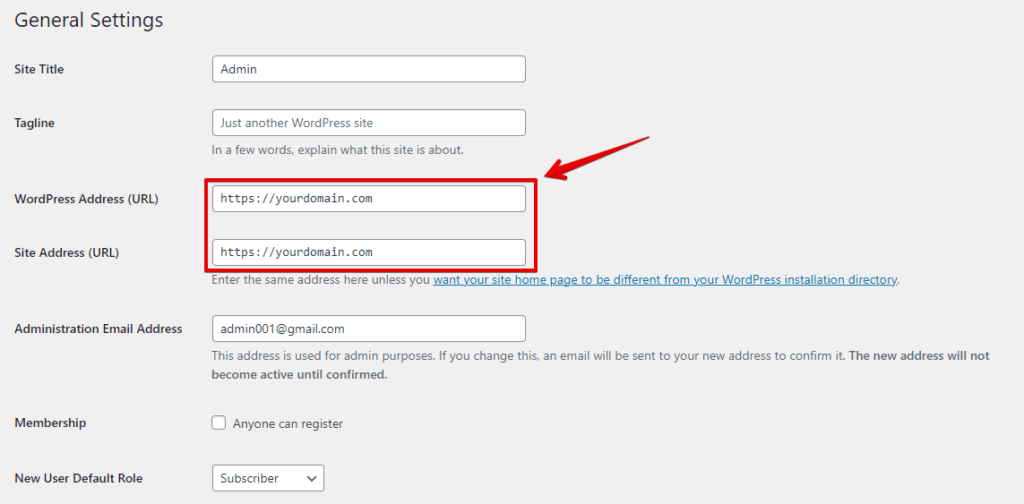
- In General Settings, check "WordPress Address (URL)" and "Site Address (URL)." Start both URLs with "https://" instead of "http://" and update if needed.
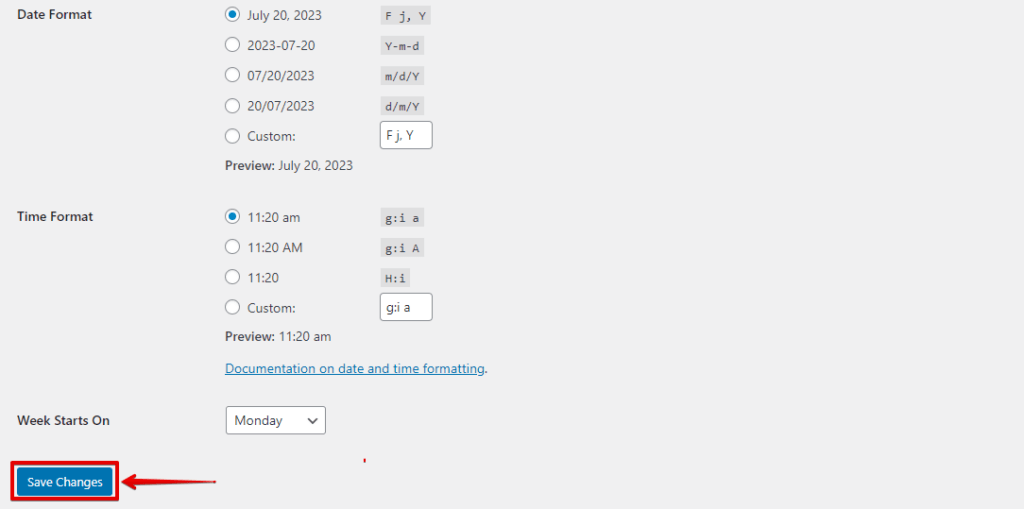
- If you need to change the URLs to use HTTPS, modify the URLs in the respective fields and then click the "Save Changes" button at the bottom of the page.
By following these steps, you can verify and set up SSL settings in WordPress, ensuring that your website securely uses HTTPS and provides a safe browsing experience for your visitors.
5. Updating Themes and Plugins
The recommended strategy for addressing redirection malware involves updating your WordPress components. Initiate a WordPress update initially, and subsequently, ensure all your website’s plugins and your current theme are up to date.
After adhering to the steps above, the redirection malware should cease to appear on your website.
At this juncture, conducting another scan of your website is recommended to verify that the issue has been resolved.
6. Manually Remove WordPress Malicious Code Via .htaccess
Meticulously inspect your .htaccessFile. If you find any signs of redirection code, then delete it. A recommended approach involves comparing each file with its counterpart in a fresh WordPress installation.
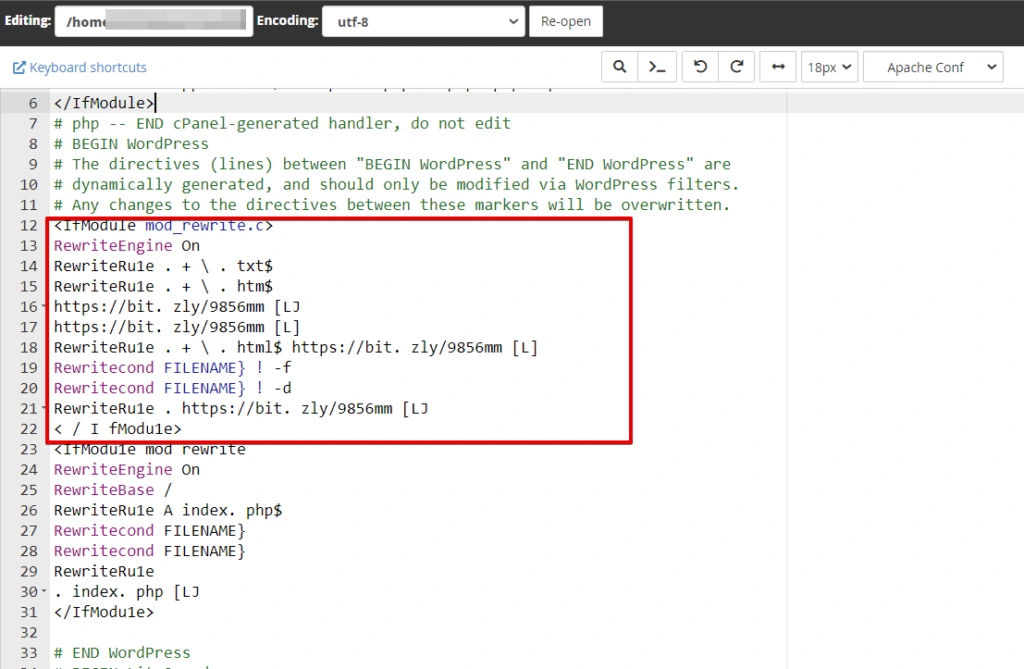
If you identify any suspicious code that appears out of place, it’s imperative to eliminate it from the file. However, exercise extreme caution to avoid inadvertently removing essential code from the file. This underscores the necessity for advanced expertise when undertaking this procedure.
Now, Let’s Get Your Website Off Google’s Warning List
Hey there, folks! If you’ve found yourself in a bit of a pickle with Google flagging your website for some security issues, don’t fret. I’m here to guide you through the process of submitting your site for a Google review so you can get back into the search results game.
1. Google’s Watchful Eye
Google is about keeping the web safe, so they regularly check websites for malicious software. If your site falls under suspicion, you might notice a warning next to it in search results. Not a great look, right? Well, here’s how you can get rid of it.
Enter Google’s Webmaster Tools
Google’s Search Central (Former Webmaster Tools) is the key to resolving this issue. If you’re not already using them, it’s time to get acquainted.
Step 1: Sign In
Log into your Google Webmaster Tools account. If you don’t have one yet, don’t worry; you can easily set it up using your Google account.
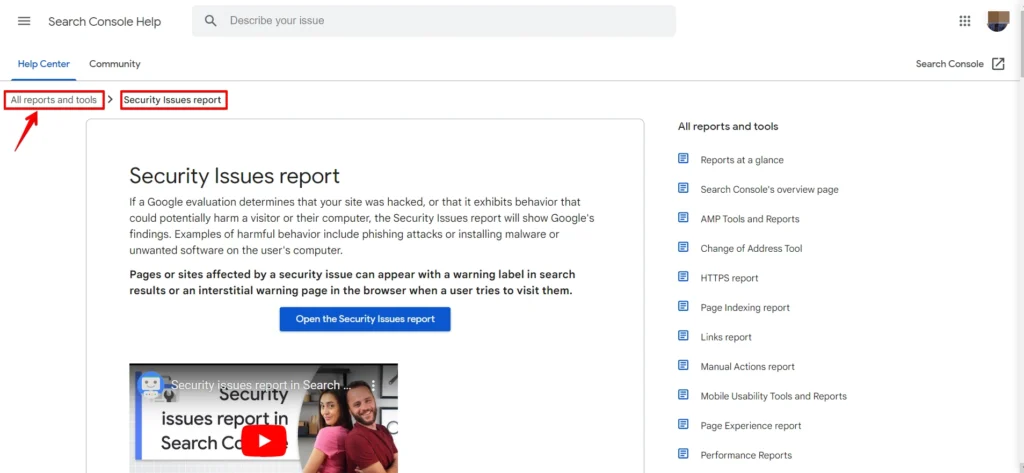
Step 2: Security Check
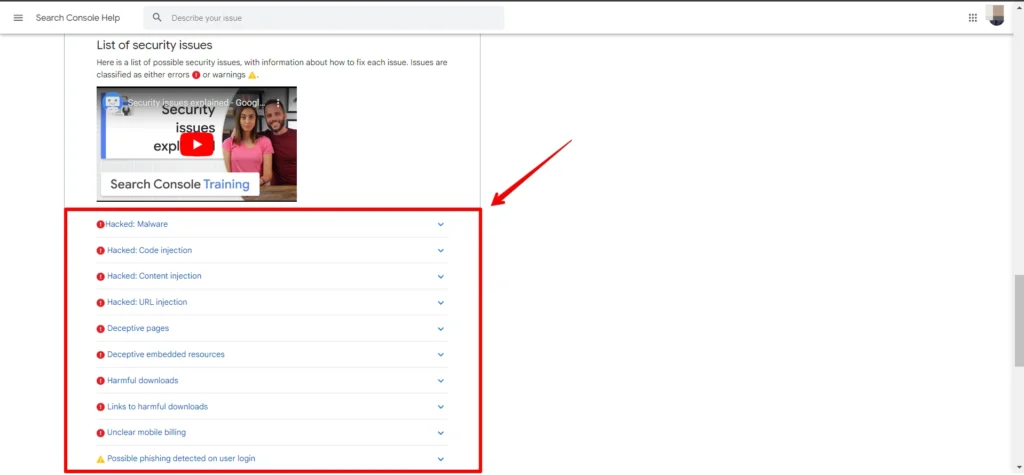
Once you’re in, head over to the "All Reports and Tools"> "Security Issues" section. Google’s a watchful eye on your site and lists any security problems it finds here.
Step 3: Clean Up
If Google spotted some issues, there is no need to panic. They’ll also provide you with handy resources for cleaning up your website and making it squeaky.
Step 4: Submit Your Site
Now, this is where the magic happens. If you’ve sorted out all the security issues, it’s time to submit your site for review.
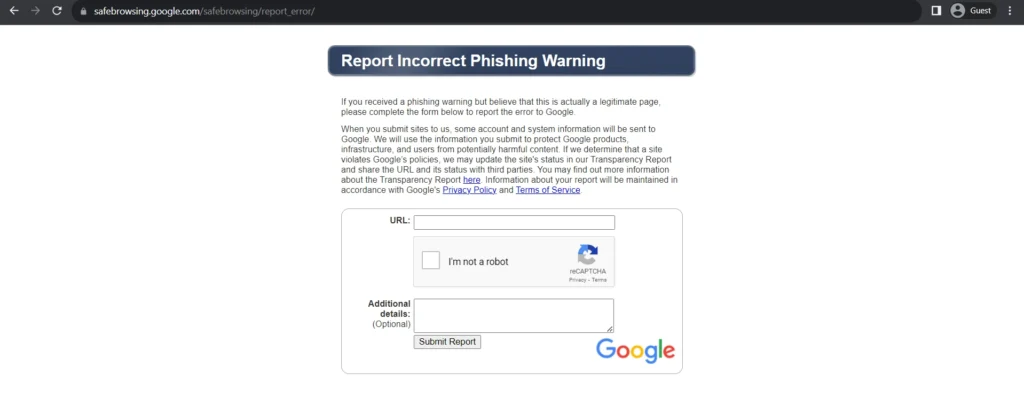
Cross Your Fingers
After making the necessary fixes, check the box confirming that you’ve resolved the problems. Then, click on the "Submit Report" button.
The Waiting Game
Once you’ve hit that button, all you can do is wait. Google’s team will review your site, and if they’re satisfied that you’ve resolved the issues, they’ll remove that warning label from your search results listing.
Conclusion
Ensuring the safety and security of your website is not just about compliance; it’s about building trust with your audience.
Following the steps outlined in this guide, you can effectively fix the "This site ahead contains harmful programs" warning and provide a secure online environment for your visitors.