If you want your WordPress website to run faster and rank better in search engines, reducing the number of HTTP requests is essential. Whenever someone visits your site, their browser asks for all the files needed to show your site correctly, like HTML, CSS, JavaScript, and images.
The more files requested, the more HTTP requests there are. Here’s an easy guide to help you reduce these requests and speed up your WordPress site.
Contents
What are HTTP Requests?
HTTP requests are the messages sent from a browser to a server when someone visits a website. Each request asks for specific data from the server, like HTML files, CSS stylesheets, JavaScript scripts, images, and videos, which are necessary to load and display the site correctly.
Essentially, every piece of content on a webpage typically requires a separate HTTP request to be retrieved from the server.
Why Is It Important to Reduce HTTP Requests?
Reducing HTTP requests is crucial for enhancing a website’s performance, especially regarding its speed and user experience. Here’s why it matters:
- Faster Page Load Times – Fewer requests mean quicker loading of your website components, resulting in a faster, more responsive user experience.
- Improved User Experience – Faster loading times enhance user satisfaction by reducing wait times and improving overall site usability.
- Better SEO Ranking – Faster sites tend to rank higher in search engine results, as speed is a factor considered by search algorithms.
- Reduced Server Load – Minimizing requests lowers the strain on your server, leading to improved response times and overall site reliability.
- Lower Data Usage – Fewer requests translate to less data consumption, benefiting users with limited data plans, especially on mobile devices.
- Better Scalability—Optimizing requests prepares your site to handle increased traffic effectively, ensuring robust performance as your site grows.
5 Ways to Reduce HTTP Requests in WordPress
- Remove Unnecessary WordPress Plugins
- Combine CSS & JavaScript
- Minify CSS & JavaScript
- Enable Lazy Load on Images and Videos
- Load Scripts Only When Needed
Note: It’s a good idea to back up your website before you make any changes. If something goes wrong, you can quickly restore your site to its previous state. You can use WP Staging for easy automatic backups. Check out the backup and restore guide for more help.
1. Remove Unnecessary WordPress Plugins
Removing unnecessary WordPress plugins is an easy way to make your website faster, safer, and cleaner. Here’s how to do it step-by-step:
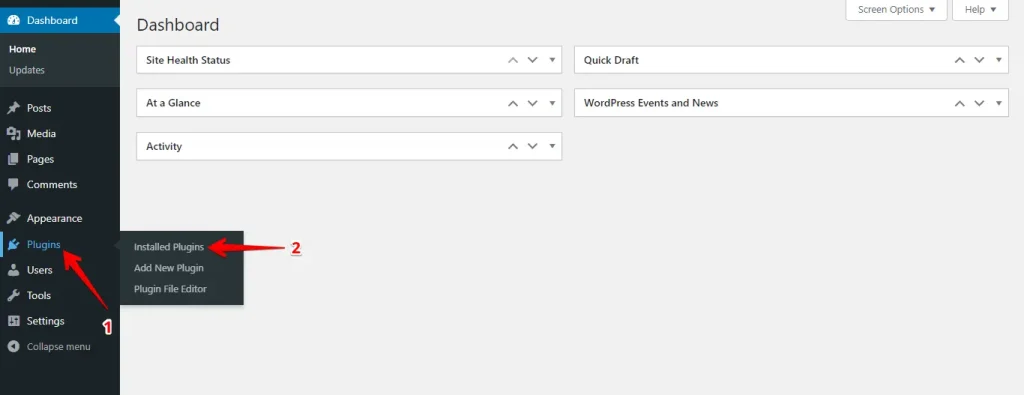
Log in to your WordPress dashboard, navigate to the “Plugins” section, and click “Installed Plugins.”
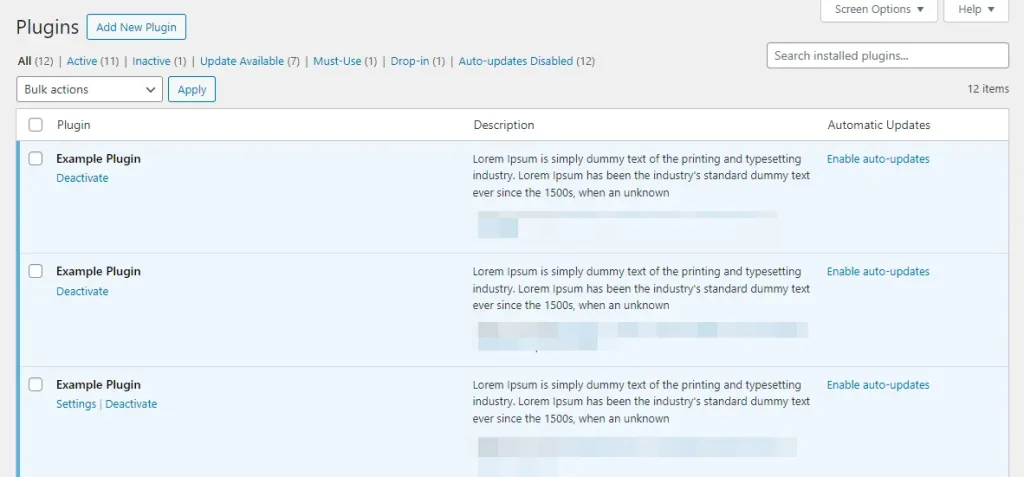
Review each plugin and evaluate its purpose. Consider whether it directly contributes to your site’s functionality, enhances user experience, or fulfills a specific need.
Before removing any plugins, backup your WordPress site to avoid any issues. Use the WP Staging plugin for an easy and reliable backup. It lets you create a quick backup and staging site, keeping your data safe while you test changes.
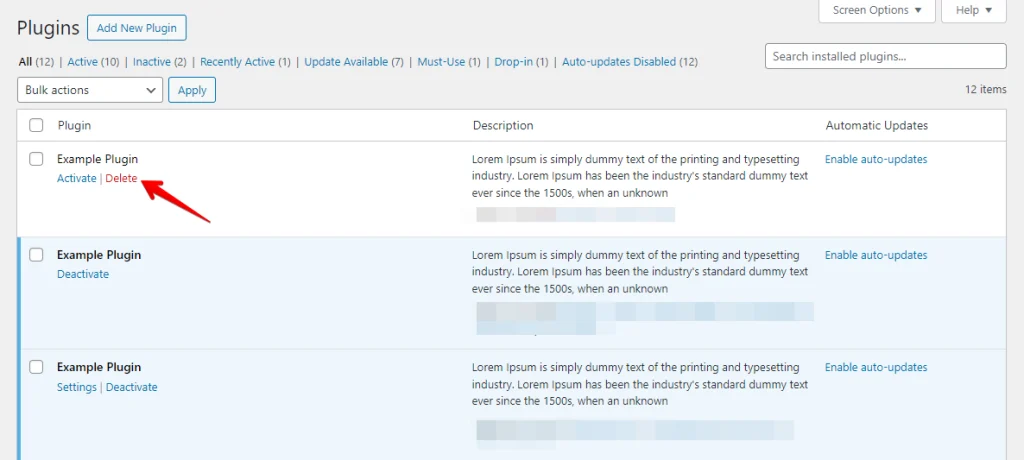
Once you’ve identified unnecessary plugins, deactivate them from your dashboard’s “Plugins” section. After deactivation, you can safely delete them by clicking “Delete” below each plugin’s name.
By following these steps, you can effectively reduce the number of unnecessary WordPress plugins on your site, which will improve performance, speed up loading times, and improve the overall user experience.
2. Combine CSS & JavaScript
Combining CSS and JavaScript files reduces HTTP requests and speeds up your WordPress site. WP Rocket makes this easy. Here’s how to do it step by step:
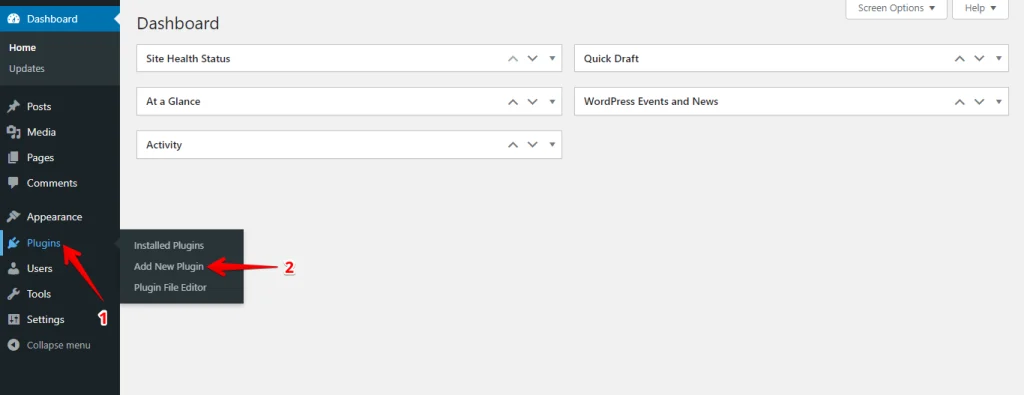
Log in to your WordPress dashboard, navigate to the “Plugins” section, and click “Add New Plugin.”
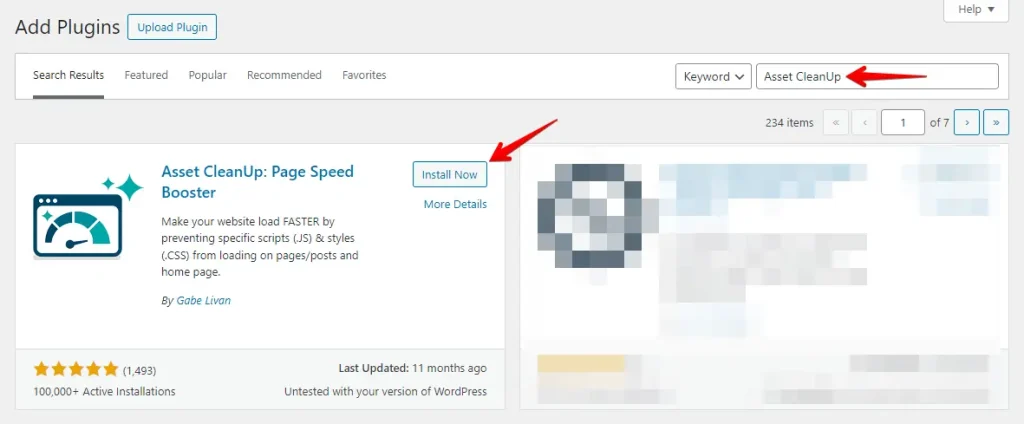
In the top-right search bar, type “Asset CleanUp,” find the plugin, and click the “Install Now” button.
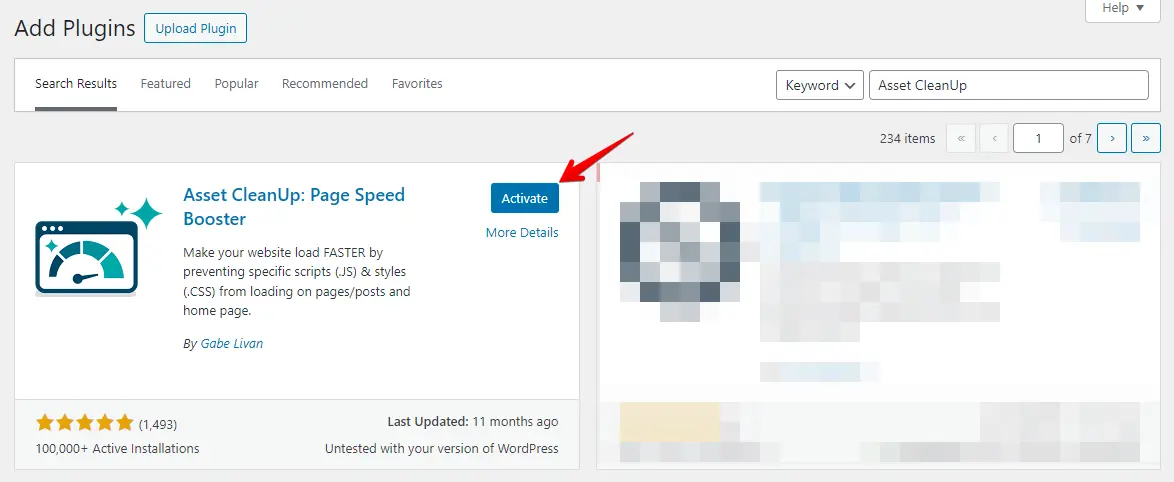
Once installed, click “Activate.”
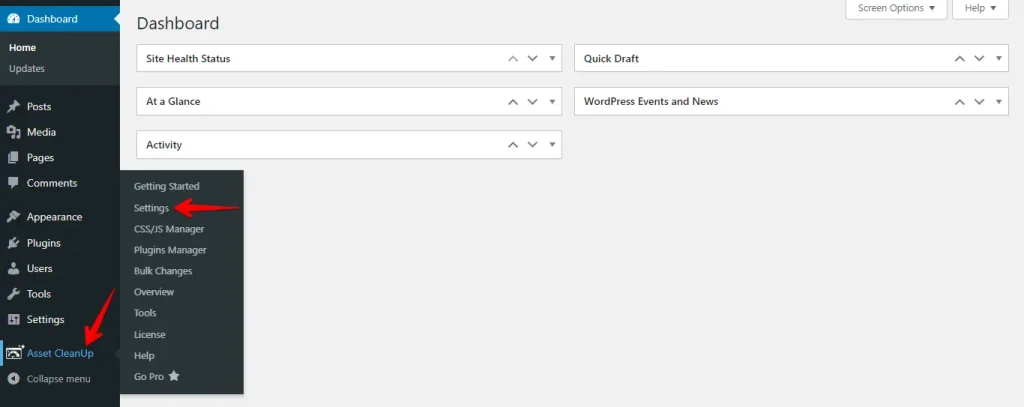
Go to the “Asset CleanUp” tab and click on “Settings” option.
Now click the “Optimize CSS” tab to combine the CSS files.
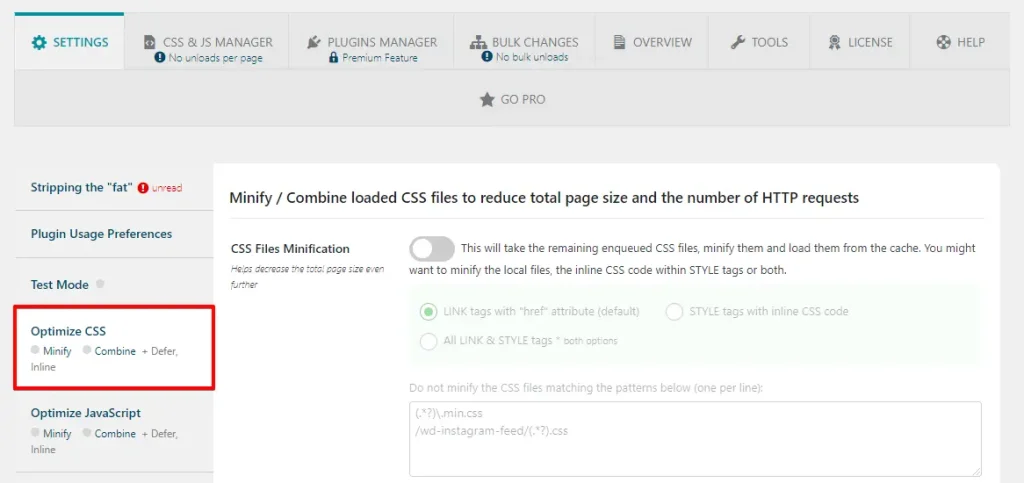
Scroll down to find the “Combine Loaded CSS” option, then click the switch button to enable it.
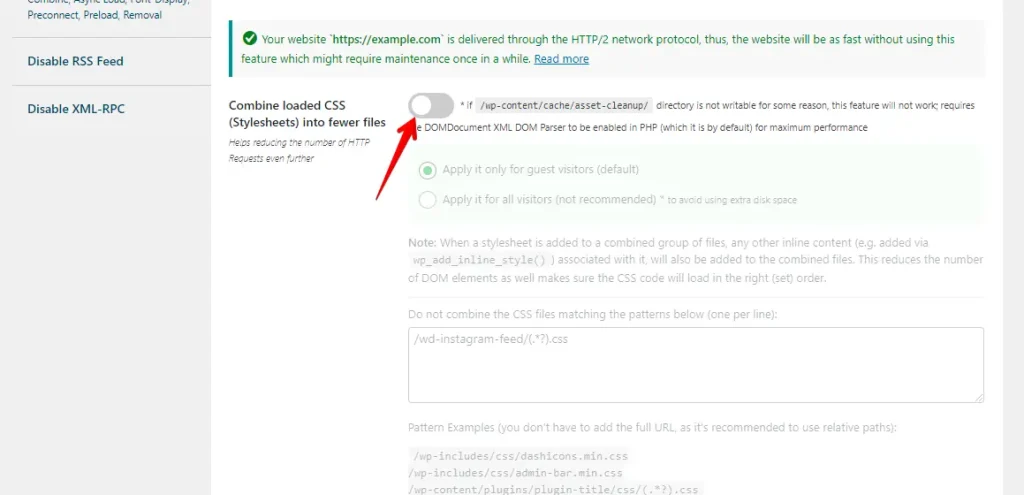
After that, scroll down further and click the “Update All Settings” button.
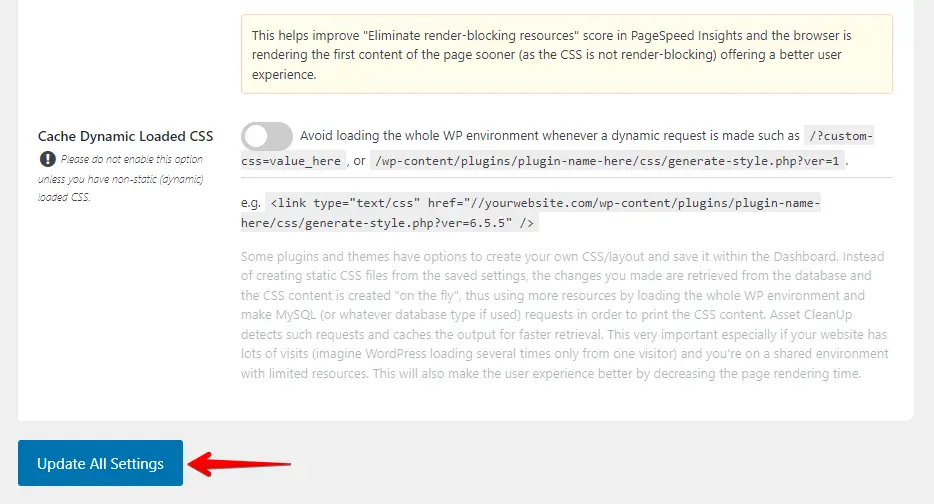
Click on the “Optimize JavaScript” tab to combine the JavaScript files.
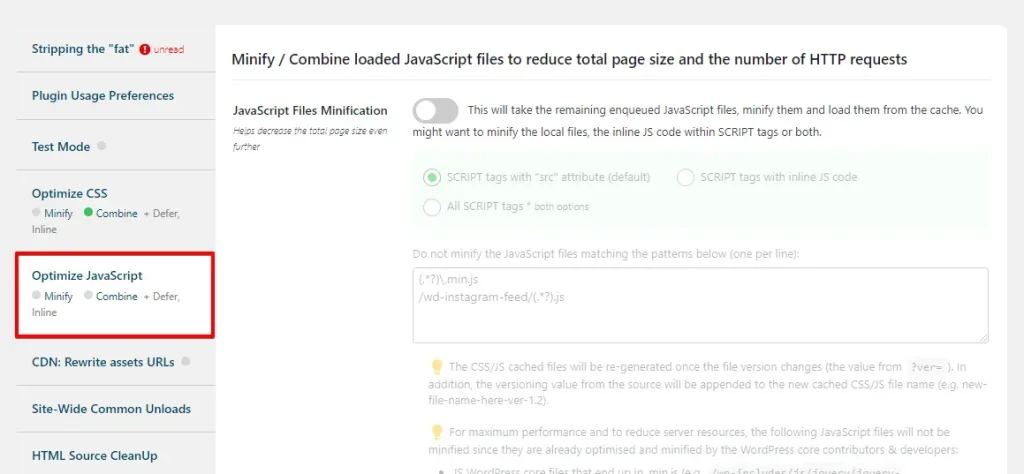
Scroll down to the “Combine Loaded JS” option and toggle the switch to enable it.
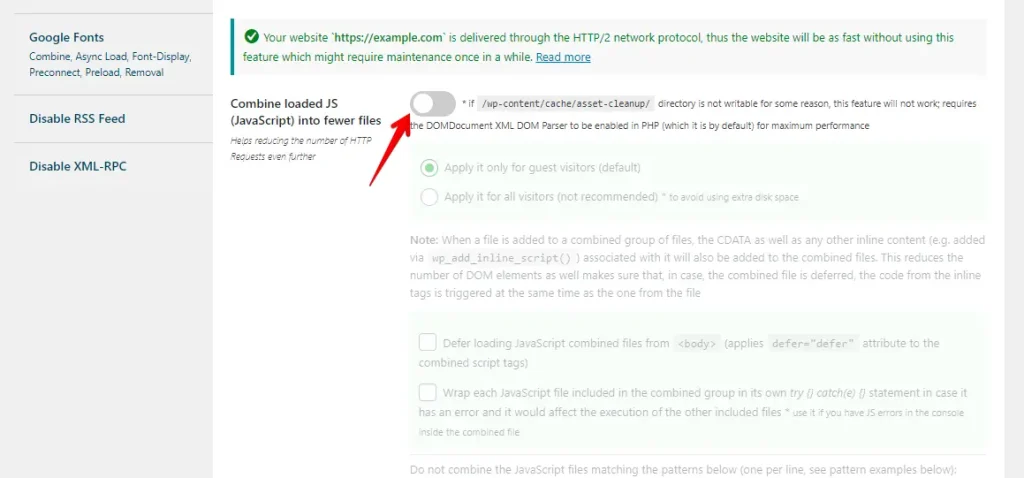
After that, scroll down and click the “Update All Settings” button.
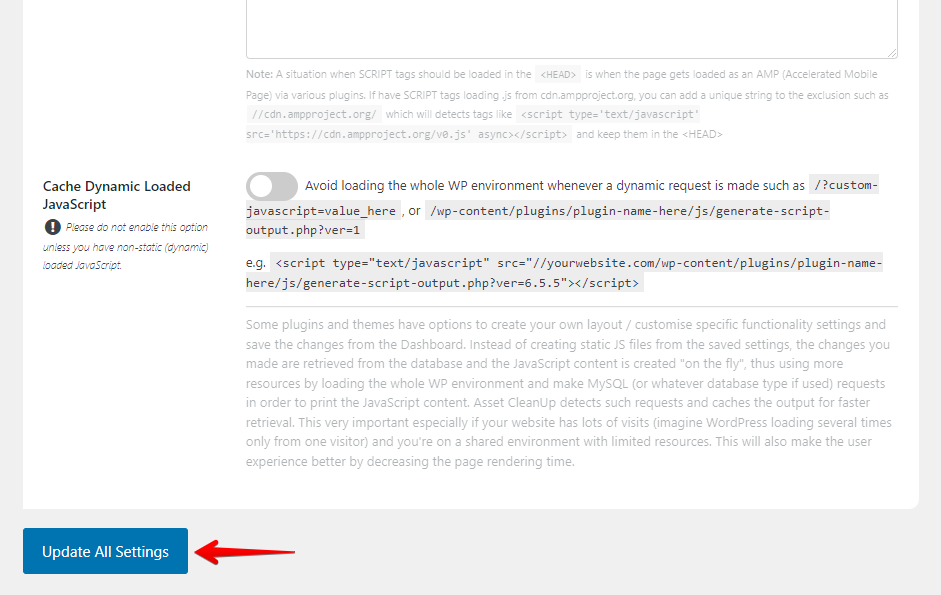
Following these steps with the Asset CleanUp plugin effectively combines CSS and JavaScript files, reducing HTTP requests and enhancing your site’s speed and performance.
3. Minify CSS & JavaScript
Minifying CSS and JavaScript files reduces their size by removing unnecessary characters, such as spaces and comments, which speeds up your WordPress site by reducing HTTP requests. Here’s how to do it:
Navigate to the “Asset CleanUp” tab and click the “Settings” option.

Go to the “Optimize CSS” tab and click the “CSS Files Minification” switch button to minify the CSS.
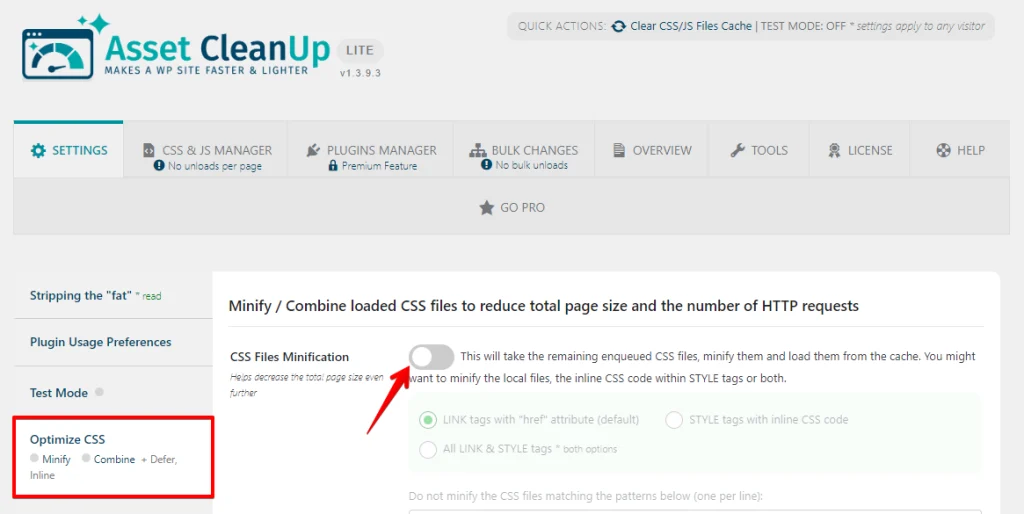
Then, scroll down and click the “Update All Settings” button.

Now, navigate the “Optimize JavaScript” tab and toggle the “JavaScript Files Minification” switch button to minify the JavaScript files.
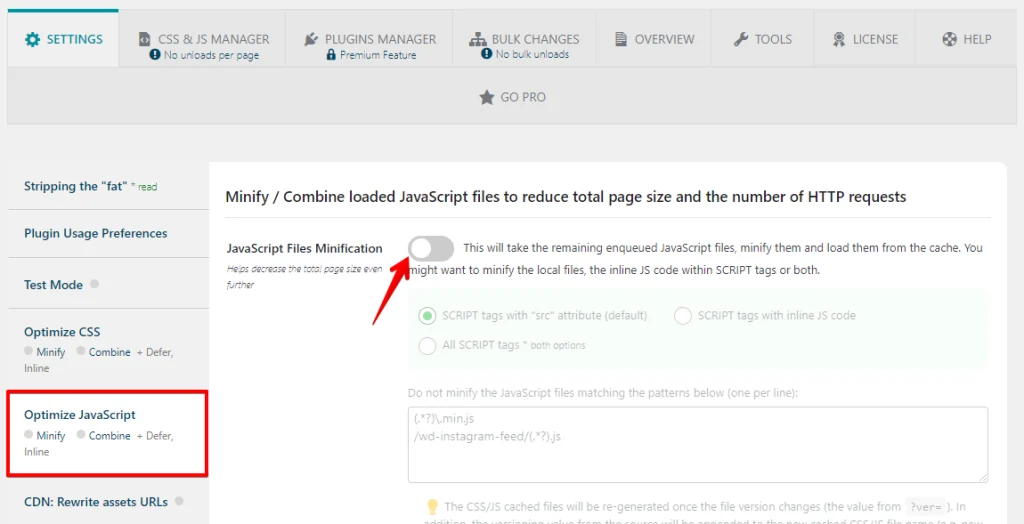
After that, scroll down and click the “Update All Settings” button.

By following these steps, you can effectively minify CSS and JavaScript, reducing HTTP requests and improving the overall performance of your WordPress website.
4. Enable Lazy Load on Images and Videos
Lazy loading images can reduce initial HTTP requests, thereby improving the loading speed of your WordPress site. Here’s how to do it:
Login to your WordPress dashboard, click “Plugins,” and click “Add NewPlugin.”

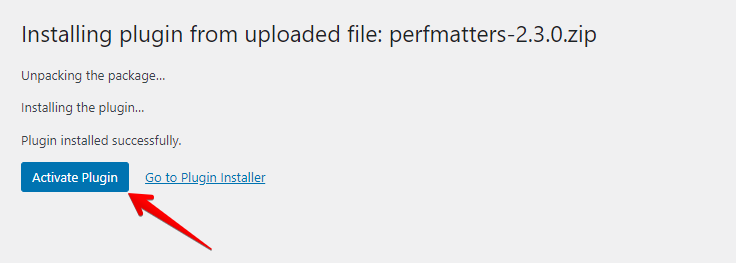
Click on the “Upload Plugin” button, choose the Perfmatters plugin from your computer, and then click the “Install Now” button.

After that, click on “Activate Plugin.”
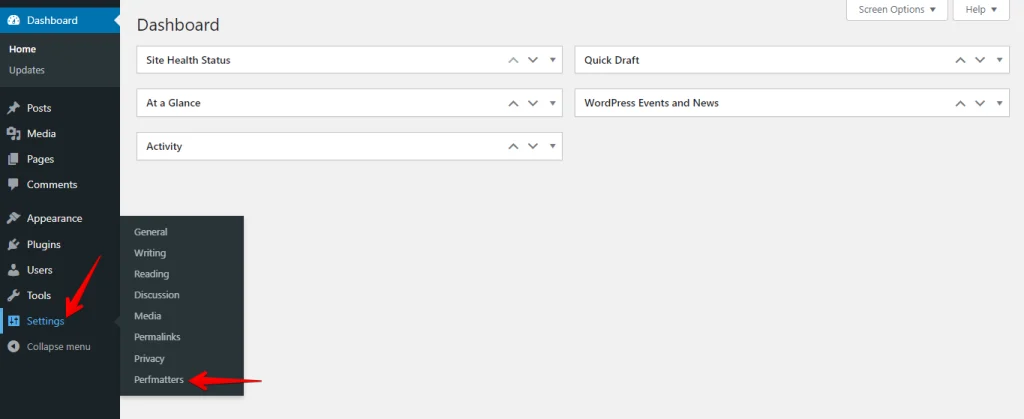
Navigate to the “Settings” tab and click the “Perfmatters” option.
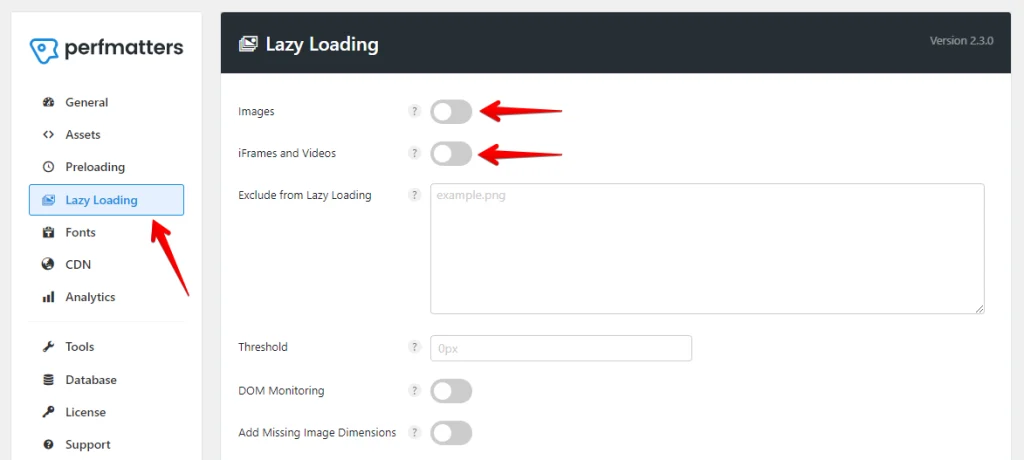
Now, go to the “Lazy Loading” tab, toggle the switch button next to “Images” to enable it, and click on the button next to “iFrames and Videos” to enable them as well.
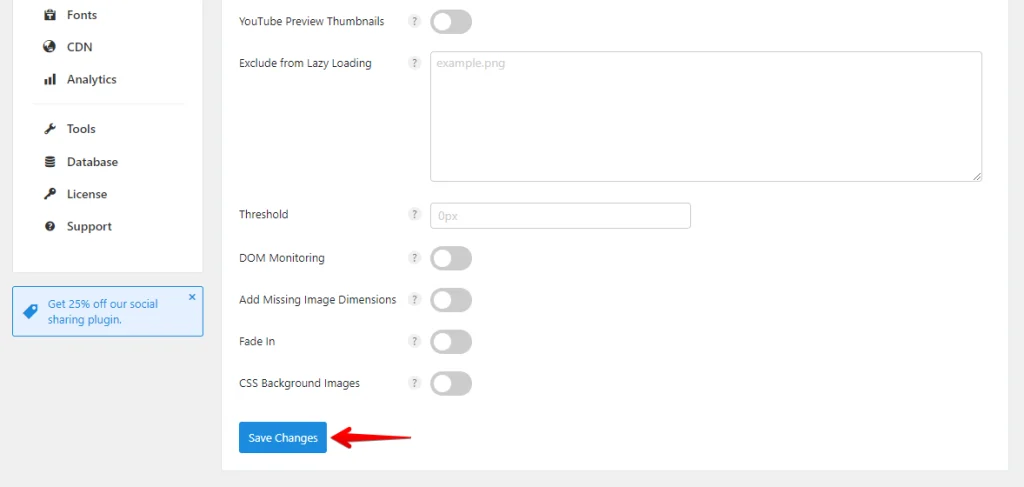
Scroll down and click on the “Save Changes” button.
Following these steps, you can enable lazy loading for images and videos using the Perfmatters plugin, reducing HTTP requests and improving your site’s speed and user experience.
5. Load Scripts Only When Needed
Loading scripts only when necessary can significantly reduce the number of HTTP requests, improving your WordPress site’s performance. Here’s how to do it step by step:
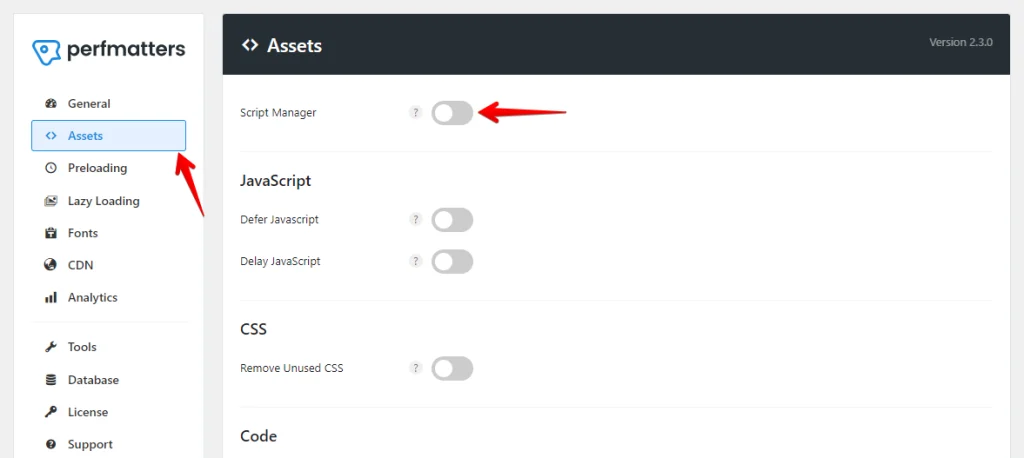
First, install and activate the Perfmatters plugin. Then, navigate to the “Settings” tab and click on “Perfmatters.”

Go to the “Assets” tab and toggle the “Script Manager” switch to enable loading scripts only when needed.
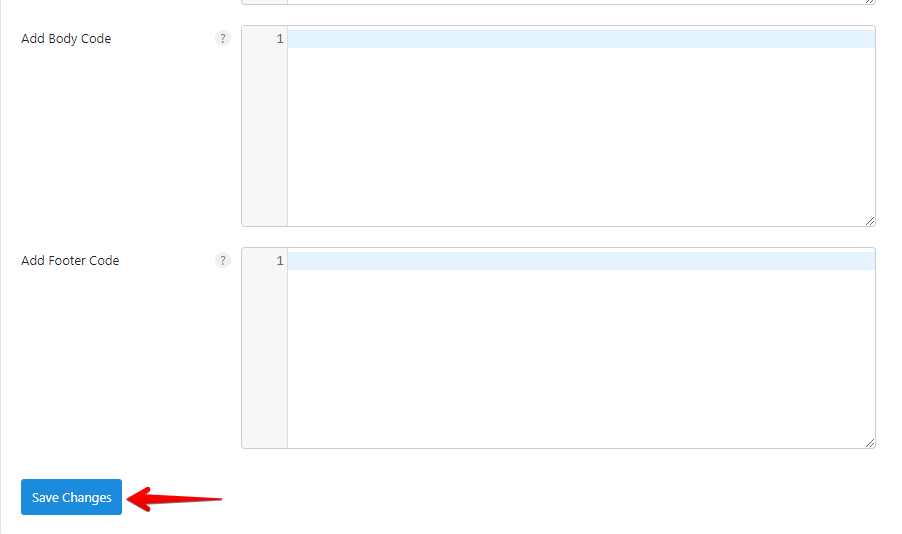
Scroll down and click the “Save Changes” button.
By following these steps, you can load scripts only when needed, reducing HTTP requests and improving the performance of your WordPress website.
Conclusion
To sum up, reducing HTTP requests in WordPress greatly enhances your site’s speed and user experience. You can make your website more efficient by cleaning up plugins, combining and minifying CSS and JavaScript, implementing lazy loading, and selectively loading scripts.
These actions lead to quicker load times, better engagement, and potentially higher SEO rankings. Keep things simple and fast for optimal performance!

