Has a plugin update ever affected your website? Or are you afraid of modifying your website while keeping your audiences on hold?
Well, I’d like to speak about a well-known solution to all this and more – create a staging site!
Managing a staging site is easier when you have just one website. Really?
What if I say it is easier to create staging sites for all your websites at once, so you have a backup of them just before updating a plugin or making a considerable change in them?
An extension of MainWP Pro along with WP STAGING makes that possible.
Contents
MainWP as a Management Platform
MainWP is a WordPress management tool that allows you to manage and control multiple websites from one place. That includes WordPress websites on other hosting providers as well.
Read more about MainWP here.
It’s a set of two plugins as follows:
- MainWP Dashboard: This plugin is installed on a WordPress website to manage other websites.
- MainWP Child: This plugin is installed on all WordPress websites you want to manage from the above-mentioned MainWP Dashboard.
So, MainWP Dashboard gets one installation to manage hundreds of websites (Child Sites) with the MainWP Child plugin installed.
Imagine having 100s of websites where you need to update the theme and plugins to function well. Will you log in to each website and do that?
MainWP simplifies updating and managing plugins and creating pages and posts from your admin website, where you see the MainWP dashboard.
But this isn’t all you can do with MainWP. This tool has many extensions that make it useful in every aspect of website management. One such extension is the one that helps create Staging sites.
Create a Staging Site Using MainWP and WP STAGING
So, without any further ado, let’s see how helpful it will be to couple WP STAGING with MainWP.
1 – Install and activate MainWP’s Staging extension
As mentioned, we need to install and activate the Staging extension of MainWP that enables us to create a staging site for every Child Site in the account.
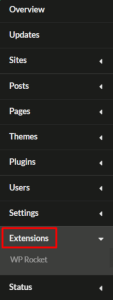
Login to your website with the MainWP dashboard installed, get into the MainWP dashboard from the left pane and click on the Extensions tab below.
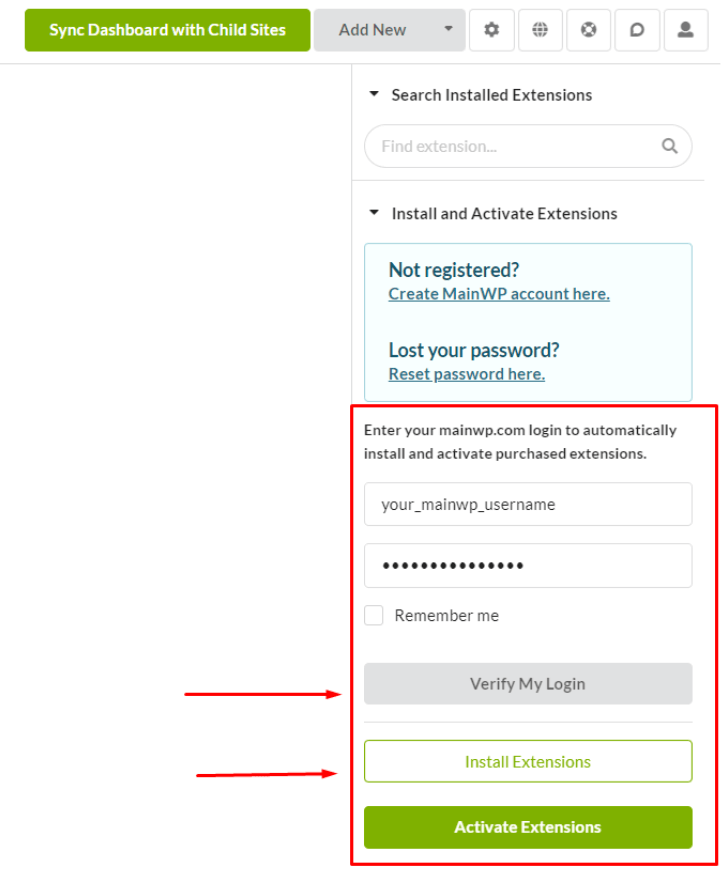
Verify your MainWP account here and click on the Install Extensions button.
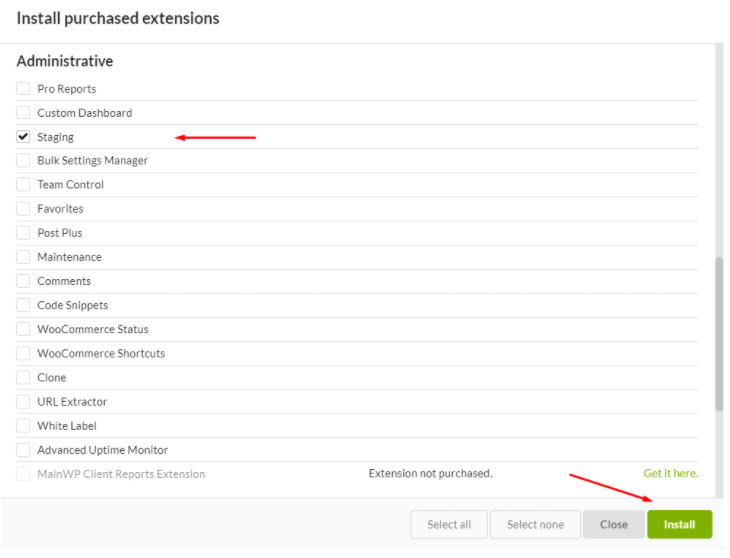
You will now see a popup with the extensions listed within. Select the Staging extension and click on Install.
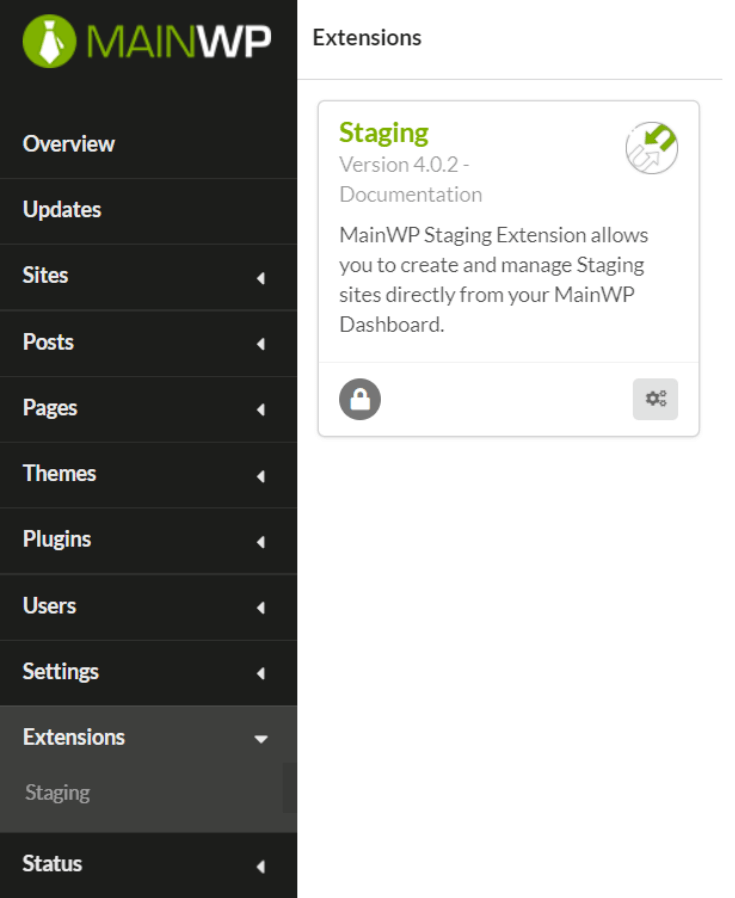
The Staging extension is now seen in your MainWP dashboard, as shown in the image below.
2 – Install the WP STAGING plugin
The WP STAGING plugin must be installed on the Child Site(s). With MainWP onboard, there are two ways you can do it. Let’s take a quick look at each of them.
Method 1: Install the WP STAGING plugin through the MainWP dashboard
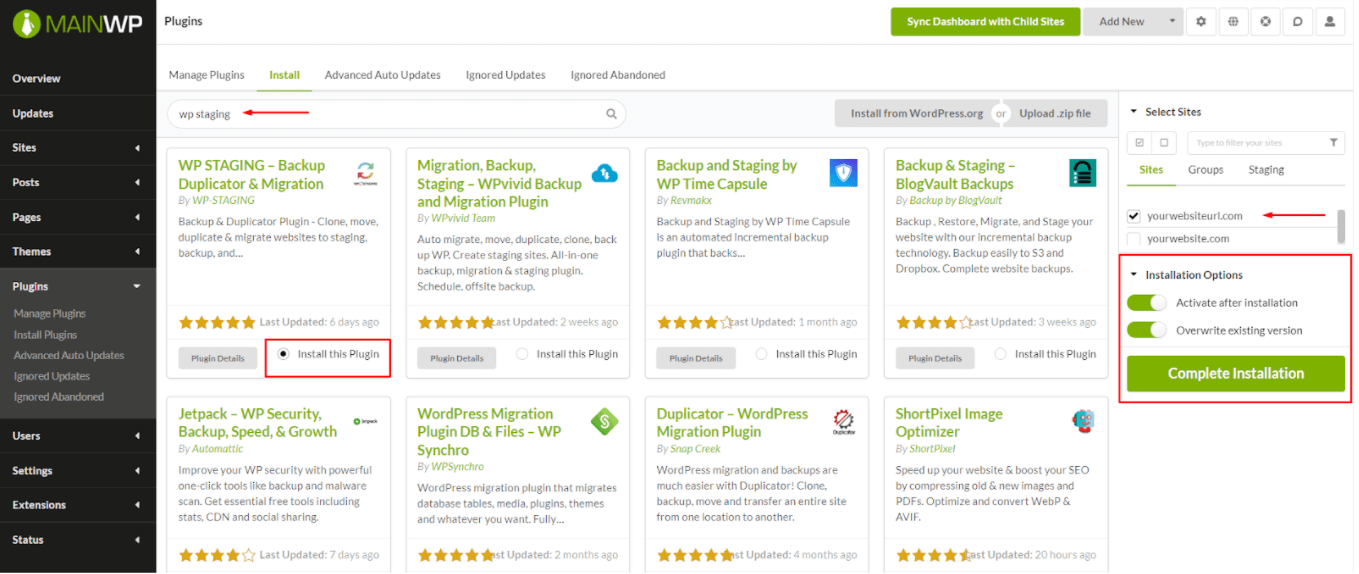
The best part of using MainWP here is that you will install the plugin on multiple websites together. Here are the steps to install the plugin using this method:
- Open the MainWP -> Plugins -> Install page.
- Search the plugin “WP STAGING” using the search field.
- Locate the WP STAGING plugin and click Install this Plugin.
- Select the Child Site(s) in which you’d like to install the plugin within your dashboard.
- An Installation Option box will open. Make sure you select the Activate after installation option.
Here’s a quick look summarizing the steps above.
Method 2: Install the WP STAGING plugin directly to the Child site(s).
This method is the typical plugin installation if you’d like to install the plugin individually on all Child Sites.
- Login to your Child Site.
- In the WordPress dashboard, go to Plugins -> Add New.
- Search the plugin “WP STAGING” in the search field.
- Install and activate the plugin on your website.
3 – Sync Child Site Data
Once you’ve installed the Staging extension on the MainWP dashboard site and the WP STAGING plugin on all Child Sites, it is time to sync the Child Site data from your MainWP dashboard.
Make sure you click the Sync Dashboard with Child Sites button on the top right in your MainWP dashboard:

4 – Create the Staging Area
Now that we’ve finished the installation and settings, let’s create the first staging site.
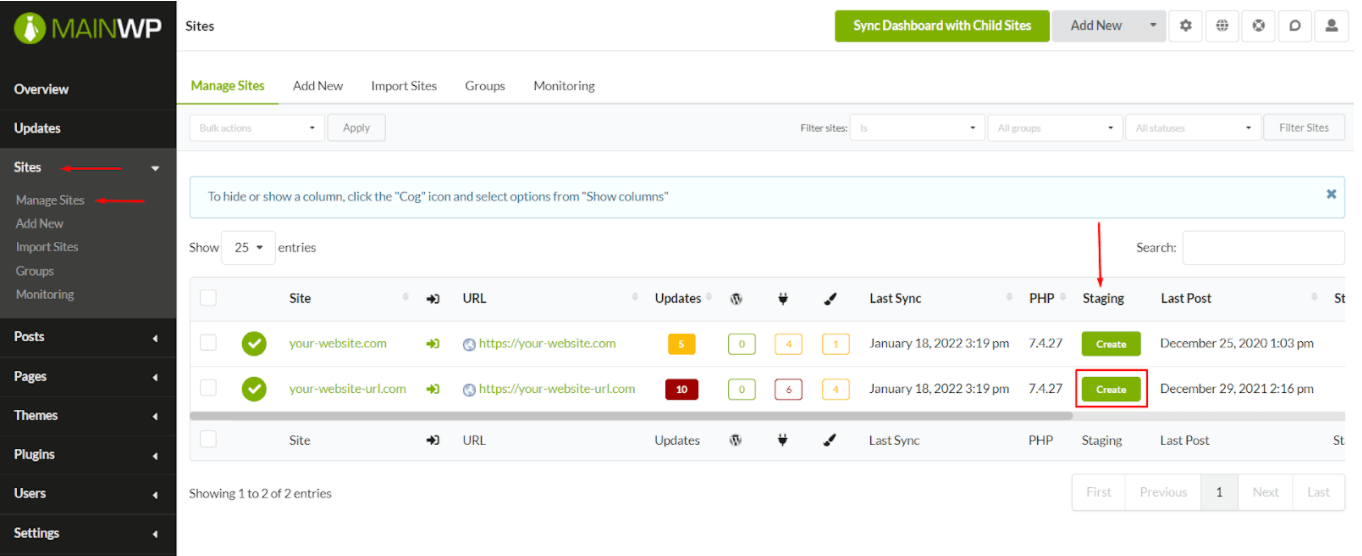
In the MainWP dashboard, go to Sites and then Manage Sites.
Out of all the columns you see here, you will find the Create button under the Staging column.
Click on Create inline with the website you’d like to create staging for.
Name your Staging site and select the files and databases you’d like to carry ahead from the main website:
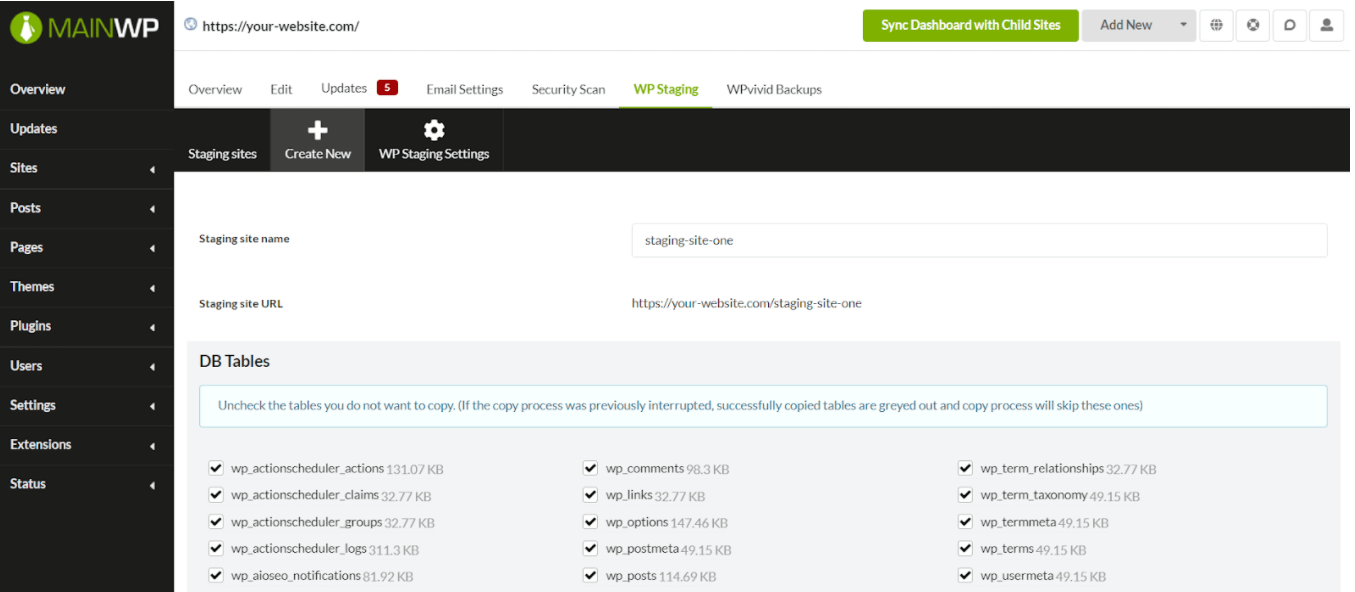
Scroll down and click the Create Staging Site button on the bottom right.
5 – Manage the Staging Area
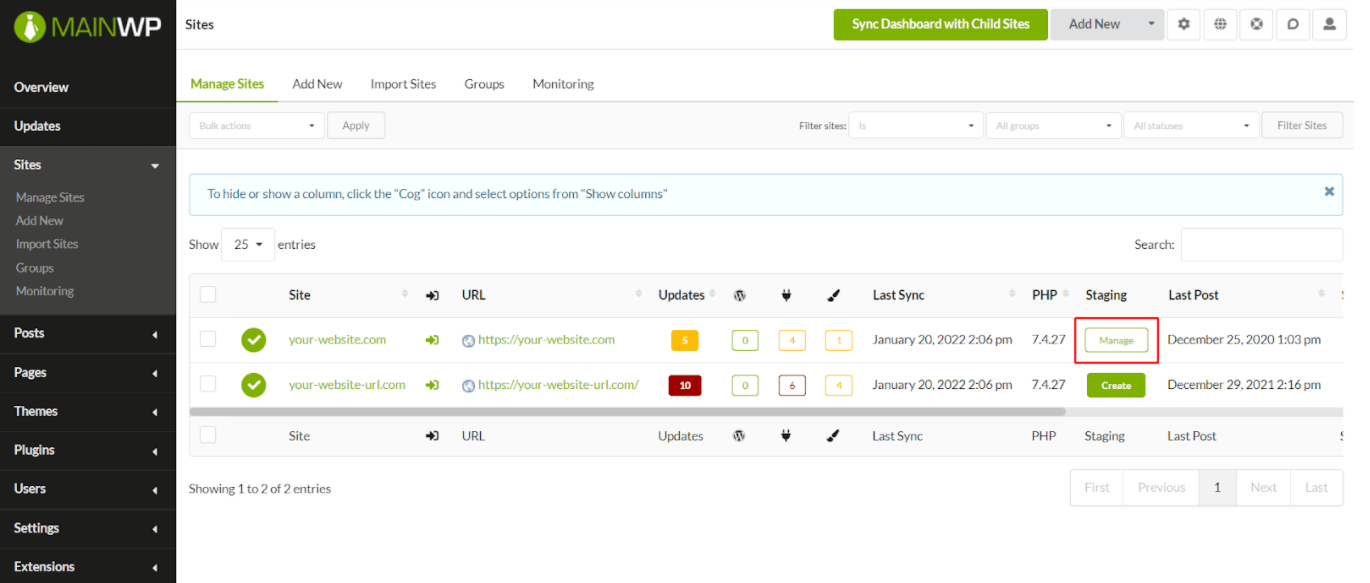
Again, we come to the best part that MainWP facilitates us with Managing your staging areas from one place.
Like the Child Sites, you manage using MainWP; you can also manage the staging areas created there.
The image below shows you how the Create button that we saw in Step 4 turns into a Manage button once the staging site is created:
Once you click on this Manage button, you’ll be taken to a screen with three tabs, as seen in the image below:
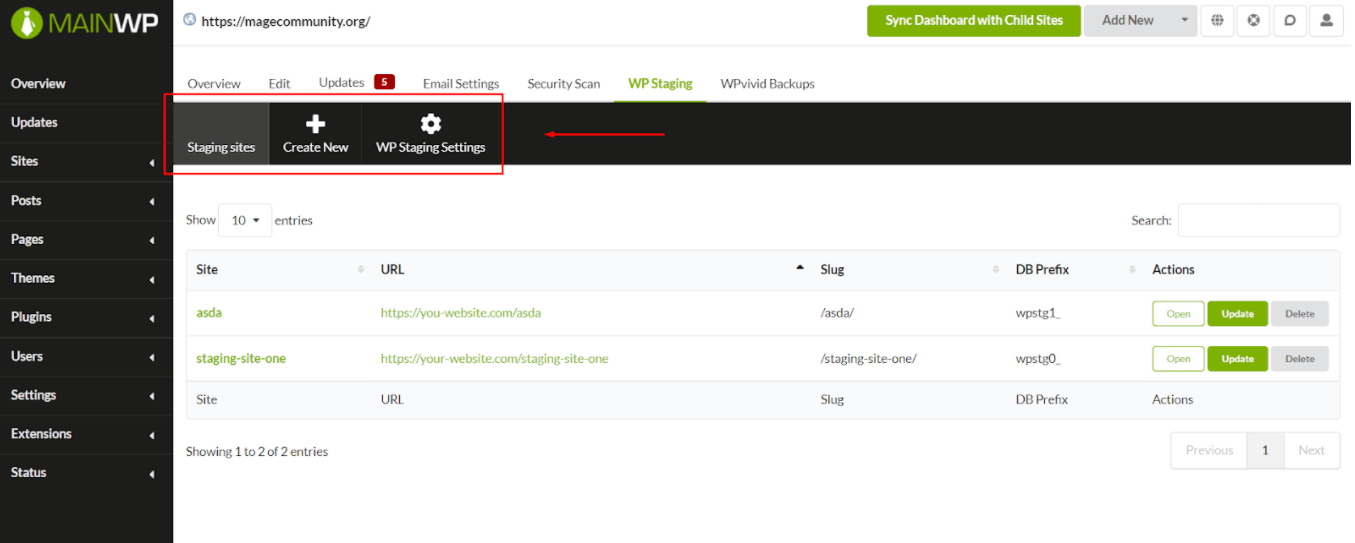
These tabs will show help you with the following:
- Staging Sites: Your staging sites are listed here with options to open, update and delete them directly through the MainWP dashboard.
- Create New: This tab will help you create another staging site.
- WP STAGING Settings: You can manage the WP STAGING global settings for all the staging sites through this tab. These include the option to Override General settings, set the DB copy query limit, file copy limit, and many more.
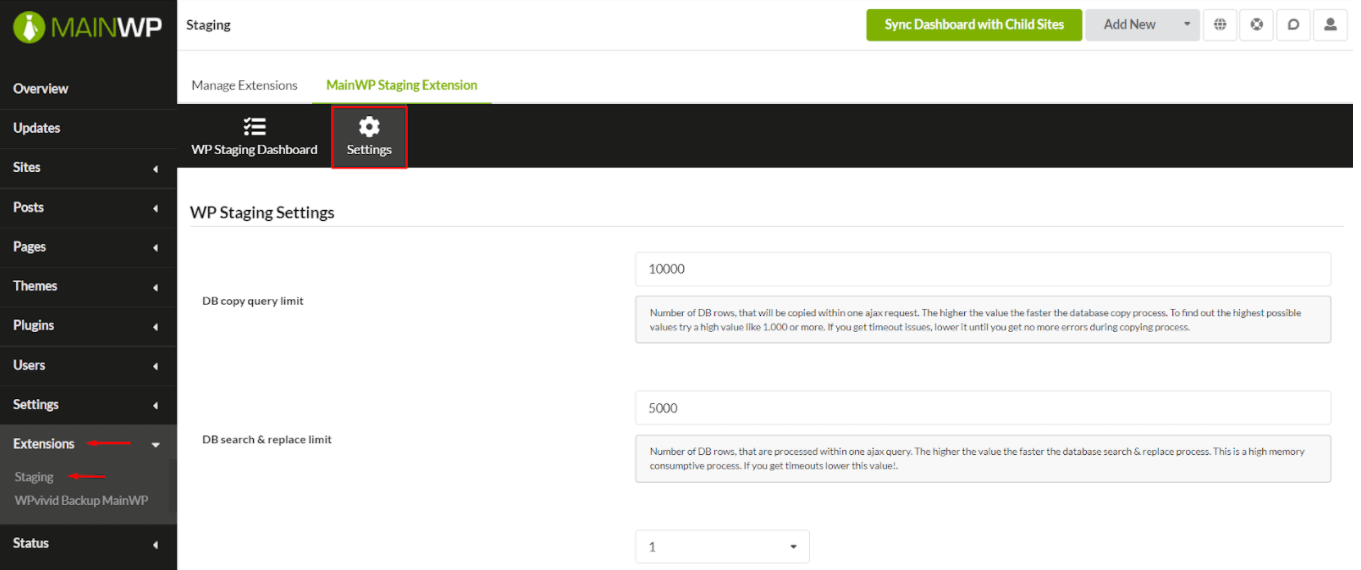
Need to access the Global settings later?
You can do that by navigating to your MainWP dashboard -> Extensions -> Staging -> Settings, as seen in the image below:
Wrapping It Up!
We are glad that WP STAGING has proved to be a helpful plugin for people to work hassle-free in an environment that won’t affect their live websites.
MainWP adds to this by allowing you to create staging sites for multiple websites and manage them through one dashboard. So, you don’t waste time hunting for notifications and credentials to log in and update them individually.
Related Articles
- Update WordPress Core Manually if Automatic Update Does Not Work
- Update WordPress Core Manually if Automatic Update Does Not Work