If you want to back up and upload your website to Google Drive, You can connect WP STAGING with your Google Drive account to upload and store your site backup files in the cloud for extra safety.
You have two options to connect with Google Drive:
- Easy one – Use WP STAGING one-click authentication to upload a backup to Google Drive
- Use Google API credentials to upload your backup files to Google Drive.
The first option is the easiest and most recommended option. It uses the dedicated endpoint auth.wp-staging.com for the authentication process between Google and WP STAGING. It uses an open standard named OAuth. You can read more about OAuth here.
We don’t store any of your data, including your backup data. We even do not store your mail address or any access token as many other backup services do. Read our Google Drive privacy terms.
The other option is to create and use Google API credentials. That is not as convenient as the one-click authentication but could be required if your company policy does not permit using the WP STAGING website for the Google authentication process.
Contents
Option 1: One-Click Connect to Google Drive
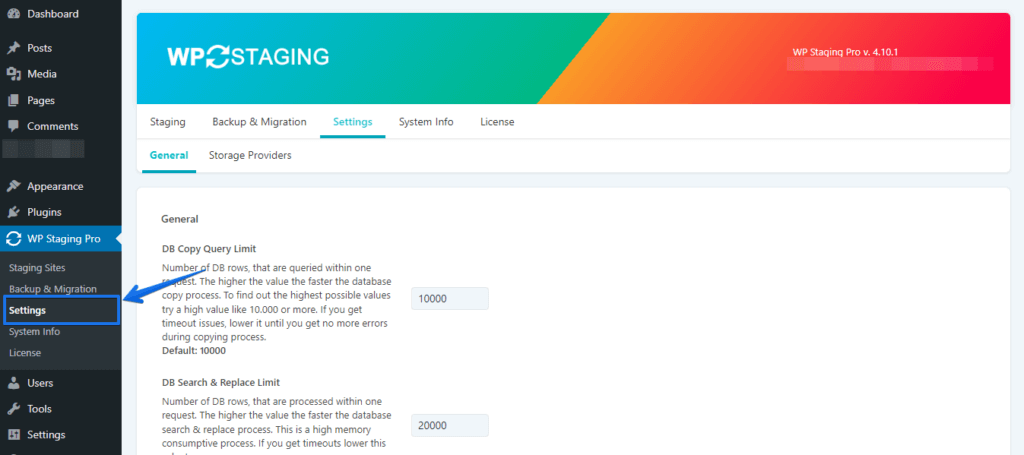
- Open WP STAGING | PRO > Settings
- Go to Storage Providers
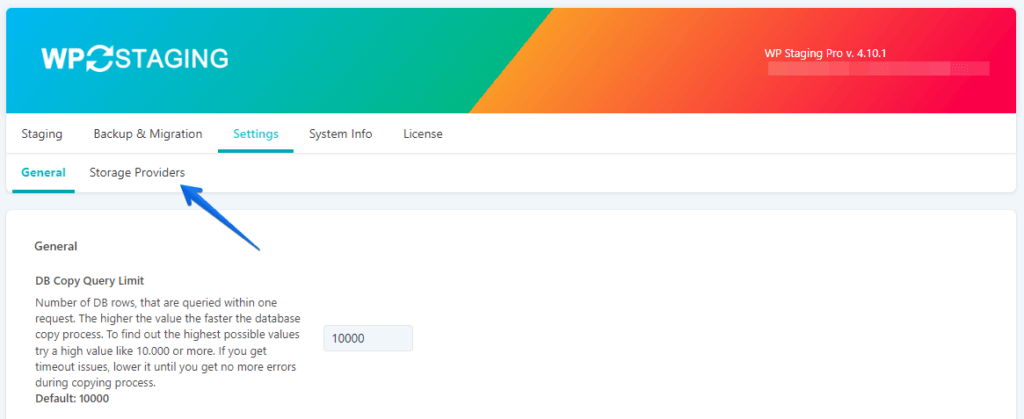
- Click on Sign in with Google
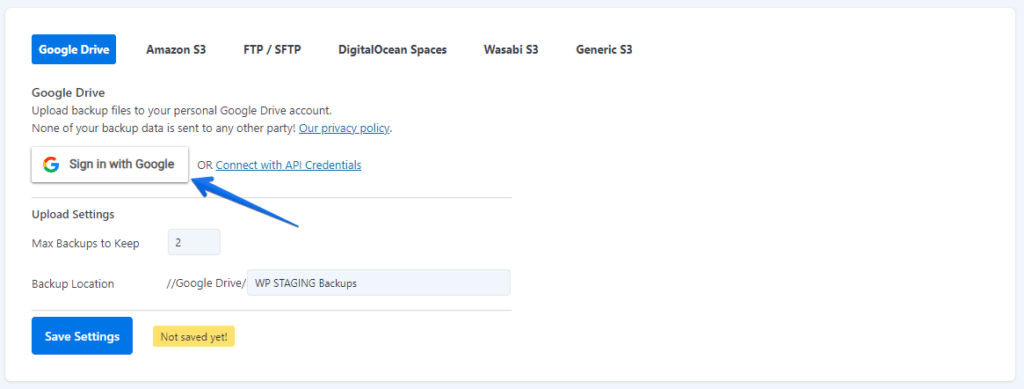
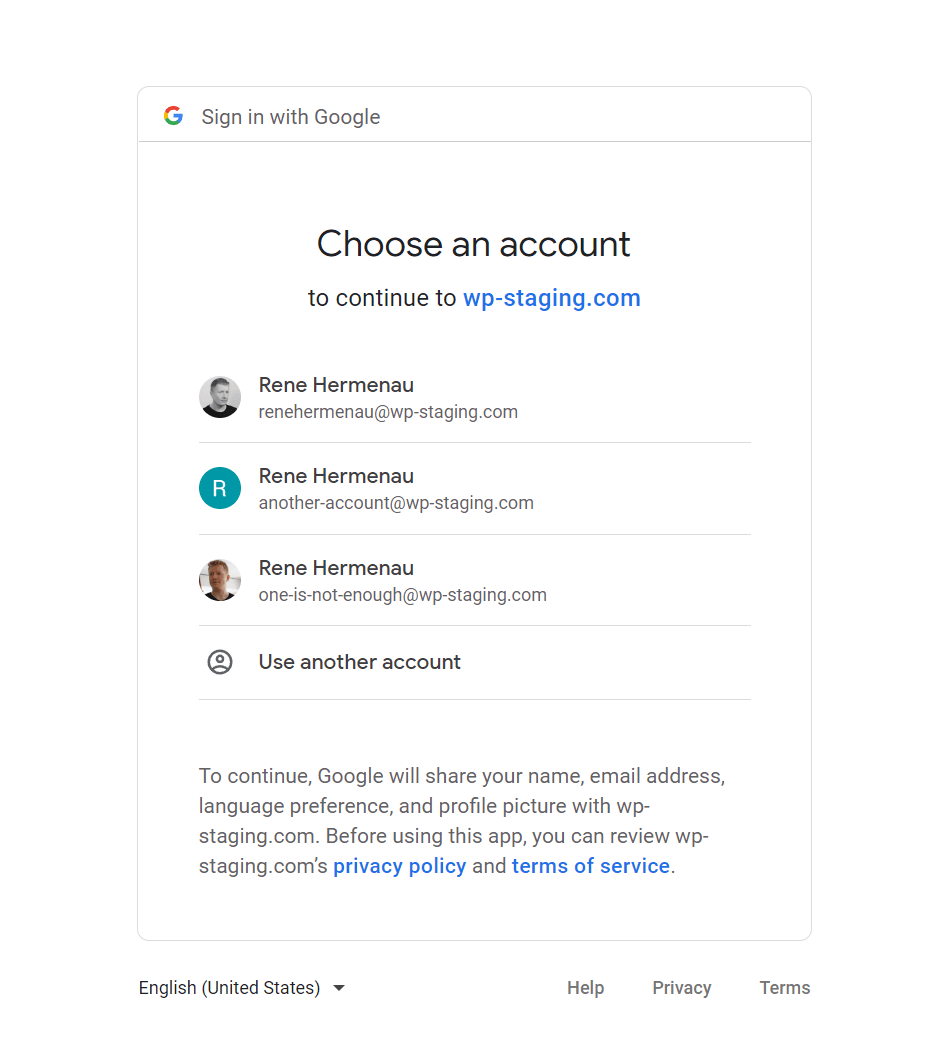
- Click on the Google Account that you want to connect to WP STAGING.
If you have multiple ones, like in the image below, choose the one that should contain the backup files.
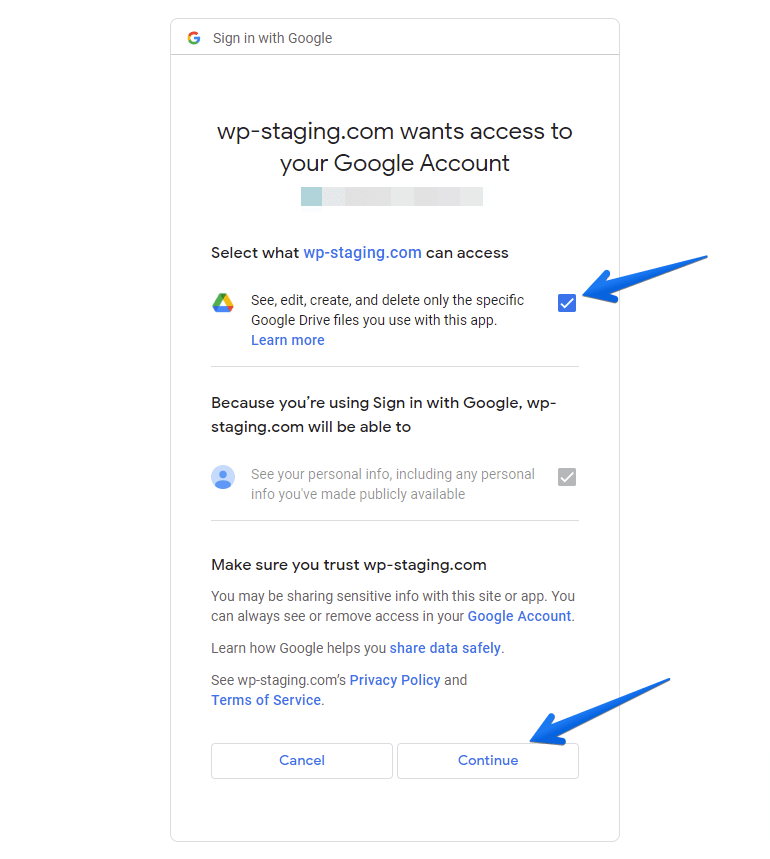
- Click the checkbox that says something like See, edit, create, and delete only the specific Google Drive files you use with this app.
Note: The name of this textbox could be slightly different if Google changed it in the meantime. - Click on Continue
- You will be redirected to your website and the WP STAGING Storage Settings.
WP STAGING will show you a logout button if you are authenticated to Google Drive.
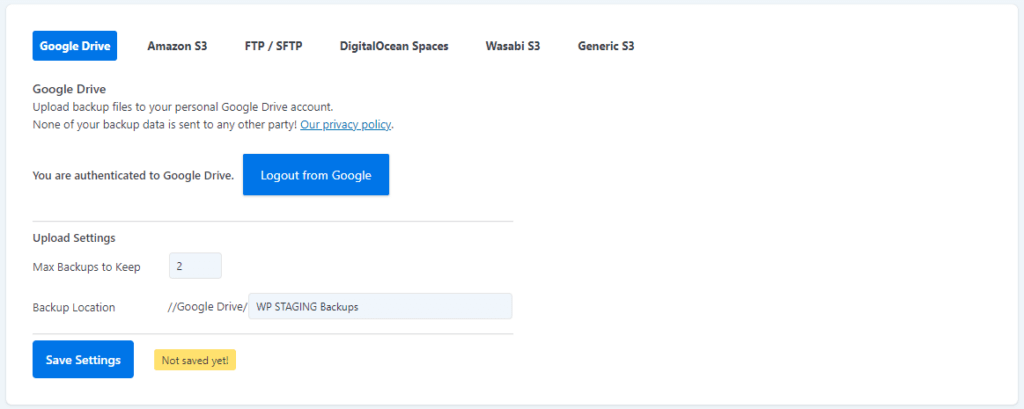
- Adjust the value for Max Backups to Keep to tell WP STAGING how many backup files should be stored on Google Drive. E.g. if you say 5, Google Drive will never store more than five backup files. The oldest backup will be deleted when a new backup is uploaded.
- You can also change the backup folder name if you want to upload your backup files to a different folder on Google Drive.
- If these settings are done, you can go to WP STAGING > Backup to create a new backup and will get the option to upload the backup to the connected Google Drive account, and you are done!
Option 2: Use Google API to Connect WP STAGING to Google Drive
- Login to your WordPress website
- Make sure WP STAGING | PRO is installed and active
- Open WP STAGING | PRO settings Page
Copy Google Redirect URI
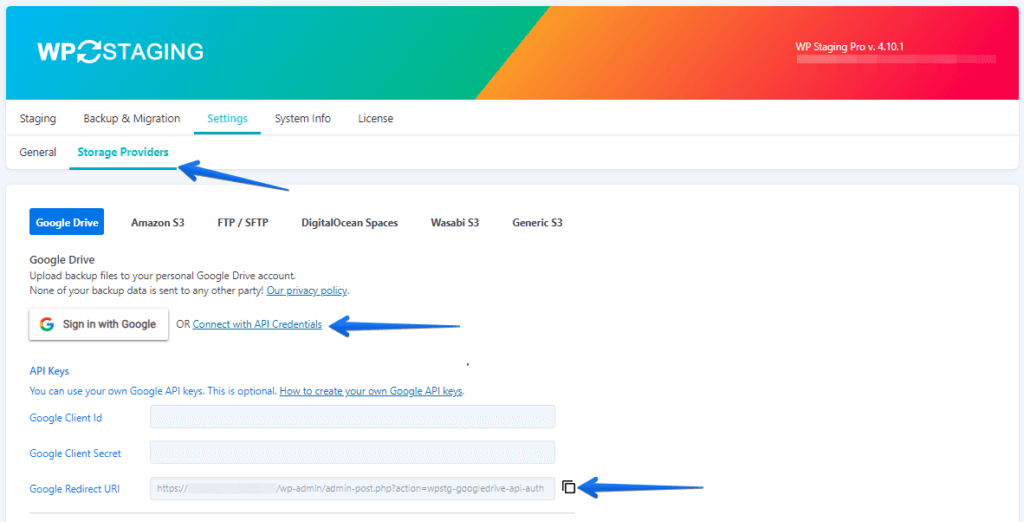
- Click Storage Providers(1),
- Connect with your API Credentials(2)
- Copy your Google Redirect URI by clicking on the copy to clipboard icon(3).
Save it somewhere; we will be using it later.
Create New Google Cloud Project
- Login into your Google Account
- Open the Google developer console page from this link.
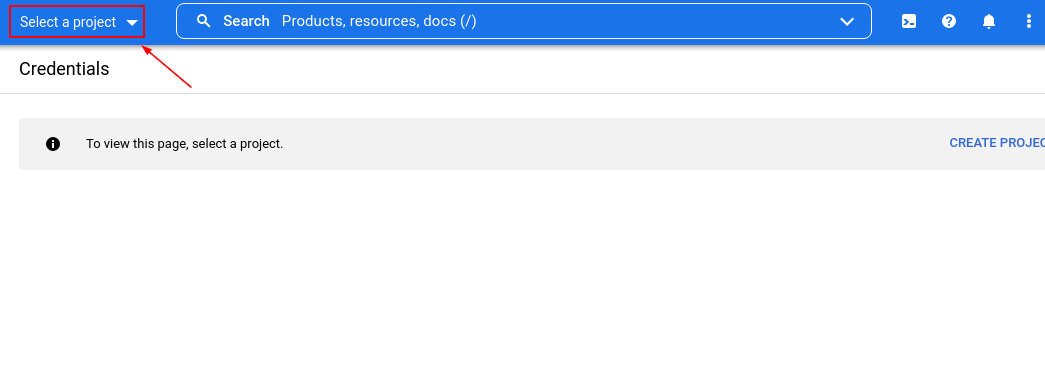
- Click Select a Project or whatever you see if another project is already created.
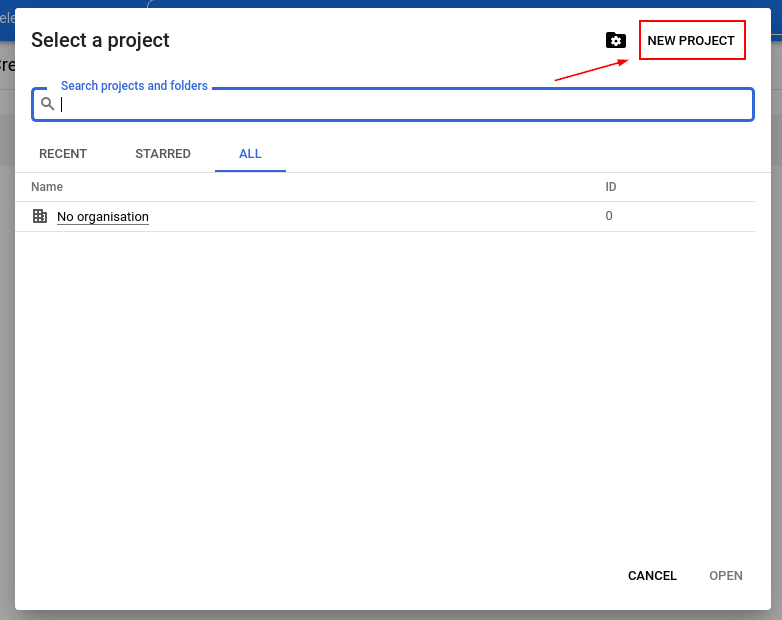
Then Click NEW PROJECT
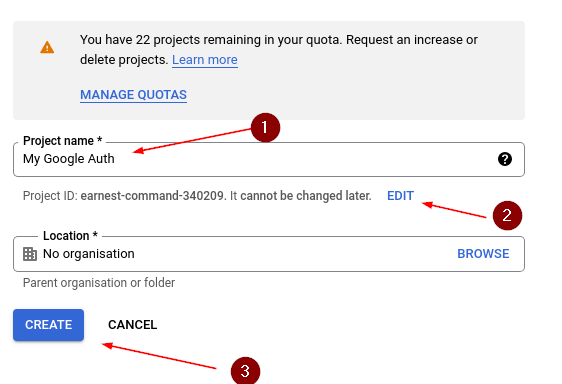
9. Now add the Project name(1); you can edit your project id too(2), but it is optional.
Then click CREATE
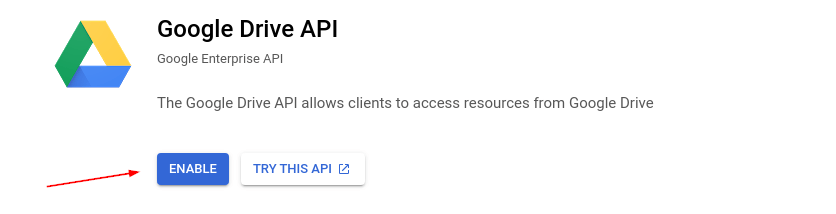
Enable Google Drive API
Click Enabled APIs and Services and click ENABLE APIS AND SERVICES

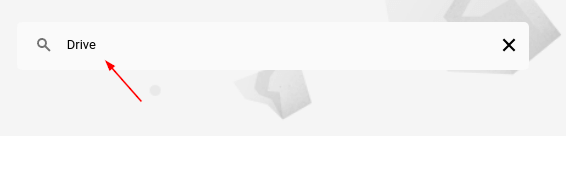
Write Drive in search bar and click enter
Click Google Drive API
And ENABLE it
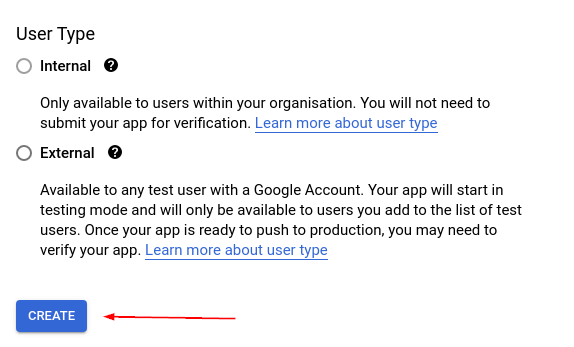
- In the sidebar, click on OAuth consent screen.
- Depending upon your active user, select Internal or External.
- Click CREATE
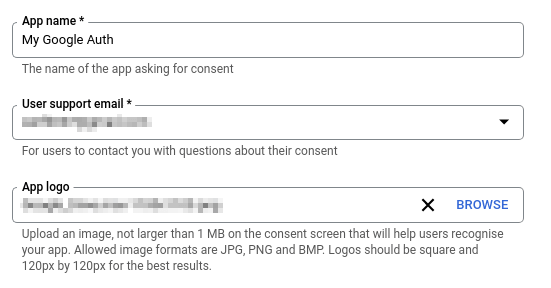
Fill in your app details:
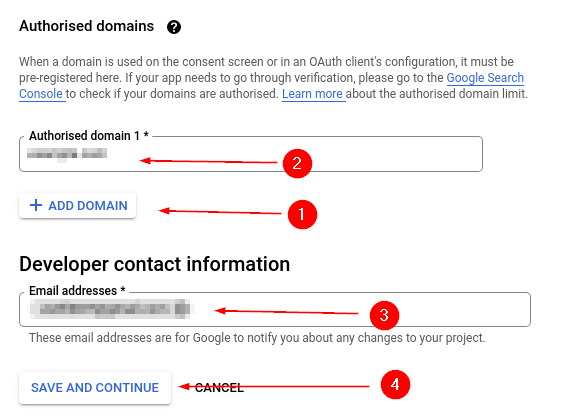
Add the domains where these API Credentials will be used, i.e., your WordPress website.
Click ADD DOMAIN(1), enter your WordPress website(2), set your email(3), and click SAVE AND CONTINUE(4)
Add Scopes and Permissions
For Google Drive, you need the scopes: userinfo.profile and drive.file
- Click ADD OR REMOVE SCOPES(1)
- Select userinfo.profile(1) and drive.file(2)
- Click UPDATE(4)


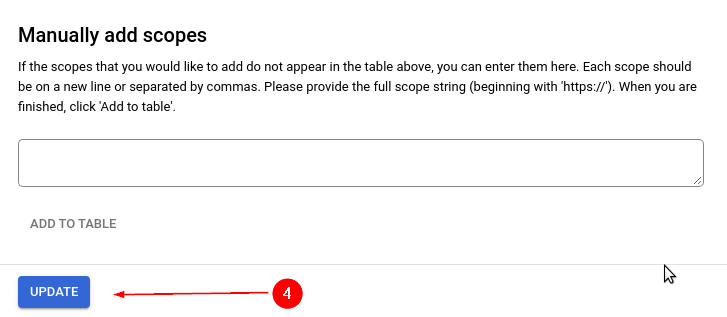
Then click SAVE AND CONTINUE
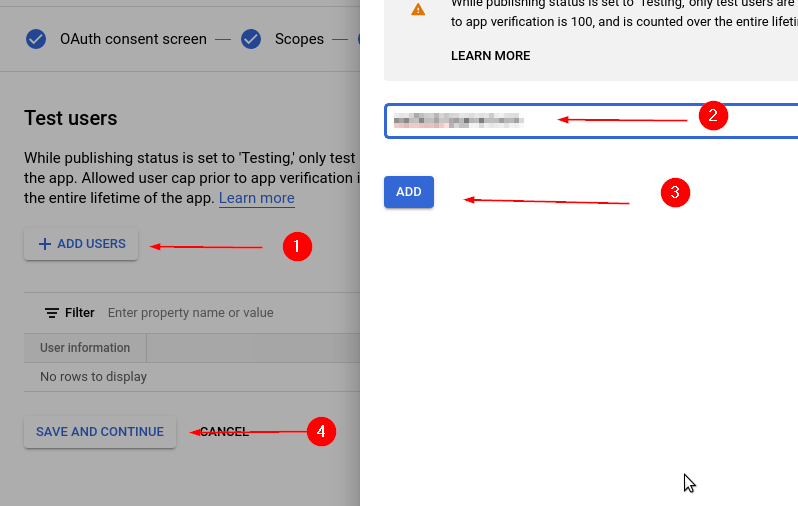
Add Test Users
Now click ADD USERS(1), enter email(s) where you want to store your backups(2), click ADD(3) and then wait some time and click SAVE AND CONTINUE(4)
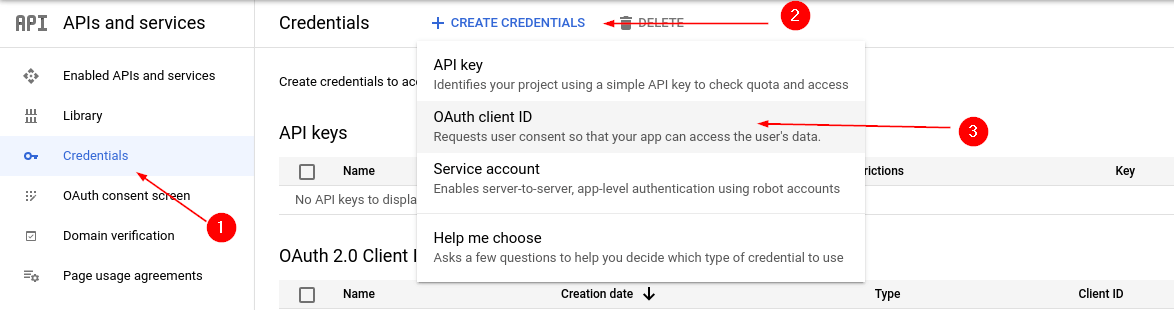
Click on Credentials(1), CREATE CREDENTIALS(2), and then OAuth client ID(3)
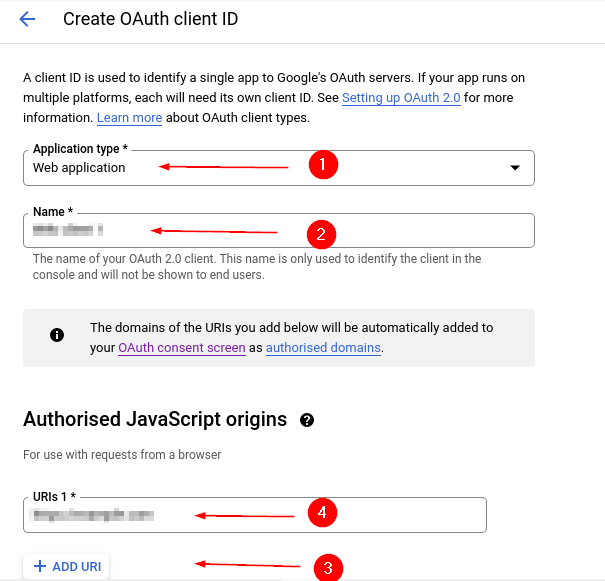
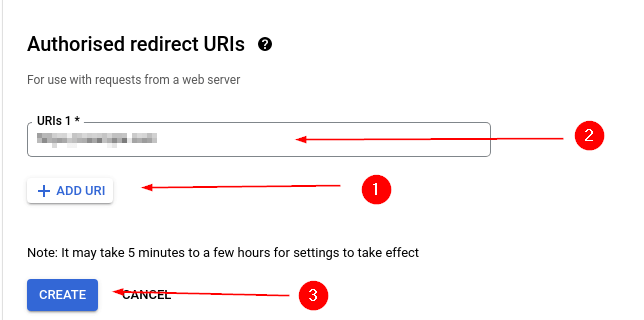
Select Web application in Application type(1), Enter name of your client(2), Now add authorized JavaScript Origin (URL of your site) by clicking ADD URI(3) and in then enter your WordPress Site(4).
Enter the Google Redirect URI that you copied in Step 4 in the textbox(2) and Click CREATE
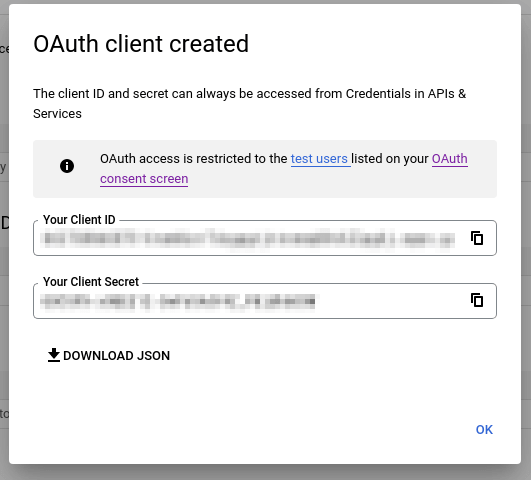
You will be presented with the screen below.
These are your client id and client secret:
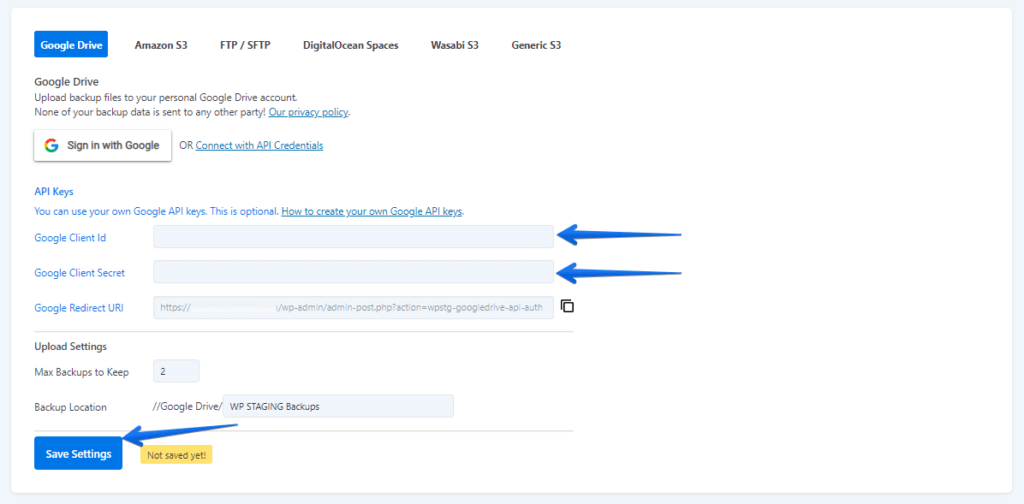
Add Google API Credentials into WP STAGING Settings
Now copy the client id and client secret and paste that into
WP STAGING > Settings > Storage Providers > Google Drive
– Click Save Settings and wait for the page to refresh: