In the realm of WordPress websites, plugins are the engines powering functionality. Yet, their benefits come hand in hand with the need for caution. This guide illuminates the art of securing your WordPress plugin setup through safe backup practices.
Discover how to fortify your website against glitches and losses, regardless of your expertise level.
Contents
The Importance of Backing Up Your WordPress Plugins
Backing up your WordPress plugins is a critical measure to ensure your website’s reliability, security, and longevity. Here’s why it’s paramount:
- Safe Customizations: Stop accidental loss or hacking. Backups swiftly restore plugin settings, keeping your customizations secure.
- Smooth Updates: Plugins can disrupt functionality after updates. Backups offer a safety net to revert to a working version if compatibility problems arise quickly.
- Elevated Security: Plugins are susceptible to breaches. With a backup, you can swiftly restore a clean version after a security compromise, swiftly undoing any damage.
- Effortless Testing: Backups allow risk-free experimentation. Easily revert to the previous state to avoid permanent issues during troubleshooting.
- Consistent Performance: Test new plugin setups confidently, as backups ensure a quick return to the previous configuration—uninterrupted performance despite unexpected issues.
- Time and Effort Savings: Instead of painstakingly reconfiguring plugins, backups allow you to restore settings efficiently. This means less downtime and fewer resources spent.
In essence, backing up your WordPress plugins is a proactive strategy, fortifying your website’s stability, security, and functionality, even when confronted with unforeseen challenges.
DO YOU KNOW? WP Staging can automate the whole process for you. CLICK HERE TO DOWNLOAD IT FOR FREE!
3 Easiest Methods to Backup Your WP Plugins
- Plugin-Based Backups
- Manual Backup via FTP
- Manual Backup via cPanel
Method 1: Plugin-Based Backups
Here is a comprehensive step-by-step guide to safely backing up your WordPress plugins using the WP Staging plugin.
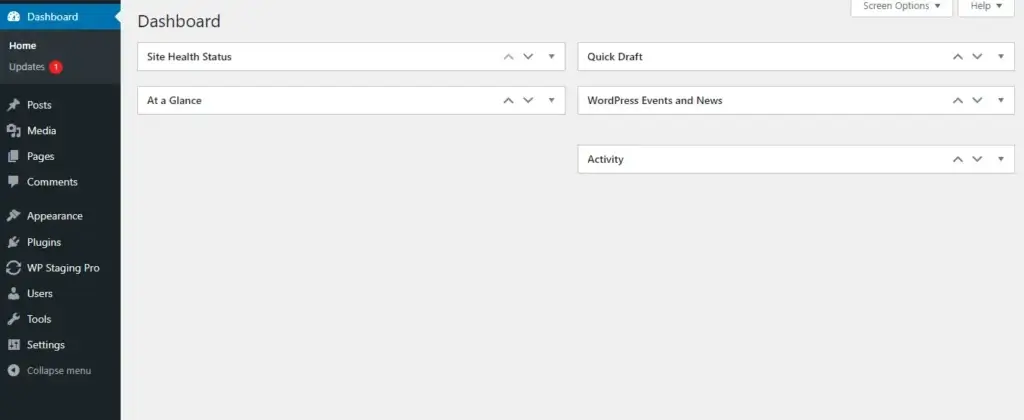
- Log in to your WordPress dashboard.
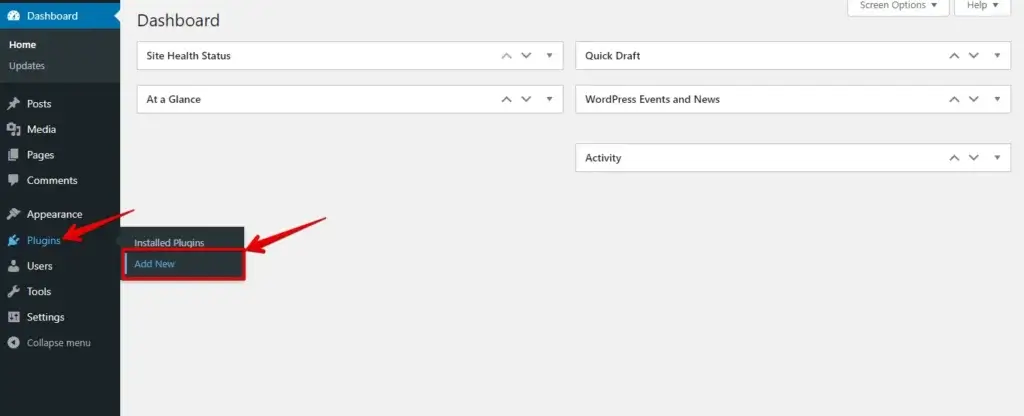
- Go to the “Plugins” section and click “Add New.”
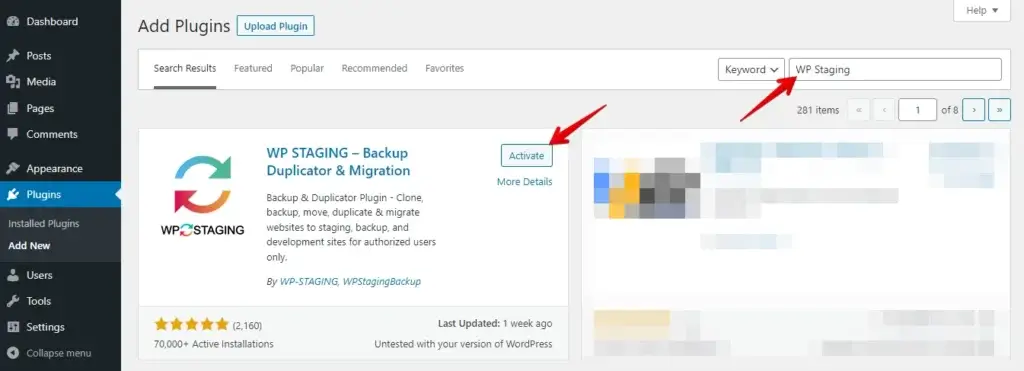
- Search for “WP Staging” in the search bar, then install and activate the “WP Staging” plugin developed by WP Staging.
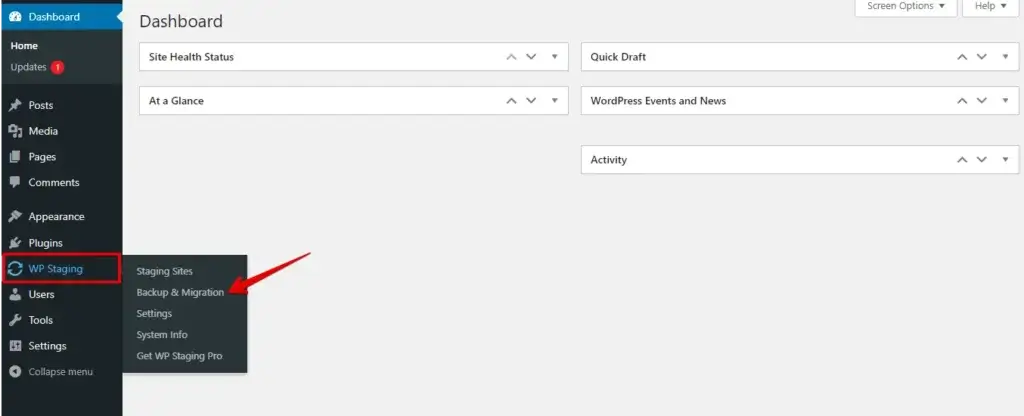
- Upon activation, you’ll notice a fresh addition in your dashboard sidebar labelled “WP Staging.” Access the “WP Staging” tab and choose “Backup & Migration.”
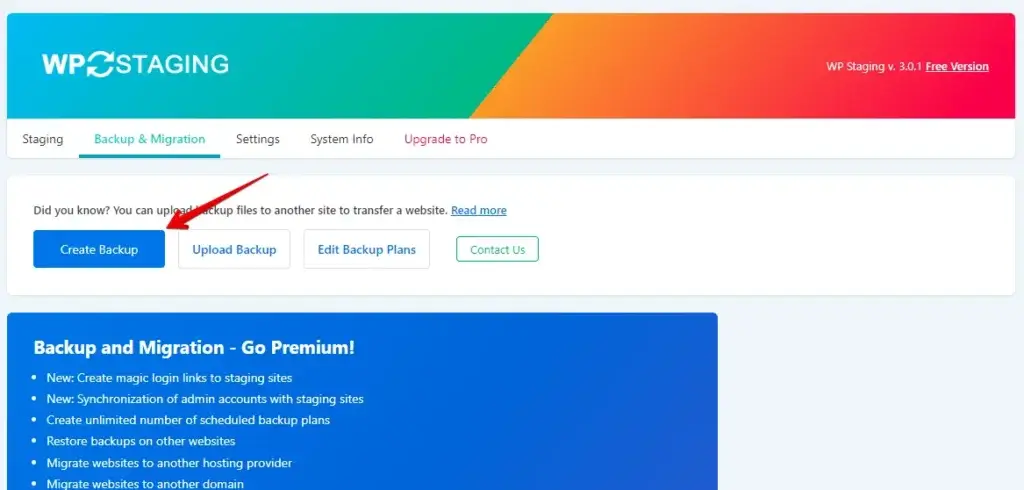
- Now, click on the “Create Backup” button.
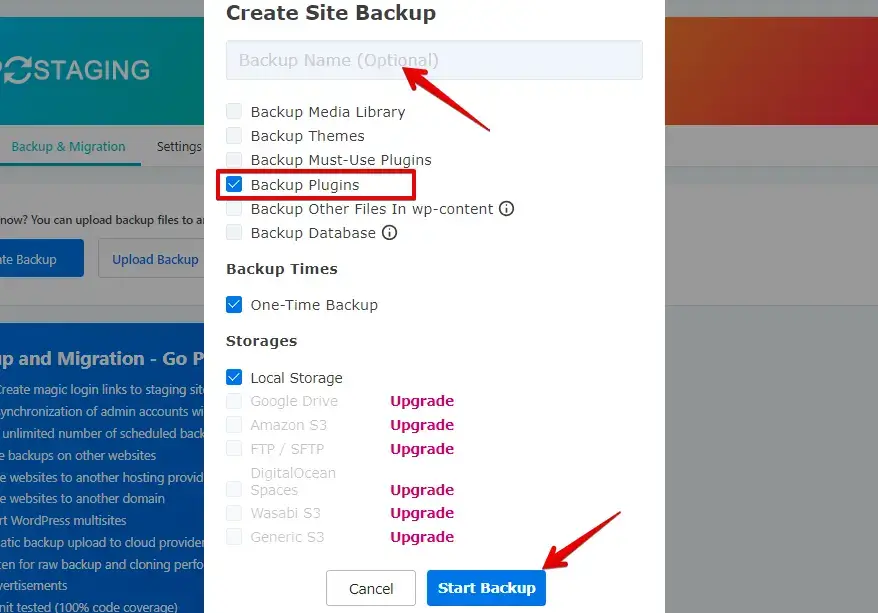
- Provide a name for the backup.
- Check the “Backup Plugins” checkbox to generate a backup of your website’s plugins, then proceed by clicking the “Start Backup” button.
- The backup has been completed.
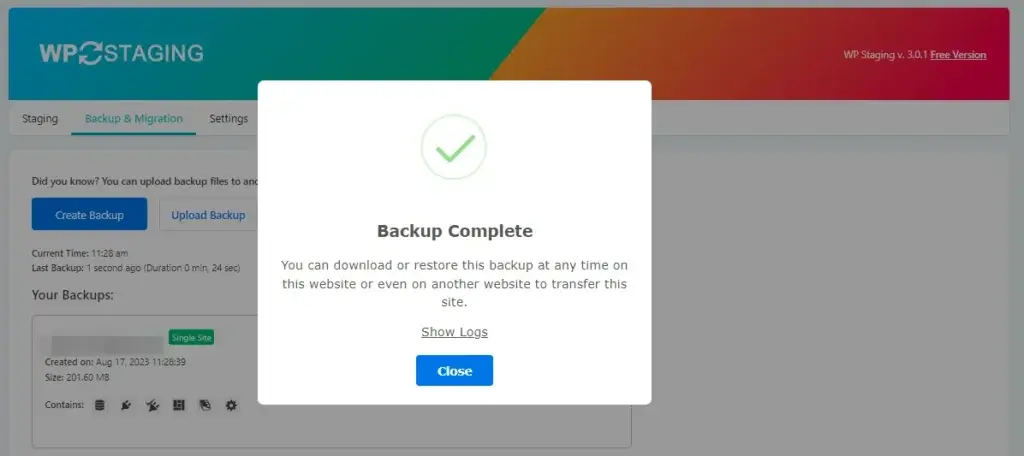
- Once the backup is generated, Click the “Download” button to save the backup ZIP file to your local device.
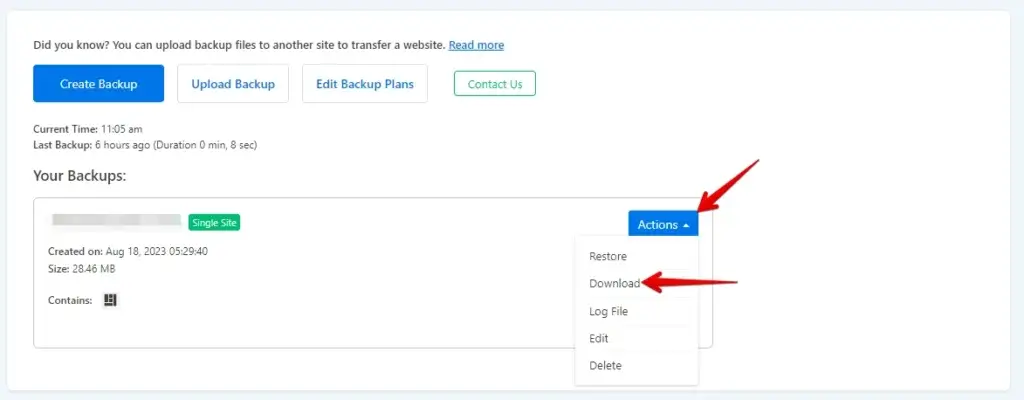
Following these steps, you’ve successfully backed up your WordPress plugins using the WP Staging plugin.
CAN’T FIND THE PLUGIN? CLICK HERE TO DOWNLOAD NOW!
Method 2: Manual Backup via FTP
- Connect with your web server using an FTP client (like FileZilla, Cyberduck, or WinSCP). You’ll require the FTP server address, username, password, and port details.
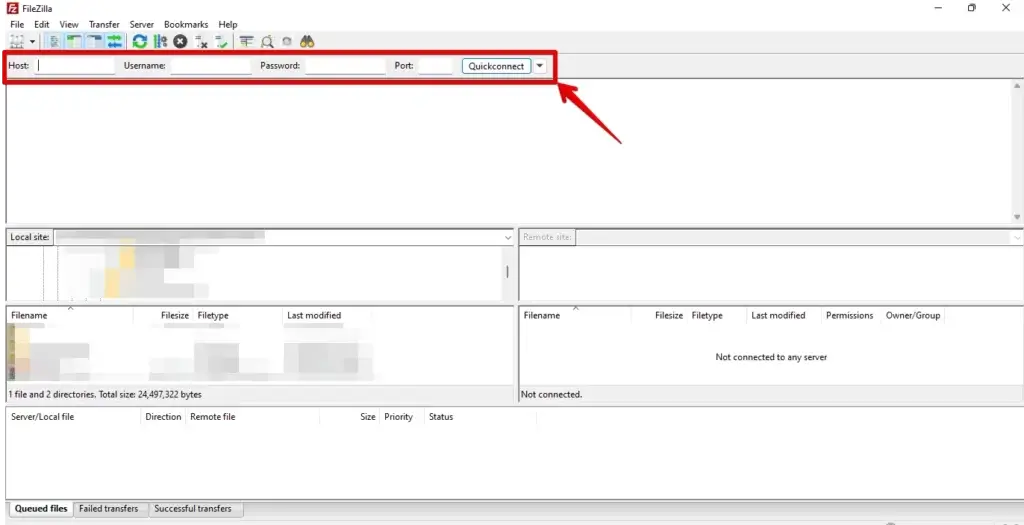
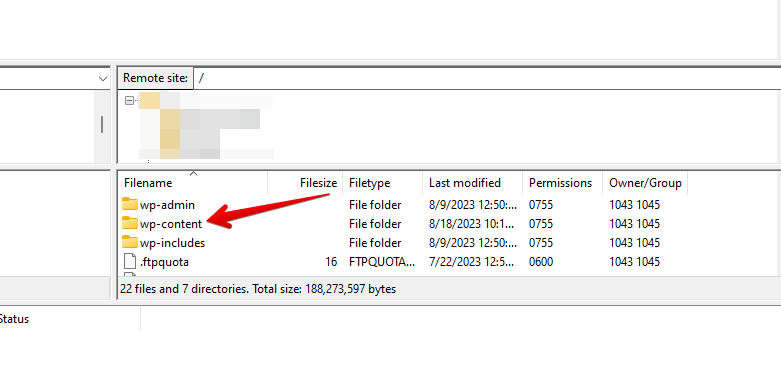
- Once the connection is established, navigate to the “wp-content” folder and gain access by clicking on it.
- Next, navigate to the “plugins” folder.
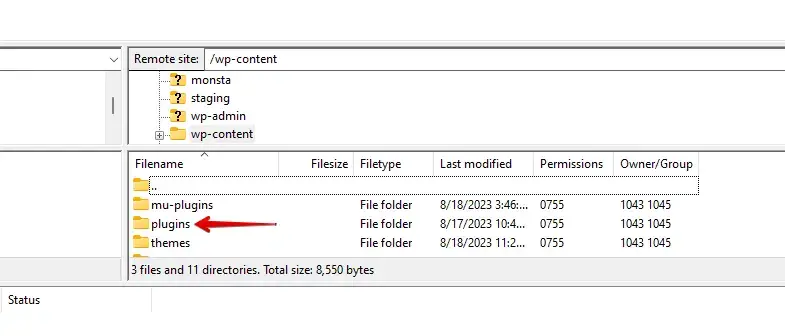
- Here, you will find a complete list of all the installed plugins.
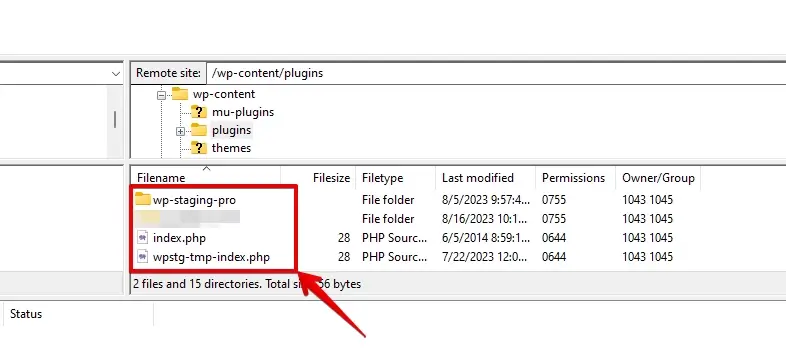
- Simply right-click on the plugin folder you wish to backup, then choose “Download” or “Download to” from the context menu.
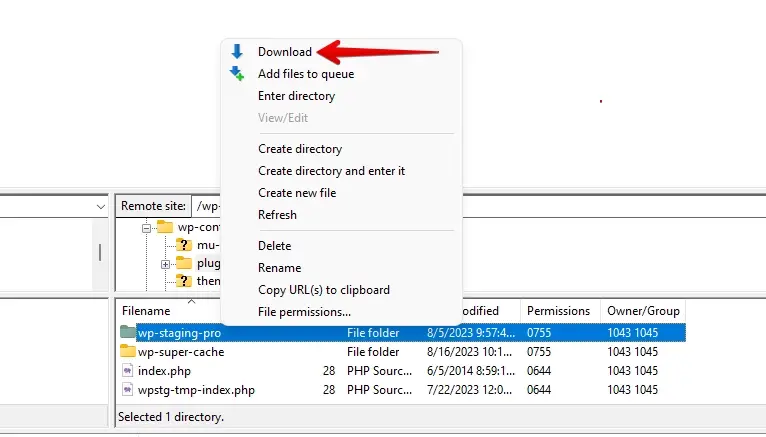
- The FTP client will start downloading the plugin folder. The time taken depends on the size of the plugin and your internet connection speed.

Generating backups via FTP for your plugins involves a hands-on approach. It’s essential to regularly repeat these procedures to maintain the safety of your plugin data. To enhance security further, it’s advisable to complement FTP backups with alternative methods such as backup plugins or cloud storage services.
Method 3: Manual Backup via cPanel
- Access your web hosting account’s cPanel dashboard. You should have received login credentials from your hosting provider.
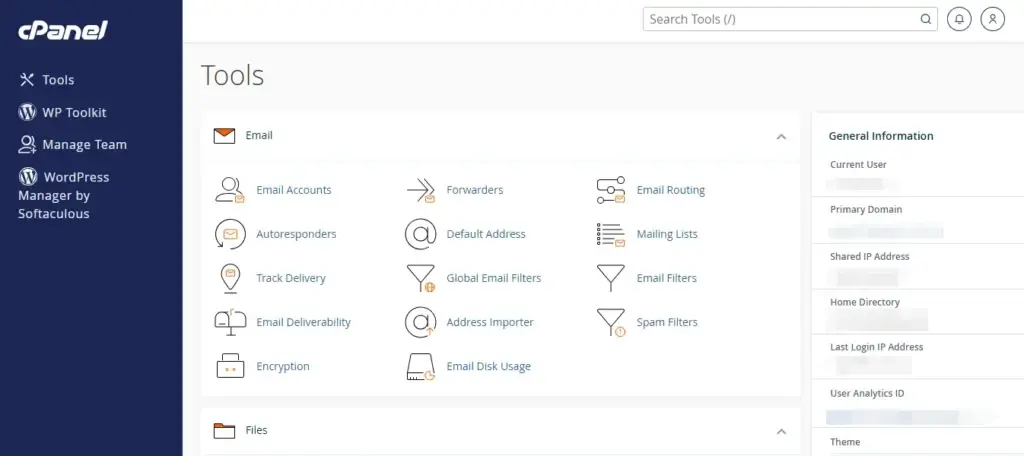
- In cPanel, look for the “Files” section and click on “File Manager.”
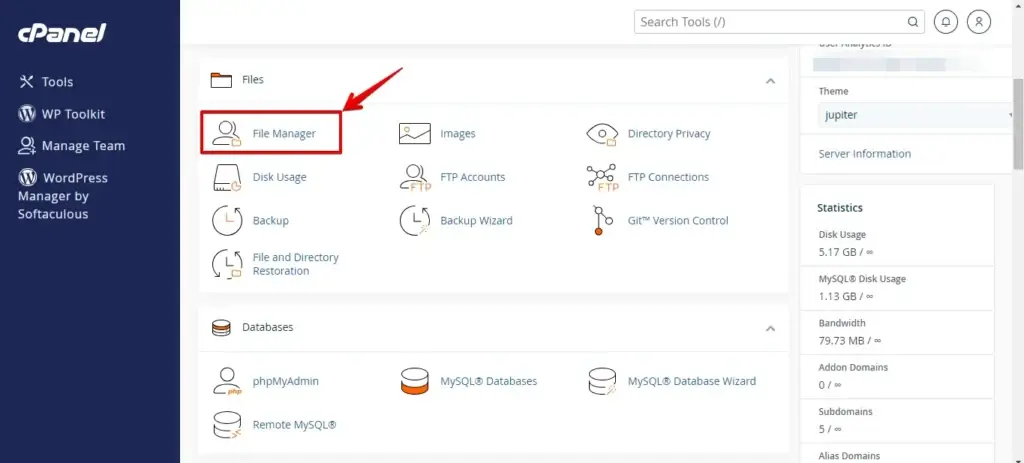
- Within the File Manager, locate the directory where your WordPress website resides. This directory is commonly named “public_html” or “www”.
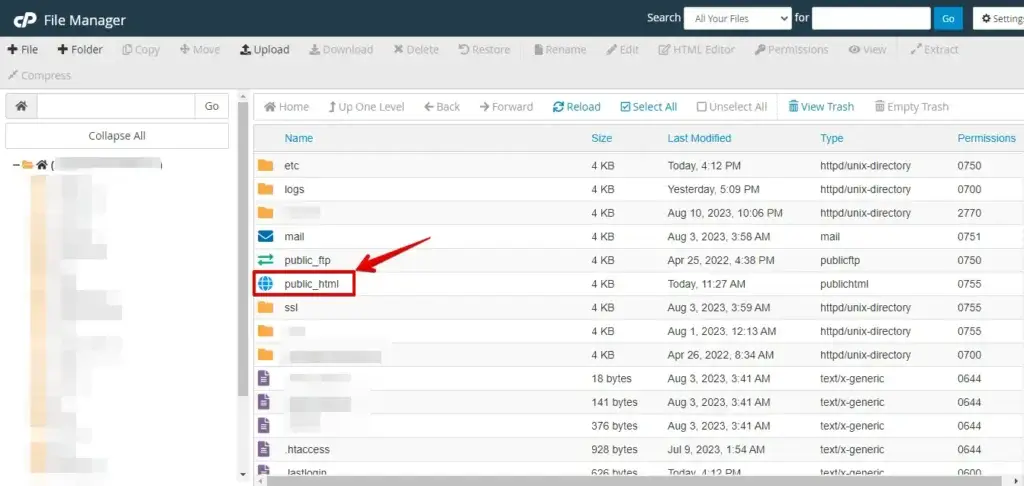
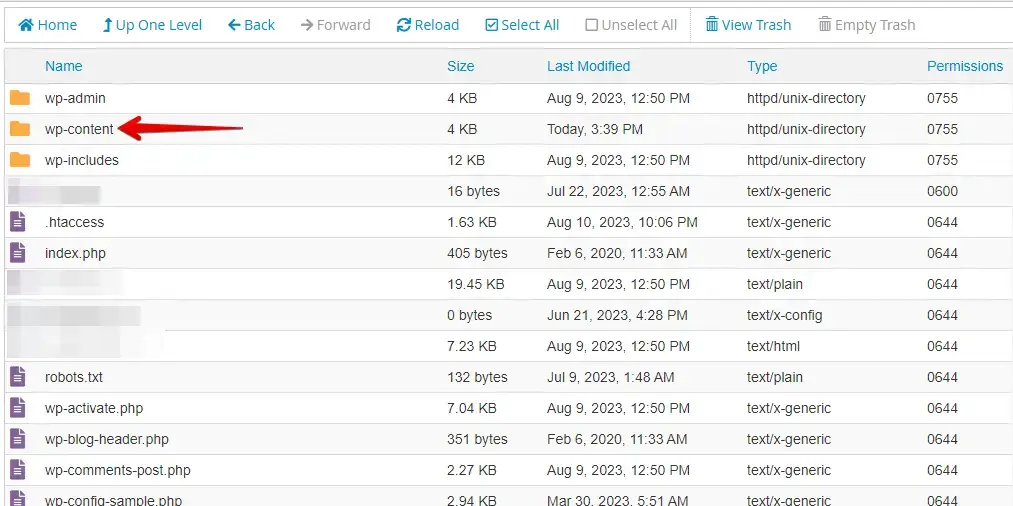
- Navigate to the “wp-content” folder in the WordPress root directory, then access it by clicking on it.
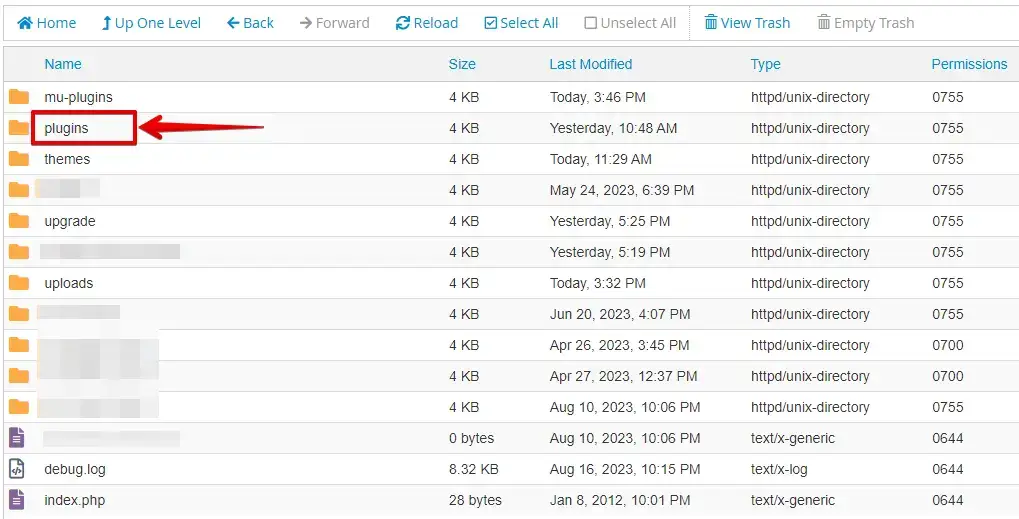
- Then go to the “plugins” Folder.
- Here, you will find a compilation of all currently installed plugins.
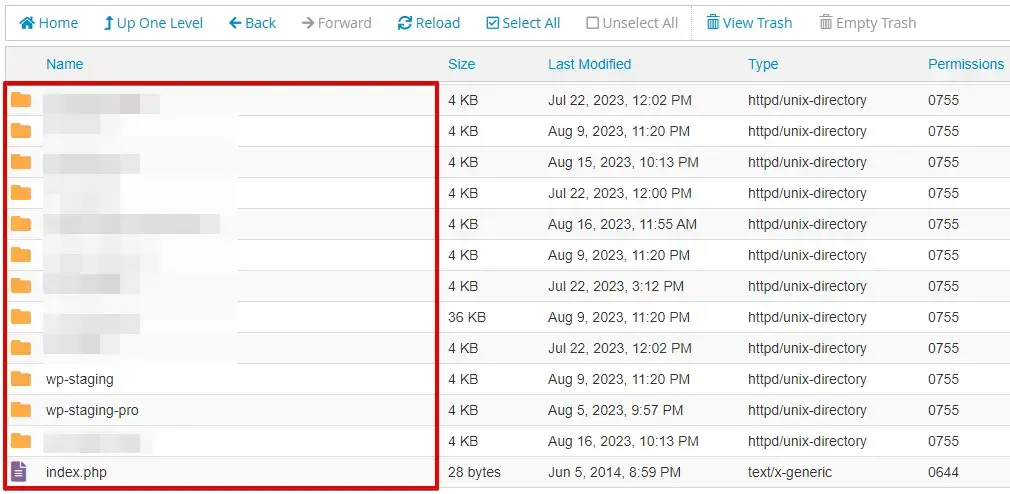
- Right-click on the plugin folder you want to backup, and select “Compress” or “Compress to” from the context menu.
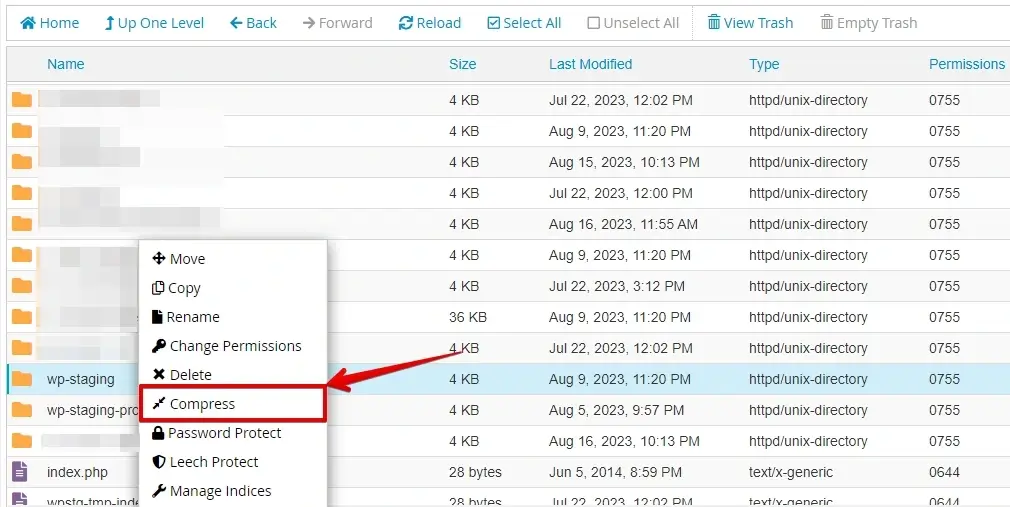
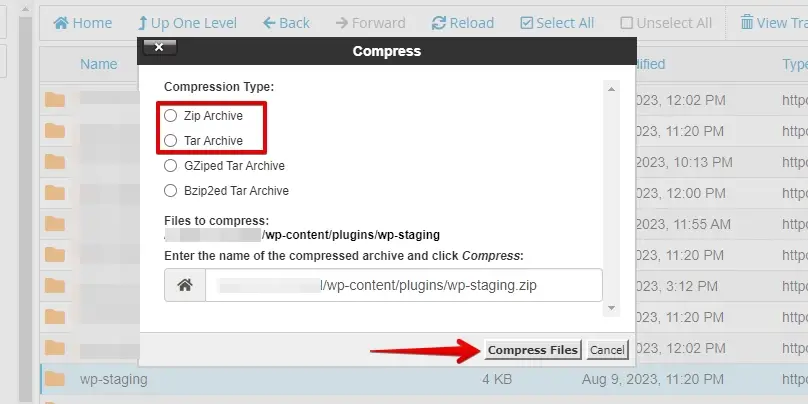
- Select a compression format such as “Zip” or “Tar.gz,” then proceed to click the “Compress Files” button. This action will generate a compressed archive containing your plugin files.
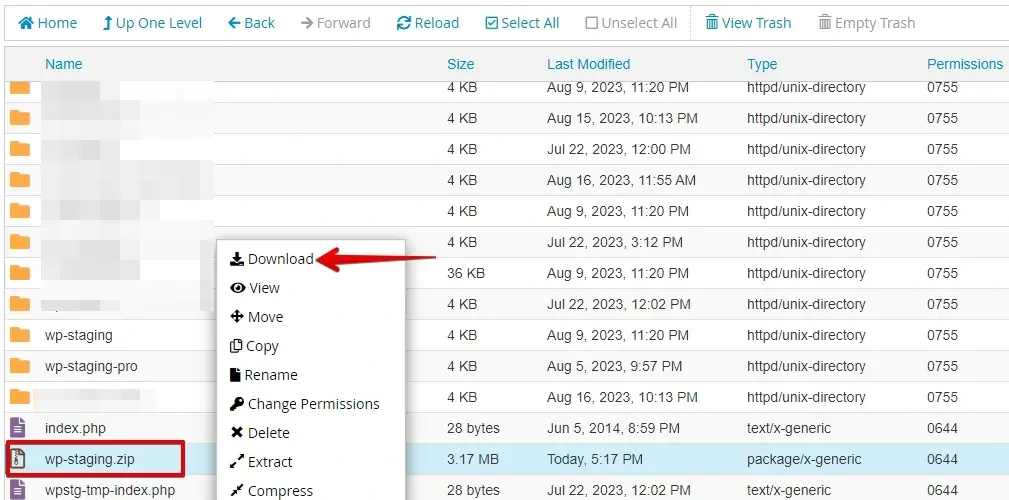
- After the compression process finishes, perform right-click on the freshly generated compressed folder and opt for the “Download” choice.
- This action will store the compressed backup files of the plugin on your local computer.
By adhering to these instructions, you’ve successfully generated a manual backup of your WordPress plugin and additional site content through cPanel’s File Manager.
Conclusion
To secure your WordPress plugins, utilize diverse backup approaches: manual copies and automated plugins. Regular tests ensure readiness. A structured backup routine offers peace of mind, letting you focus on enhancing your site’s performance and ensuring your plugin data remains intact.

