Your WordPress website’s database is the heart and soul of your digital presence, storing vital information that powers your site. However, this database can accumulate unnecessary clutter over time, slowing down your website’s performance.
That’s why it’s crucial to prioritize WordPress database optimization to ensure your site runs smoothly.
This article will explore seven tried-and-true methods for optimizing your WordPress database and enhancing your website’s overall performance.
Whether you’re a seasoned developer or a WordPress beginner, these tips will help keep your site in shape.
Contents
What is the WordPress Database?
The WordPress database is the backbone of your website, where all the essential data is stored. This includes your posts, pages, comments, user information, settings, etc.
WordPress relies on a database management system, usually MySQL, to efficiently store and retrieve this information.
Why is Database Optimization Important?
A well-optimized database ensures smooth website performance, quick loading times, and the ability to handle heavy traffic without crashes. Here’s why it’s crucial:
- Faster Loading – Speedier sites improve user experience and lower bounce rates, key factors for Google’s rankings.
- Enhanced Security – Optimal databases bolster security, safeguarding user data and your site’s reputation.
- Lower Server Load – Database optimization eases server strain, accommodating more concurrent visitors.
- SEO Boost – Google factors in speed and performance, making a well-optimized database an SEO advantage.
The Road to Optimization
Now that we understand the significance of database optimization, let’s explore the steps to achieve it effectively.
1. Regularly Back Up Your Database
Excessive database queries can slow down your site. Review your theme and plugins to minimize unnecessary queries and optimize the essential ones.
2. Delete Unnecessary Data
Deleting unnecessary data from your WordPress database is essential in optimizing its performance. Here’s a step-by-step guide on how to do it:
- Log in to your hosting account.
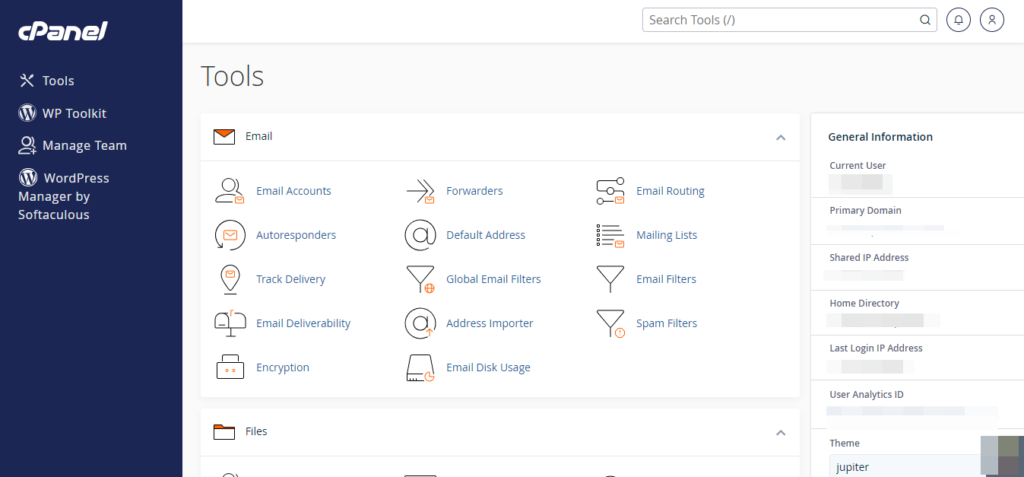
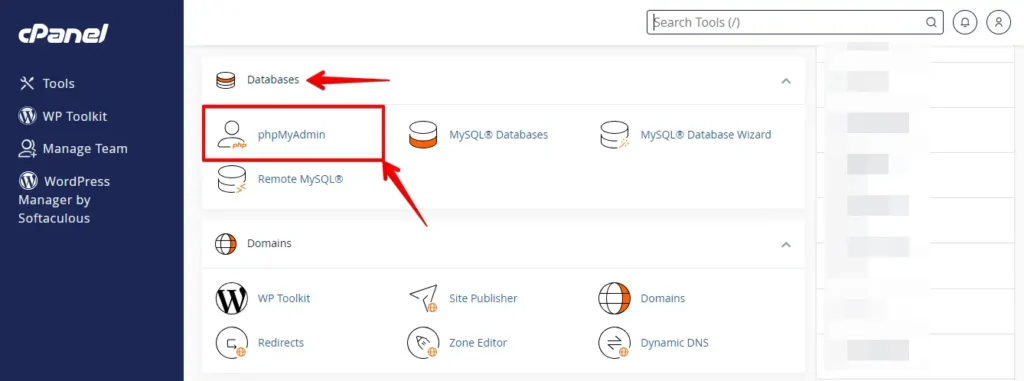
- Look for a section called “Databases” or “Database Management.”
- Find and click on phpMyAdmin.
- In phpMyAdmin, click your WordPress database. Make sure you don’t select any other databases if you have multiple.
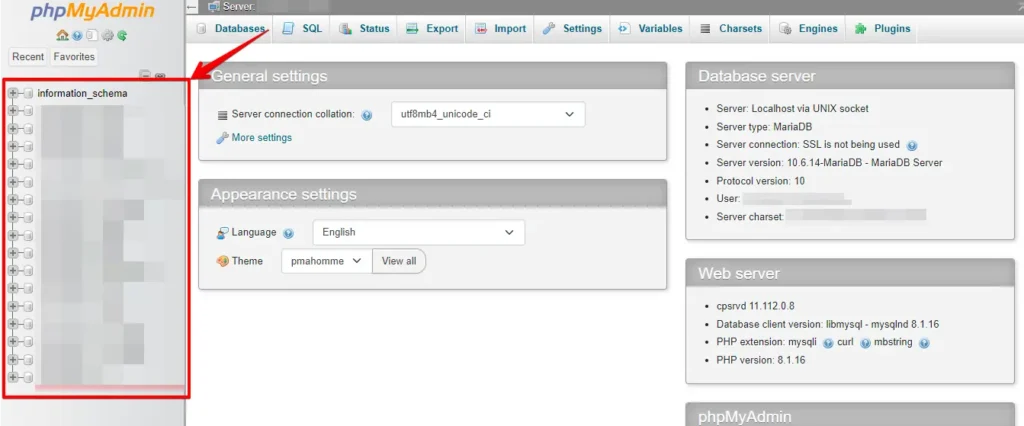
- In phpMyAdmin, you’ll see a tab labeled “SQL.” Click on it.
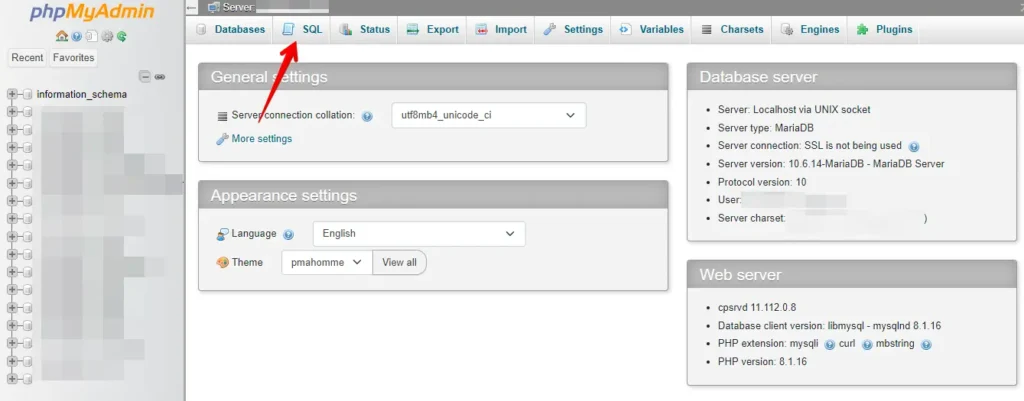
- Here, you can run SQL queries to delete specific types of data.
- For example, to delete all spam comments, you can use this SQL query:
DELETE FROM wp_comments WHERE comment_approved = 'spam';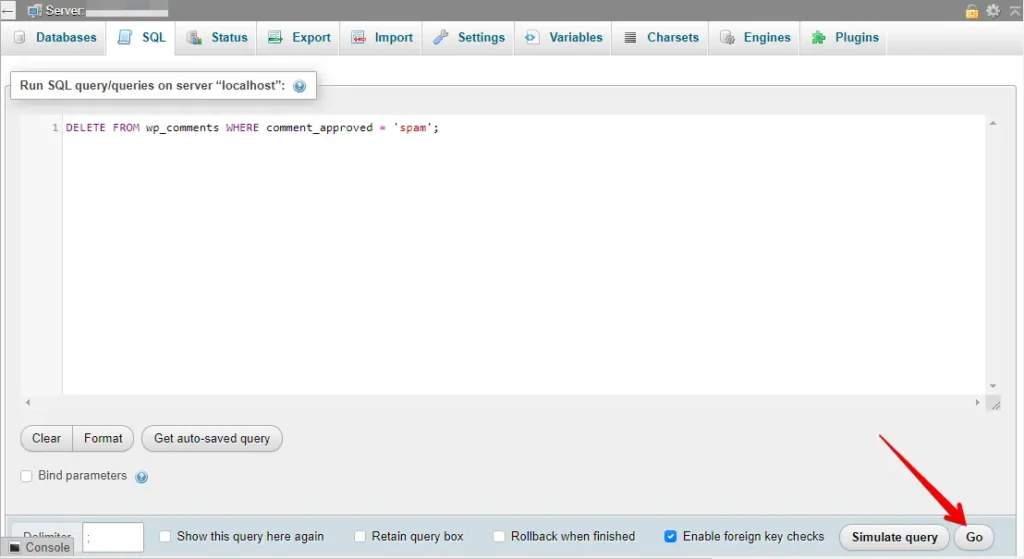
Replace wp_ with your WordPress database prefix if it’s different.
- To delete all post revisions, you can use this query:
DELETE FROM wp_posts WHERE post_type = 'revision';Be extremely cautious when running SQL queries, as they can permanently delete data. Double-check your queries and ensure you’re targeting the correct data.
3. Limit Post Revisions
You can limit the number of revisions stored or disable them altogether. Here are the steps to limit post revisions in WordPress:
- Log in to your hosting account’s cPanel.
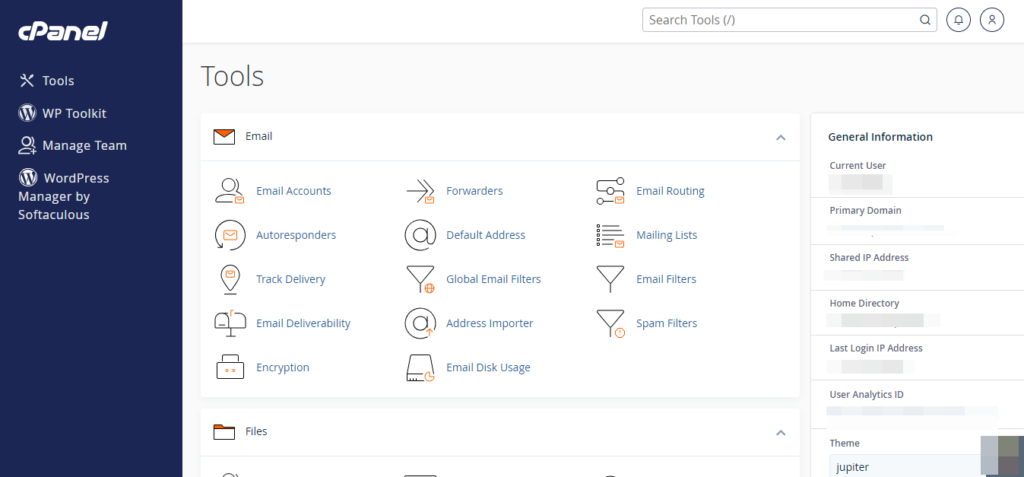
- In the cPanel dashboard, look for the “File Manager” icon or option.
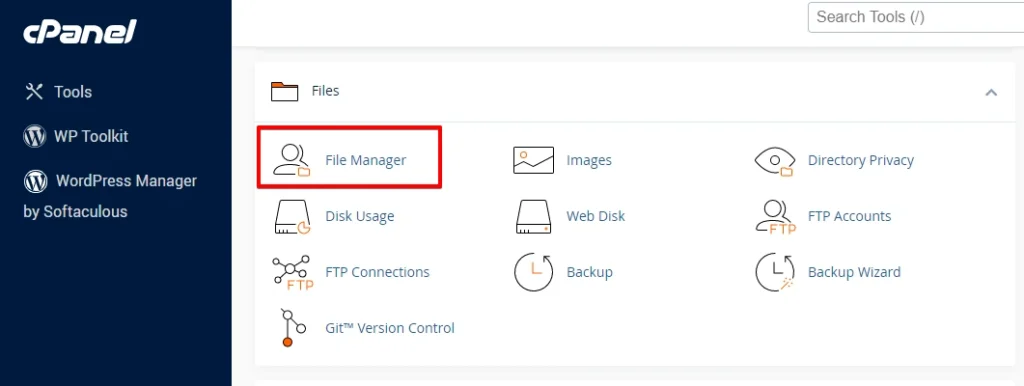
- Go to the folder where your WordPress website is set up, usually found within the “public_html” directory.
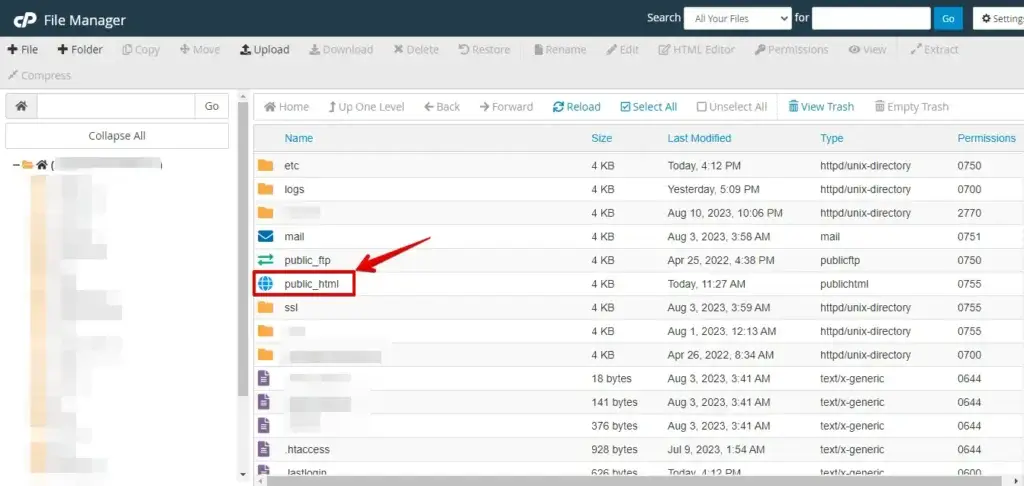
- In your WordPress files, locate the
wp-config.phpfile. - Please right-click on the
wp-config.phpfile and choose to edit it.
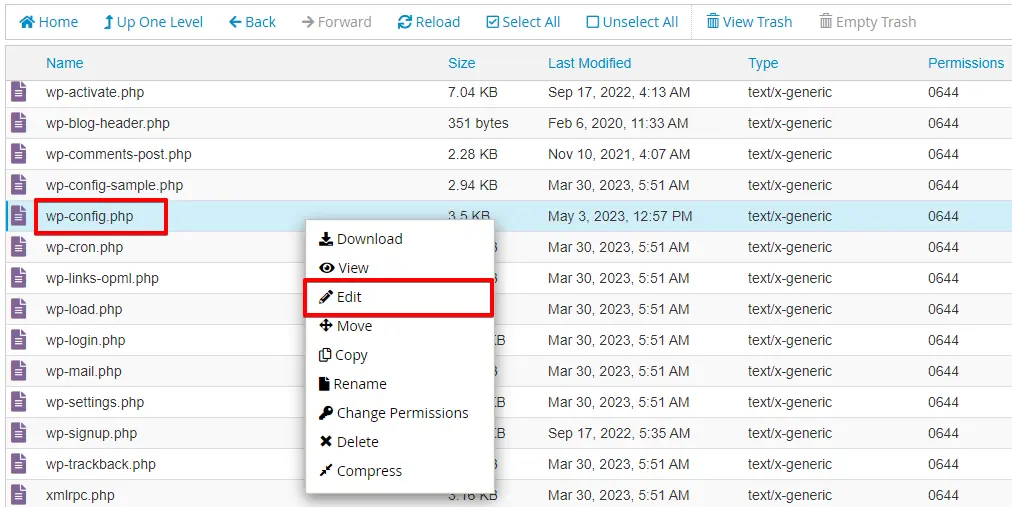
- Inside the
wp-config.phpfile, add the following line of code anywhere before the line that says/* That's all, stop editing! Happy blogging. */:
define('WP_POST_REVISIONS', 3); // Limit to 3 revisions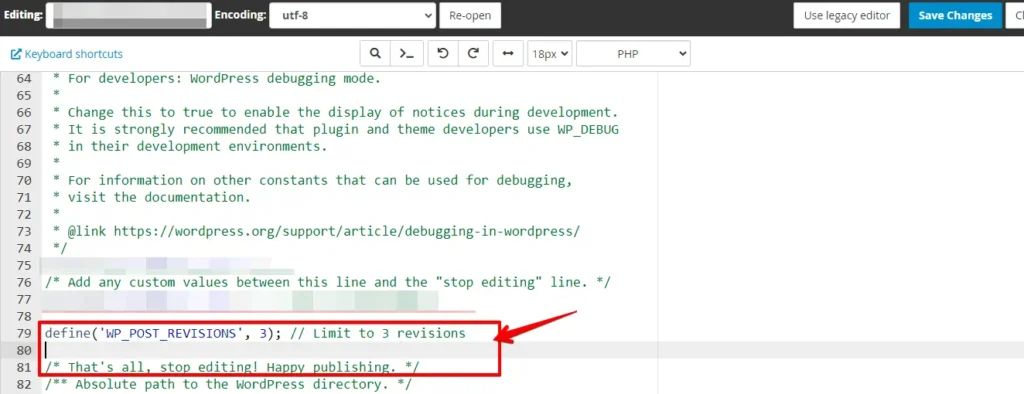
- After adding the code, save the
wp-config.phpfile.
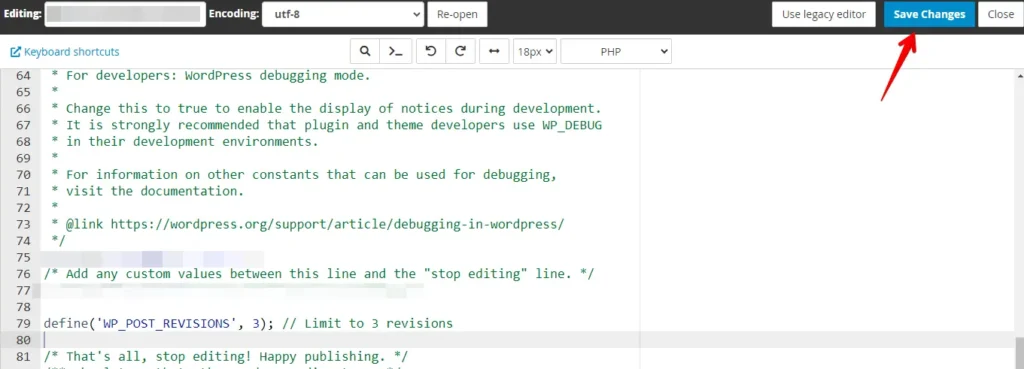
That’s it! You’ve successfully limited the number of post revisions in WordPress by modifying the wp-config.php file. This helps keep your database cleaner and more efficient.
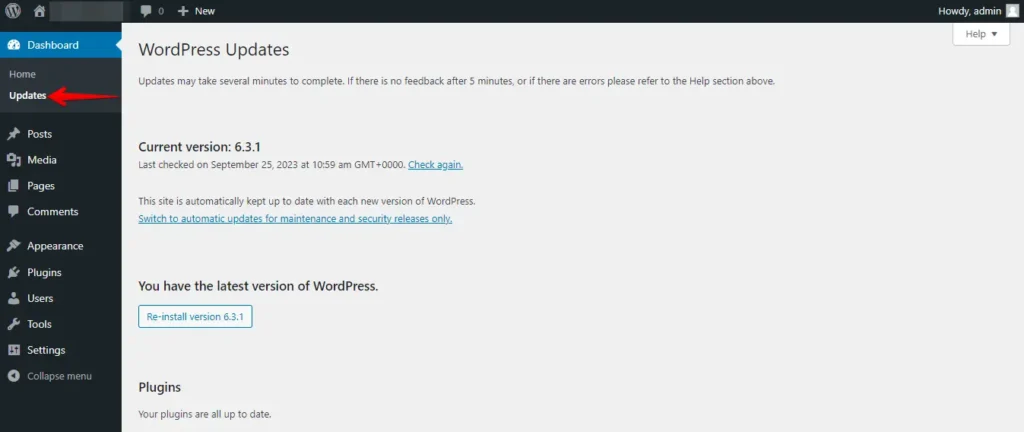
4. Keep WordPress and Plugins Updated
Ensure that WordPress core, themes, and plugins are up to date. Developers often release updates that include performance improvements and security fixes.
5. Optimize Images
Compress and optimize images before uploading them to your site. Use plugins like Smush or EWWW Image Optimizer to optimize existing images automatically.
Here’s a step-by-step guide on how to optimize images for your WordPress website:
- Start by logging into your WordPress dashboard.
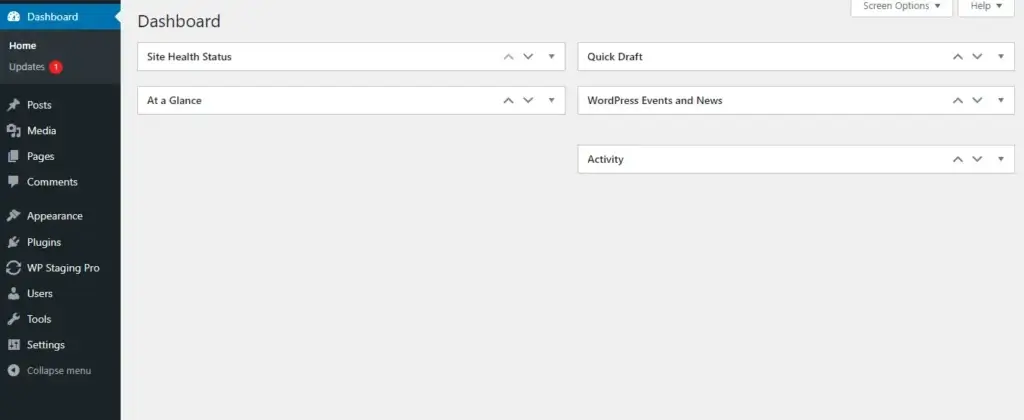
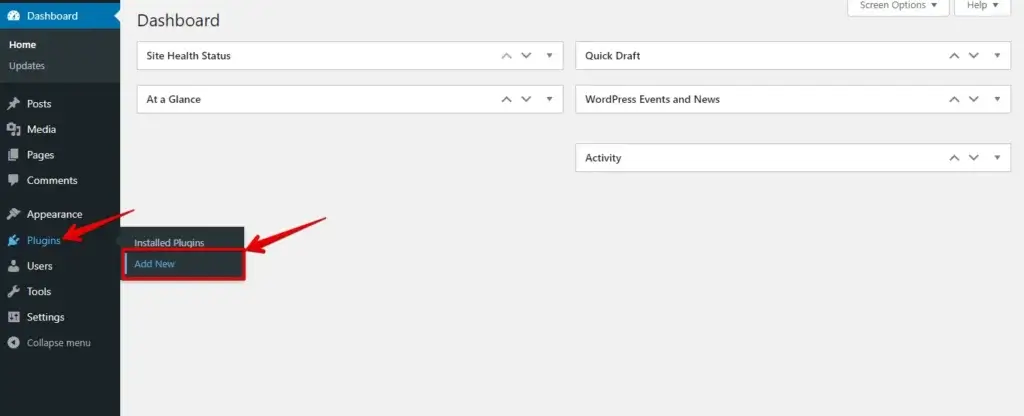
- Go to “Plugins” in the left sidebar and click “Add New.”
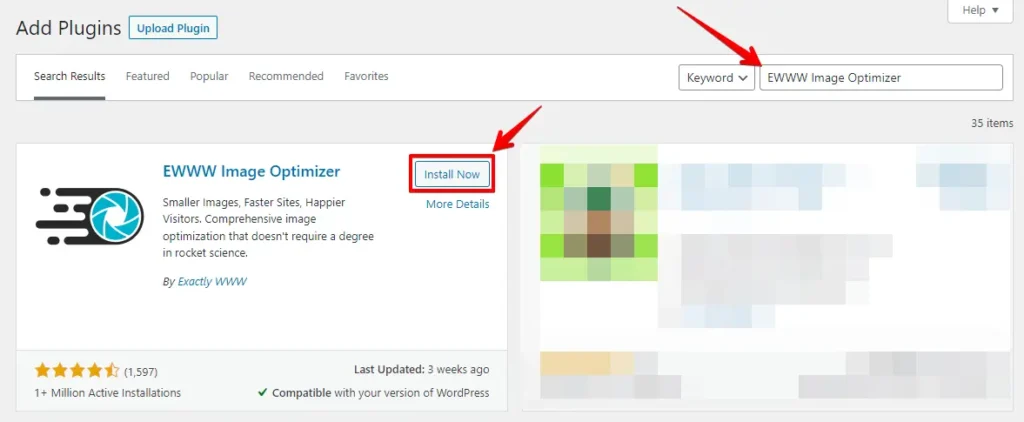
- Search for an image optimization plugin like “Smush” or “EWWW Image Optimizer” using the search bar.
- Click “Install Now” next to the plugin you choose, and then click “Activate” to activate the plugin.
- Activate the plugin and go to its settings (usually under “Media” or “Settings”).
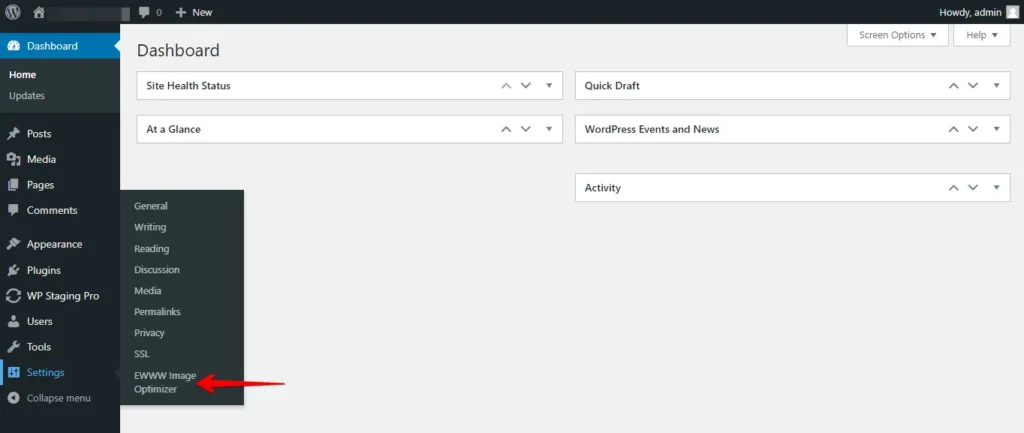
- Configure all the settings of the plugin and save your changes.
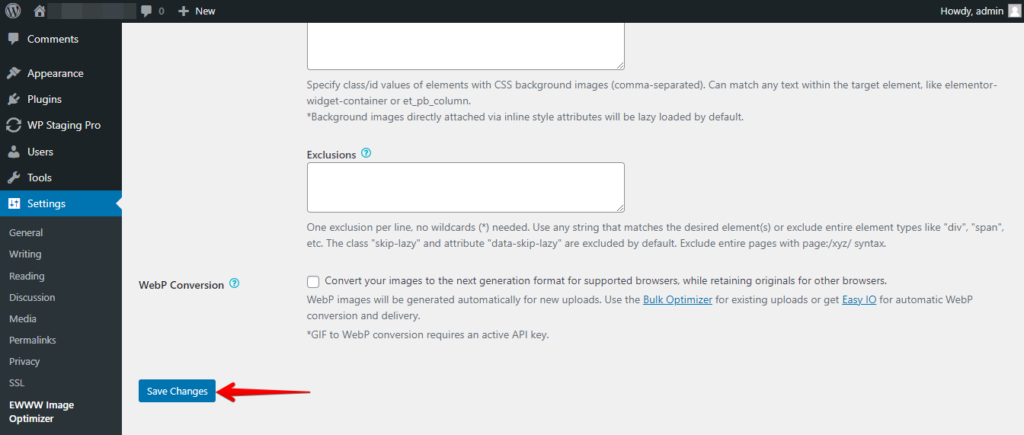
Optimizing images speeds up your site and enhances user experience. Use image plugins to reduce file sizes while preserving quality, boosting your WordPress site’s performance.
6. Use a Reliable Hosting Provider
Choosing a reliable hosting provider optimized for WordPress is crucial for ensuring your website’s performance, security, and overall success.
Take your time to make an informed decision, and regularly monitor your website’s performance to ensure it meets your expectations.
Conclusion
In summary, optimizing your WordPress database is crucial for top-notch website performance. You can significantly enhance your site’s speed and user experience by implementing the recommended strategies and maintaining good practices.
Choosing a reliable hosting provider is also vital. Regular maintenance ensures long-term efficiency and an excellent user experience.

