
In this guide, I’ll show you how to speed up your WordPress website tremendously by setting up a few tools.
Learn how to speed up your website loading times by a factor 5 or more. Let’s go for a better user experience and improved search engine rankings 💪
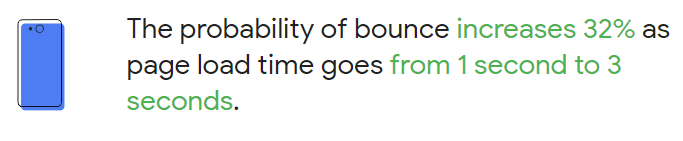
Lowering your site page load and increasing the site speed will tremendously improve your site’s user experience. Your website visitors will stay longer, and the number of users who switch away from your website after opening the first page will be lower than before. You may already have heard about this metric as the so-called bounce rate.
Even better, site speed is a Google ranking factor which means your website can get higher search rankings on Google after a while. That will result in more users finding your website and getting more traffic.
There are a few reasons your WordPress website can be slow.
The most common reasons are "No caching" and a too-big page size.
In addition to these two main reasons, several other variables can affect your website’s speed:
- Many installed plugins
- Configuration of your server
- Bad code in one or more plugins.
- Bad code in the theme
- Slow Network Connectivity
- Slow Server Response
Before I begin, it is essential to remember that not all recommended actions might improve your website’s loading time. One might work better than the other, and some affect your website loading time only negligible.
Contents
Video: How to Speed up WordPress
If you prefer watching a video instead of reading this article on how to speed up WordPress, You can watch this entire article as a video:

Tools We Use to Speed Up WordPress
- ShortPixel Image CDN
- WP Super Cache
- Autoptimize
- wp-staging.com
- Pingdom
- Google PageSpeed Insights
- GiftofSpeed GZIP Test
Benchmark Your Website’s Pagespeed
Let’s start with some benchmark tests to get an overview and understanding of your own website’s speed.
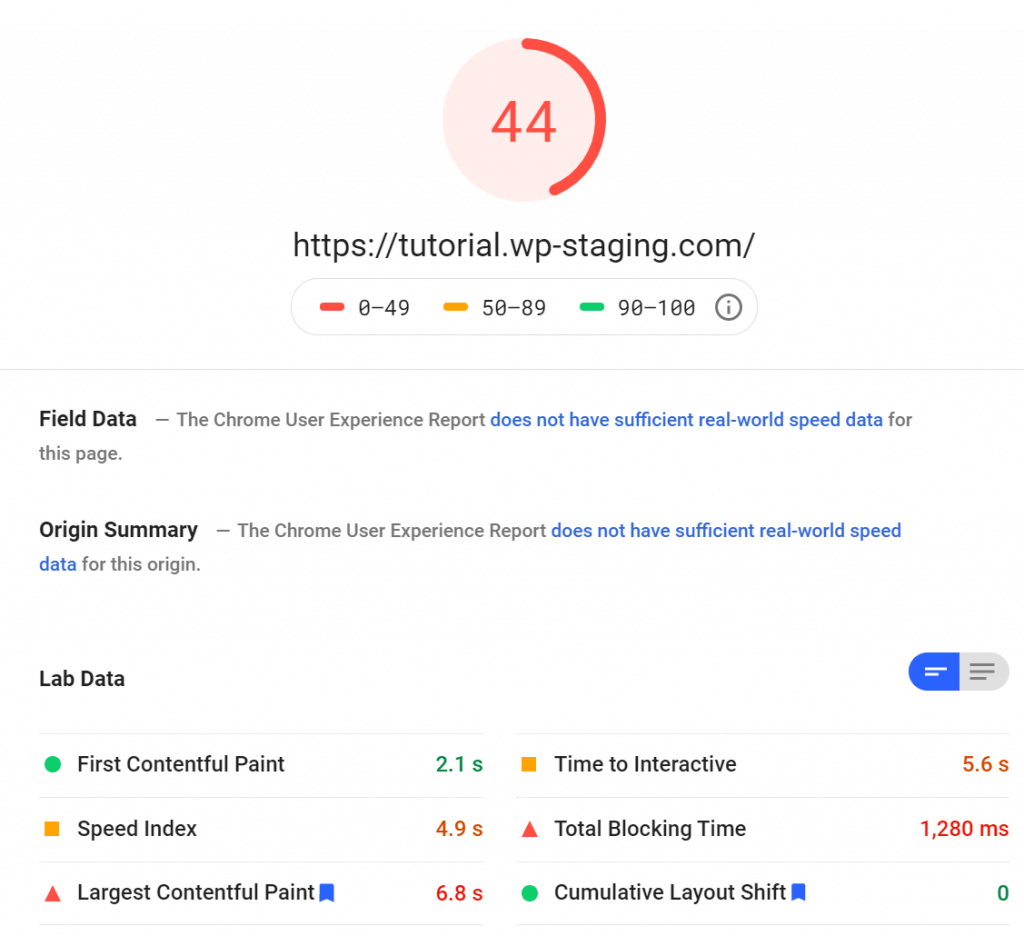
For benchmarking and analyzing the website’s speed, You can use the free online page speed tools Pingdom and Google PageSpeedInsights.
These results are from a sample website with WordPress 5.6, a handful of popular plugins, and the free version of the theme "Astra." and a far away from fast loading WordPress website:
Activate Caching
Let’s start with the first step, installing a cache plugin.
A caching plugin saves the visible HTML output of your website in temporary files on your website. Executing code from a plugin or theme is very time expensive because the server has to do numerous calculations to do the execution.
With caching, these calculations must be done only once when a visitor opens your site. The caching plugin checks first if there is an existing cache for specific content.
If the content is already cached, It directly outputs the pre-calculated HTML output instead of executing all the code again. Then the server has more free resources to load your website faster. Only installing a caching plugin and adjusting it correctly can make your website ten times faster or even more.
Before you follow this guide, we recommend creating a clone of your website to safely test out all the steps from this WordPress speed up guide. The following instructions are easy to follow, but it’s still possible that one of your plugins or your theme does not play well with these performance adjustments.
So before anything breaks on your production website, apply all modifications for testing purposes on your website’s clone first. If everything goes well, you can apply the same optimizations to your production site then.
For cloning your website quickly, You can use the free plugin WP STAGING. It can create a clone with a simple click, and you can try out all possible speed up optimizations in a secure environment.
I recommend WP Super Cache. Automattic develops this plugin. That’s the same company that’s responsible for WordPress core development. The plugin is free, mighty, and simple if you understand how it works.
This plugin is in many options, even as powerful as premium plugins, such as the popular WP ROCKET you may have heard of before.
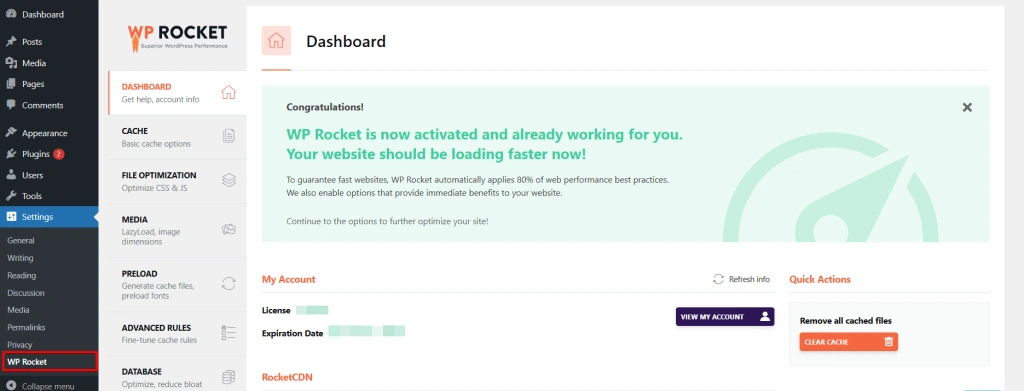
WP ROCKET has a more user-friendly interface and might be easier to use for first-time beginners. Don’t worry; I’ll take your hand and show you all the clicks you need to do to get similar results as you would use a premium caching plugin.
So you get the same speed results for free!
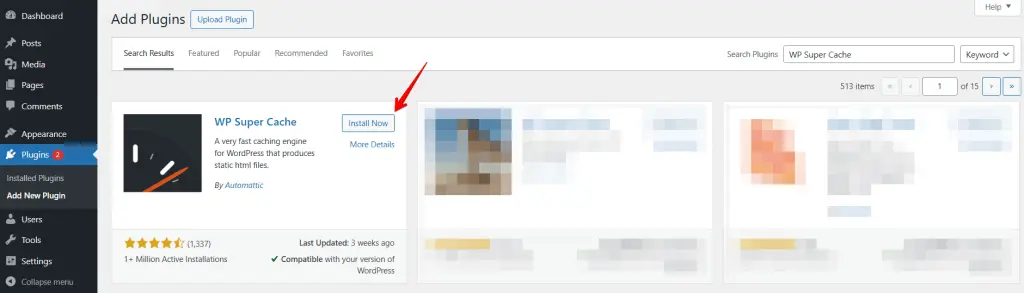
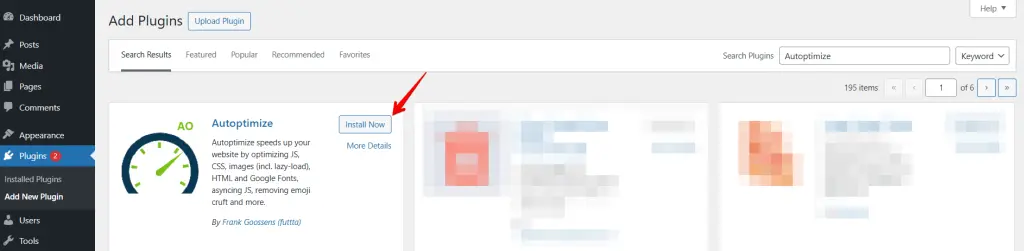
Go to the plugin store and search for WP Super Cache.
After installing and activating the WP Super Cache plugin, let’s set it up.
It would be possible to activate the cache via the "Easy" section by choosing "caching on," but at this point, we go directly to the "Advanced" area, as we can configure the settings here more precisely.
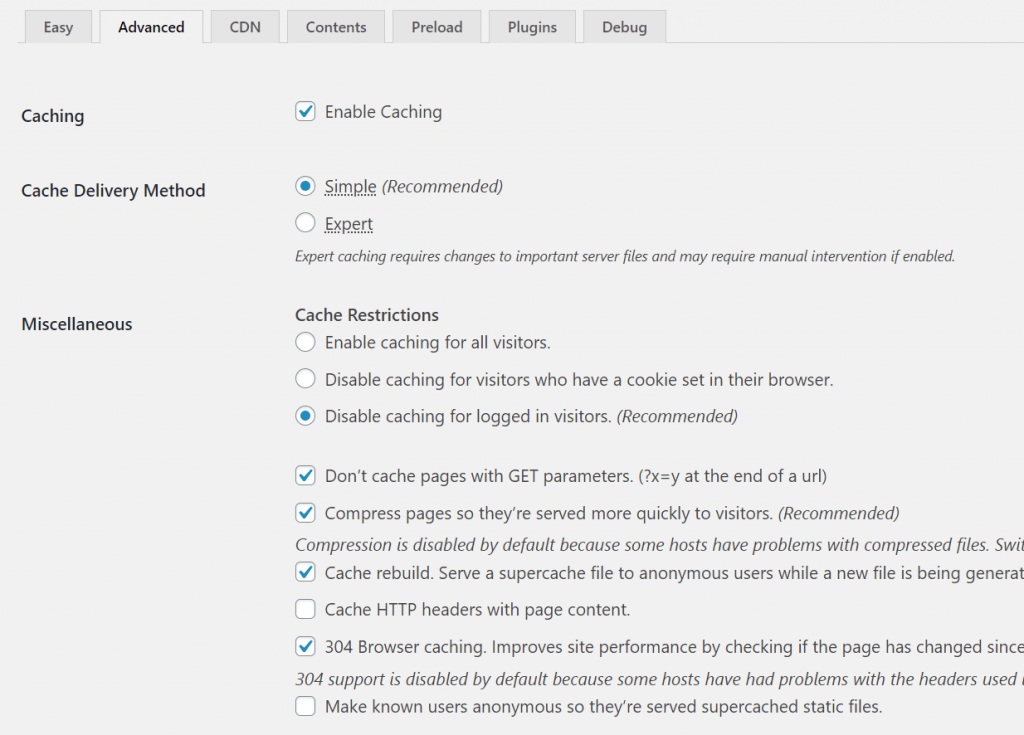
- Activate the "Enable Caching" checkbox.
- Simple as the cache delivery method.
- Disable caching for logged-in visitors.
- Don´t cache pages with GET parameters. Ensures that dynamic pages that are different for every user, such as shopping carts, will never be cached.
- Compress pages so they’re served more quickly to visitors,
and activate Gzip-compression, which significantly speeds up your website. Please note that some servers already compress the data themselves, leading to errors when starting the option. To see if your server is already using gzip-compression, You can use this gzip performance test. - Cache rebuild,
shows cached content to the user even if the cache is updated due to new content. This means your visitors will never see uncached content except for the first time generation of the cache. - 304 Browser Caching,
tells the user to load the website from a browser cache if there is already cached content in the user’s browser instead of connecting to the server. That can lower the CPU load of your server even more.
Then scroll down to the tab "Advanced.”
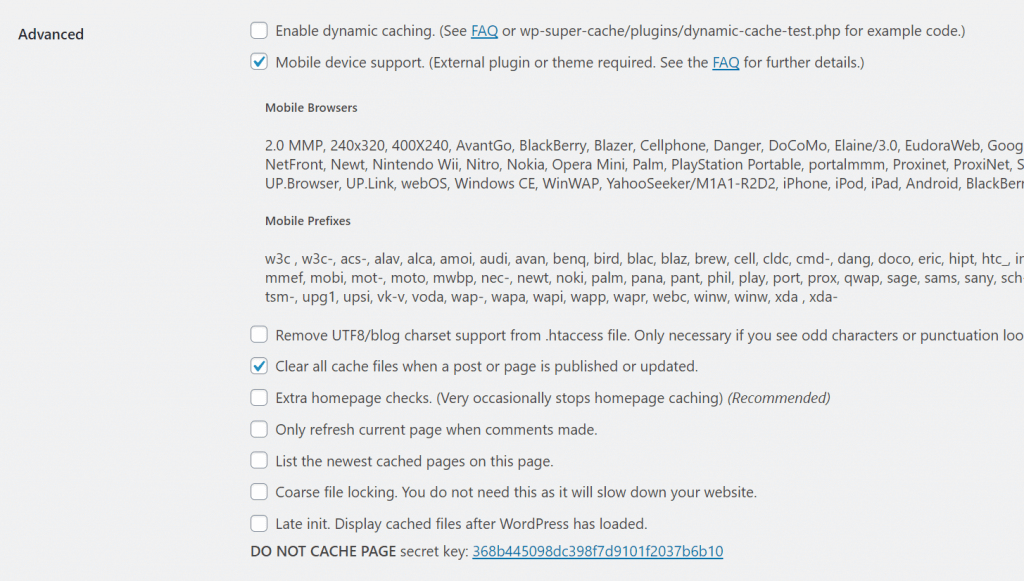
- Activate mobile device support. A simple click is sufficient, but wp-super-cache points out that, depending on the design, an additional plug-in may have to be installed. Since we use a standard WordPress theme, this is unnecessary. If your site works fine on mobile devices after activating this option, you are good to use it.
- When a post or page is published or updated, clear all cache files and ensure that the cache will get cleared so that new content can be shown.
Finally, the last step in the cache plugin settings is the PRELOADING option, which you can find under the "Preload" tab:
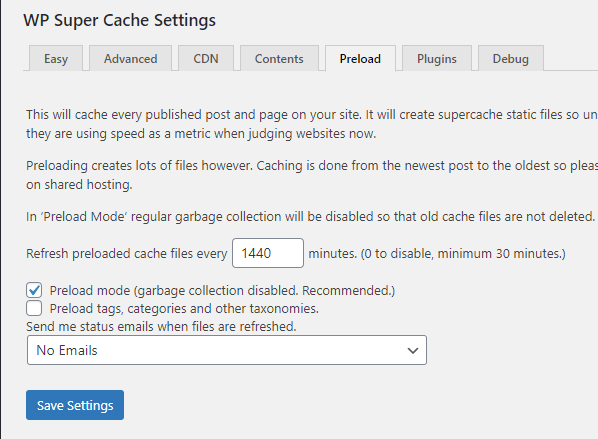
The preload setting makes the plugin cache all your site’s posts and pages periodically. You can set the time interval between each cache refresh. This time interval is a very crucial setting.
In a shared hosting environment, you should optimally set it to once daily– every 1440 minutes.
If you update your site twice daily, you can select the time interval between each cache refresh to 720 minutes. With this setting, the entire cache will be refreshed twice a day. Such a low refresh time can incur an additional server load.
I would recommend not using a lower value in shared hosting environments – since it might and most probably will be counted as server resource overuse.
However, if you’re on a VPS or a dedicated server – you can set the refresh rate as low as 60 minutes.
It’s worthwhile to know that the number of posts and pages on your site affects the resources required for each preload cache refresh operation. An optimal refresh time for a dedicated server on a high-traffic site would be 2 hours.
I’ve checked the relevant checkboxes and have set the cache refresh interval to 1440 mins. You are free to choose any value!
Optimize CSS, JavaScript files & Images
For the next adjustments, such as combining Javascript and CSS files and optimizing images and the HTML output, we use another plugin named "Autoptimize," which we can install from the WordPress plugin repository.
Whether or not you should aggregate CSS and JavaScript files depends mainly on how your server is configured.
Every website loads files via the protocol HTTP 1.1 or the newer HTTP 2.
With HTTP 1.1, all files will be downloaded one after another. For instance, one file must be fully loaded to the visitor before the server can begin to send the next file.
To reduce the number of files to download, Autoptimize can combine those files. So instead of sending ten CSS files, your server only needs to download one file, resulting in a faster total loading time. Even though a combined CSS or JS file’s total file size is bigger, every single request comes with additional overhead; like the extra time, a request needs to establish a connection to the server. That’s why it can be faster to load one big single file instead of loading multiple files.
So if your server runs HTTP 1.1, it’s recommended to aggregate all the CSS and JS files on your site.
On the contrary, the HTTP2 protocol can download multiple files simultaneously. If that’s the setting on your server, it can be counterproductive to activate file aggregation. HTTP2 is usually much faster because it can download multiple small files simultaneously instead of one big one.
Therefore, combining CSS and JS files often does not benefit and can even slow down the website if it uses HTTP2. To be on the safe side, you can test out both options to determine what setting gives you the best results.
To see if your site uses HTTP 2, use the KeyCDN http2 service.

Optimize JavaScript
Select the "JS, CSS & HTML" tab.
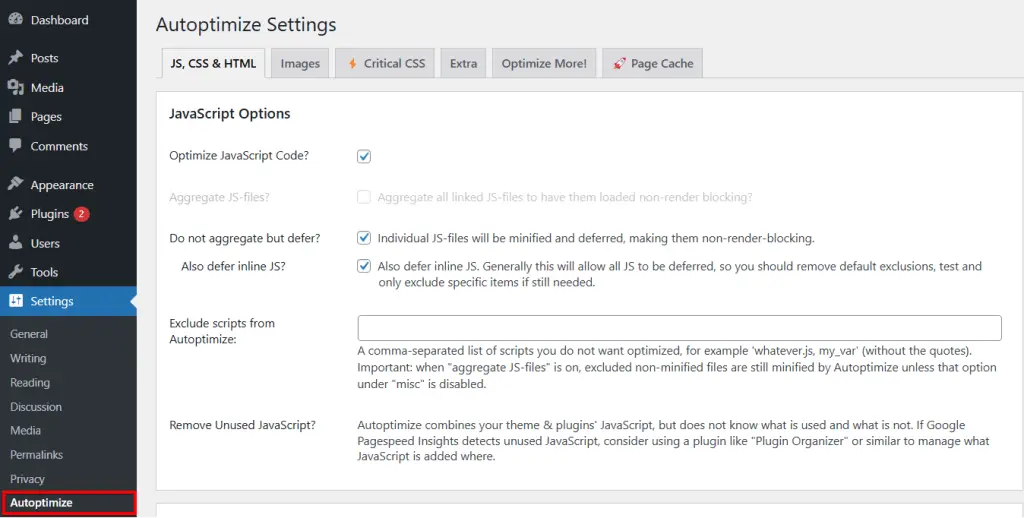
Activate Optimize JavaScript Code
If your server uses HTTP 1:

- Activate Aggregate JS files to combine JavaScript files as recommended by page speed benchmark services
Disable the options:
- Force JavaScript in <head
- Exclude scripts from Autoptimize
- Add try-catch-wrapping.
Activate these options only if you aggregate javascript files and experience website issues. Then you can exclude particular javascript files from the combining process.
If your server uses HTTP 2:
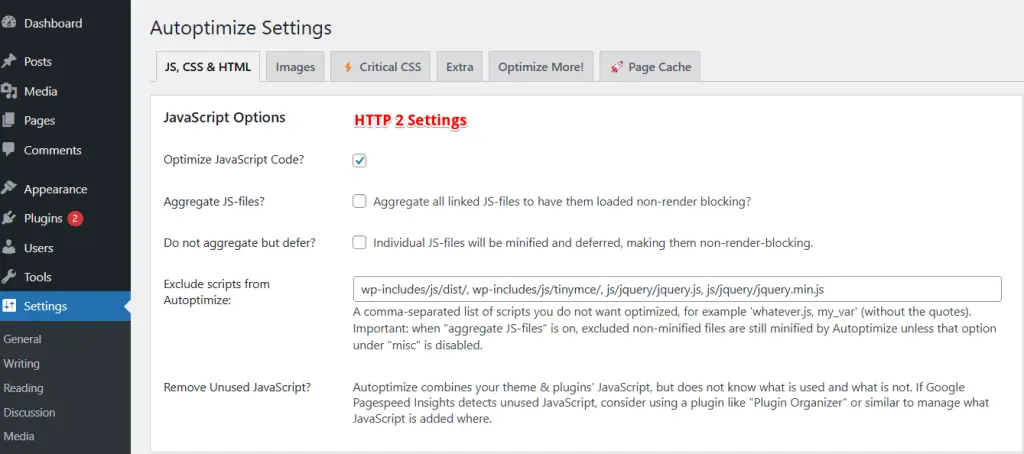
- Disable Aggregate JS Files
Optimizing the JavaScript can break things on your website! I highly recommend testing this step on a staging site before making the adjustments on your production website.
Optimize CSS Files
The next step is the optimization of CSS files.
- Click on Optimize CSS Code.
If your server uses HTTP 1.1, activate the options:
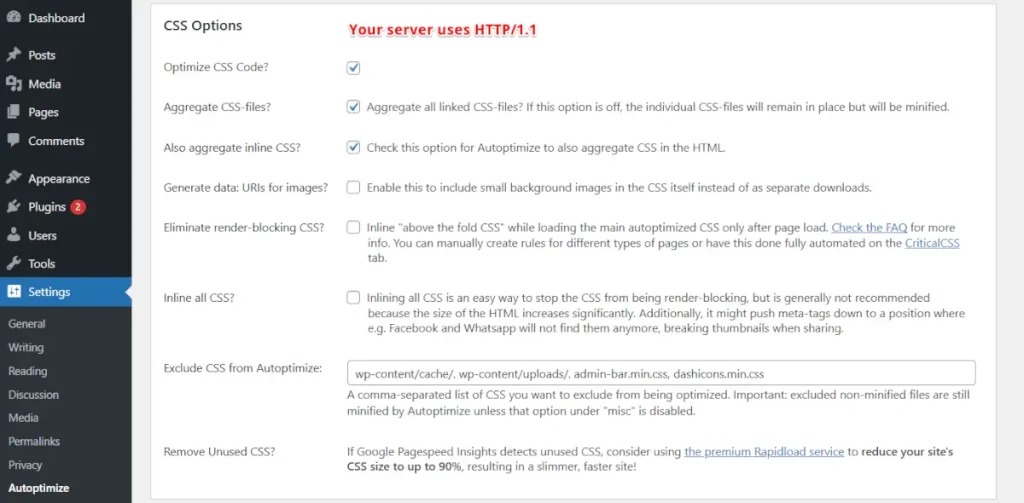
- Aggregate CSS-files
- Aggregate inline CSS.
This will further improve the page speed score. It´s the same thing as aggregating Javascript-files and inline javascript-files but only for CSS. Keep this option disabled if your server uses HTTP2!
If your server uses HTTP1 or HTTP2:
- Activate Generate data: URIs for images – This can result in fewer HTTP requests. But not after you set up a CDN and serve images through that. In the case of using a CDN, you would have to disable it. By using a CDN, files are cached on several data centers worldwide.
- Disable Inline and Defer CSS
- Exclude CSS from Autoptimize:
Use this only if you aggregated CSS files and experience visual issues on your website. Then you can exclude particular CSS files from the combining process.
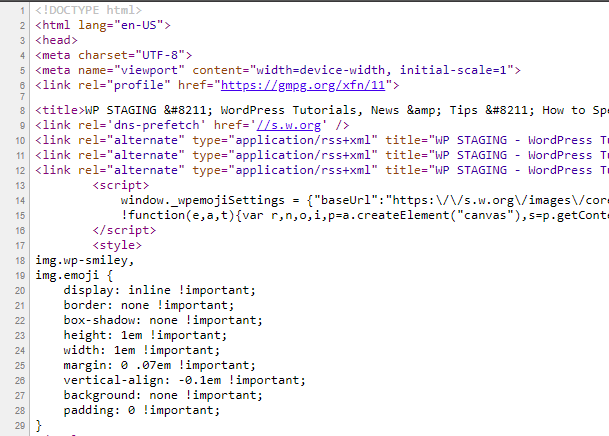
Optimize HTML
Activate the option “Optimize HTML code”.
When optimizing HTML files, spaces and comments are removed from the code. This will reduce the file size. And smaller files usually load faster than larger ones.
Before HTML optimization:
After HTML optimization
The last section to edit is the MISC Options in Autoptimize.
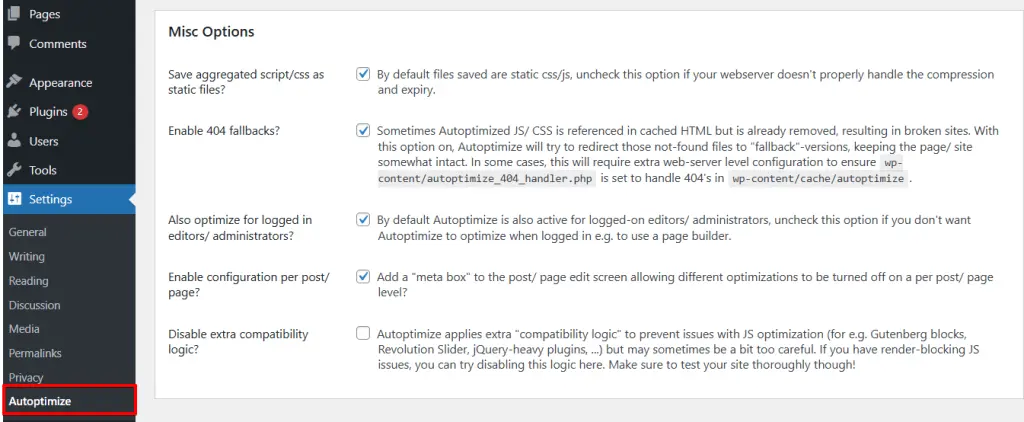
Enable the first four options:
- Save aggregated script/CSS as static files.
- Minify excluded CSS and JS files.
- Enable 404 fallbacks.
- Also, optimize for logged-in editors/administrators.
If you are logged in and experience issues with a page builder like Elementor or another backend plugin, disable the last option.
Optimize Google Fonts
Let’s move on to the tab "Extra.”
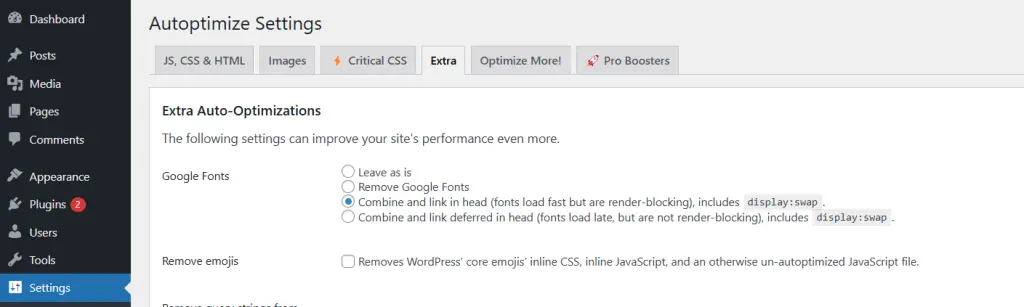
Google Fonts can slow down the loading time as they’re pulled from external resources. I prefer the “combine and link in head” option since it improves load times without seeing the font load. If you are in the European Union, this also makes your website more GDPR compliant, as these external resources are no longer loaded from google.
But you should also test the last Google Font option, “combine and load fonts asynchronously with webfont.js,” and see which yields better results in the page speed tool.
Then, enable "remove Emojis" because the Emojis responsible javascript is bloated and not beneficial for a good loading time.
Optimize Images
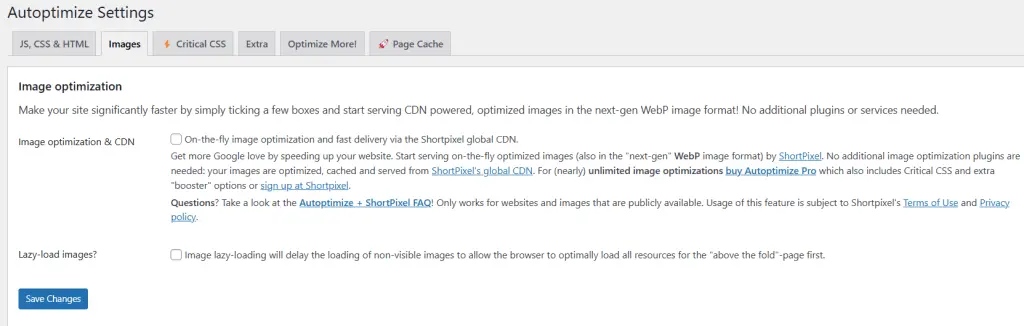
Autoptimize can also help make images load faster by using an integrated third-party service called ShortPixel. If you want to try this out, go to the Images section.
Choose “Optimize Images”; URLs on your website will be changed to point to ShortPixel’s CDN.
Shortpixel reduces/adapts 100 pictures per month for free, which might be enough if you have a small or medium website.
Image Optimization Quality – You can find the right balance between compression and quality by clicking on "You can test compression levels here.”
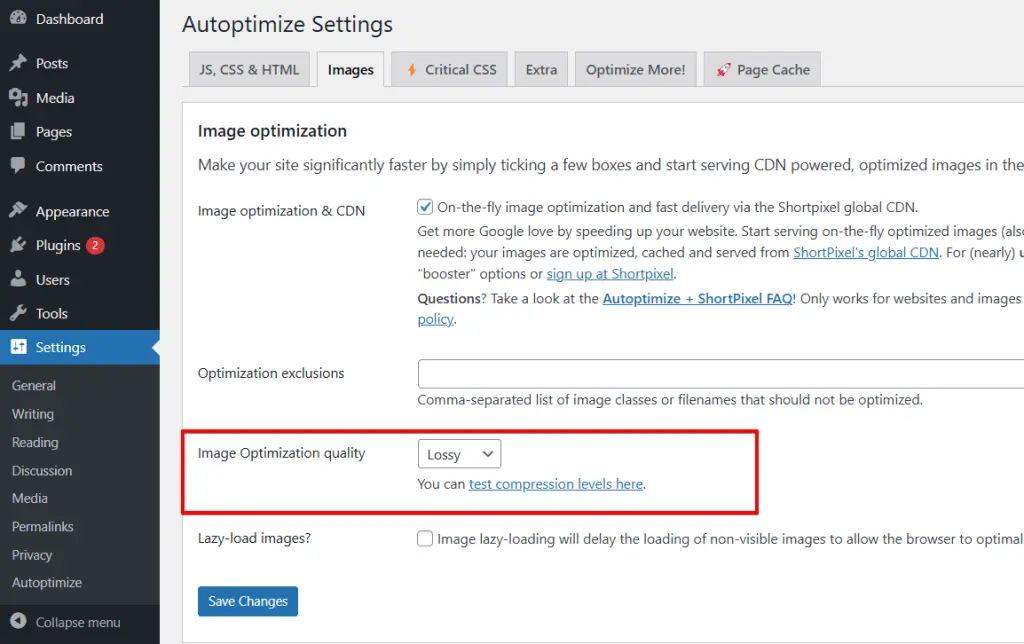
You´ll be lead to shortpixel.com," where you can visually see the differences in each compression level from ShortPixel by uploading one of your pictures.
Which one is best for you?
- Lossy: most compression, most quality loss.
- Glossy: medium compression, little quality loss.
- Lossless: low compression, lowest quality loss.
Go back to Autoptimize and enter your settings!
- Load WebP or AVIF in supported browsers – enable this so that Autoptimize will serve images in the WebP format, which lets you compress images even further without compromising quality by much.
- Lazy-Load images – this has to be enabled, as well, and will result in fewer requests and is recommended by Google for faster load times.
What about Cloudflare?
Maybe you wonder why I don’t mention a CDN or DNS service like Cloudflare, as many other tutorials recommend for further optimization?
The simple answer is that switching the DNS service is not required for most websites as it comes with some potential drawbacks.
For instance, switching to a DNS-based CDN service like Cloudflare gives away control over your website and its traffic. I often stumble over websites running under the Cloudflare DNS service, where I am required to fill a captcha before I can even access the website. Such captchas can lead to a visitor’s high bounce rate and affect search rankings negatively. A DNS service could also redirect a part of your traffic to somewhere else, and you would not even notice it immediately. So keep this in mind when you like to give a third-party DNS service control over your domain.
After the optimizations we applied, your website is already so fast that it will not limit Google ranking, so in this article, we’ll not cover the Cloudflare service.
Let me know if you see this differently and have another opinion about using Cloudflare.
Related Articles
- How to Optimize the WordPress Database for Superior Performance?
- phpMyAdmin Repair and Optimize Database Tables Tutorial
- Why is WordPress Slow + How To Fix It
- How to Clear Browser Cache and Cookies?