Are your WordPress updates not showing up on your site? You’re not alone; many WordPress users face this issue. The usual suspect is caching, which can happen at various levels, like your browser, WordPress site, or content delivery network (CDN).
This guide explains how caching can hide updates on your WordPress site and offers simple troubleshooting steps to resolve the issue, ensuring your changes are visible to everyone.
Contents
Why WordPress Changes Aren’t Showing Up and How to Fix It
WordPress changes not showing” is when updates you make on your WordPress site don’t appear right away. This often happens due to caching, which saves older versions of your site. Clearing your cache or refreshing your browser usually solves the problem.
If the issue persists, it could be due to caching plugins or a Content Delivery Network (CDN) holding old versions of your site. Clearing the cache on these tools usually resolves the problem.
1. Reload the Page
Reloading the page can sometimes resolve the HTTP 501 Not Implemented Error in WordPress, mainly if temporary server glitches or outdated cache data cause it.
By performing a simple reload or a hard refresh (using Ctrl + Shift + R on Windows OS or Command + Shift + R on macOS), you can ensure that your browser fetches the latest data from the server.
This method is quick, easy, and often effective, making it a significant first step in troubleshooting before moving on to more complex solutions.
2. Clear Browser Cache
Clearing your browser cache can effectively resolve the WordPress changes not shown error. The cache stores temporary files to speed up loading, but outdated or corrupted data can cause errors. Here’s how clearing it helps:
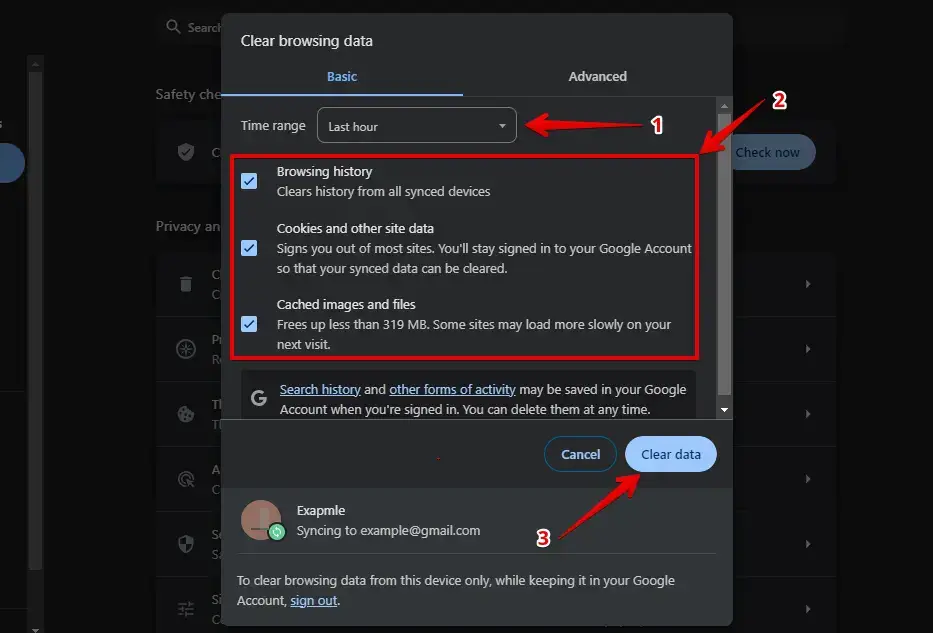
Google Chrome: Press Ctrl + Shift + Delete, select the desired time range, and click “Clear Data.”
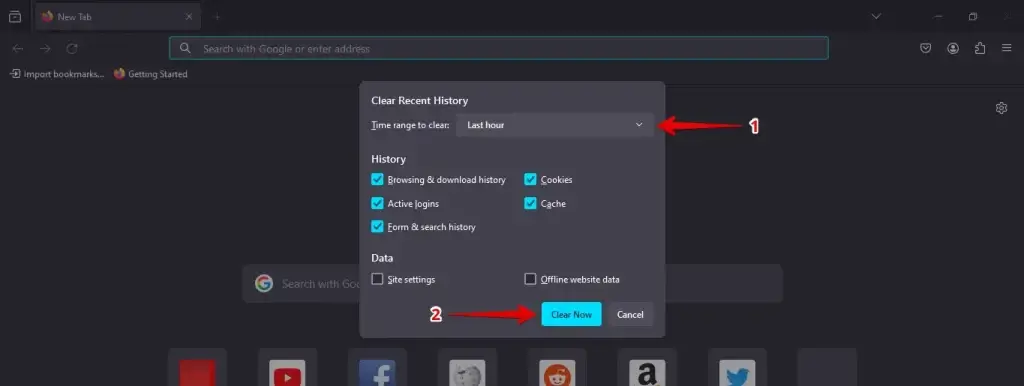
Mozilla Firefox: Press Ctrl + Shift + Delete, choose the appropriate time range, and click “Clear Now.”
After clearing your cache, reload your site to check if the WordPress changes not show error is fixed. If not, consider other solutions. Regularly clearing your cache helps ensure you’re viewing the latest version of your site.
3. Clear Cache Using WP Rocket Plugin
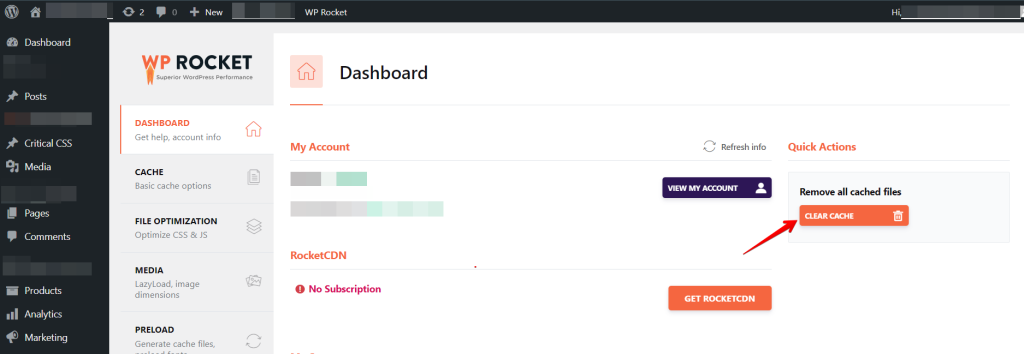
If you’re using a caching plugin like WP Rocket, clearing the plugin cache can also help fix these problems, including WordPress changes not being updated. This process removes old data that might interfere with your site’s display and functionality.
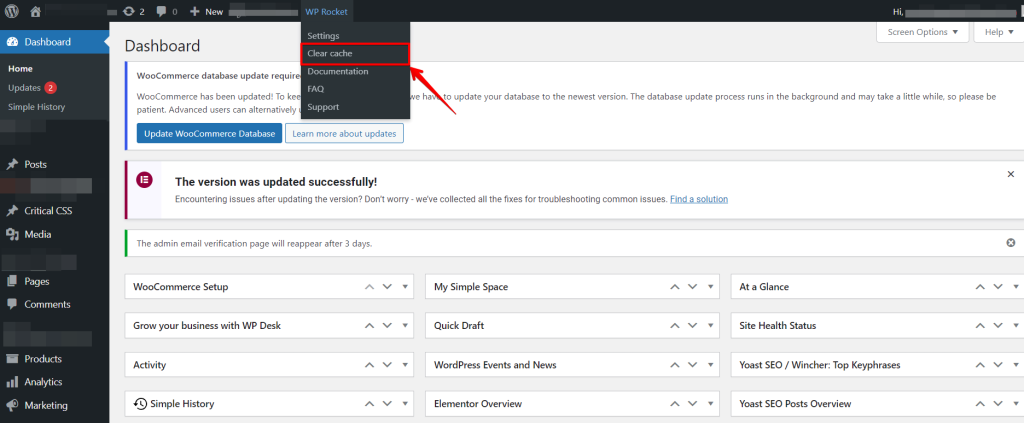
To clear the cache with WP Rocket, go to the plugin settings and click the “Clear cache” option. This refreshes stored data, restores your visual editor, and resolves other issues. Regularly clearing your cache helps keep your site running smoothly.
4. Flush Your DNS Cache
Flushing your DNS cache can help resolve the WordPress update. Don’t show errors by clearing outdated or corrupted DNS information. This forces your computer to refresh the DNS information and may fix the error.
Windows:
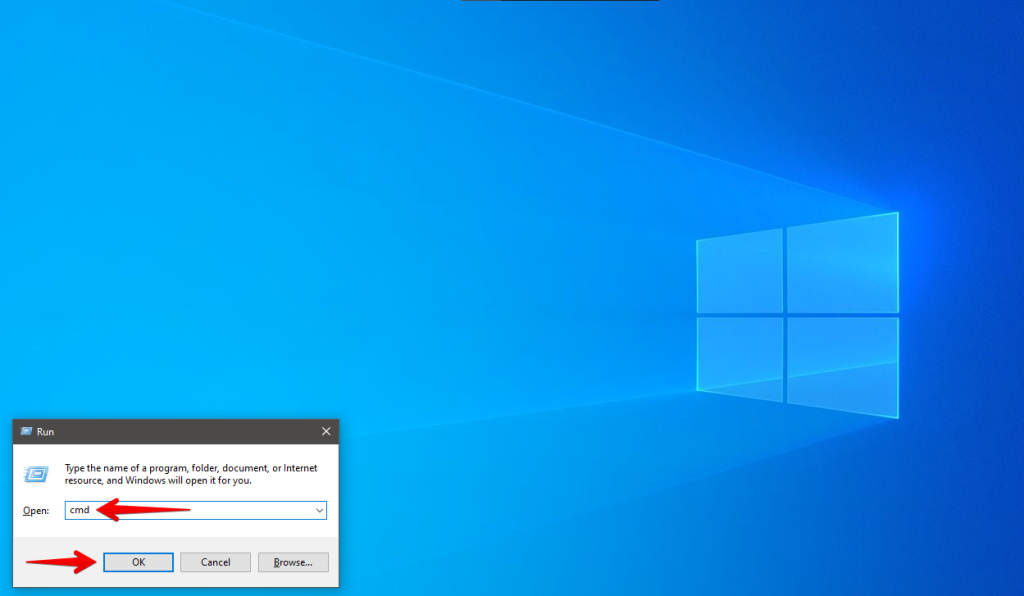
Press Win + R, type cmd, and press Enter.
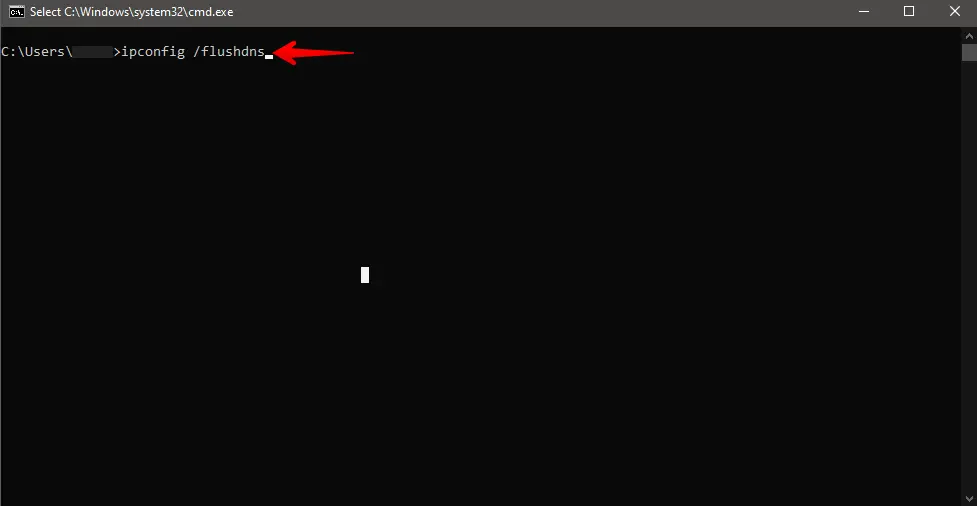
Type ipconfig /flushdns and press Enter.
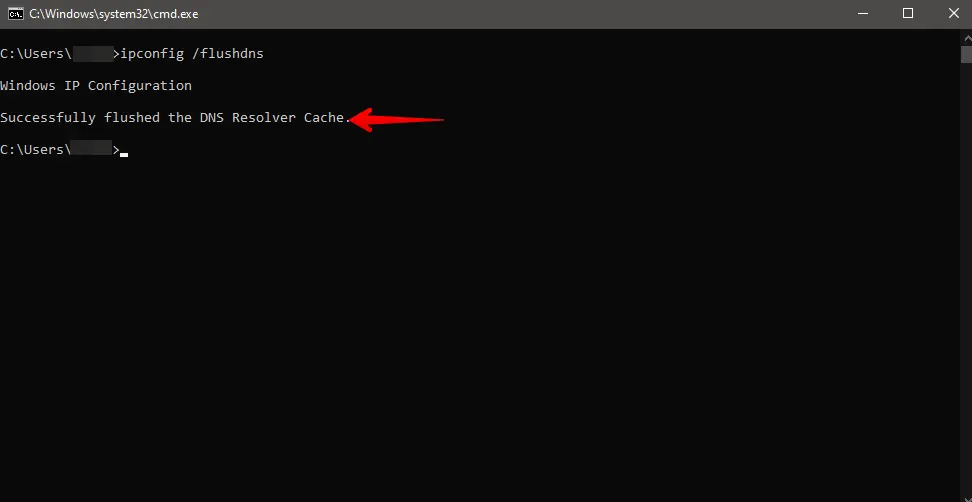
You should receive confirmation that the DNS cache has been successfully flushed.
Mac:
Open Terminal (Applications > Utilities > Terminal) and run the appropriate commands based on your macOS version to clear the DNS cache. You may need to enter your admin password.
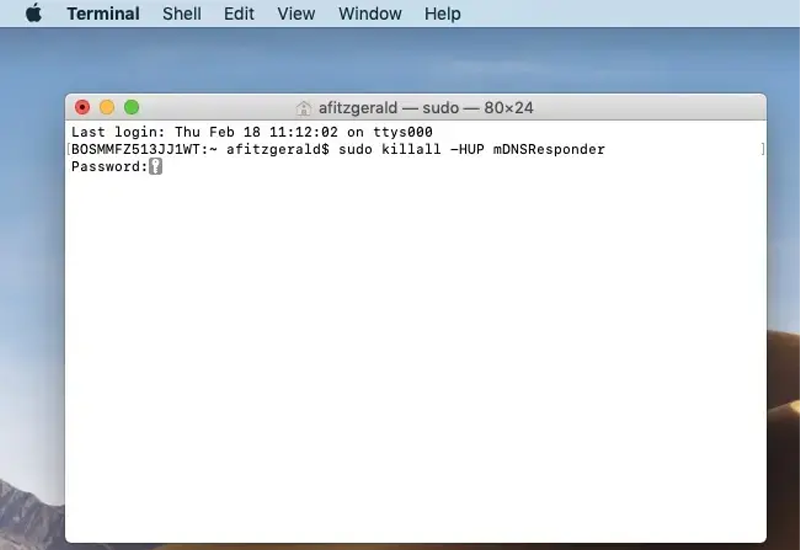
- MacOS 10.10.4 and above:
sudo killall -HUP mDNSResponder - MacOS 10.10.1, 10.10.2, and 10.10.3:
sudo discoveryutil mdnsflushcache - MacOS 10.7, 10.8, and 10.9:
sudo killall -HUP mDNSResponder - MacOS 10.5 and 10.6:
sudo dscacheutil -flushcache
After clearing your DNS cache, close and reopen your browser to ensure the changes take effect. Once your browser is restarted, visit your WordPress site to check if the error is resolved. This step helps refresh the connection and can often fix the problem.
Conclusion
If your WordPress changes aren’t showing up, they are often related to caching issues, whether browser caching or plugin caching.
By systematically troubleshooting these areas, you’ll usually find a quick fix. Always remember to clear the cache after making any changes to your site.

