You can follow the standard WP STAGING guide “How to Create a Staging Site,” but on GoDaddy Managed WordPress you should also apply the tips below to avoid login, permalink, and routing issues that are common on managed environments.
1) Plan limitation (critical)
On some GoDaddy Managed WordPress tiers, running a second WordPress installation in a sub directory can be restricted. If your staging site cannot be created, does not load correctly, or keeps behaving like the live site, this is often the reason. In that case, the practical fix is to follow the instructions below.
2) How to Log into the Staging Site
After WP STAGING creates the staging site in a sub folder, use the staging login URL pattern and add wp-login.php to the staging sites URL like this:
https://mysite.com/staging/wp-login.php If you are still redirected back to the live site when trying to log in, this is usually caused by one of these:
- A forced redirect at host level
- A security or redirection plugin that hard enforces the production URL
- The hosting plan disallowing a second WordPress install in a subdirectory
In that case we recommend creating a staging site on a separate server or in a subdomain like dev.mysite.com.
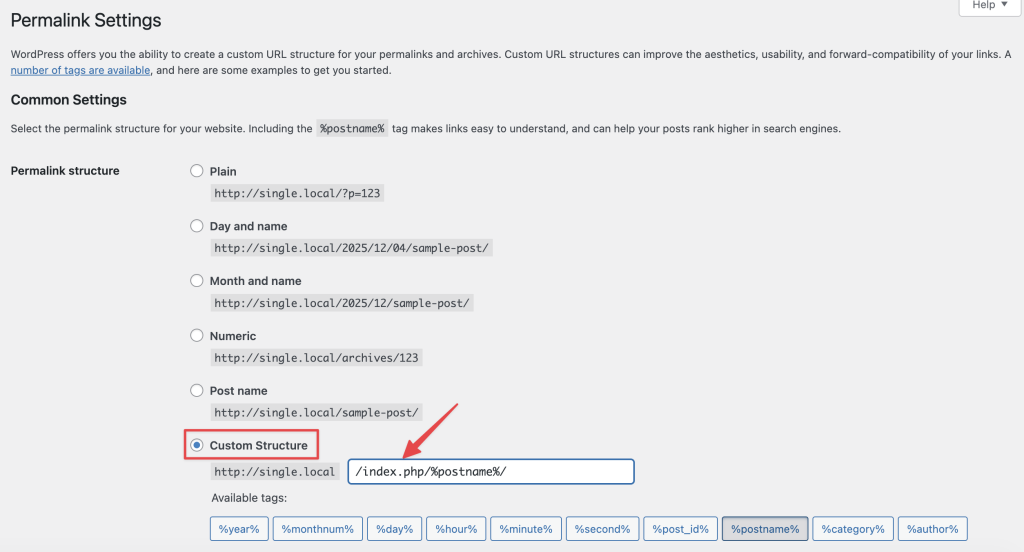
3) How to enable permalinks on the staging site (GoDaddy workaround)
On GoDaddy Managed WordPress, the loading of the staging site in a subfolder can fail because rewrite rules are constrained. A reliable workaround is to include index.php in the permalink structure on the staging site.
- Log into the staging WordPress dashboard.
- Go to Settings → Permalinks.
- Select Custom Structure and use:
/index.php/%postname%/ - Click Save Changes.
If you still see 404 errors on posts/pages:
- switch to another structure (for example “Plain”), save
- switch back to the custom structure above, save again