Fantastic, you’ve created your first WordPress clone and development site with WP Staging.
You’ve also just installed a new theme on the development site.
After testing and verification, everything works and you decide to push the staging site to live.
Now, take a breath: If you did not do any change on the production site and there is no new content on the live site you can push the entire staging site to live right now.
For instance, sites with no user-generated content like transaction, orders or comments can be pushed to live without taking anything into account.
Go to Production site > WP Staging > Start
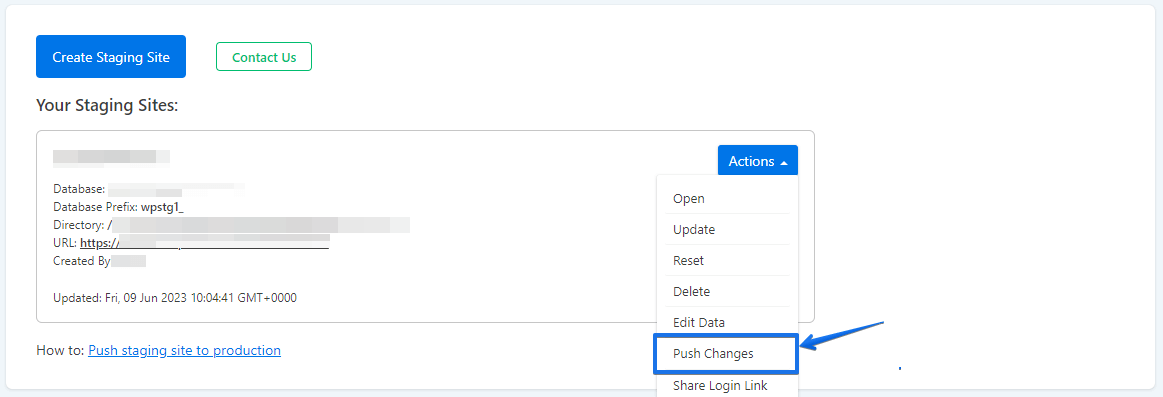
Click on Push Changes
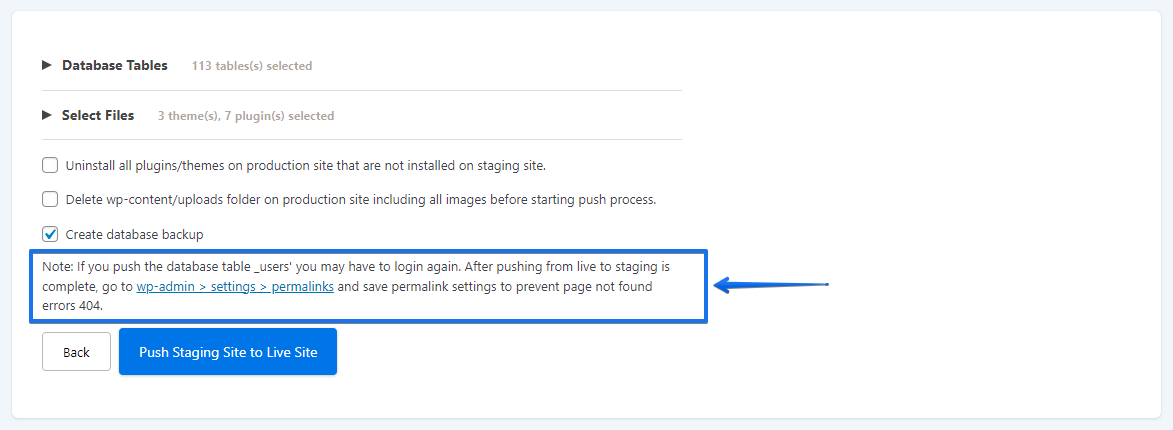
Keep all the default selected database tables and folder and start the pushing process.
If the copying process is over you can visit your live site.
In most cases, the migration will be done with this step.
Depending on your WordPress setup and on the installed plugins it could be necessary to do two more extra steps on the live site:
- Go to
Settings > Permalinksand click on the Save Changes button.
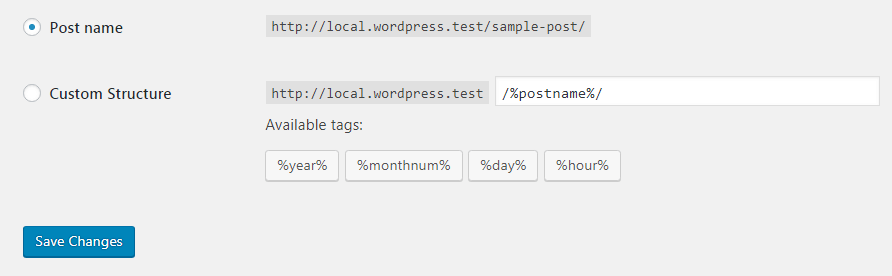
This will recreate the WordPress permalinks and is necessary if some pages throw a 404 page not found error.
- Go to your theme settings dashboard and save the theme settings, too!
Some themes like AVADA use an internal caching system which needs to recreate the cached files after pushing.
So if some styles are missing or if the website does not look as intended just save the theme settings!
Visit again your frontpage and check if all data is there.
If you need a more detailed instruction about how to push the staging site to the production one please follow this guide.