Featured images are an essential element of your WordPress site, enhancing its visual appeal and boosting SEO. However, nothing is more frustrating than discovering your featured images don’t show up and appear in the website article.
Whether you are a seasoned WordPress user or a beginner, this guide will help you troubleshoot and fix common issues with featured images.
Contents
Common Reasons for Why Featured Images Don’t Show Up
There are several reasons why your featured images might not be displaying properly:
- Theme issues – Sometimes, your theme doesn’t support featured images, or there could be a bug.
- Plugin conflicts – Certain plugins might interfere with how images are displayed.
- Image settings – Incorrect settings can prevent images from showing up.
- Cache problems – Old versions of your site might be showing up instead of the latest one.
- Lazy Loading – Lazy loading can interfere with displaying featured images, causing them to load incorrectly.
6 Ways to Fix Featured Images Don’t Show Up
- Fix HTTP Error When Uploading Featured Image
- Fixing Theme Issues
- Resolving Plugin Conflicts
- Disable Lazy Loading
- Clearing Cache Issues
- Adjusting User Roles to Allow Featured Image Uploads
NOTE: It’s a good idea to back up your website completely. This way, you can quickly restore your website if something goes wrong*. You can use WP Staging, which makes automatic backups with just a few clicks.* For more details, check out the backup and restore guide.
1. Fix HTTP Error When Uploading Featured Image
If you’re getting an HTTP error when trying to upload a featured image in WordPress, it probably means your PHP memory limit isn’t enough. Here’s how to fix it:
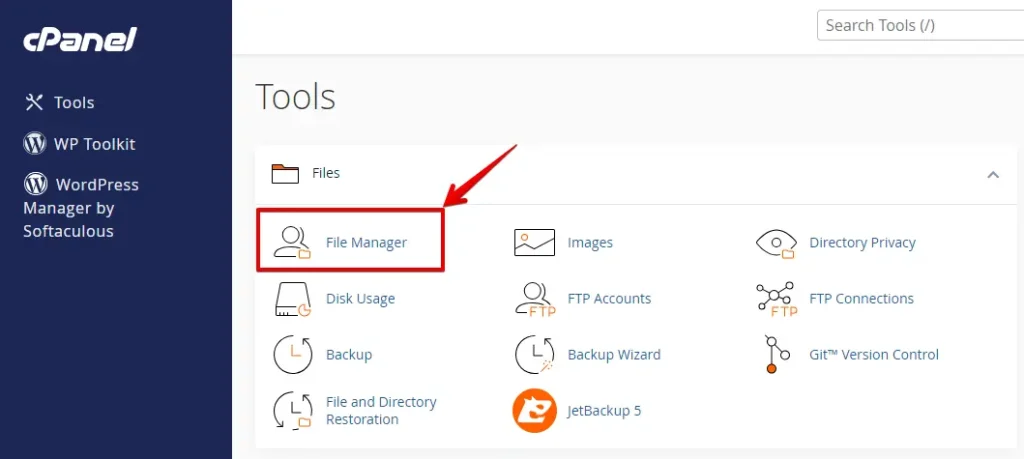
Log in to your web hosting panel, locate the "File Manager" option, and click on it.
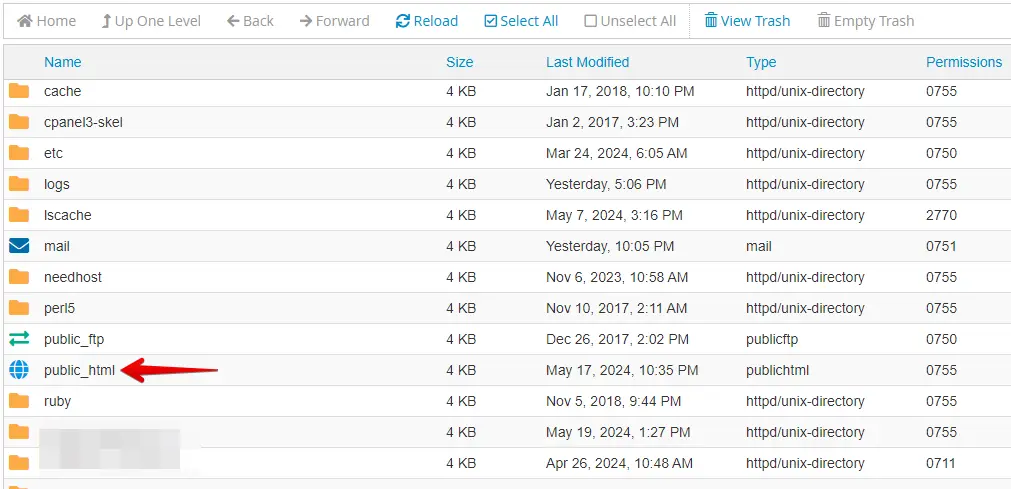
Locate the root directory of your WordPress installation (usually named “public_html” or “www”).
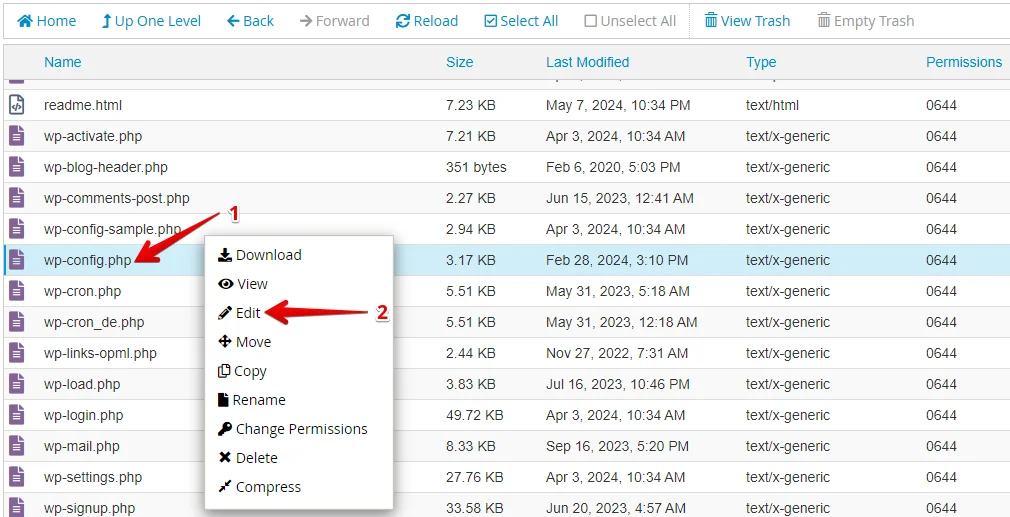
Look for the wp-config.php file, right-click, and select the "Edit" option.
Scroll down to where the PHP settings are. Add this line of code just above the line that says, "That’s all, stop editing! Happy blogging."
define( 'WP_MEMORY_LIMIT', '256M' );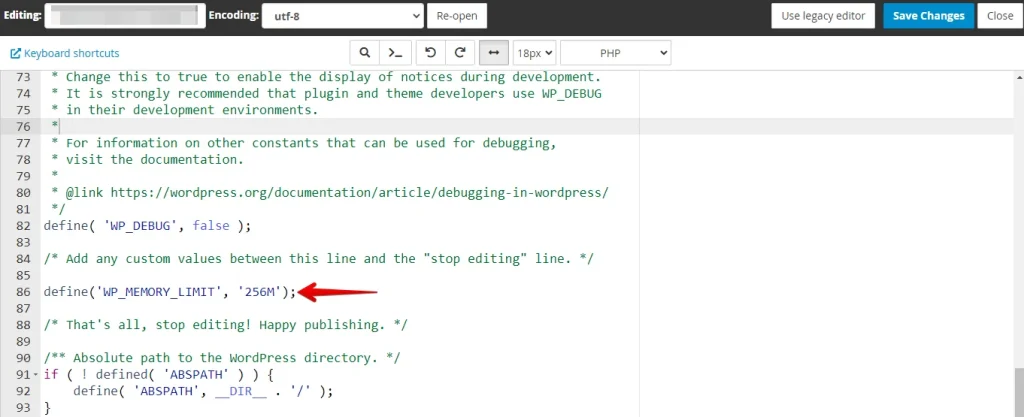
After that, click the "Save Changes" button to save the wp-config.php file.
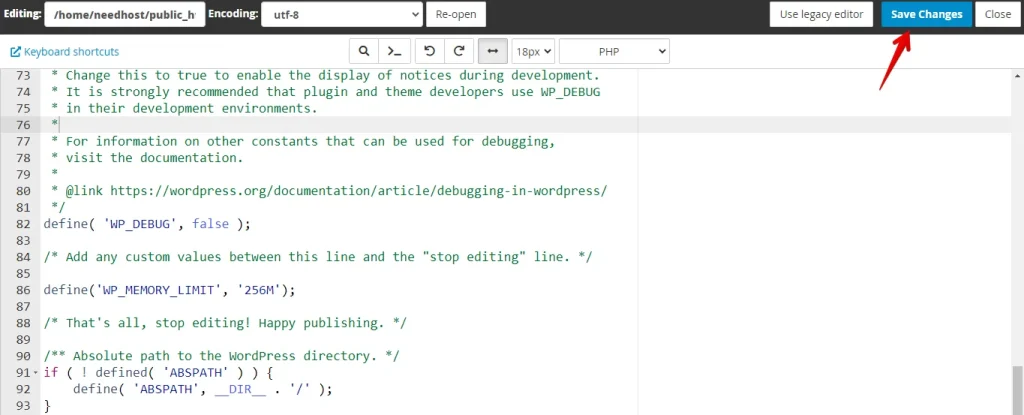
After saving the changes, close the file editor. Refresh your WordPress site and try uploading the featured image again. If the HTTP error persists, consider increasing the limit or moving to the next method.
2. Fixing Theme Issues
Your WordPress theme might be causing the problem if featured images aren’t showing up. To see if that’s the issue, try switching to one of the default WordPress themes. Here’s how:
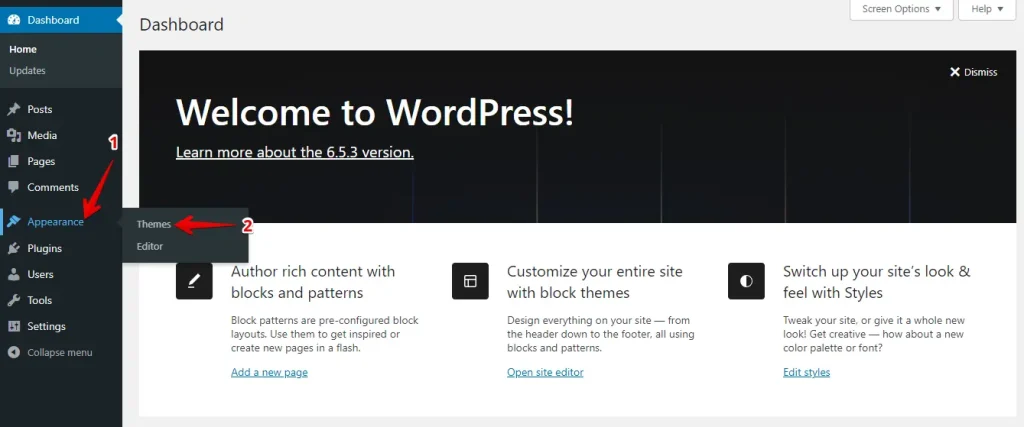
Log in to your WordPress admin area and go to "Themes" under the "Appearance" section of the dashboard menu.
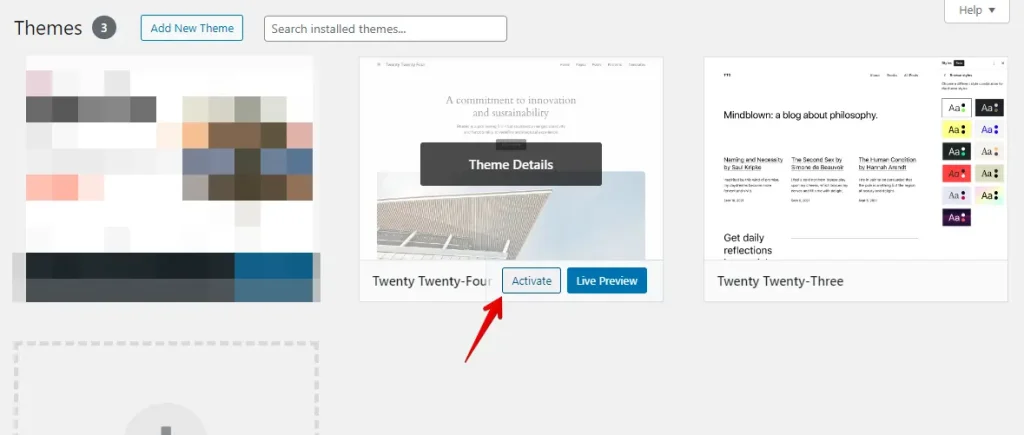
Now, Find default themes such as Twenty Twenty-Four, then click "Activate" to set it as the active theme.
After activating the default theme, check your website to see if the featured images appear correctly. Assess any changes to your site’s appearance and functionality. More troubleshooting may be needed if the images still don’t show up.
3. Resolving Plugin Conflicts
Sometimes, plugins installed on your WordPress site can clash with each other or with your theme, leading to issues like missing featured images. To identify and resolve these conflicts, follow these steps:
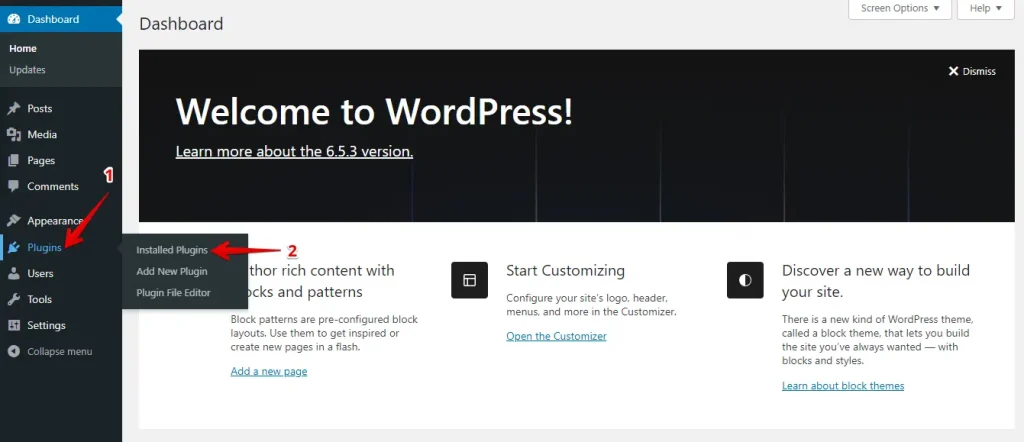
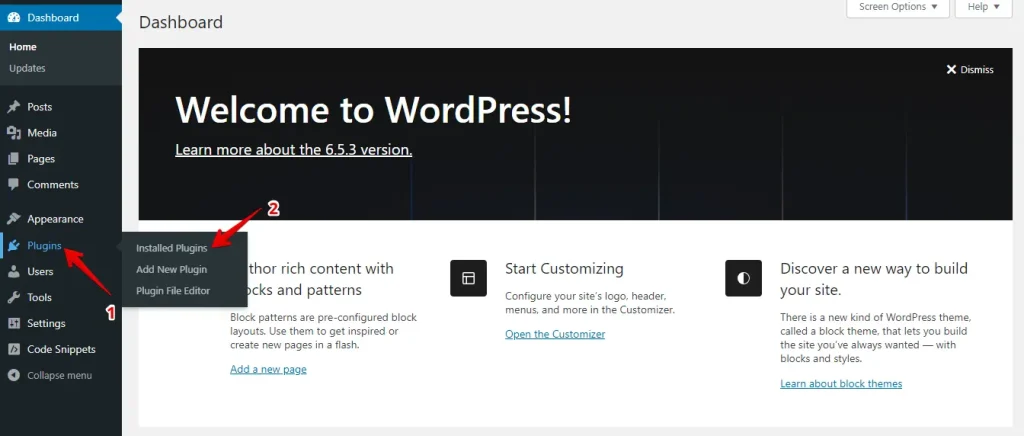
Log in to your WordPress admin dashboard and navigate to the "Installed Plugins" under the "Plugins" section of the dashboard menu.
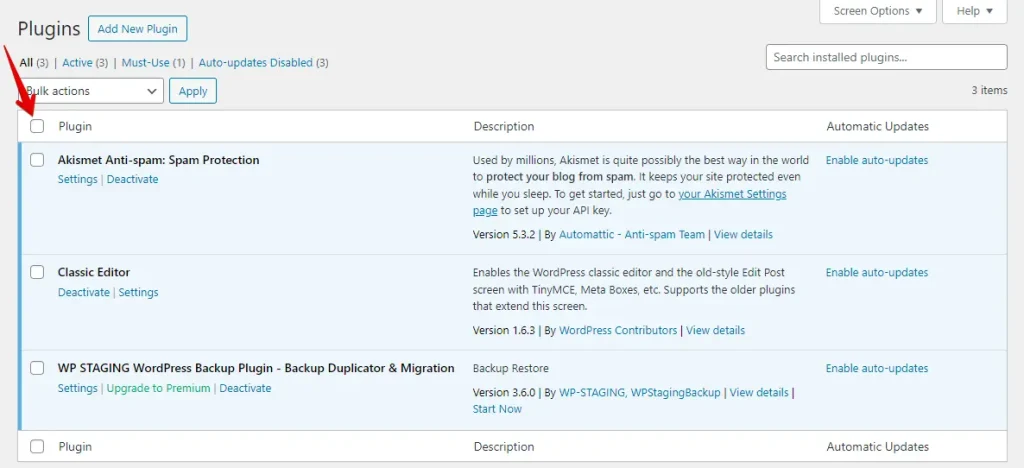
Check the box next to each plugin to select them.
Choose "Deactivate" from the "Bulk Actions" dropdown menu and click "Apply" to deactivate the selected plugins.
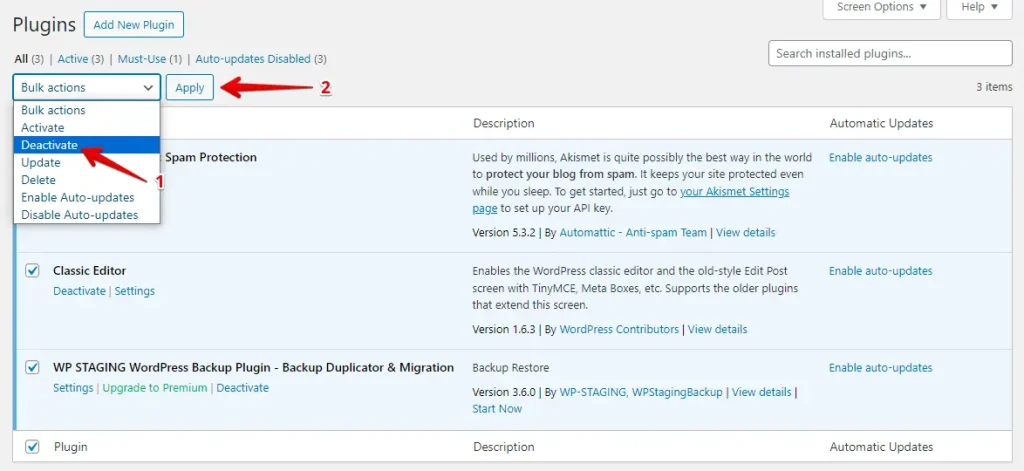
After deactivating all plugins, visit your website to see if the featured images display correctly. If they are, it indicates that one of the plugins was causing a conflict.
4. Disable Lazy Loading
Lazy loading delays image loading until they enter the viewport, improving page load times but sometimes causing featured images not to display. Disabling lazy loading might fix this. Here’s how to do it on your WordPress site:
Disable lazy loading from your lazy loading plugin. You can also easily disable lazy loading by customizing the code snippet with WPCode. Here are the steps:
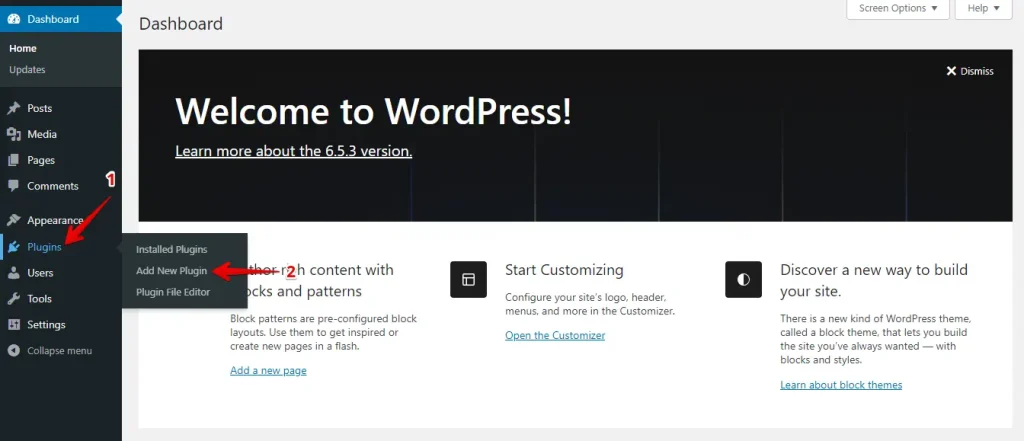
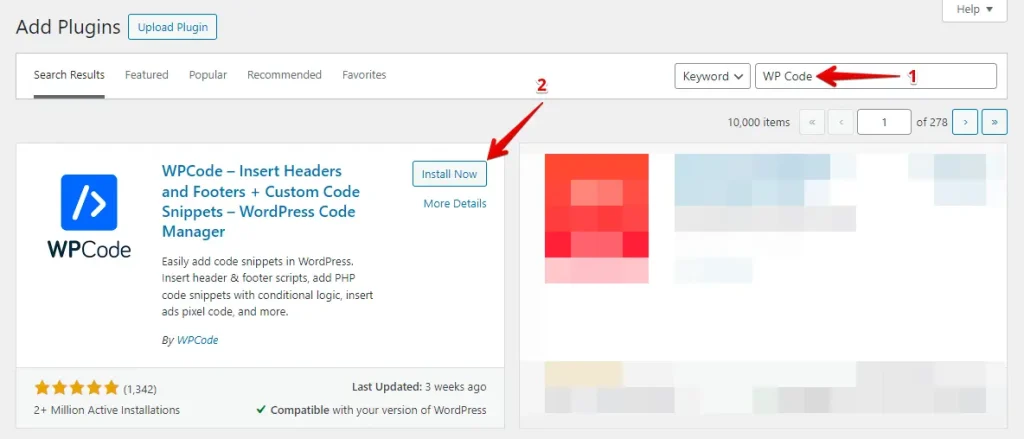
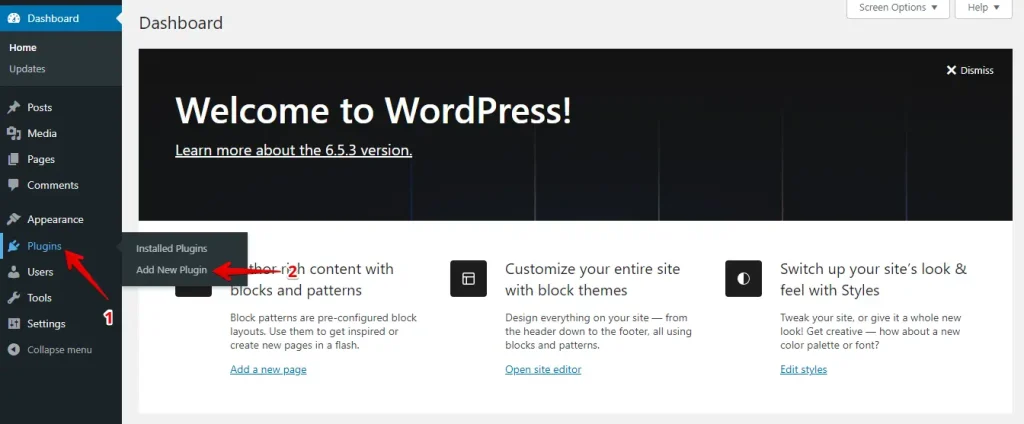
Log in to your WordPress admin dashboard and go to "Plugins" > "Add New Plugin" in the menu.
Type "WPCode" into the search bar and press Enter on the "Add Plugins" page. Next, click "Install Now" and then "Activate" it.
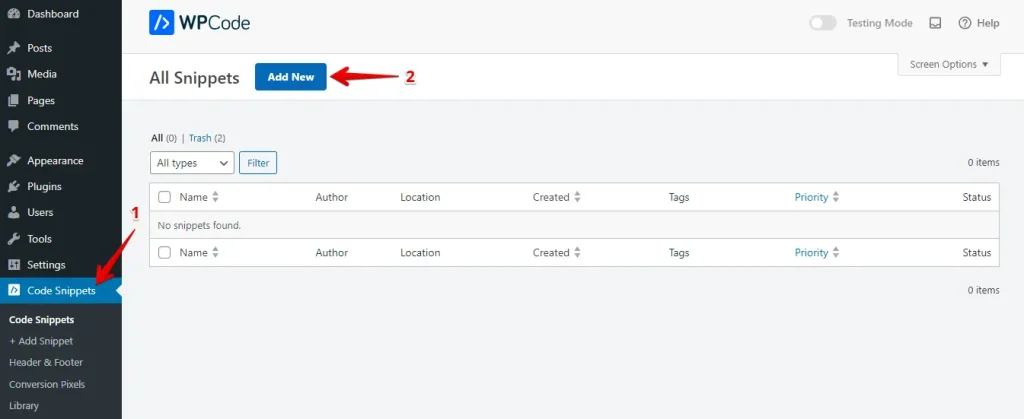
After that, Navigate to the "Code Snippets" tab and click the "Add New" button.
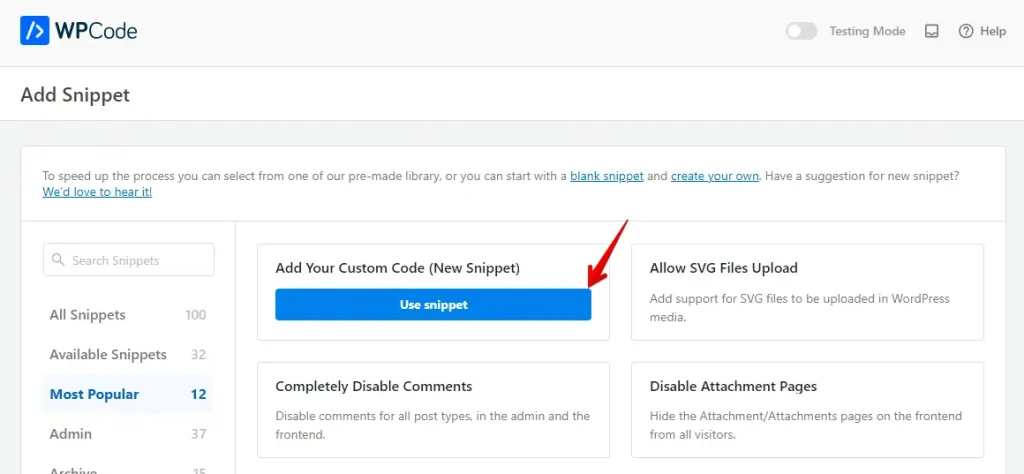
Next, click on the "Use snippet" button.
Enter a name for the code snippet and select "PHP snippet" as the snippet code type.
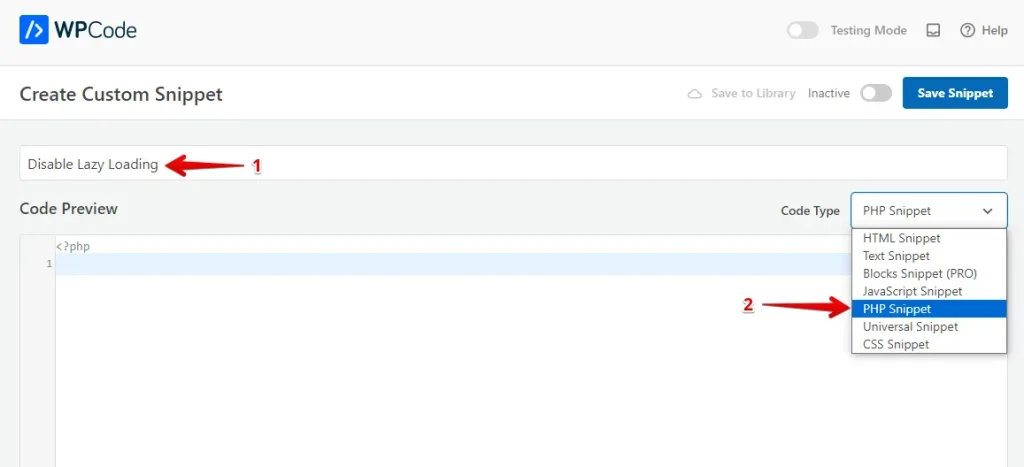
Enter the code snippet, toggle the switch to activate it, and click the "Save Snippet" button.
add_filter( 'wp_lazy_loading_enabled', '__return_false' );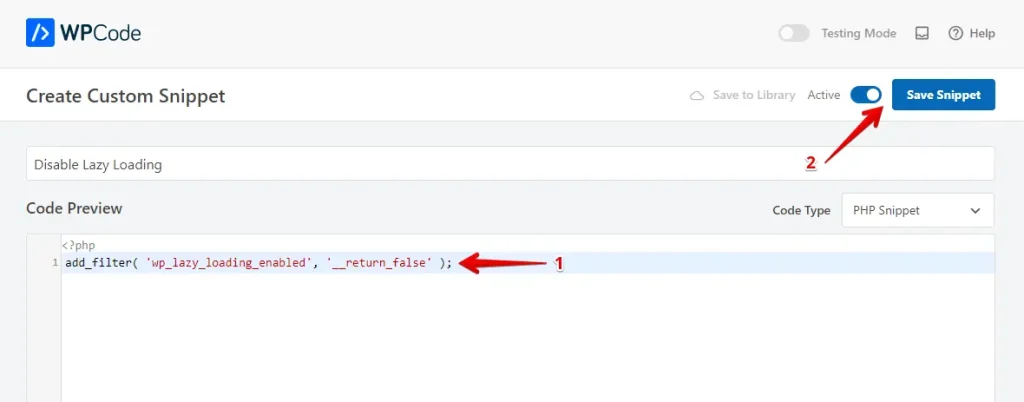
Following the steps above, you can easily disable lazy loading and ensure your images appear as intended.
5. Clearing Cache Issues
Sometimes, cached versions of your website can cause issues displaying updated content, including featured images. Clearing your cache ensures you see your site’s most current version. Here’s a step-by-step guide to clearing cache issues:
Log in to your WordPress dashboard, find the "Plugins" section in the left-hand menu, and click on "Installed Plugins" to see a list of all installed plugins.
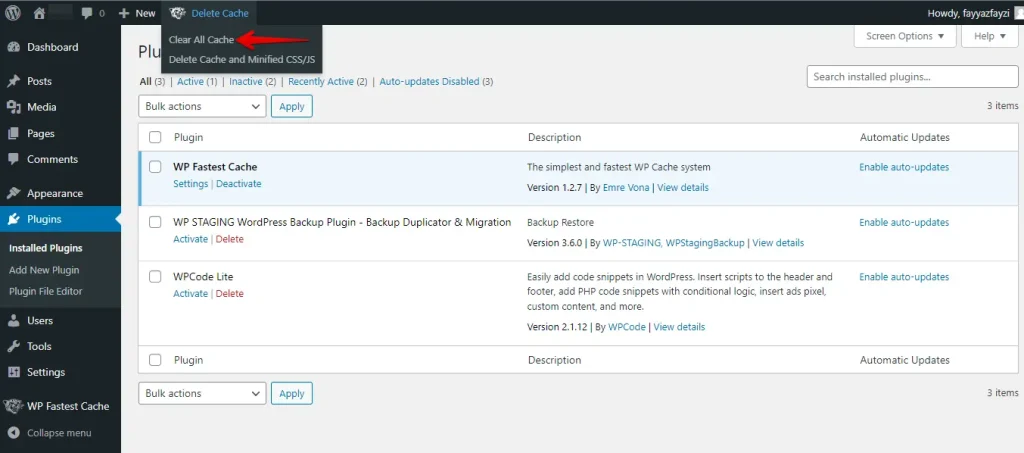
Find your caching plugin in the list and click the option to clear or purge the cache, usually labeled "Clear Cache," "Purge All Caches," or "Delete Cache."
Clearing your site’s cache can often fix problems with featured images not displaying on your WordPress site. This ensures you see the most up-to-date version of your site.
6. Adjusting User Roles to Allow Featured Image Uploads
Ensuring users have the correct permissions to upload featured images can be crucial for maintaining your WordPress site’s content flow. Here’s a step-by-step guide on how to adjust user roles to allow featured image uploads:
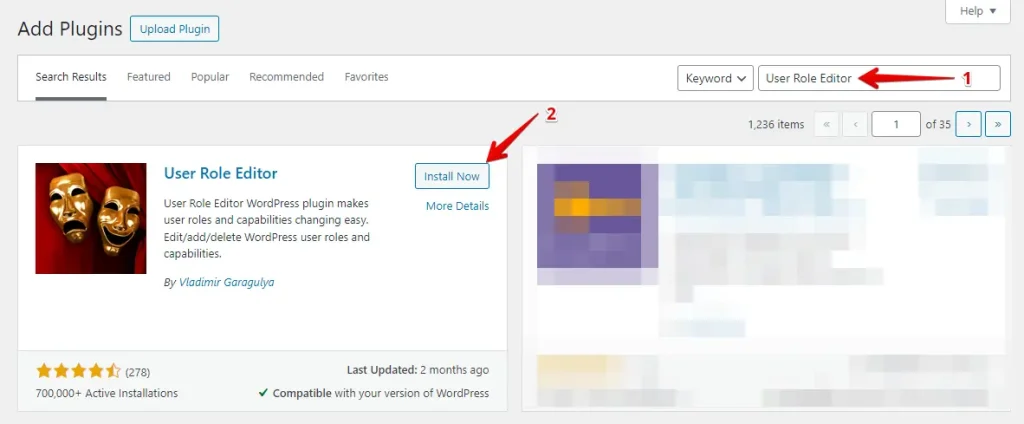
Log in to your WordPress dashboard, go to the "Plugins" tab, and click "Add New."
Enter "User Role Editor" in the search bar, then click the "Install Now" button next to the plugin.
After that, activate the plugin by clicking the "Activate" button.

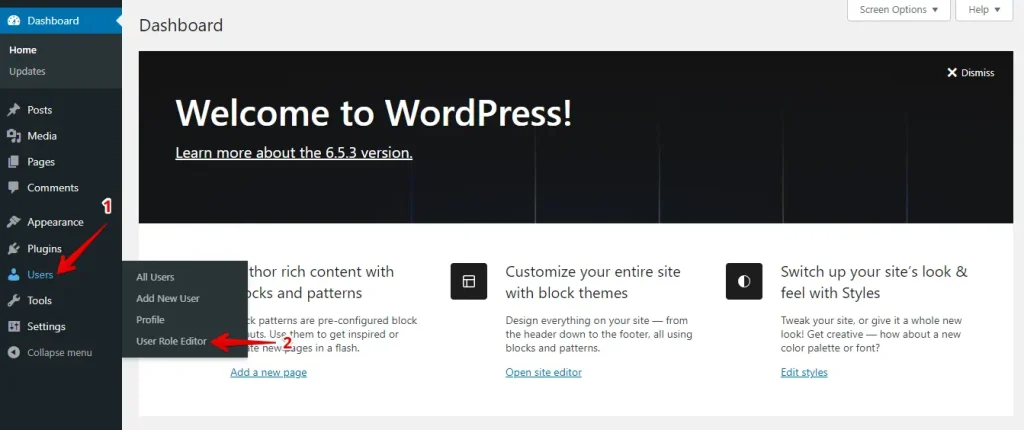
Go to "Users" in the left-hand menu and click "User Role Editor."
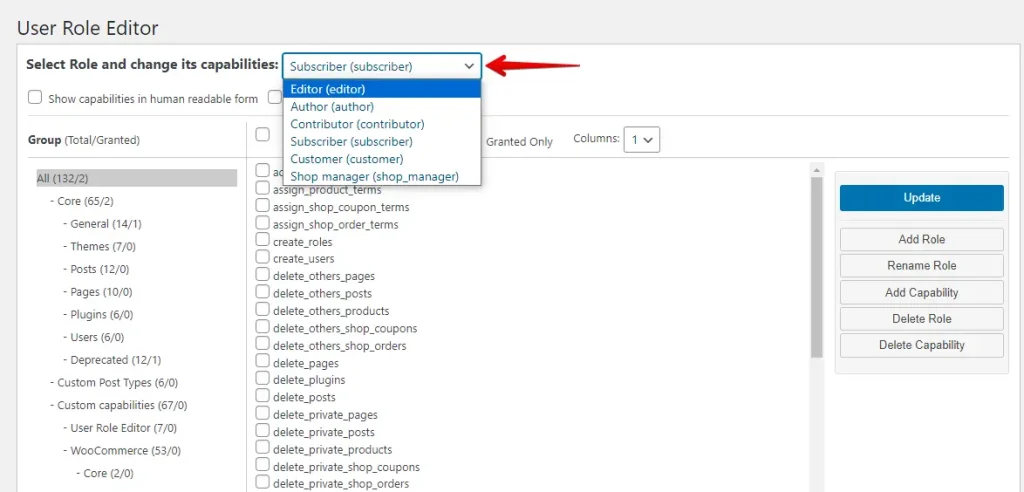
You’ll see a dropdown menu on the User Role Editor page at the top. Select the user role you want to edit (e.g., Author, Editor).
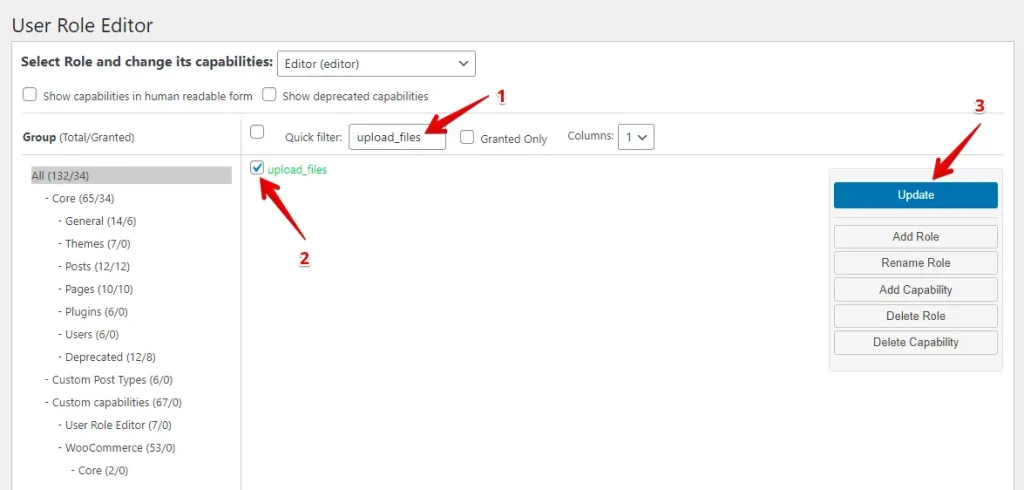
In the Quick filter, search for the "upload_files." Ensure that the "upload_files" checkbox is checked. This permission allows the user to upload media files, including featured images. After that, click on the "Update" button.
Following these steps, you can adjust user roles to allow featured image uploads on your WordPress site.
Conclusion
Fixing featured images that don’t show up on your WordPress site can be frustrating, but it’s usually a simple fix. Following this guide, you can solve common problems like theme or plugin conflicts, user role permissions, PHP memory limits, and cache issues.
Featured images are crucial to making your site look good and boosting your SEO, so it’s worth the effort to get them working. Regular checks can prevent future problems. If issues persist, contact your hosting provider or a WordPress expert. With these easy steps, your featured images will be back quickly.