What do you do to roll back the content after a mistake?
This article guides you in undoing unexpected changes using the core feature called revisions and associated features (autosaves).
What are Revisions in WordPress?
Revisions in WordPress are a lifesaver when you accidentally mess up your content or make changes you later regret. They are essentially a series of saved versions of your content, allowing you to effortlessly revert to an earlier version.
What are Autosaves in WordPress?
Autosaves are your silent protectors, ensuring you never lose your work in case of browser crashes or sudden interruptions. WordPress automatically saves your changes at regular intervals.
When you edit a post or page, WordPress automatically creates an autosave. You can find these autosaves in the ‘Revisions’ section mentioned earlier.
What are Snapshots in WordPress?
Snapshots are a more comprehensive way to save your website’s state. Think of them as a complete backup of your site at a specific time.
Method 1: Navigating the Revision History
Suppose you’ve made some changes to your content and realize you want to revert to an earlier version. Fear not; WordPress makes it simple. Follow these steps to undo changes effectively:
- Access the Post/Page Editor: Identify the post you wish to revise within the WordPress content editor. Take a moment to ensure you’re working with the correct content.
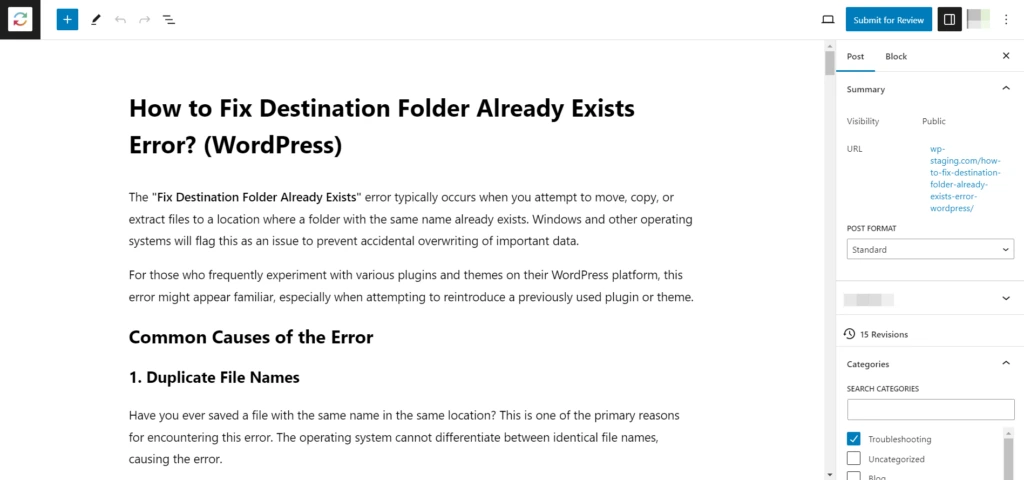
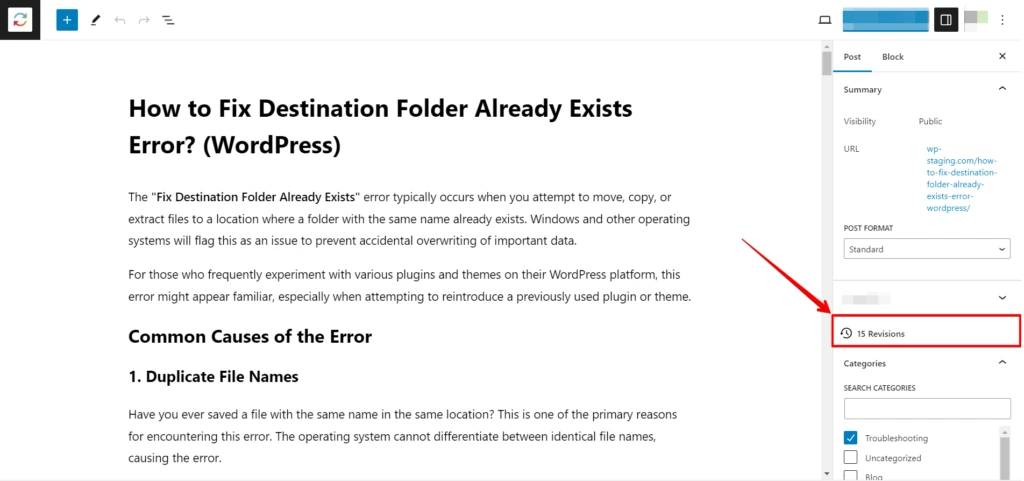
- Locate the Revisions Sidebar: Access the Revisions option under the Page or Post tab in the settings panel once the post is pinpointed. You’ll find the ‘Revisions’ widget on the right-hand side of the editor. This is your gateway to the world of content revisions.
Exploring Previous Post Revisions
With the Revisions interface at your disposal, you’re now ready to dive into the pool of post-revisions. Understanding how to navigate these revisions effectively is essential.
- Review Revisions: Click on ‘Browse’ to view the revision history. You can compare different revisions to see the changes made.
Navigating the Revisions Slider: At the top of the revisions interface, you’ll find a slider that empowers you to select the specific revision of the post you want to explore. This slider allows for easy navigation and comparison of different versions of your content.
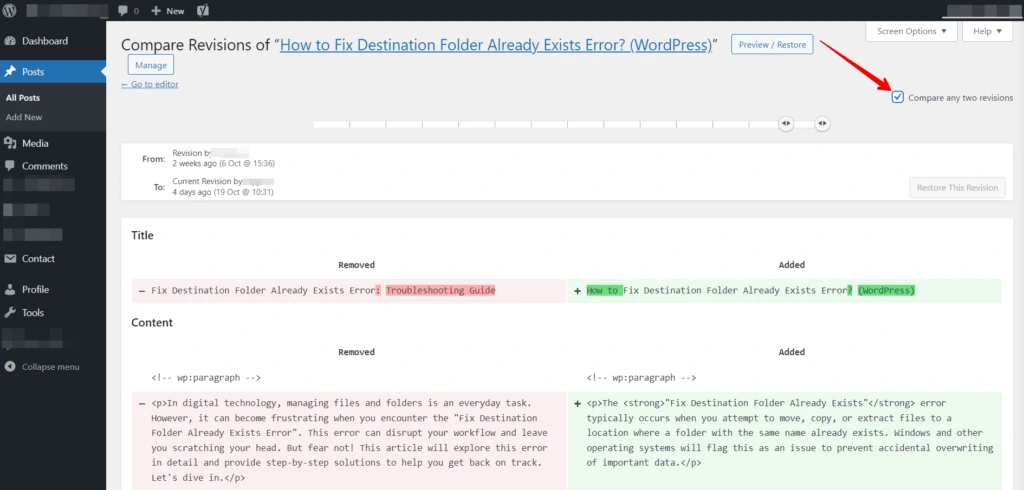
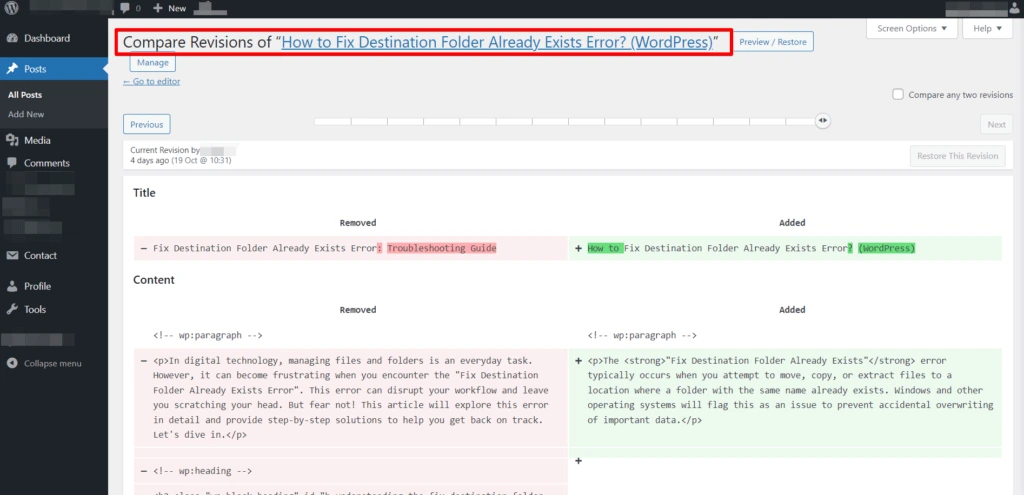
To do this, click "Compare Any Two Revisions" and utilize the slider tool to locate the revisions you wish to juxtapose. This feature grants you more flexibility in evaluating content alterations.
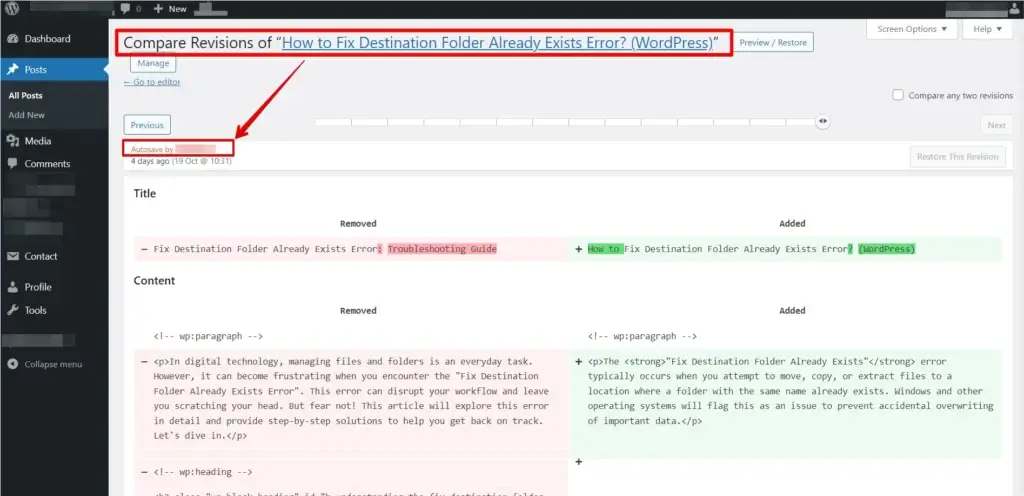
Understanding the Revisions Screen
Below the slider, the revisions screen unfolds, offering you a dual-column view. On the left, you’ll encounter the most recent revision of your post, while on the right, the earlier version stands.
- Highlights of Content Changes: Newly added content appears in vibrant green, making it effortlessly distinguishable. Conversely, deleted portions are highlighted in a striking red, aiding in identifying content alterations.
- Tracking Changes: This screen also provides valuable information about who made the changes and when these modifications occurred, offering a trail of accountability for content revisions.
- Restore a Revision: Select the revision you want to revert to and click "Restore This Revision".
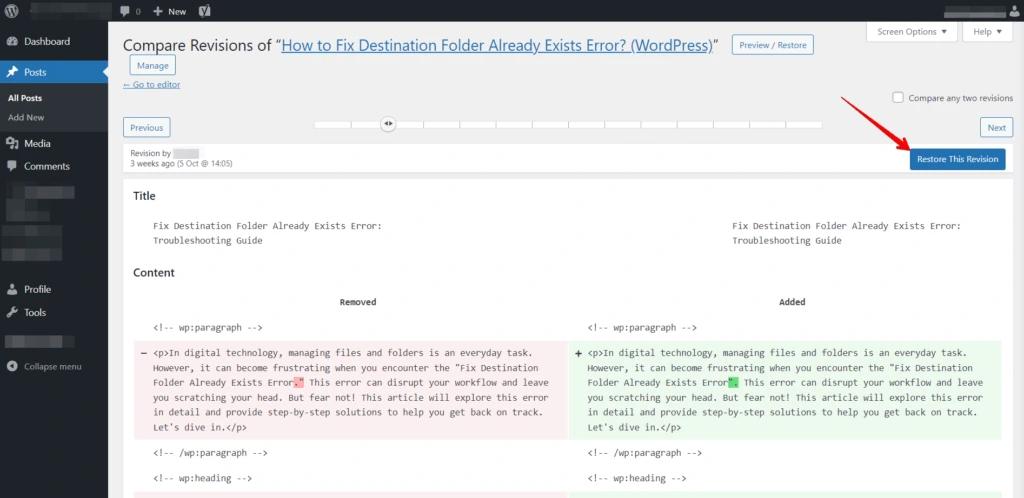
- Save Changes: Once you’ve restored the revision, don’t forget to save your post or page.
Simple Alternative for Content Restoration
If you’d rather not delve into complex procedures, there’s a straightforward and manual approach to restoring content that may interest you. This method is particularly handy when you’ve made a singular deletion and wish to bring back specific content without affecting the recent additions.
By adopting this uncomplicated strategy, you can easily regain the desired content, avoiding the need for intricate processes that might overwrite the other valuable additions you’ve made in the interim.
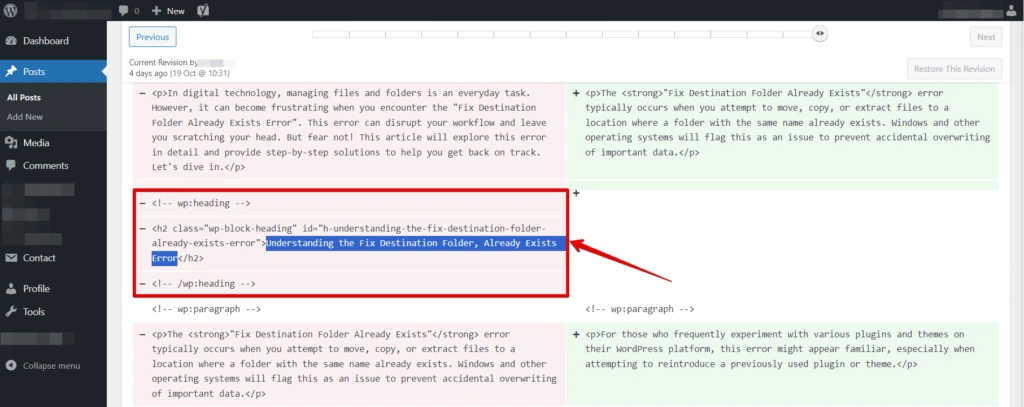
By adopting this uncomplicated strategy, you can easily regain the desired content, avoiding the need for intricate processes that might overwrite the other valuable additions you’ve made in the interim. It’s a practical way to maintain the integrity of your edits while rectifying specific content omissions.
Take Control of Your WordPress Revisions
In the world of WordPress, you have the power to manage and customize how many revisions you wish to retain for each article. To limit post revisions and streamline your content management, you must incorporate a simple code snippet into your WordPress site’s "wp-config.php" file.
define( 'WP_POST_REVISIONS', 15 );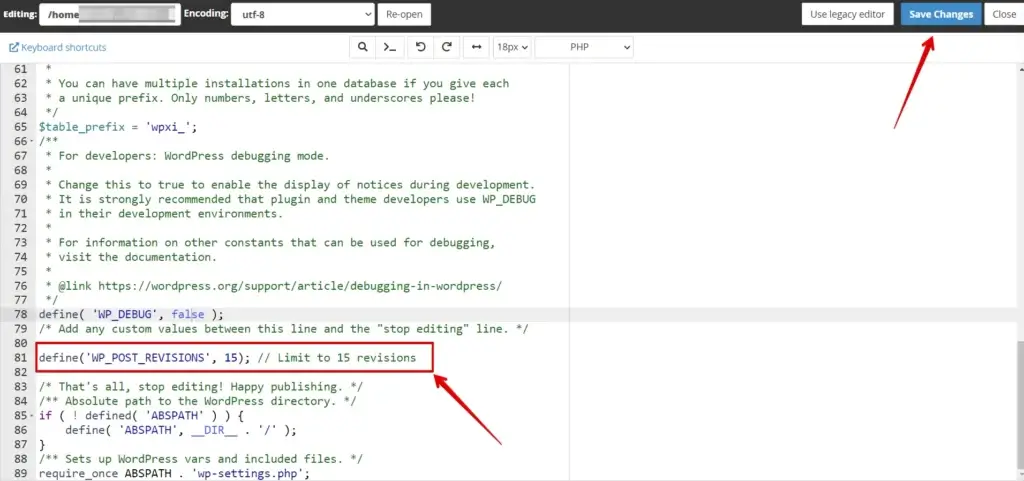
This method can effectively tailor your revision settings to meet your specific needs, ensuring a more efficient content management experience.
Method 2: Autosaves – Your Silent Guardians
Even if you forget to manually save your work by clicking Save Draft, Publish, or Update, WordPress has your back with autosaves. While using the Classic editor, an autosave is created every 60 seconds. In the newer block editor (Gutenberg), this happens every 10 seconds. WordPress retains only one autosave at a time, overwriting the previous autosave with each new interval.
Both revisions and autosaves can be accessed through the Revisions interface, making it convenient for users to restore their content.
It’s worth noting that autosaves closely resemble revisions, with the primary distinction being the use of red text to indicate that you’re viewing an autosave:
In conclusion, understanding the mechanics of WordPress revisions and autosaves is vital for maintaining the integrity of your content. These features ensure that your hard work is preserved and your website remains a reliable and efficient platform for your audience.
Method 3: Snapshots – Your Website’s Last Line of Defense
We understand that unforeseen errors can occur beyond the reach of revisions and autosaves.
For example, the backup frequency and retention period may have changed or varied depending on the hosting plan.
Another option to restore a WordPress backup is through a hosting panel if your hosting provider offers backup creation and restoration.
For example, We’ll show you this process in the hPanel of Hostinger hosting services. Just adhere to these steps:
- Access your hosting control panel and navigate to the "Dashboard" section.

- Click on the "Manage" option and select "Backups".
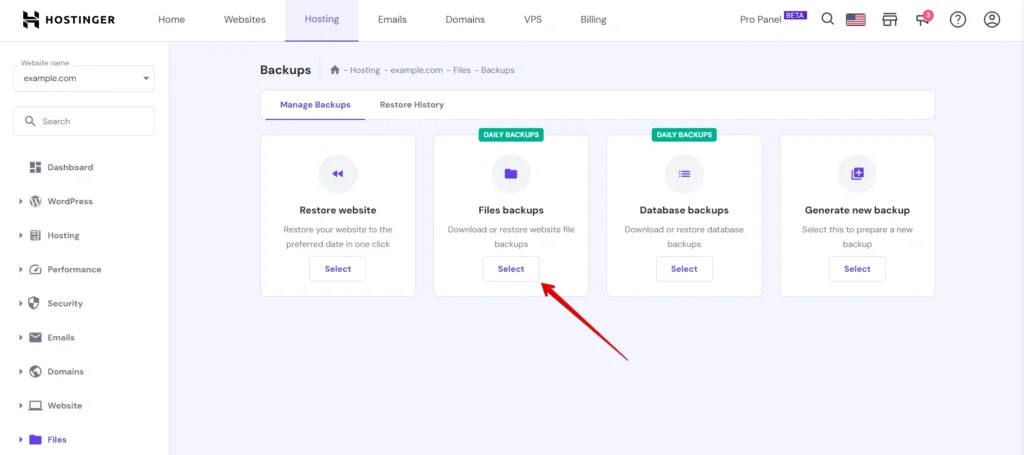
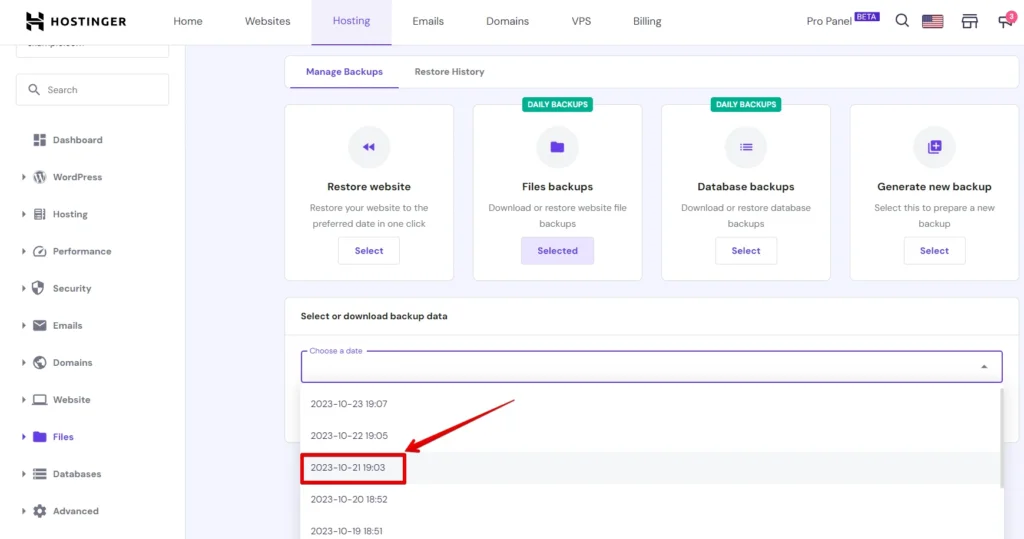
- In the "Files Backups" section, click the "Selected" button. From the dropdown menu, opt for the desired date for restoration. Proceed by clicking on "Next Step".
- Choose individual files or the complete "public_html" folder to restore the website.
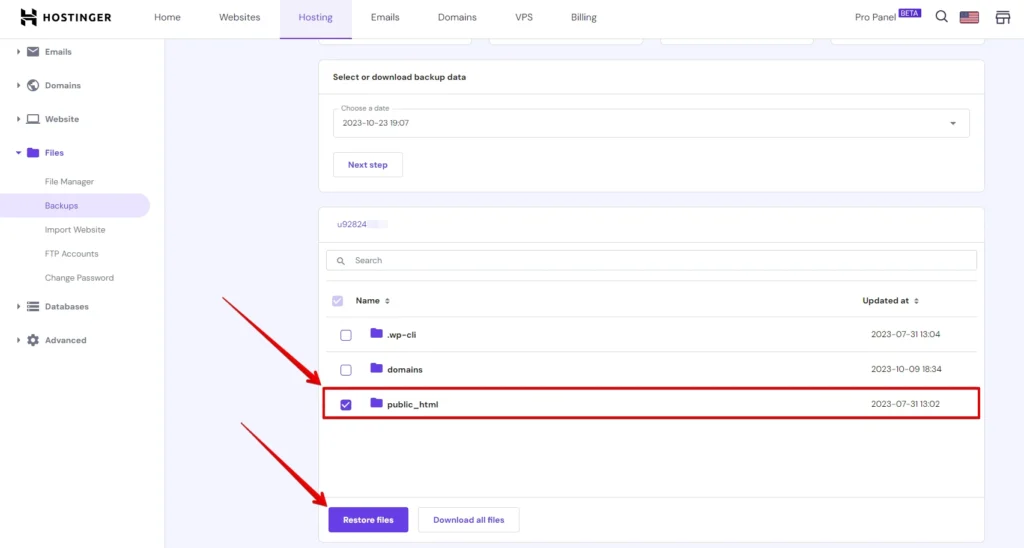
Click the "Restore Files" button to initiate the process; alternatively, you can download them by clicking "Download All Files."
Conclusion
We recommend taking automatic backups of your WordPress website. You can use WP Staging, a powerful tool to automate website backups and staging environments.