Imagine your WordPress website as a car. Just like how a car needs regular maintenance to run smoothly, your website needs its kind of tune-up to perform at its best. The heart of your WordPress site, much like a car’s engine, is its database.
This database is where all your content lives—from the insightful blog posts you’ve written and the stunning images you’ve uploaded to the comments your visitors have left. Over time, just like an engine can get clogged, your website’s database can get cluttered with unnecessary data, slowing down your site and affecting user experience.
But here’s the good news: You don’t need to be a mechanic to give your website the maintenance it deserves. Optimizing and repairing your WordPress database is simpler than you might think, and it can significantly impact your site’s performance.
In this blog post, we’ll guide you through the why and how of optimizing and repairing your WordPress database. We’ll keep the technical jargon to a minimum and focus on easy-to-understand steps you can follow, regardless of your technical expertise.
Contents
First Thing First
Before diving into database optimization, it’s crucial to back up your database. Mistakes can happen, and a backup ensures you can restore your website to its former state if needed.
Plugins like WP Staging are the best way to fully back up your WordPress database, themes, content, or a complete website with clicks.
Here is a detailed guide on how to create a WordPress database backup.
Download the Plugin:
The 3 Ways to Revitalize Your WordPress Database
- Use the WordPress Default Database Repair Tool
- Fix WordPress Database Issues Through PHPMyAdmin
- Repair WordPress Database Using Repair Plugins
1. Use the WordPress Default Database Repair Tool
WordPress doesn’t have a built-in database repair tool, but it offers a feature to attempt database repair in case of corruption.
The database repair tool is accessed by adding a specific parameter to the WordPress configuration file (wp-config.php). Here’s how to use it:
- You need access to your WordPress installation files via FTP or your hosting provider’s file manager.
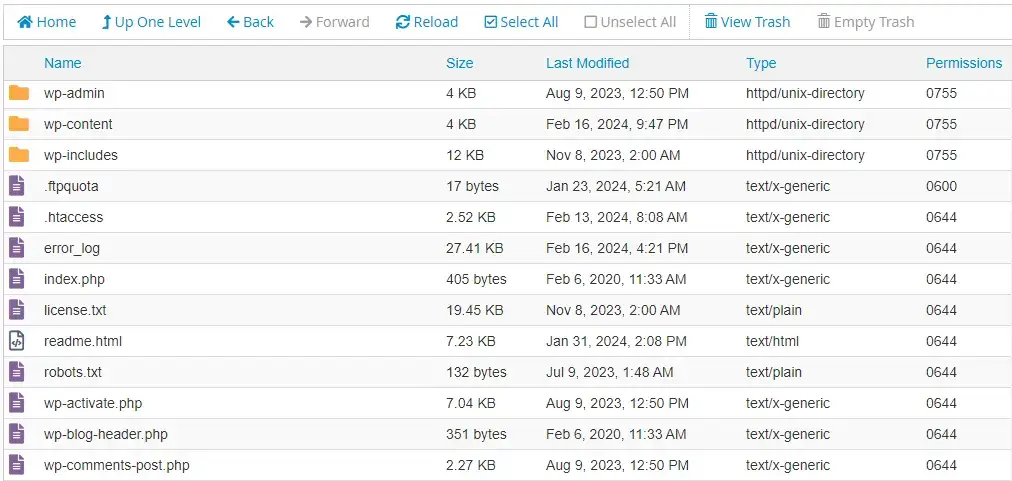
- Locate wp-config.php in the root directory of your WordPress installation and open it for editing.
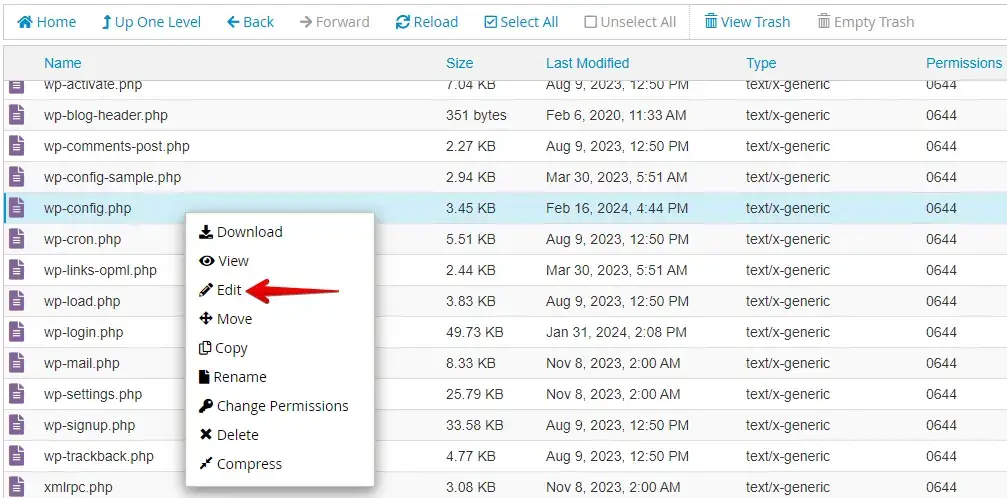
- In wp-config.php, add the following line of code just above the line that says, “That’s all, stop editing! Happy blogging.”
- Save the changes to the
wp-config.phpfile.
define('WP_ALLOW_REPAIR', true);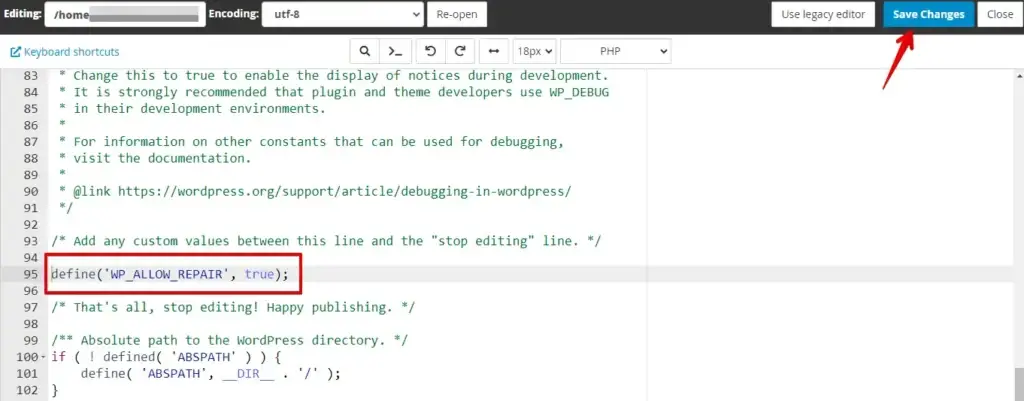
- Now, you can access the database repair tool by visiting the following URL in your web browser and replace
yourdomain.comwith your actual domain name:
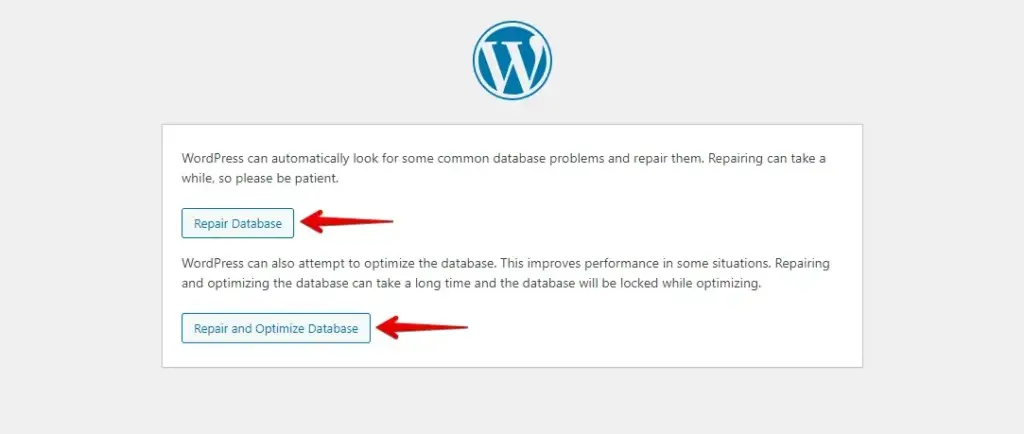
http://yourdomain.com/wp-admin/maint/repair.php- Click "Repair Database" or "Repair and Optimize Database" on the repair page as needed. The process duration varies with database size.
For security reasons, it’s essential to remove the parameter WP_ALLOW_REPAIR from the wp-config.php file once you’ve finished repairing the database. Delete or comment on the line you added earlier.
2. Fix WordPress Database Issues Through PHPMyAdmin
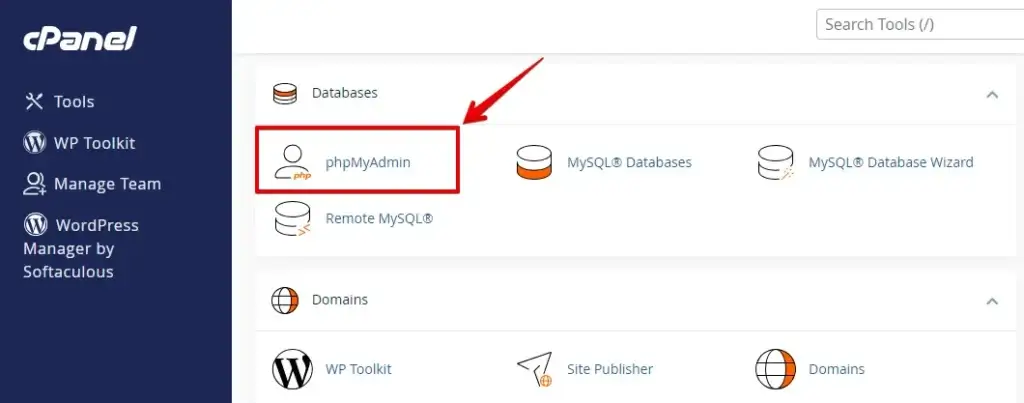
- Log in to your web hosting control panel and navigate to phpMyAdmin.
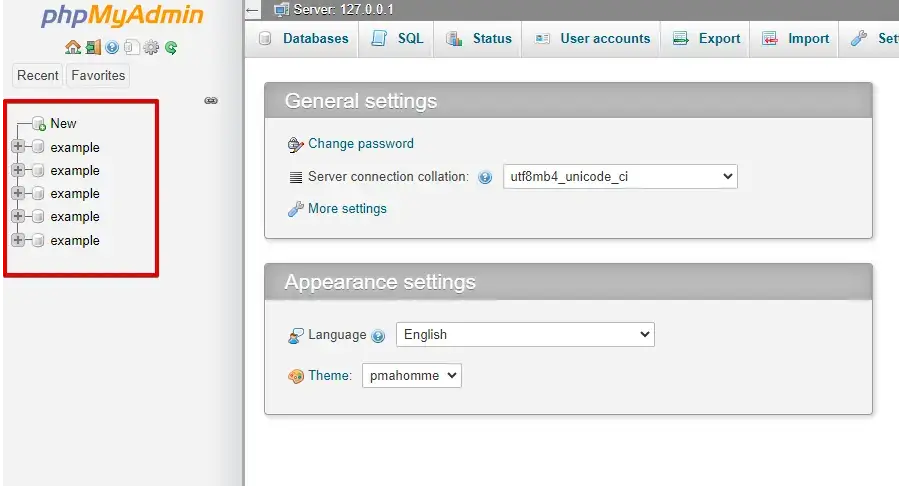
- In phpMyAdmin, locate and select the database associated with your WordPress site from the left-hand sidebar.
- Scroll down and check the box next to "Check All" to select all tables.
- Then, choose "Repair table" from the dropdown menu labeled "With selected".
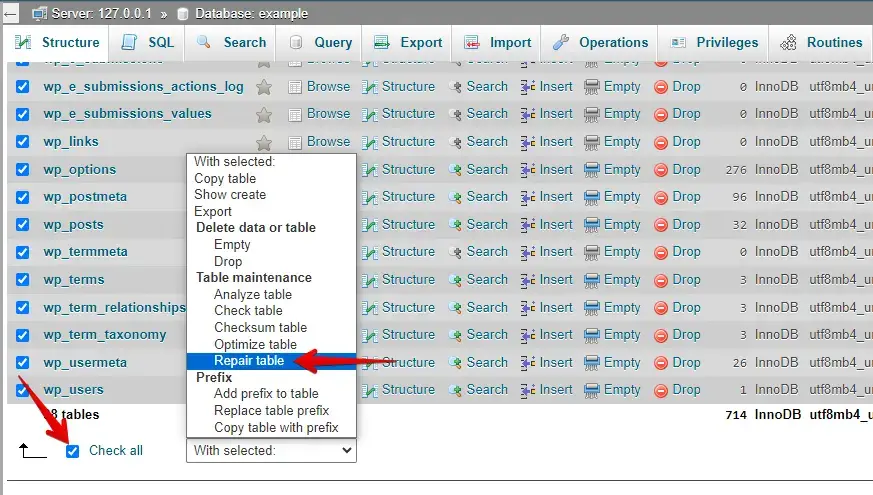
By following these steps, WordPress database issues can be effectively resolved using phpMyAdmin, ensuring the smooth operation of your website.
3. Repair and Optimize WordPress Database Using Repair Plugins
Repairing and Optimizing a WordPress database is crucial for fixing errors like connection issues or corrupted tables. Utilizing database repair and optimization plugins offers a simple solution without the need for direct database interaction. Here’s how to do it:
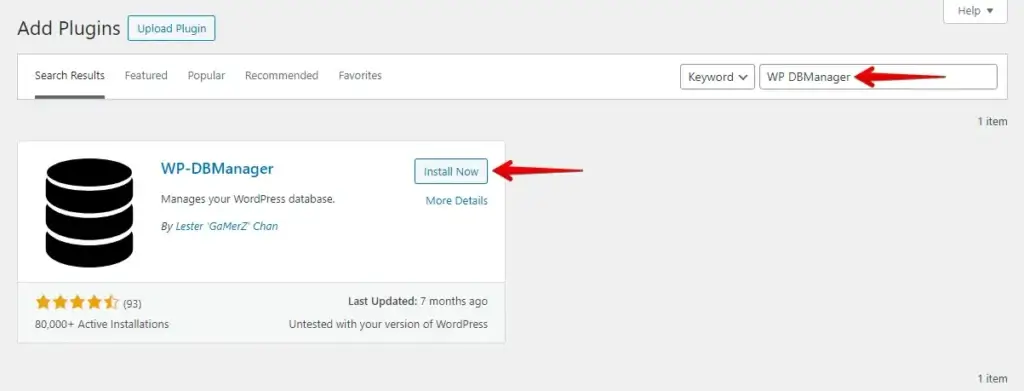
- Select a database repair and optimize plugin like WP-DBManager or WP-Optimize.
- Install the chosen plugin from the WordPress repository and activate it.
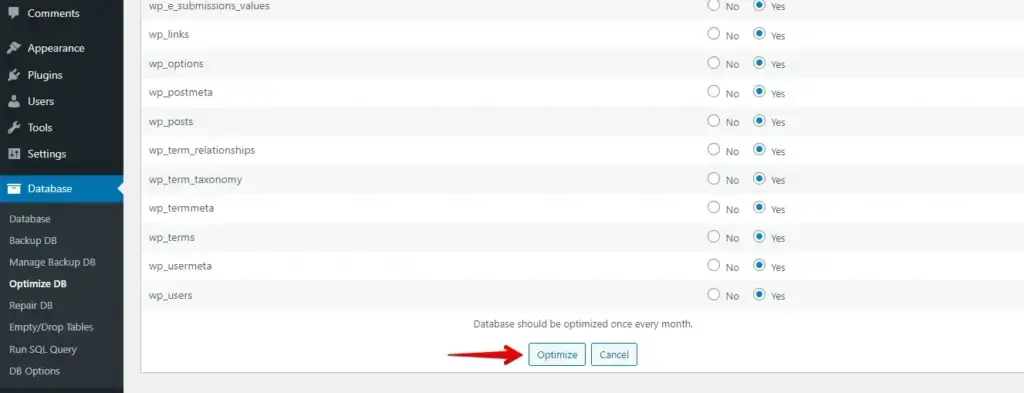
- Navigate to the plugin’s settings or dashboard menu to find the repair and optimize feature.
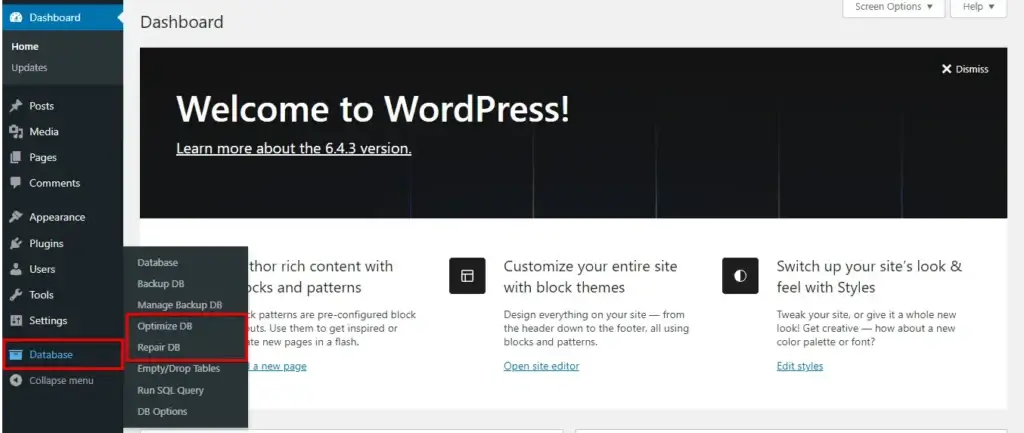
- Start the repair and optimization process within the plugin interface.
Using a database repair and optimization plugin simplifies the process and eliminates the need for manual intervention, making it an efficient solution for fixing WordPress database problems.
Bottom Line
Repairing and optimizing the WordPress database is vital for website health and performance, addressing issues like errors and slow loading. It improves speed, reduces downtime, and optimizes resource usage for sustainable website success.
Related Articles
- How to Fix the Error “Establishing a Database Connection” in WordPress
- How to Disable a WordPress Plugin from Database
- How to Change WordPress Table Prefix of mySQL Database
- phpMyAdmin Repair and Optimize Database Tables Tutorial
- How to Repair mySQL Database with phpmyadmin and adminer
- How to Optimize the WordPress Database for Superior Performance?