Backing up your WordPress website to Dropbox is a smart way to ensure your data is safe in case of a server crash, hacking, or any other unforeseen event that could lead to data loss.
There are several methods to achieve this, but one of the most straightforward ways involves using plugins that facilitate the backup process directly to your Dropbox account.
Here’s how you can do it:
STEP 1: Choose a Backup Plugin
Several WordPress plugins allow you to back up your site to Dropbox.
However, WP Staging Pro is the most reliable option.
How?
- You’ll be able to back up your site within a few clicks.
- Requires less technical knowledge.
- Ability to Automate Backups to Dropbox.
- One-click backup restoration.
On the other hand, you can achieve much more for a significantly lower price.
Contents
STEP 2: Backup Your WordPress Website on Dropbox Using WP Staging Pro
If you don’t have a Dropbox account, you must create one first. You can sign up for a free account at Dropbox’s website.
- Log in to your WordPress dashboard.
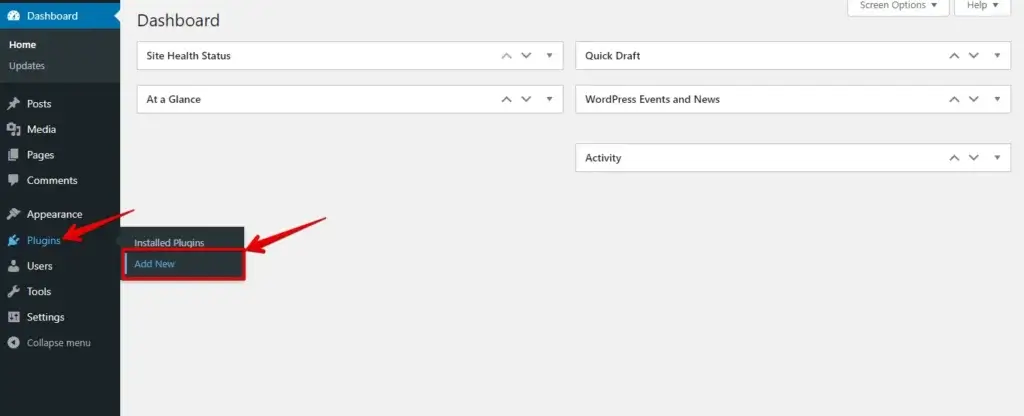
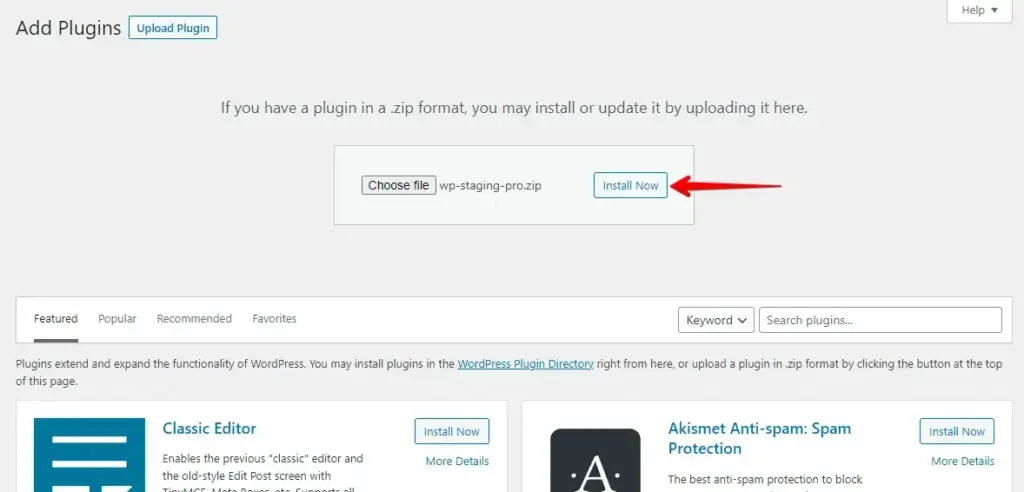
- Go to "Plugins" in the left-hand menu and click "Add New."
- Click the "Upload Plugin" button, then select the "Choose File" option to upload the WP Staging Pro plugin.
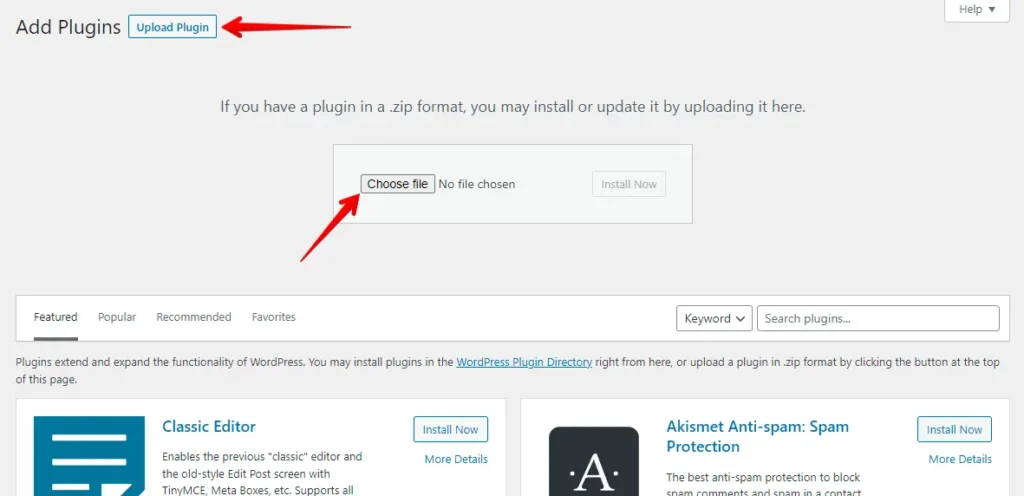
- After that, click on the "Install Now" button.
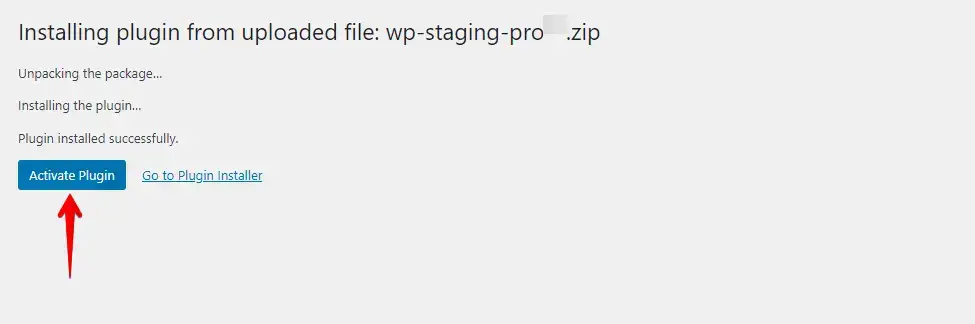
- Once the plugin is installed, please activate it.
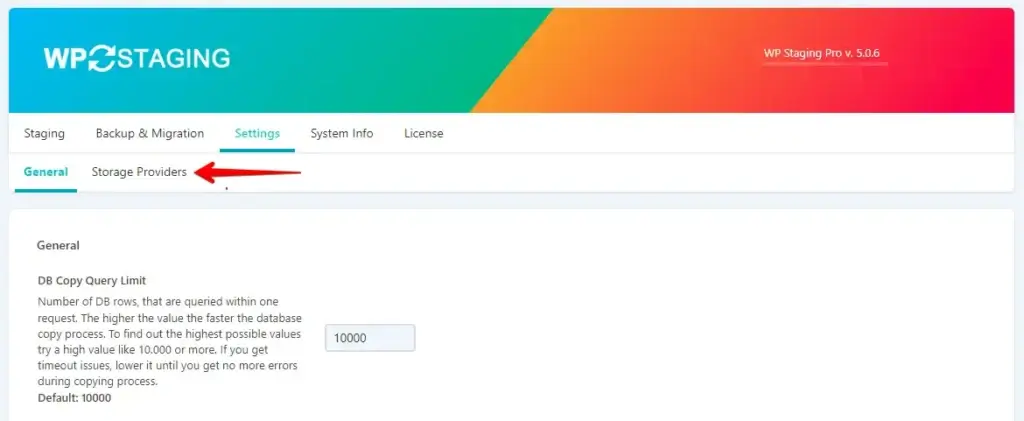
- Navigate to "WP Staging Pro" in the menu on the left and click "Settings."

- Within the settings, click on "Storage Providers."
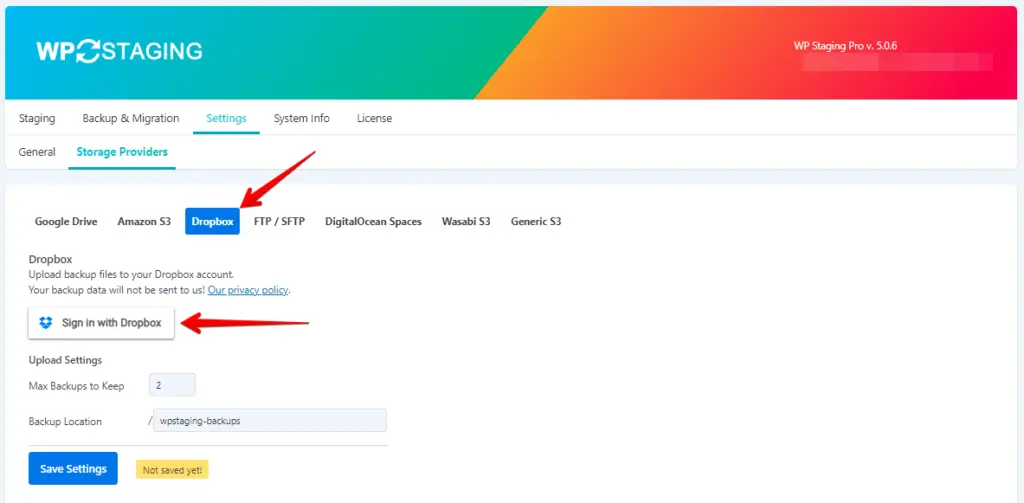
- Click the "Dropbox" button.
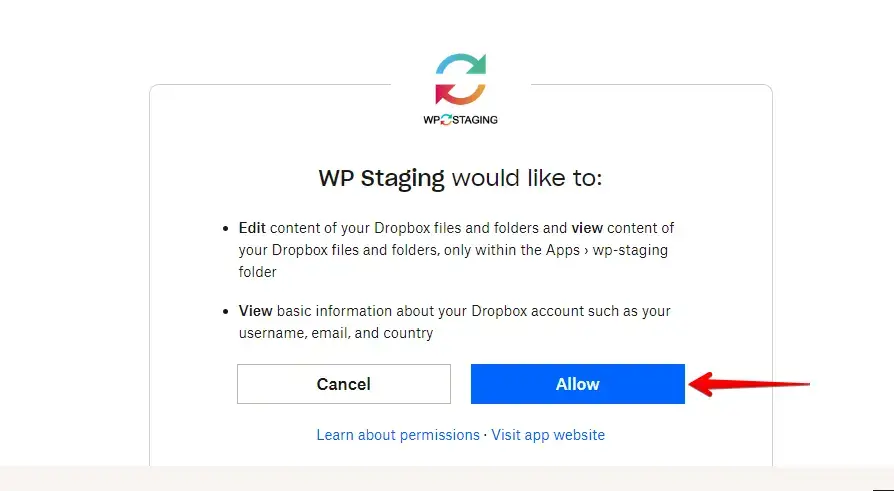
- If you haven’t linked your Dropbox account with WP Staging, click the "Sign in with Dropbox" button.
- After that, click the "Allow" button.
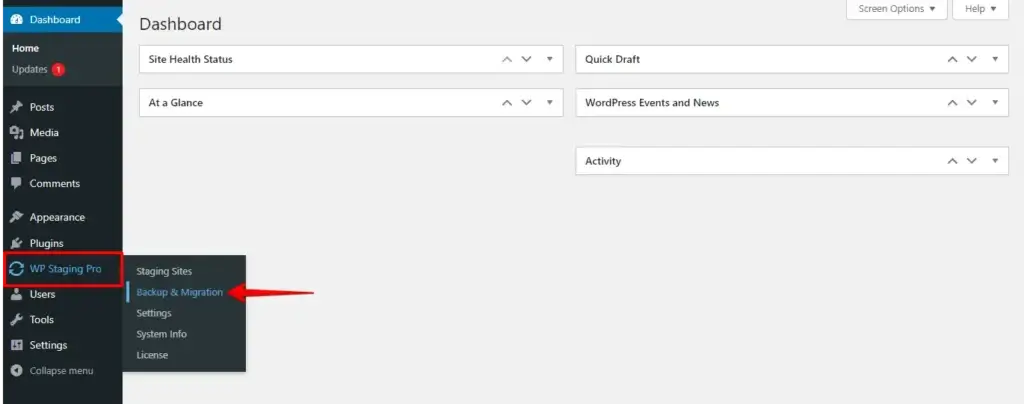
- Once you’ve successfully linked Dropbox, go to the "WP Staging Pro" option in the left-hand menu and click "Backup & Migration."
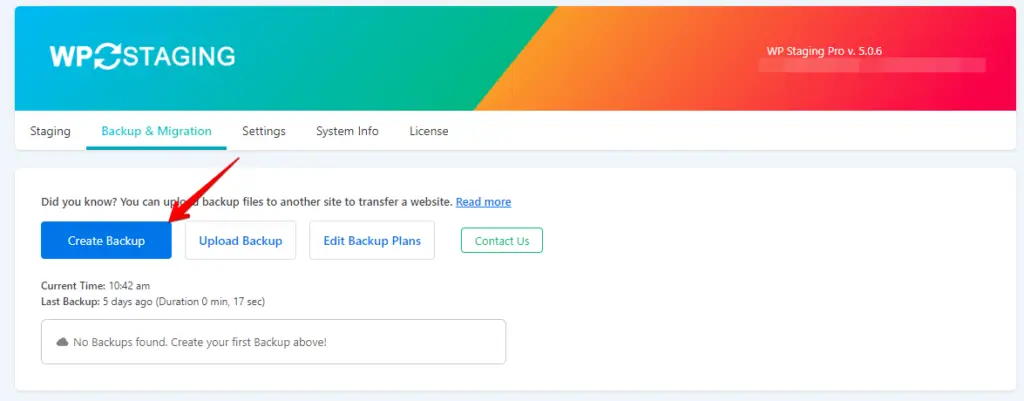
- Next, click the "Create Backup" button.
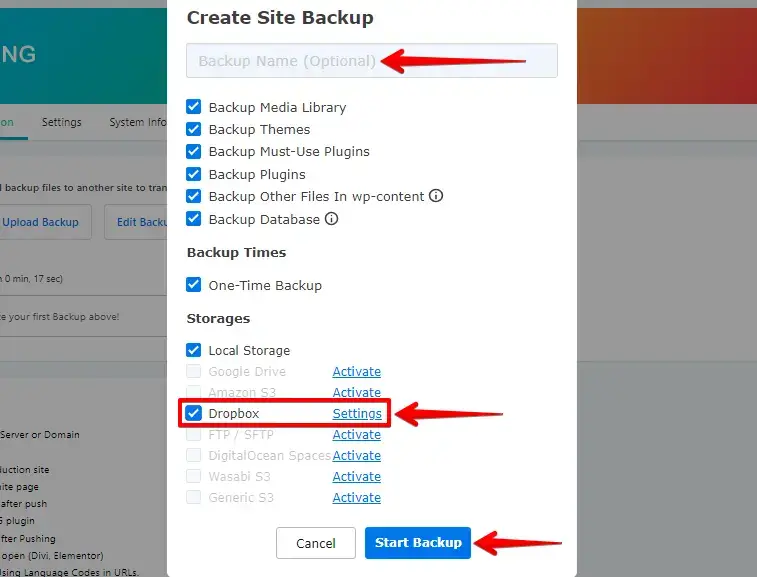
- Enter a name for the backup, ensure the "Dropbox" option is checked, and then click the "Start Backup" button.
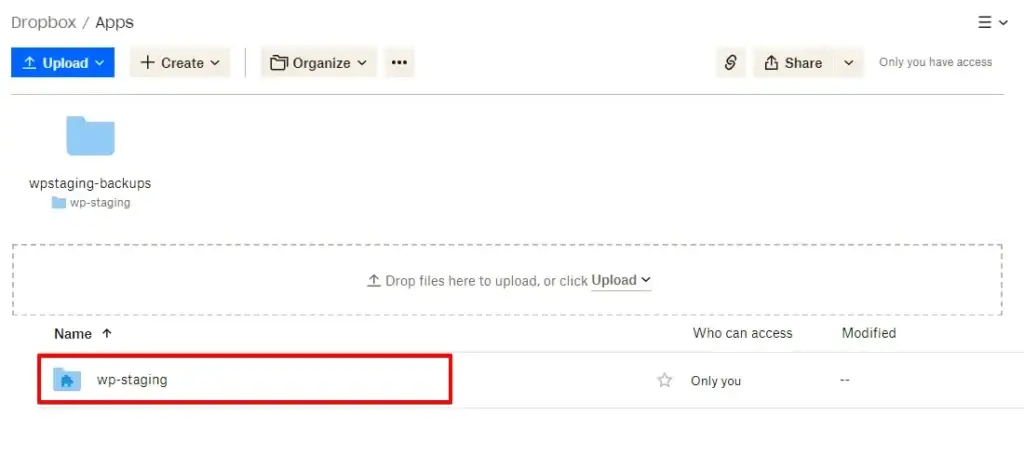
- Your website backup has been completed.
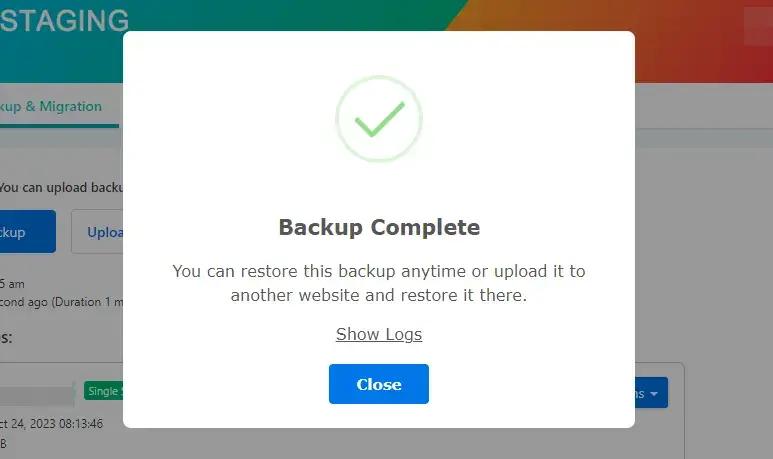
- Check your Dropbox account to confirm that the backup has been successfully uploaded.
Additional Tips
- Ensure your Dropbox has enough space for your backups. Consider how often you back up and the size of your site.
- Consider using multiple backup locations. In addition to Dropbox, you might want to keep a local backup or use another cloud service as a secondary backup location for added redundancy.
Conclusion
By following these steps, you can establish a reliable backup system that ensures the safety and continuity of your online presence. Remember that regular backups are not an option but a necessity for every website owner.
If you still face any difficulty using WP Staging Pro, feel free to contact our customer support.