We invest countless hours into creating, customizing, and optimizing our online presence, so it’s crucial to have a reliable backup plan in place. In the event of unforeseen circumstances like data loss, hacking attempts, or even accidental deletion, having a backup ensures that you can quickly restore your website to its former glory.
Regarding backups, the more secure and convenient the solution, the better. And what better place to store your website’s backup than the cloud giant?
In this comprehensive guide, we will walk you through backing up your WordPress website to Google Drive, ensuring the safety and accessibility of your valuable data.
Contents
Why Google Drive?
Google Drive is one of the most popular and widely used cloud storage services. Trusted by millions of users worldwide, it offers a range of benefits that make it an ideal choice for backing up your WordPress website:
- Ample storage: Google Drive provides a generous amount of free storage (15GB) with affordable upgrade options for larger storage needs.
- Reliability and security: As a product of Google, Drive boasts industry-leading infrastructure, ensuring data reliability and robust security measures.
- Easy access and sharing: Google Drive seamlessly integrates with other Google services, making accessing and sharing your backups with team members or clients effortless.
- Automated backups: By leveraging a few WordPress plugins, you can automate the backup process, saving time and effort.
- Version control: Google Drive keeps multiple versions of your files, allowing you to restore specific versions from different points in time.
Now that we understand the significance of a reliable backup system and why Google Drive is an excellent choice, let’s dive into the step-by-step process of safeguarding your WordPress website with this powerful cloud storage solution.
Set Up a Google Account and Google Drive
If you don’t already have one, create a Google Account. Once you have an account, access Google Drive by visiting (drive.google.com). It’s a cloud storage service that offers 15 GB of free storage space, which should be sufficient for most small to medium-sized WordPress websites. For larger websites, consider upgrading to a paid storage plan.
Backup WP to Google Drive with WP Staging
WP Staging Pro is an impressive WordPress plugin that enables the creation of staging environments for websites, serving as a valuable tool for backup and migration tasks. With its user-friendly interface, the plugin streamlines the backup process and offers efficient management of backups.
Step 1: Install and Activate the Plugin
Next, you must install and configure a backup plugin on your WordPress website. Several reliable plugins, such as WP Staging Pro.
Simple Steps to Get Started with WP Staging Pro:
- First, go to your WordPress Dashboard.
- Navigate to the "Plugin" section, and click the "Add New" button.
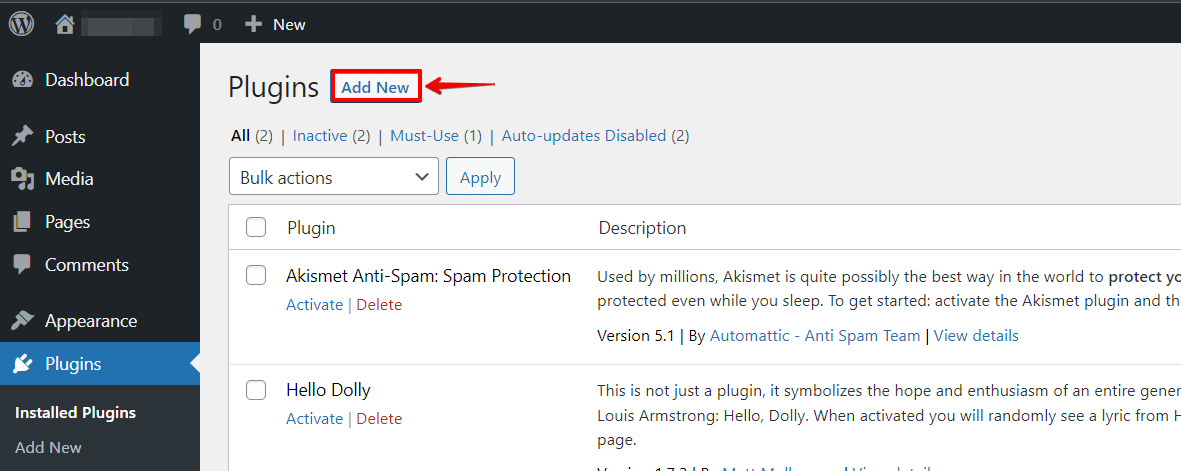
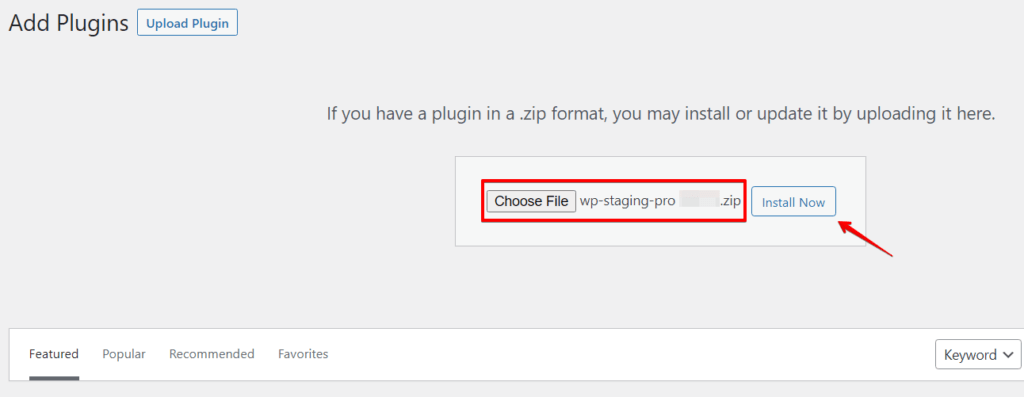
- Click on the "Upload Plugin" button next to the page title.
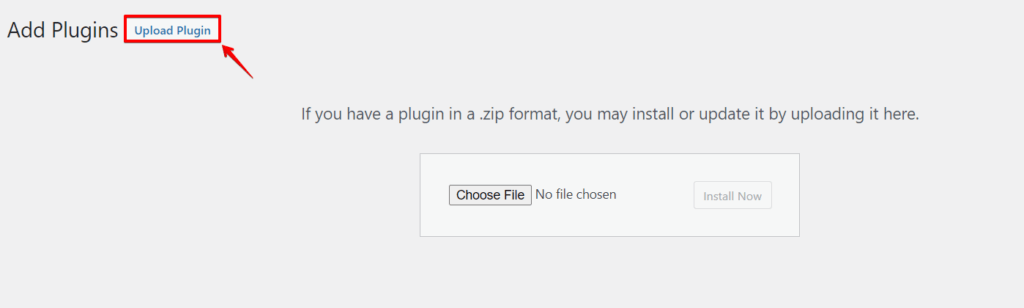
- Choose the WP Staging Pro plugin file you downloaded and click "Install Now".
- Once the installation is complete, click "Activate" to activate the WP Staging Pro plugin.
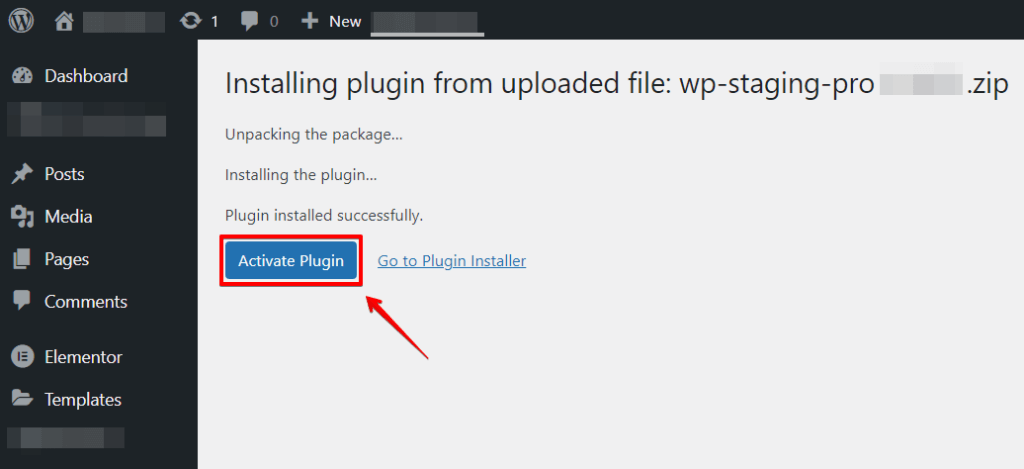
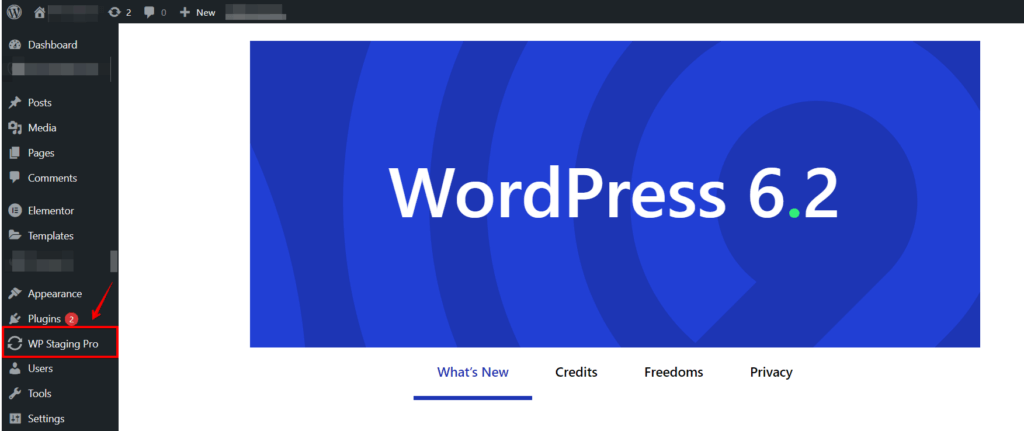
- You will see the WP Staging Pro menu in your WordPress admin sidebar.
Step 2: Configure WP Staging Pro to Backup to Google Drive
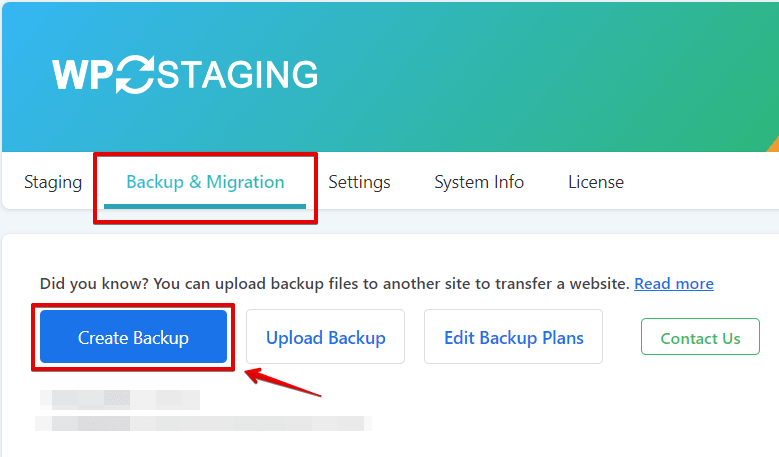
- After activating the plugin, click the "WP Staging Pro" option in the left-hand menu and click the "Backup & Migration" option.
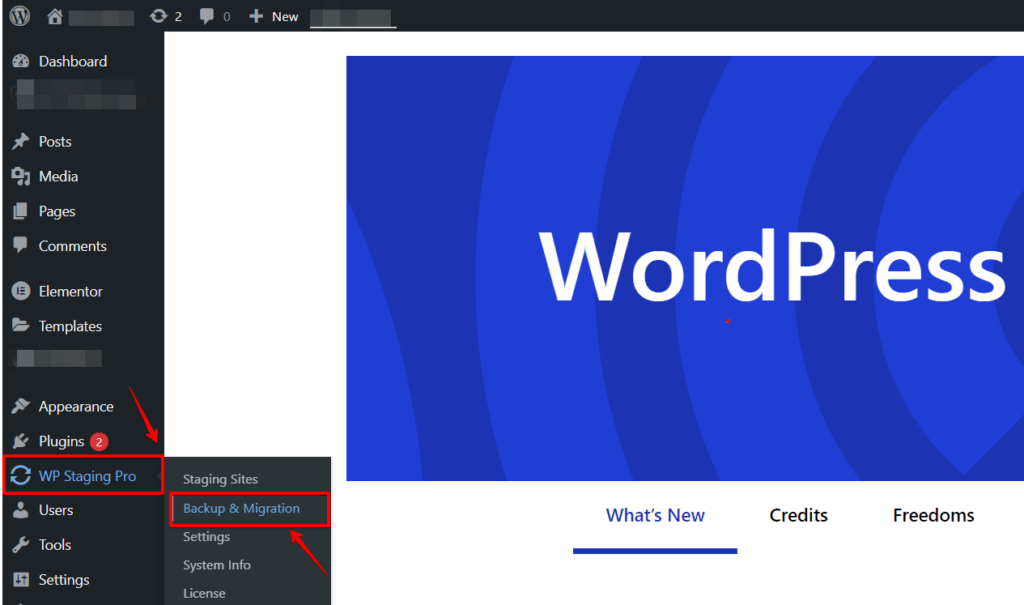
- After clicking the "Backup & Migration" option, you will see the menu of the "Backup & Migration" options. Then, click the "Create New Backup" option.
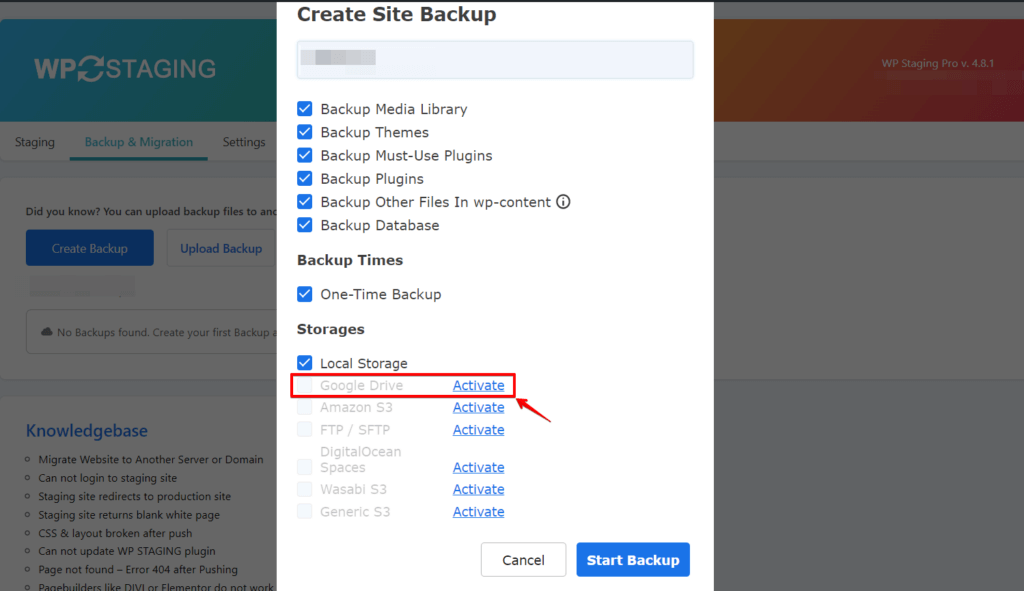
- A new section will appear once you click the "Create Backup" option. Choose the backup options, including files, databases, or both. Scroll down to the "Storage" section, select "Google Drive" as the storage provider, and click the "Activate" button.
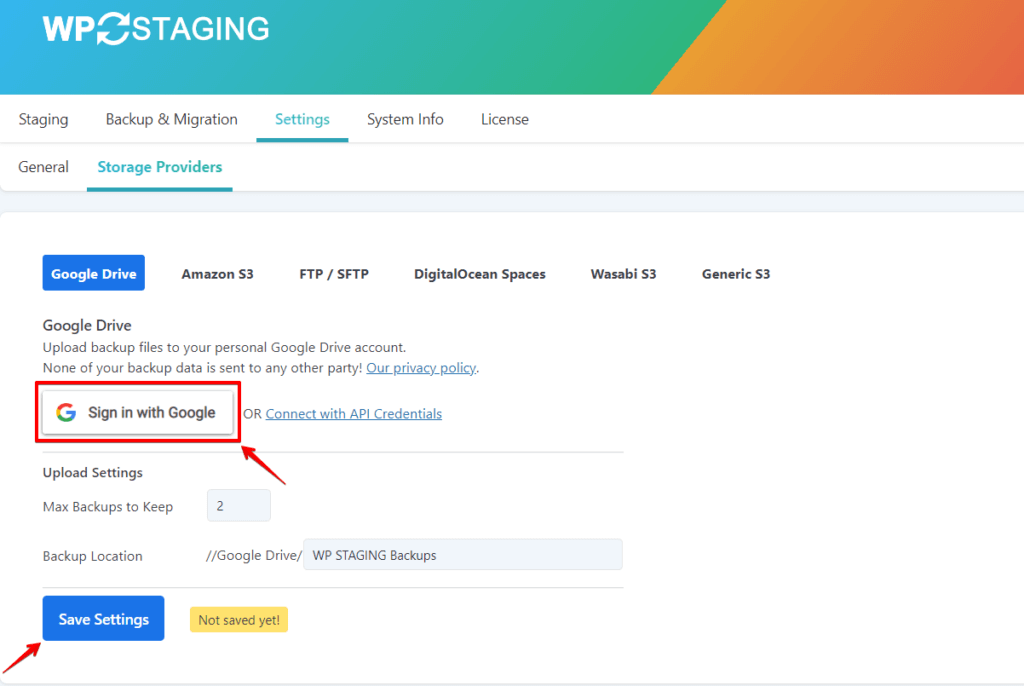
- Here, you can sign in to your Google Account. If you enter your Google Account Credentials, click "Save Settings".
Step 3: Initiate the Backup Process
You can initiate your first backup once you have configured WP Staging Pro.
- Go to the WP Staging "Backup & Migration" page and click the "Create Backup" button.
- A new section will appear once you click the "Create Backup" option. Choose the backup options, including files, databases, or both. Scroll down to the "Storage" section, select "Google Drive" as the storage provider, and then click the "Start Backup" button.
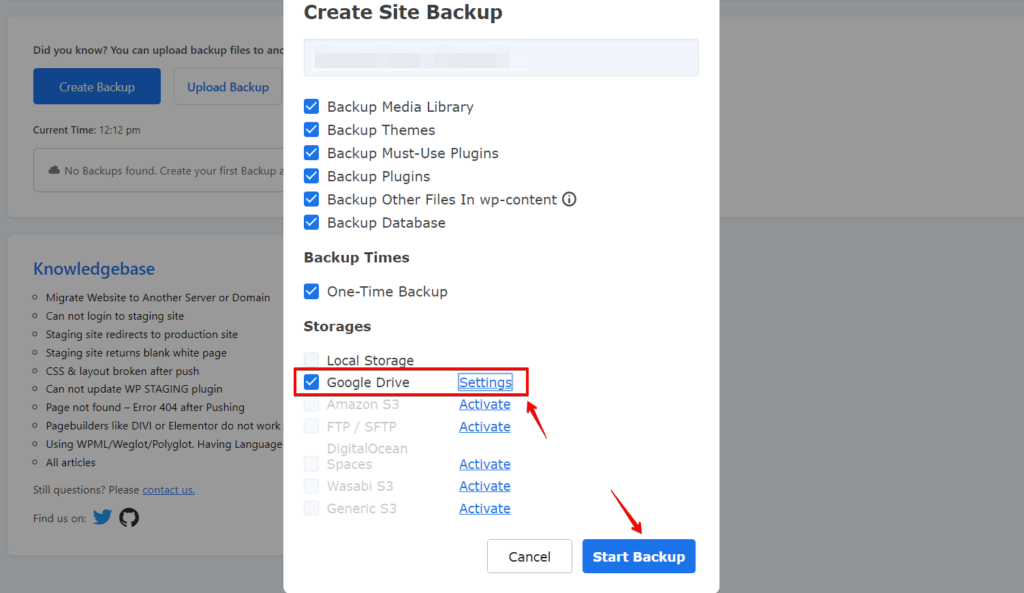
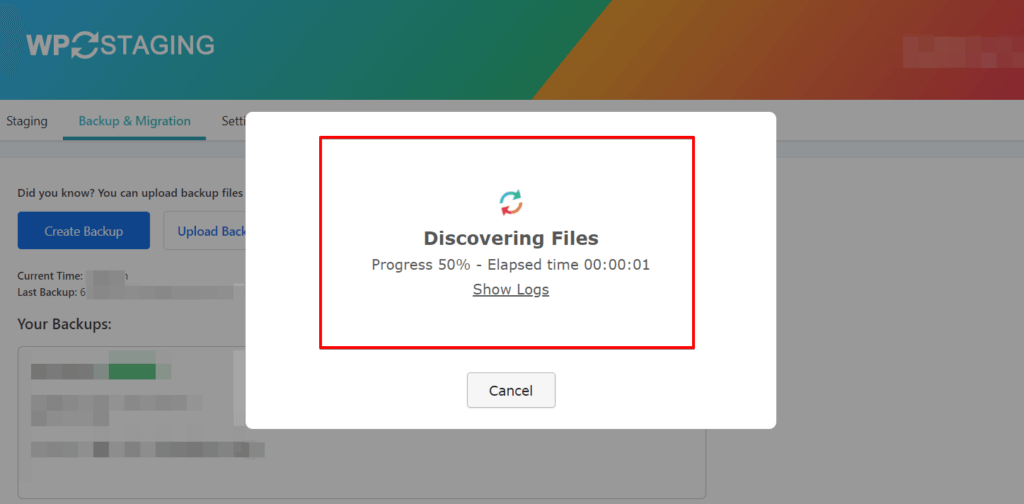
- WP Staging Pro will start the backup process and upload your website’s files and databases to Google Drive. The time will depend on your website’s size and internet connection speed.
Step 4: Verify your Backups
Log in to your Google Drive account and navigate to the designated backup folder to confirm that the backup was successfully uploaded to Google Drive. You should see a folder named after the WP Staging Pro plugin containing your website’s backup files.
🔥GET STARTED WITH WP STAGING TO EFFICIENTLY MANAGE BACKUPS & CREATING STAGING ENVIRONMENTS.
Conclusion
Backing up your WordPress website to Google Drive offers a reliable and secure storage solution, ensuring the safety of your valuable data. Establish a robust backup strategy to safeguard against data loss and facilitate effortless disaster recovery.
Enhance your backup capabilities with WP Staging Pro, a powerful plugin that provides a staging environment for seamless testing of updates and changes, ensuring secure website management.