The "Fix Destination Folder Already Exists" error typically occurs when you attempt to move, copy, or extract files to a location where a folder with the same name already exists. Windows and other operating systems will flag this as an issue to prevent accidental overwriting of important data.
This error might appear familiar to those who frequently experiment with various plugins and themes on their WordPress platform, especially when attempting to reintroduce a previously used plugin or theme.
Common Causes of the Error
1. Duplicated File Names
Have you ever saved a file with an identical name in the same location? This is one of the primary reasons for encountering this error. The operating system cannot differentiate between identical file names, causing the error.
2. Overlapping Folders
Overlapping folders, where one folder contains another with the same name, can confuse your system. This often triggers the error message.
3. File System Corruption
In some cases, file system corruption can be the culprit. When your system’s file structure becomes damaged, it may struggle to manage files correctly, resulting in this error.
Don’t let the "Installation Failed: Destination Folder Already Exists" error deter you. It’s usually due to existing plugins and theme folders, especially when updating themes or plugins.
🔥PLAY SAFE:GET STARTED WITH WP STAGING TO EFFICIENTLY MANAGE BACKUPS & CREATING STAGING ENVIRONMENTS.
Solutions to Fix the Error
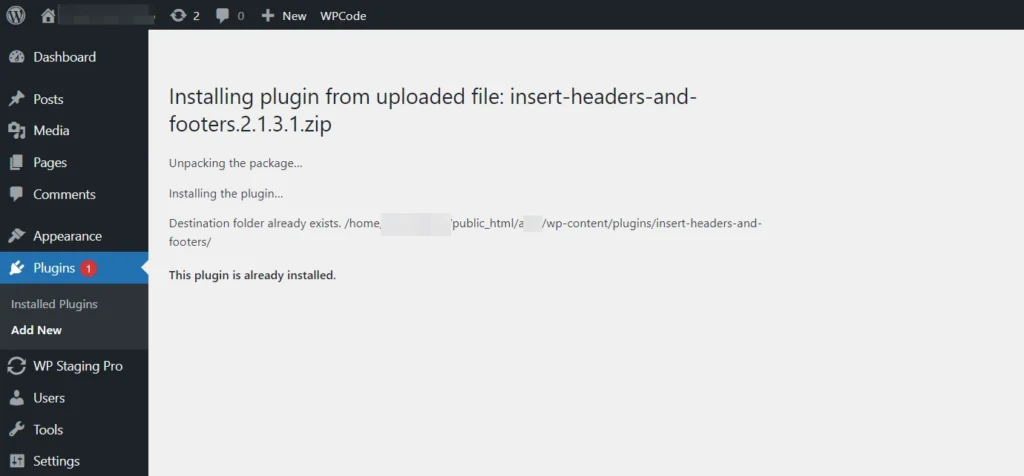
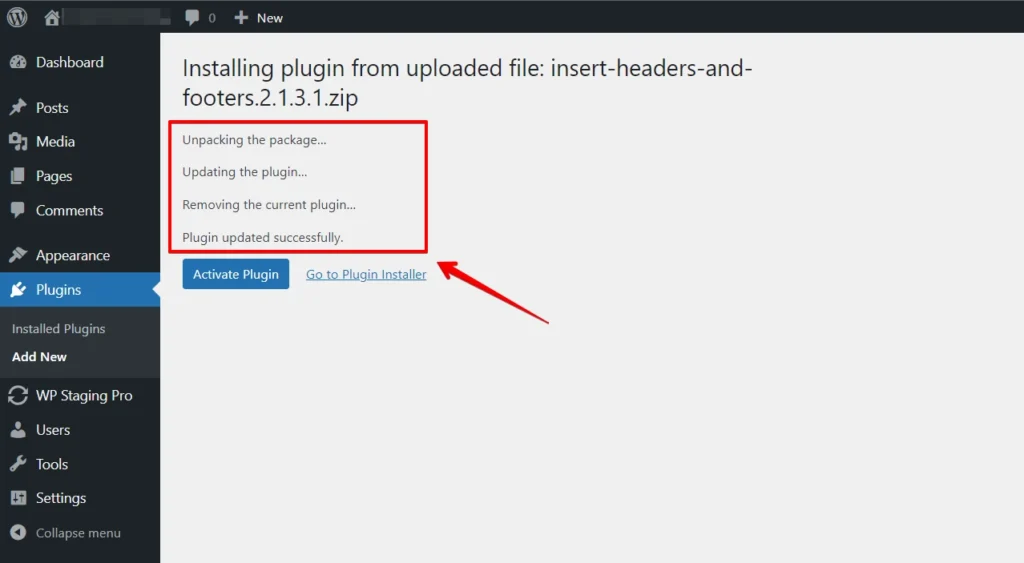
Method 1: Replace the Existing Folder With an Uploaded File
When manually uploading a theme or plugin, you may encounter the "Destination Folder Already Exists" error if it’s already installed.
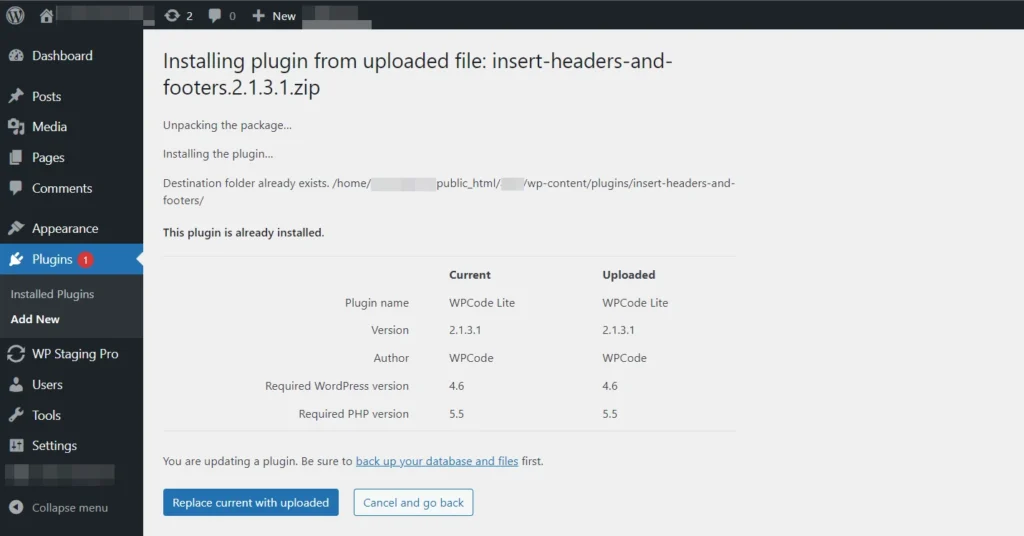
When this happens, click the "Replace current with uploaded" button, which will both upload the new file and remove the old one simultaneously.
It’s a quick solution to update your files.
Method 2: Delete the Existing Folder Using File Manager Plugin
Efficiently manage your WordPress site’s files and folders with the WordPress File Manager Plugin. We’ll guide you through deleting folders for a streamlined, clutter-free website.
Here is a step-by-step guide to deleting an existing folder using the File Manager Plugin:
- Access your WordPress admin dashboard by logging in to your site.
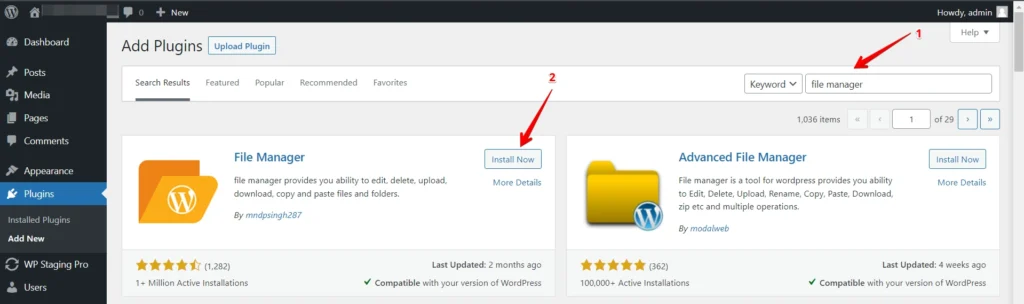
- Go to "Plugins"> "Add New" from the sidebar menu and click on it.
- If you haven’t already installed the File Manager Plugin, you can search for it in the "Add New" section and install it. Once installed, activate the plugin.
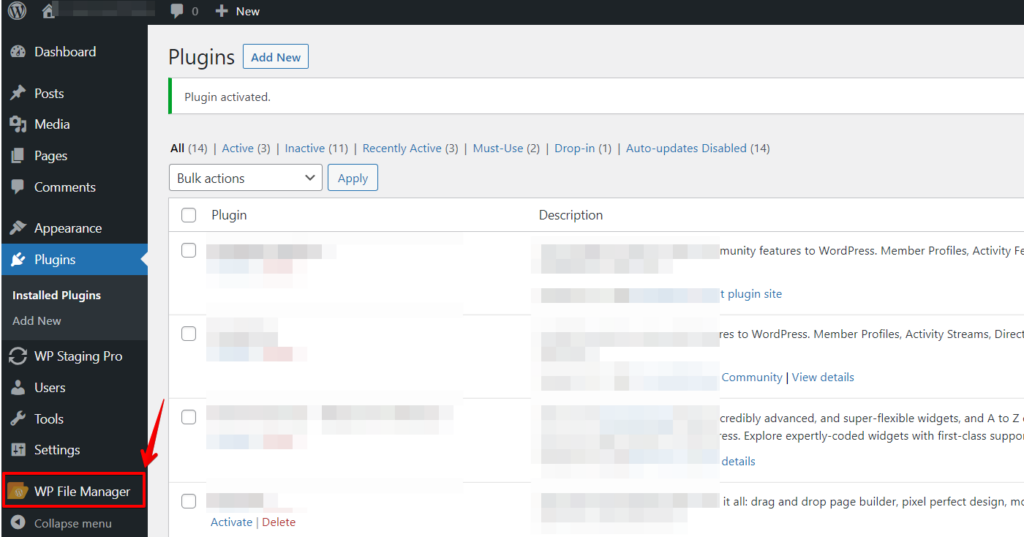
- After activation, a new menu item called "File Manager" should appear in your dashboard. Click on it to access the File Manager.
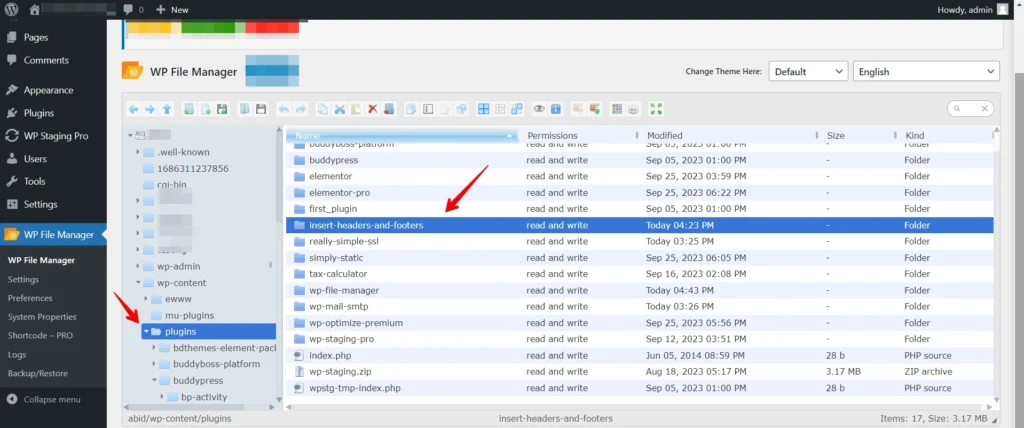
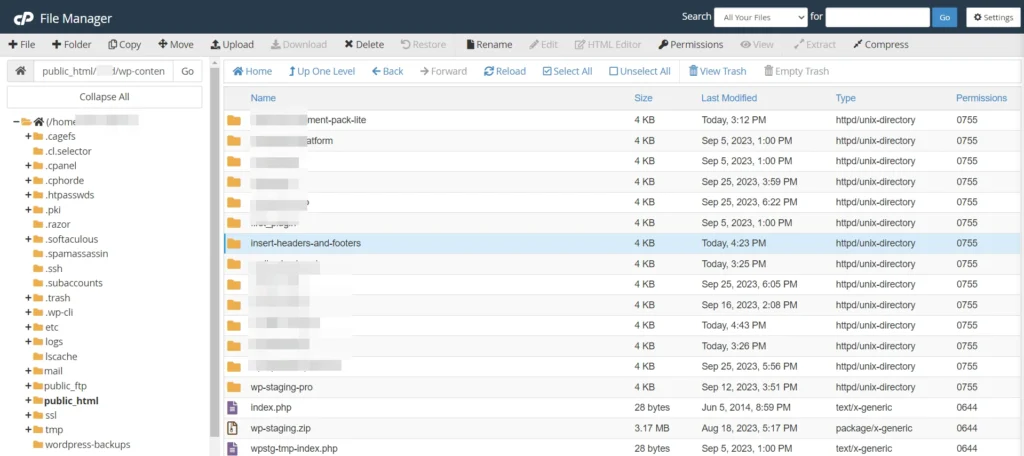
- Use the File Manager interface to navigate to the folder you want to delete. You can typically find your website files under the "public_html" or "www" directory. Click on the folder you wish to delete to highlight it.
- Look for an option or button like "Delete," "Remove," or a trash can icon. Click on this option to delete the selected folder.
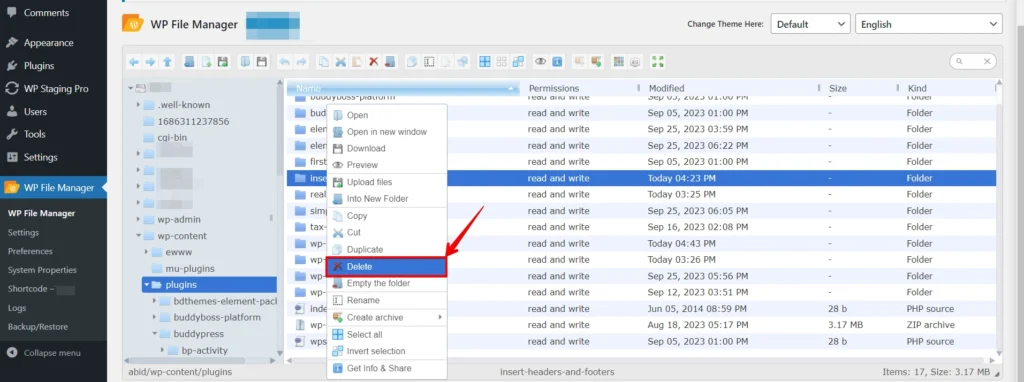
After deletion, double-check to ensure the folder and its contents have been removed successfully. Cleaning up any unnecessary files is good practice to free up server space.
Method 3: Delete the Existing Folder Via Cpanel
- Log in to your cPanel account provided by your web hosting service.
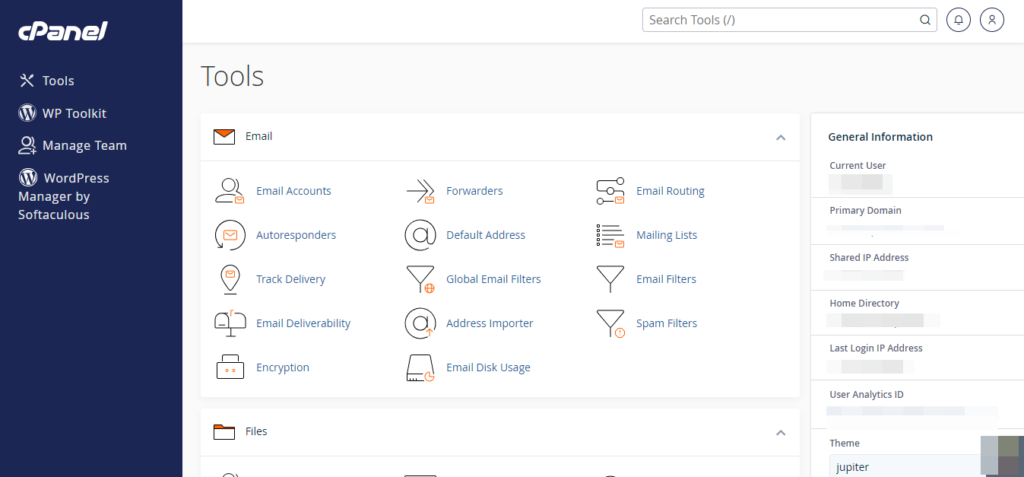
- Look for the "File Manager" icon or link in your cPanel dashboard and click on it.
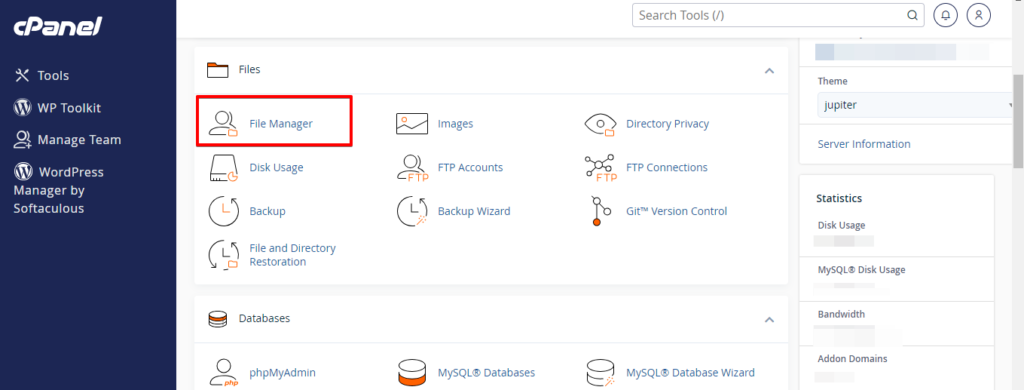
- In the File Manager, navigate to the directory where your WordPress website is installed. This is usually the
public_htmldirectory or a subdirectory within it.
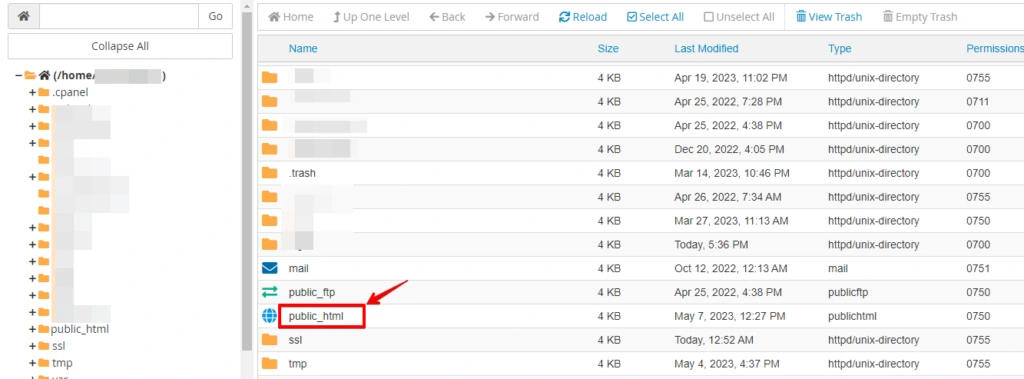
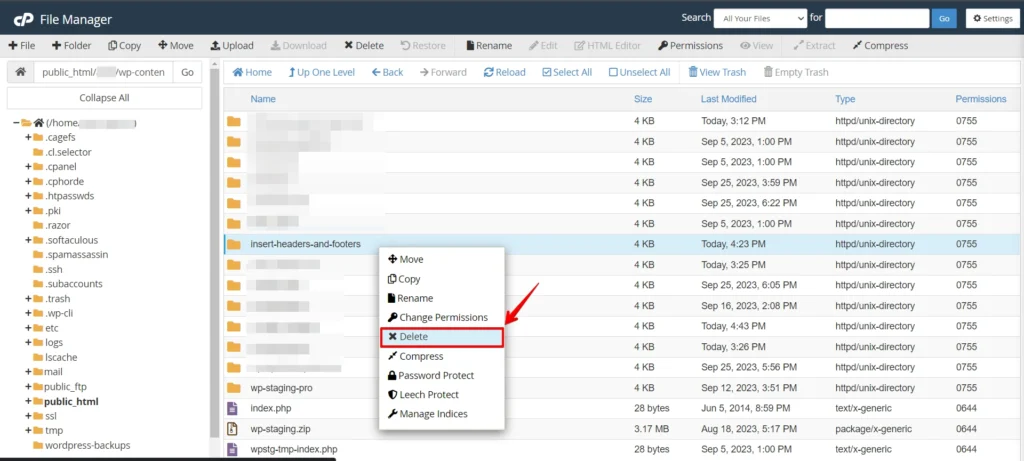
- Navigate to the directory where the folder you want to delete is located by clicking on the folder names. You can use the directory tree on the left side for navigation. Locate the folder you wish to delete. Click on it to select it.
After selecting the folder, you can typically find a "Delete" or "Remove" option in the top menu or as an icon (often represented by a trash can or a delete symbol). Click on this option.
Double-check to ensure that the folder has been deleted successfully. It’s a good practice to refresh the File Manager to ensure it’s no longer present.
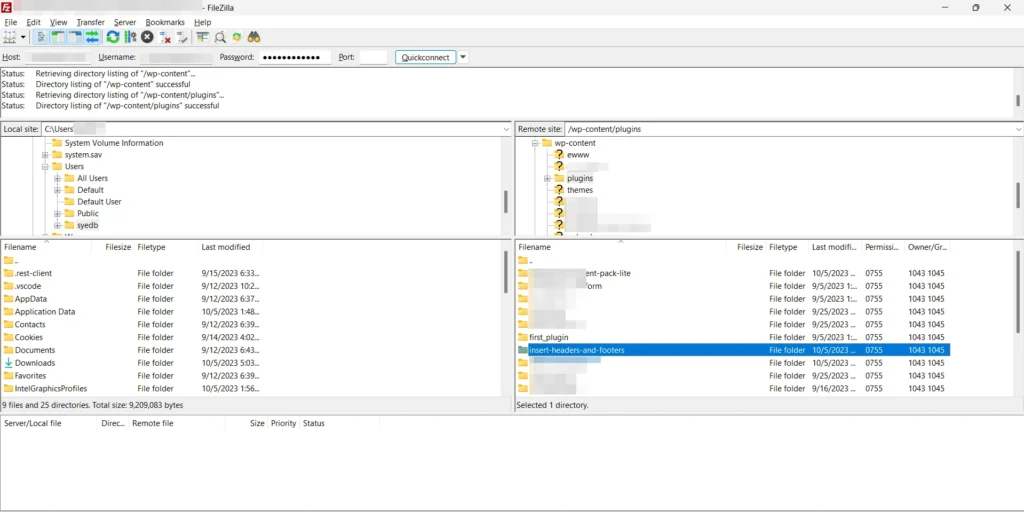
Method 4: Delete the Existing Folder Via FTP
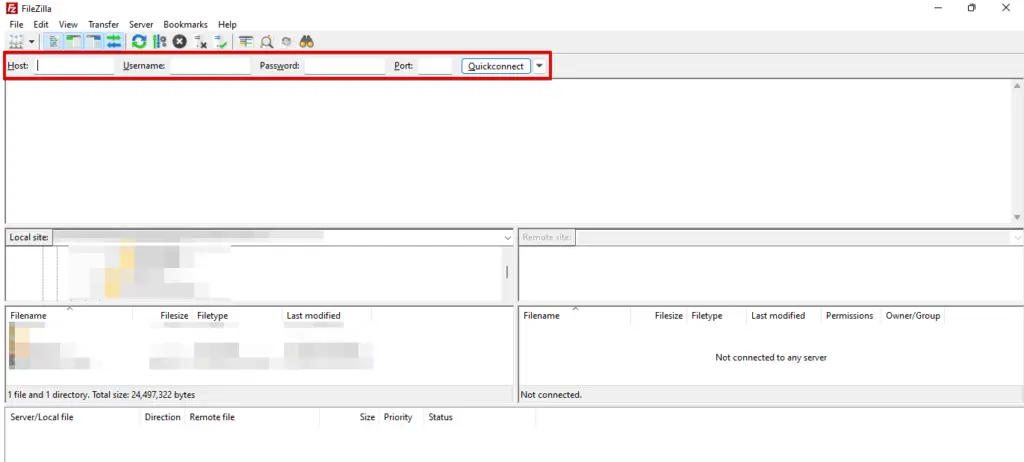
- Use an FTP client (such as FileZilla, Cyberduck, or WinSCP) to connect to your web server. You’ll need the FTP server address, username, password, and port information.
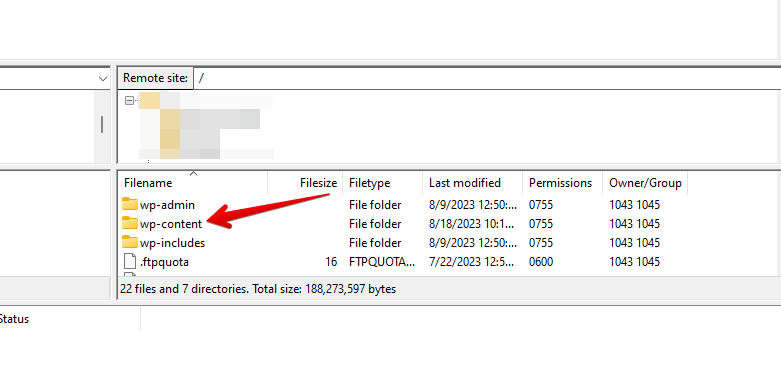
- After establishing the connection, proceed to the "wp-content" folder and access it by clicking.
- Subsequently, navigate to the "plugins" directory. Locate the folder you wish to delete. Click on it to select it.
- Right-click on the selected folder or look for a "Delete" or "Remove" option in the FTP client’s menu. Click on this option to delete the folder.
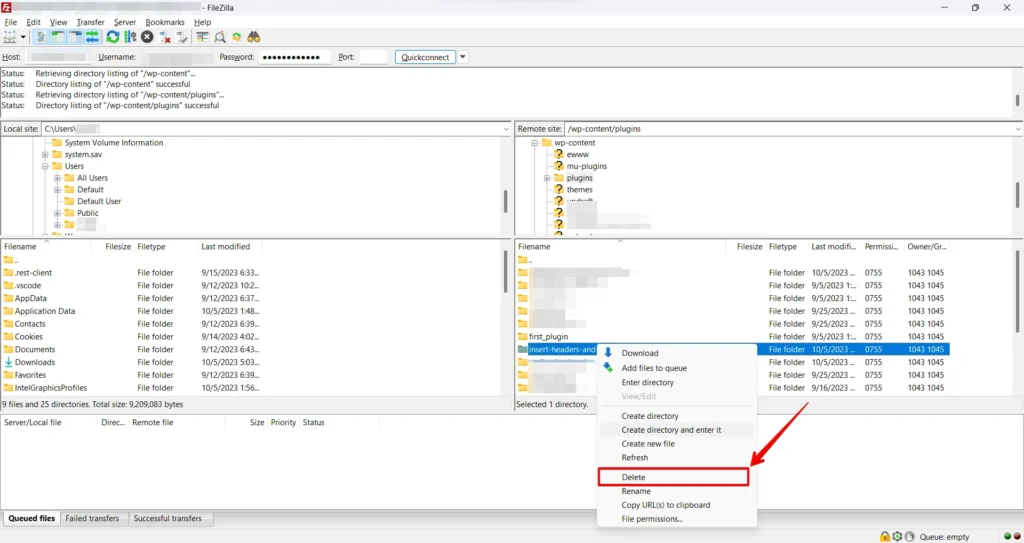
To ensure the folder has been deleted successfully, refresh the remote server view in your FTP client or navigate back to the folder’s directory to confirm its absence.
Conclusion
The "Fix Destination Folder Already Exists Error" can be a frustrating hurdle in your digital journey, but you can overcome it with the proper knowledge and troubleshooting steps.
Remember to practice good file management habits to prevent future occurrences of this error. Now, go ahead and resolve this issue with confidence.