Experiencing a 400 Bad Request Error on your WordPress site can be frustrating and confusing. This error typically occurs when the client, meaning the browser sending the request, sends information to the server that the server cannot understand or process.
In this blog post, we will explore the causes of this error and provide a step-by-step guide for effectively resolving it.
Contents
What Causes a 400 Bad Request Error?
Several factors can lead to a 400 Bad Request Error on a WordPress site:
- URL String Syntax Errors: Incorrectly typed URLs or characters not allowed in a URL.
- Corrupted Browser Cookies and Caches: Stored cookies or caches that conflict with the server’s new or updated data.
- DNS Lookup Failures: Problems resolving a domain name into an IP address.
- Server-Side Faults: Issues on the server itself, such as faulty configurations or corrupted files.
Easy Fixes for the 400 Bad Request Error
- Clear Browser Cache and Cookies
- Double-Check the URL
- Disable Browser Extensions
- Flush Your DNS Cache
- Increase the PHP Memory Limit
Note: It’s a good idea to back up your website before you make any changes. If something goes wrong, you can quickly restore your site to its previous state. You can use WP Staging for easy automatic backups. Check out the backup and restore guide for more help.
1. Clear Browser Cache and Cookies
Sometimes, your browser’s cache and cookies can get corrupted, leading to a 400 Bad Request error. Clearing them can often fix the problem.
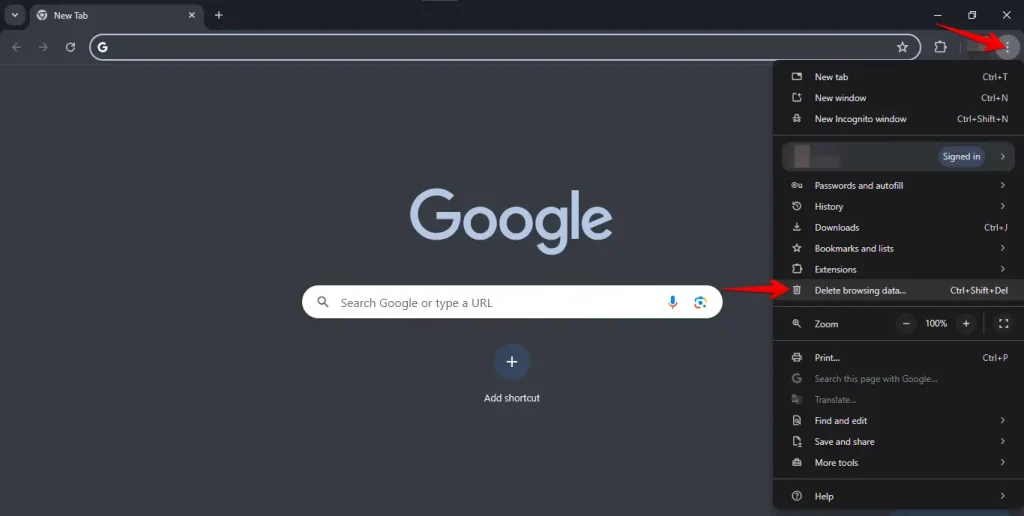
- Open your browser, click on the three dots in the upper right corner, and select “Delete browsing data.”
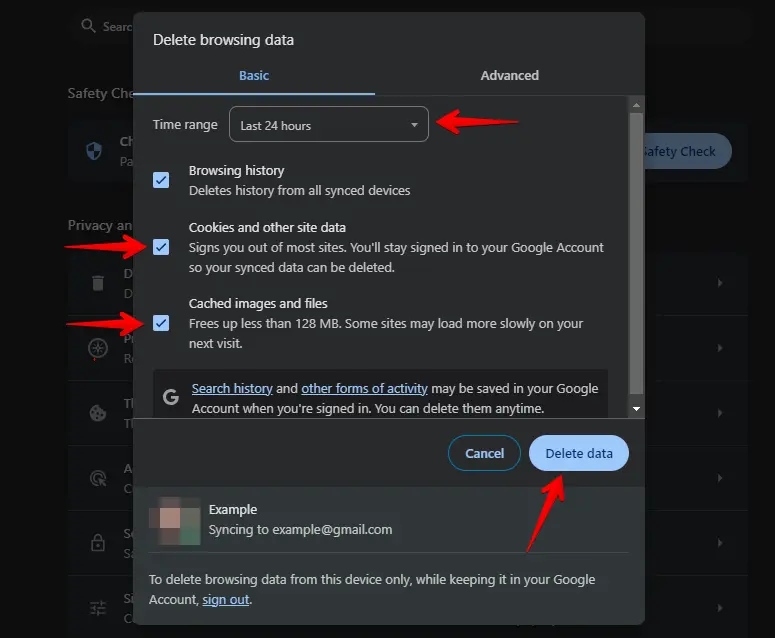
- Select the time range, check “Cookies and other site data” and “Cached images and files,” then click “Delete data.”
After clearing the cache and cookies, restart your browser and try revisiting your WordPress site. This often fixes the 400 Bad Request Error because it lets your browser start fresh without errors.
2. Double-Check the URL
A common cause of the 400 Bad Request error is a mistake in the URL. To fix this, ensure the web address does not contain typos, extra characters, or incorrect formatting.
Check for unnecessary spaces, symbols, or punctuation marks, and verify that query strings are correctly formatted.
Sometimes, trying a simpler URL version, such as the homepage, can help identify if the problem lies with a specific page. This is a simple yet effective fix.
3. Disable Browser Extensions
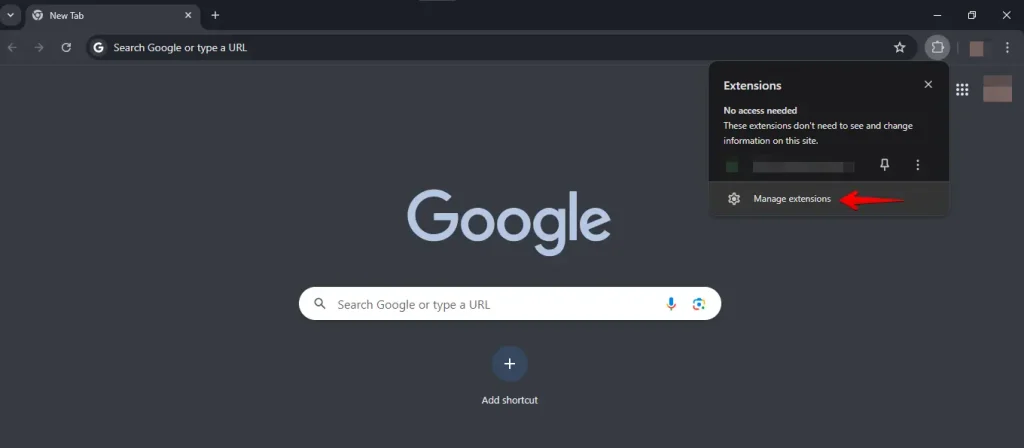
Sometimes, browser extensions can interfere with how your WordPress site loads, causing a 400 Bad Request error. To check if an extension is the issue, try disabling them.
Access your browser’s settings or menu, then locate the section for managing extensions or add-ons.
Turn off all extensions temporarily, then close and reopen your browser to apply the changes. Visit your WordPress site to check if the error is resolved.
If disabling the extensions fixes the issue, you can enable them individually to identify which one is causing the problem.
4. Flush Your DNS Cache
Flushing your DNS cache can help resolve the 400 Bad Request error by clearing outdated or corrupted DNS information. This forces your computer to refresh the DNS information and may fix the error.
Windows:
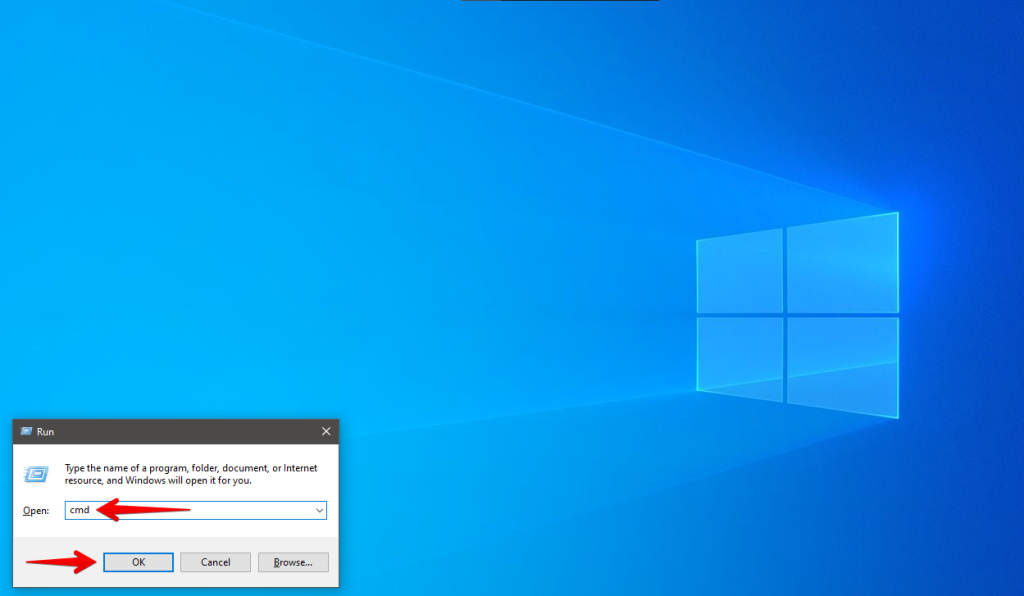
Press Win + R, type cmd, and press Enter.
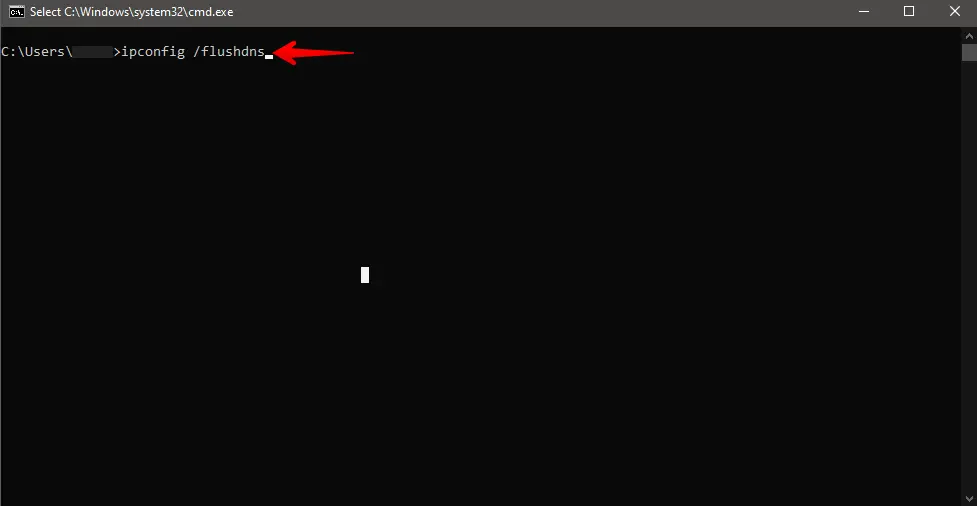
Type ipconfig /flushdns and press Enter.
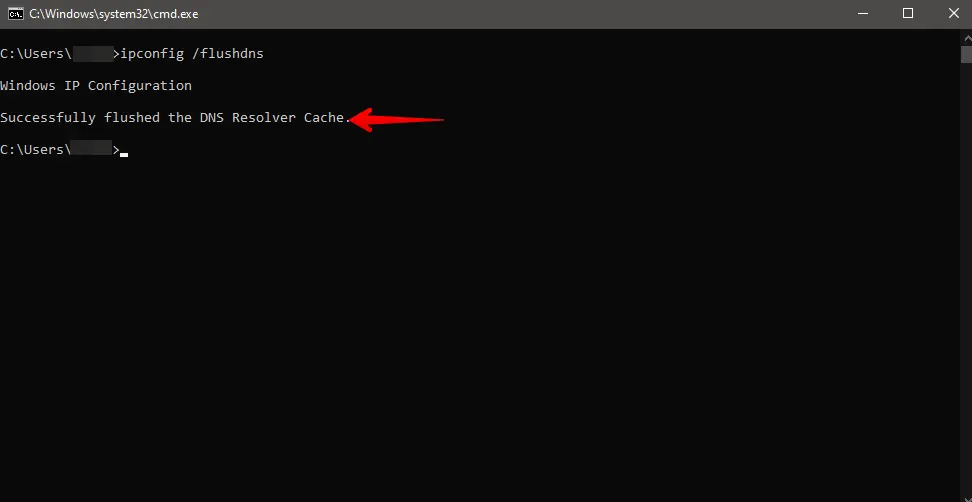
You should receive confirmation that the DNS cache has been successfully flushed.
Mac:
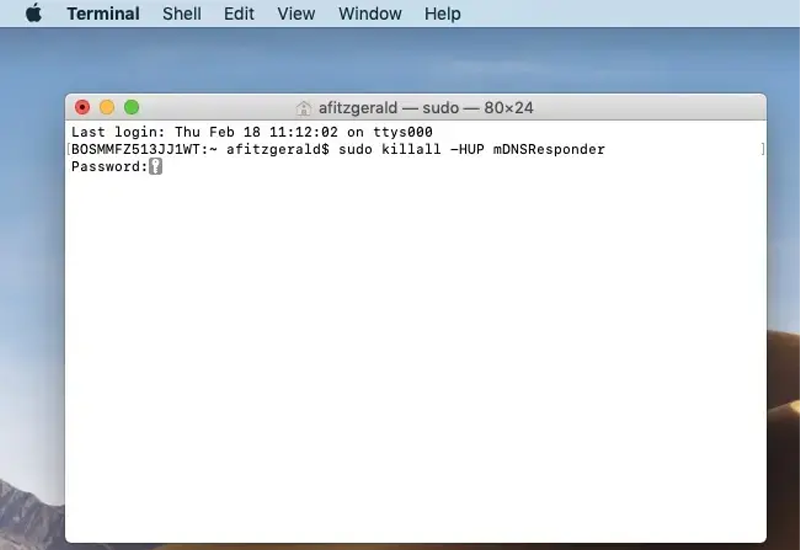
Open Terminal (Applications > Utilities > Terminal) and run the appropriate commands based on your macOS version to clear the DNS cache. You may need to enter your admin password.
- MacOS 10.10.4 and above:
sudo killall -HUP mDNSResponder - MacOS 10.10.1, 10.10.2, and 10.10.3:
sudo discoveryutil mdnsflushcache - MacOS 10.7, 10.8, and 10.9:
sudo killall -HUP mDNSResponder - MacOS 10.5 and 10.6:
sudo dscacheutil -flushcache
After clearing your DNS cache, close and reopen your browser to ensure the changes take effect. Once your browser is restarted, visit your WordPress site to check if the 400 Bad Request error is resolved. This step helps refresh the connection and can often fix the problem.
5. Increase the PHP Memory Limit
A low PHP memory limit can sometimes cause a 400 Bad Request error on your WordPress site. Increasing the PHP memory limit allows your site to handle more data and can resolve this issue.
Access your WordPress root directory via FTP, File Manager, or cPanel.
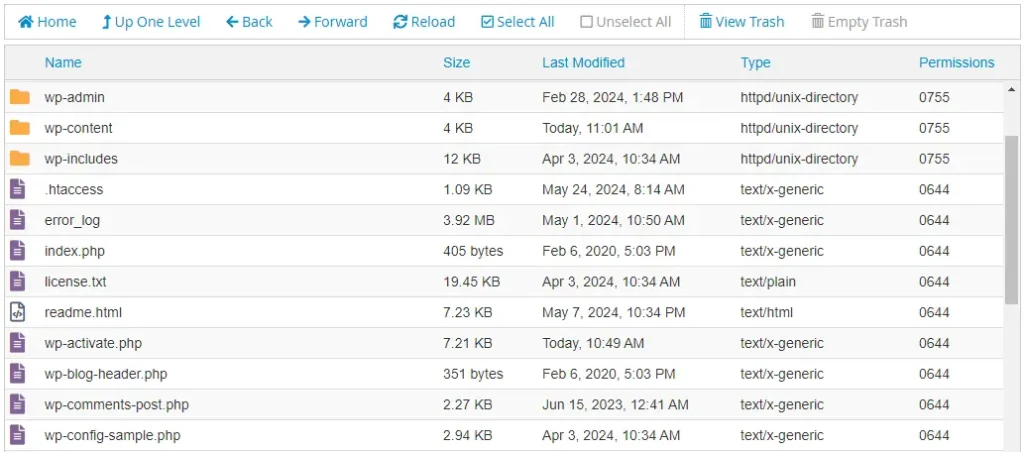
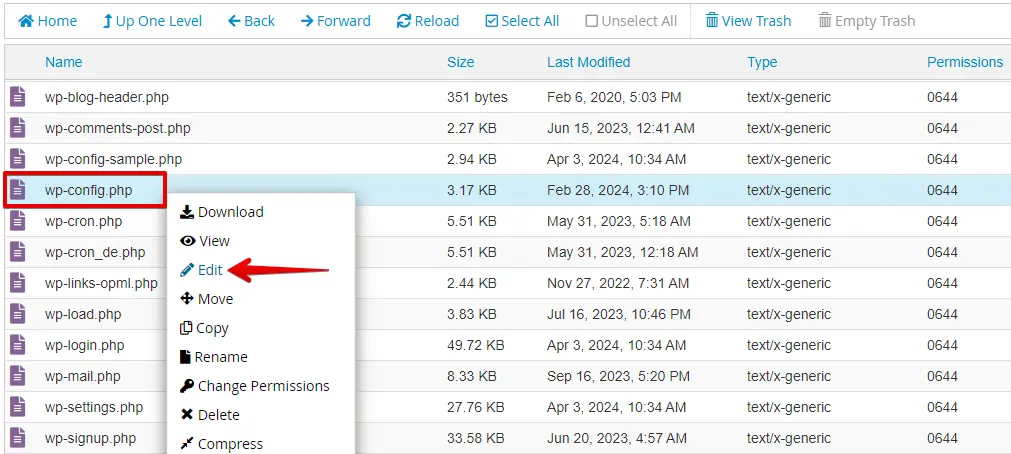
Inside your WordPress root directory, find the file named wp-config.php. Right-click on wp-config.php and select “Edit” from the context menu.
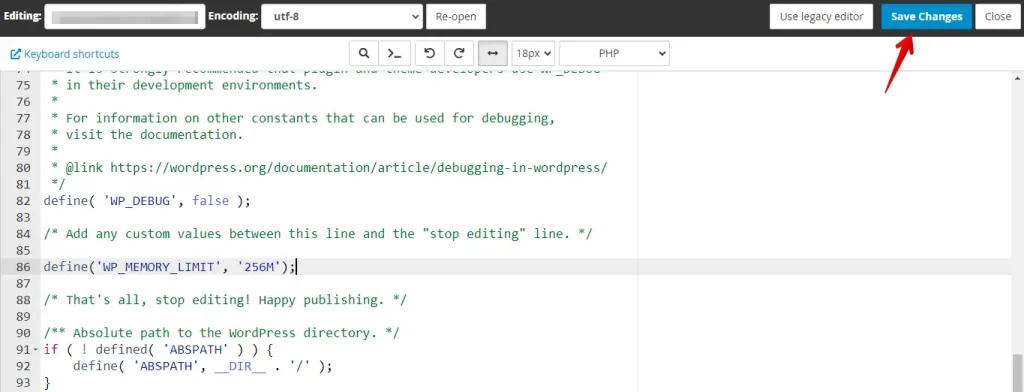
In the editor, add the following line of code near the top of the file, just before the line that says /* That's all, stop editing! Happy publishing. */:
define('WP_MEMORY_LIMIT', '256M');
After adding the code, click the “Save Changes” button at the top right corner of the editor.
Conclusion
Try simple steps to fix the 400 Bad Request error on your WordPress site. First, clear your browser cache and cookies. Then, check the URL for mistakes. Disable browser extensions and flush your DNS cache if needed. Increasing the PHP memory limit can also help.
These steps should help resolve the error and get your site running smoothly. If the problem still exists, contact your hosting provider for more help.