


TL;DR: Add
php_value max_input_vars 3000to.htaccess, setmax_input_vars = 3000inphp.ini, or add@ini_set('max_input_vars', 3000);towp-config.php. Pick the method that matches your hosting environment — see the table below.
The max_input_vars directive was introduced in PHP as a security measure that limits the maximum number of POST variables the server processes per request. When a WordPress page submits more variables than the limit allows, the server silently drops the excess — causing menus to lose items, theme settings to disappear, and plugin configuration pages to fail to save.
In WP STAGING support tickets, the most common trigger is a WooCommerce or WPML site with a large settings page that silently drops fields on save.
Raising max_input_vars to 3000 or higher resolves these symptoms in most cases. The right method depends on your hosting environment. If you are unsure which applies, contact your hosting provider before editing server configuration files — not all shared hosts grant permission for every method below.
Contents
Which Method Should You Use?
| Hosting type | Recommended method | Notes |
|---|---|---|
| Shared cPanel (Apache) | Edit .htaccess |
No server restart required |
| Shared hosting (nginx) | php.ini or host panel |
Method varies by provider |
| Managed WordPress (WP Engine, Kinsta, etc.) | Host control panel or support | Direct file edits may be restricted |
| VPS or dedicated server with SSH | Edit global php.ini |
Restart PHP-FPM after saving |
| Cloud-managed (Cloudways, SpinupWP, etc.) | Host control panel | Each provider exposes its own settings UI |
If your host does not support any of the file-based methods below, open a support ticket — raising max_input_vars is a routine request.
How to Increase the PHP Max Input Vars Limit
The three most common methods are editing .htaccess, php.ini, or wp-config.php. Try them in the order that matches your hosting environment; move to the next only if the first has no effect.
Method 1: Edit the .htaccess File
The .htaccess file is in the root directory of your WordPress installation. Open it with your file manager or FTP client.
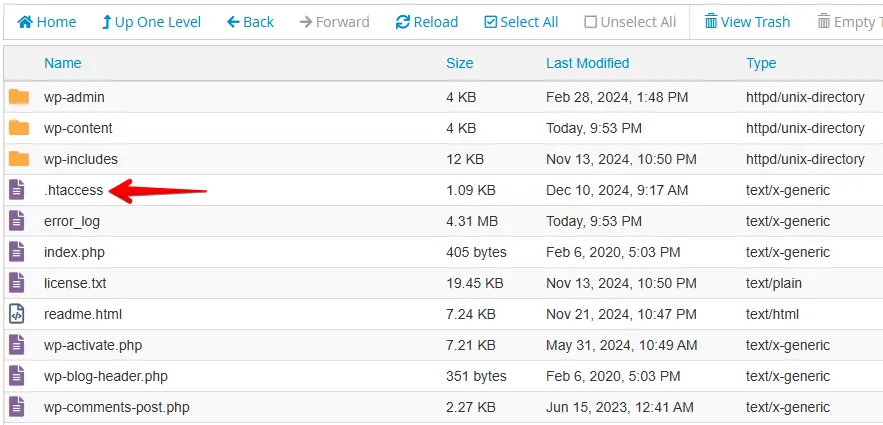
If you cannot locate the file, most hosting file managers hide dotfiles by default. Look for a Show Hidden Files option and enable it.
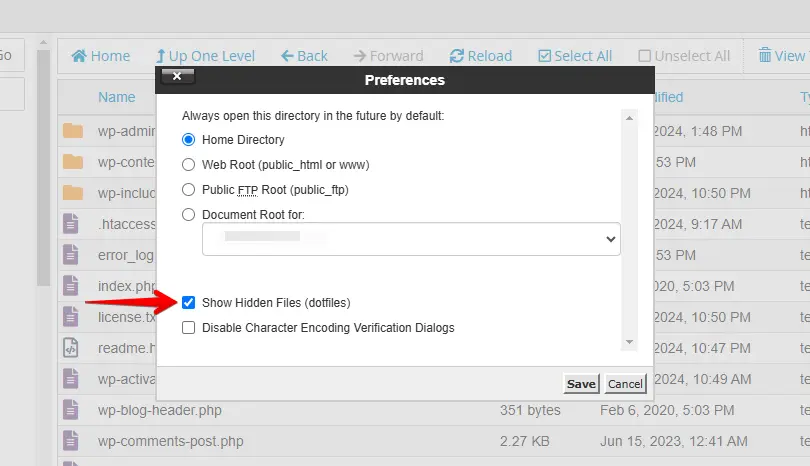
Open .htaccess in a text editor and add the following line:
php_value max_input_vars 3000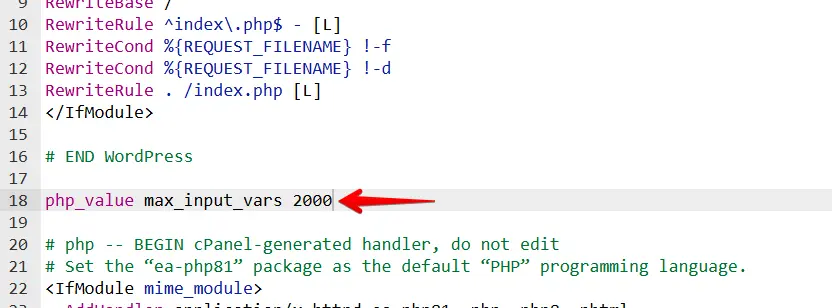
If your server uses the Suhosin security extension, use these lines instead:
php_value suhosin.request.max_vars 3000
php_value suhosin.post.max_vars 3000
A value of 3000 covers most WordPress installations with large menus or complex plugin settings pages. Increase it further only if symptoms persist after saving.
Method 2: Edit the php.ini File
The php.ini file is also in the root directory of your WordPress installation. If no file exists there, create an empty one.
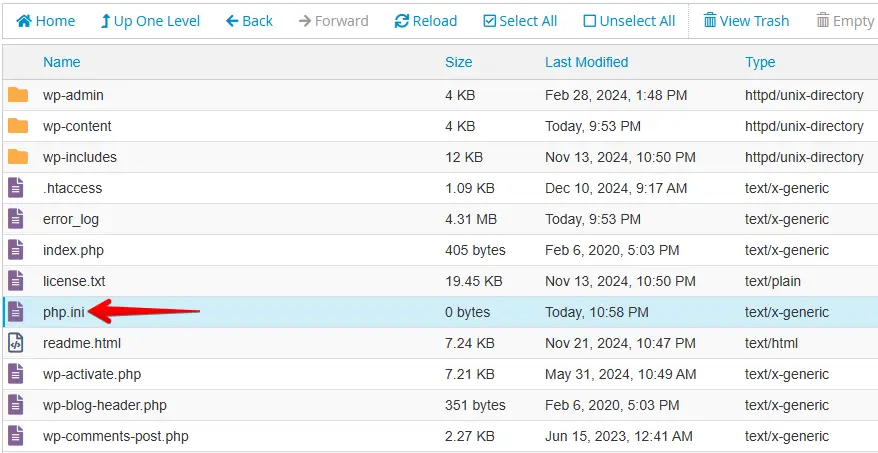
Open the file in a text editor and add or update this line:
max_input_vars = 3000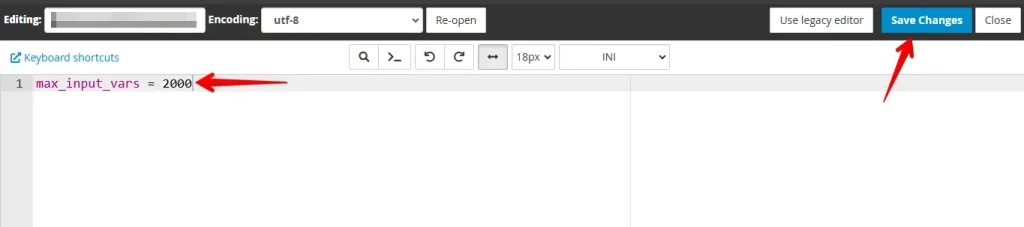
Save the file. If you have shell access, restart PHP-FPM or Apache so the value takes effect immediately. On shared hosts, the next PHP request picks up the new setting automatically.
Method 3: Edit the wp-config.php File
Log in to your hosting panel or FTP client and navigate to File Manager. Open wp-config.php in the root of your WordPress installation.
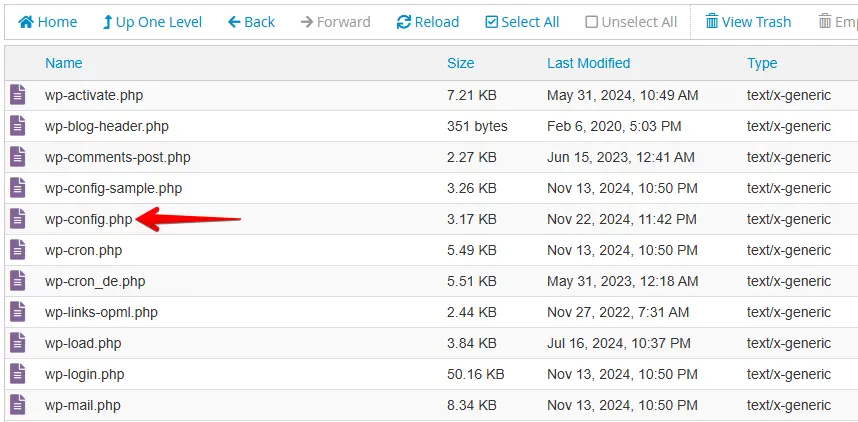
Add the following line before the line that reads /* That's all, stop editing! */:
@ini_set( 'max_input_vars', 3000 );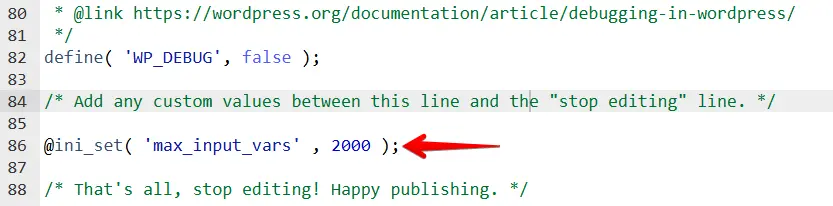
Save the file. This method sets the limit at PHP runtime and works on shared hosting environments where you cannot modify .htaccess or php.ini directly. You can replace 3000 with any value your site requires — we recommend 3000 or higher to cover complex admin pages.
Legacy Note: PHP 5 Hosting
PHP 5 reached end-of-life in December 2018. If your host still runs PHP 5, the php.ini approach above applies, but you may also need to create php5.ini and user.ini files in the same directory with the same directive:
max_input_vars = 3000Contact your host immediately to upgrade — PHP 5 servers no longer receive security patches. The Suhosin extension directives (suhosin.get.max_vars, suhosin.post.max_vars, suhosin.request.max_vars) are only relevant on servers with Suhosin installed; modern PHP 8.x servers do not require them.
What to Do If the Fix Doesn’t Work
If the methods above did not resolve the problem, work through these checks before contacting your host.
The change didn’t persist after saving. Your host’s control panel may ship a master php.ini that overrides any local file you create. Open your host’s PHP configuration panel (in cPanel: Software → Select PHP Version → Options) and set max_input_vars there directly.
The value is set but symptoms remain. A different PHP directive may be the actual bottleneck. Create a temporary file in your web root containing <?php phpinfo(); ?>, open it in a browser, and search for max_input_vars to confirm the new value is active. Also check post_max_size — if it is lower than the data your settings page submits, raising max_input_vars alone will not fix the issue.
phpinfo() does not show the new value. PHP can load multiple configuration files. The phpinfo() output shows Configuration File (php.ini) Path — confirm you edited the file listed there. On cPanel servers the active php.ini is often in the user’s home directory, not the WordPress web root.
The wp-config.php approach has no effect. Some server configurations disable ini_set() via the disable_functions directive. In that case, use the .htaccess or php.ini method instead.
For help with a related PHP configuration limit, see PHP memory limit in WordPress.
The official specification for this directive is in the PHP manual: max_input_vars.
Conclusion
Raising max_input_vars is a one-line configuration change, but choosing the right file matters: .htaccess for shared Apache hosts, php.ini for VPS environments, wp-config.php when you cannot modify server configuration files. If the change does not stick, your host’s master configuration is likely overriding it — the troubleshooting steps above cover the most common causes.
Always back up your site before editing server configuration files. If you need additional help, our support team can assist.
Related articles:
- How to Increase the Maximum Upload File Size in WordPress
- Staging Site redirects to the live site
- PHP Fatal Error allowed memory size exhausted
- How to fix the "Sorry, You Are Not Allowed to Access This Page" Error in WordPress?
- How to Fix WordPress Login Page Refreshing & Redirecting Issues?
