Migrating your WordPress site to a new host can be tricky, and it’s expected to run into a few problems afterward. Maybe your links don’t work, images are missing, or the whole site seems to have broken down.
Don’t worry! In this blog post, I’ll guide you through some simple steps to get your WordPress site back up and running smoothly after you’ve moved it.
Contents
Why Your WordPress Site Might Not Work After a Migration: Key Causes
Troubleshooting why your WordPress site isn’t working after a migration involves identifying fundamental causes. Here are the main ones:
- DNS Issues – Incorrect settings or propagation delays can prevent site loading (up to 48 hours).
- File Transfer Errors – Incomplete file transfers lead to missing media, themes, or plugins, causing broken functionality.
- Database Connection Issues – Incorrect
wp-config.phpCredentials can prevent database connection. - Serialized Data Issues – URLs or paths may not update correctly during migration, breaking functionality.
- Configuration Problems – Incorrect
wp-config.phpSettings or PHP version incompatibility can cause site errors. - Permalink Issues – Broken permalinks result in 404 errors; resaving settings usually fixes this.
- .htaccess File Issues – Missing or incorrect
.htaccessFiles disrupt URL structure and functionality.
5 Ways to Fix Your WordPress Site Not Working After a Migration
- Clear Your WordPress Cache
- Modify the Site Address Through WordPress Settings
- Revise the Site URL Using the WordPress Database
- Regenerate the .htaccess File
- Set Correct File Permissions
Note: Always back up your website before making changes. This ensures you can quickly restore it if anything goes wrong. Try WP Staging for simple, automatic backups. For more assistance, refer to the backup and restore guide.
1. Clear Your WordPress Cache
Clearing your WordPress cache can resolve many issues that arise after a migration. Cached files might cause your site to display old or incorrect information. Follow these steps to clear your WordPress cache:
Log in to your WordPress dashboard, navigate to the “Plugins” menu, and select “Installed Plugins.”
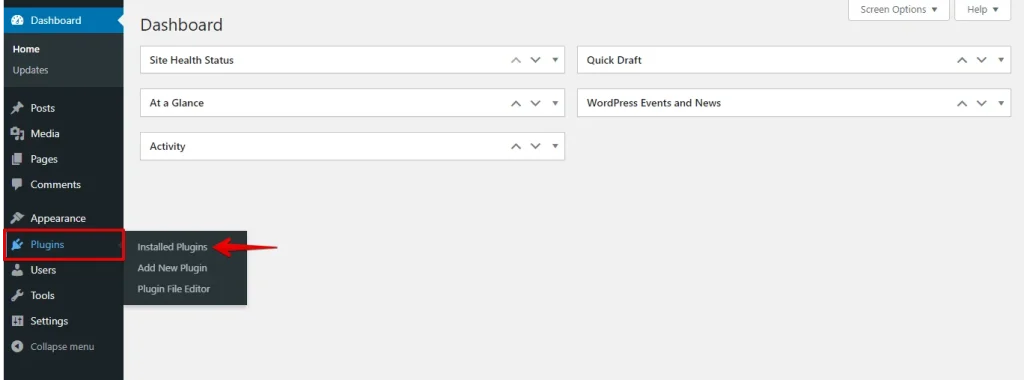
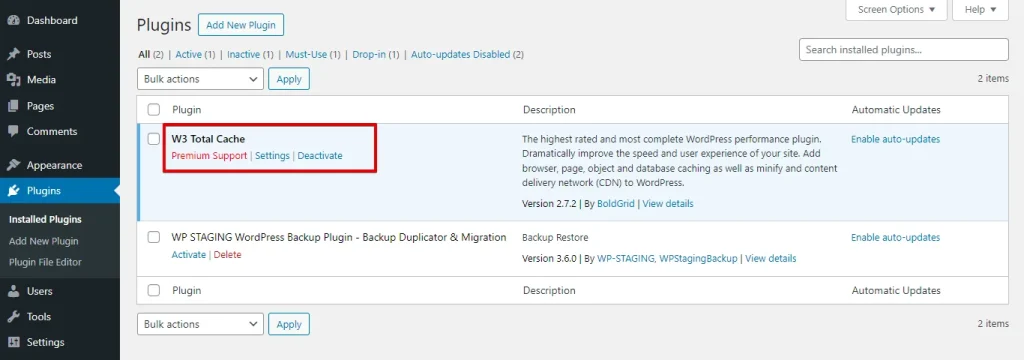
Check for any active caching plugins, such as W3 Total Cache, WP Super Cache, or any other caching plugin you may use.
Go to “Performance” in your WordPress dashboard and select “Dashboard.” Then, click the “Empty All Caches” button.
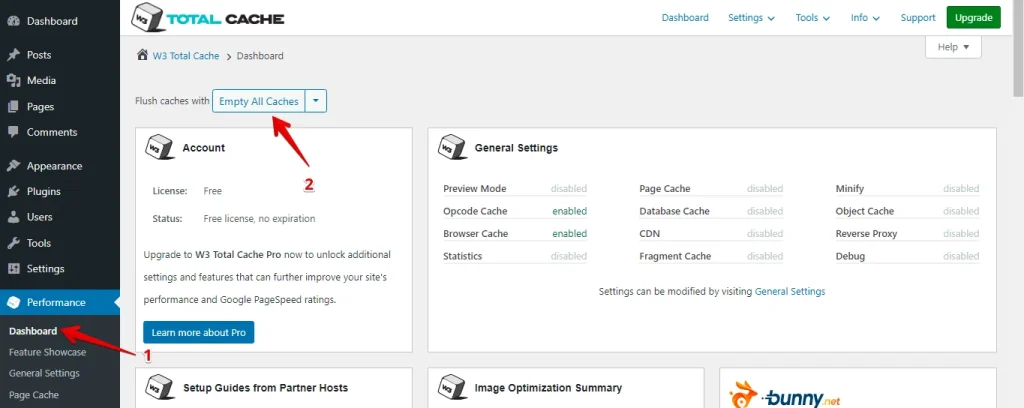
After clearing all caches, refresh your WordPress site. Ensure the site displays correctly and verify that any previous issues have been resolved.
Following these steps, you can effectively clear your WordPress cache, potentially resolving many post-migration issues and ensuring your site displays the most up-to-date content.
2. Modify the Site Address Through WordPress Settings
Change the URL within the WordPress dashboard to modify the site address via WordPress settings. This updates all internal links and references. Here’s how to do it:
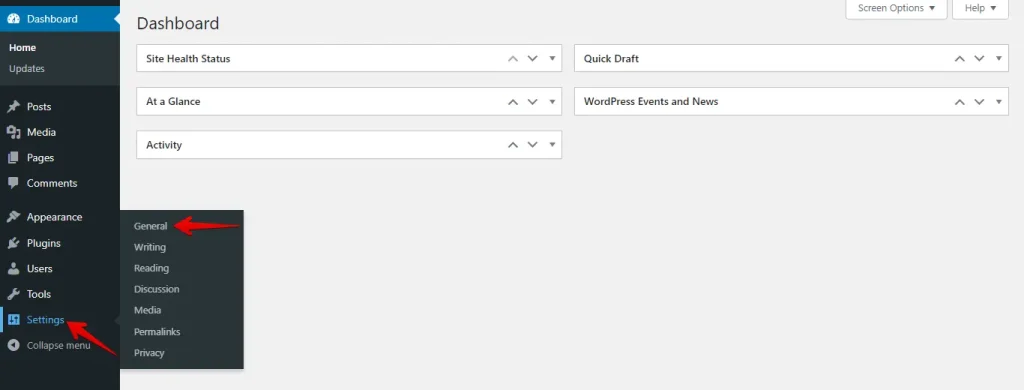
Access your WordPress dashboard and navigate to “Settings” > “General.”
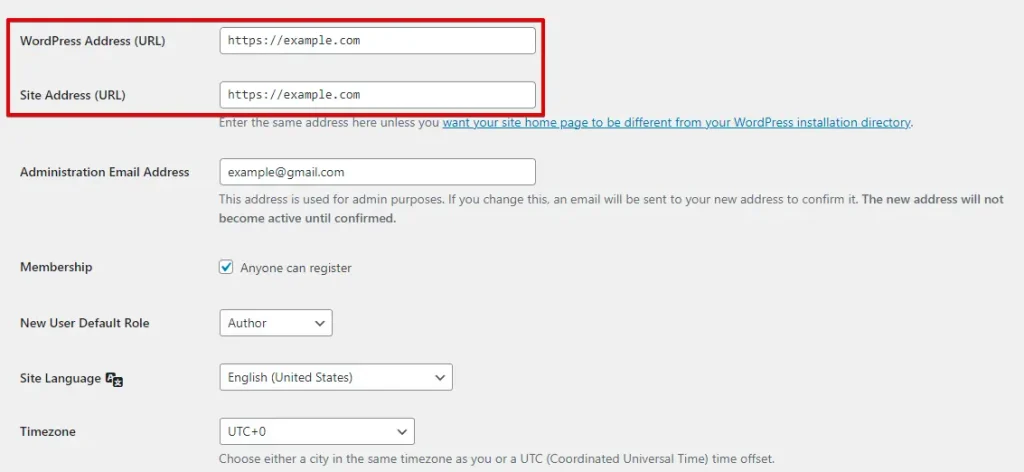
After that, enter your new domain under the ‘Site Address (URL)’ field.
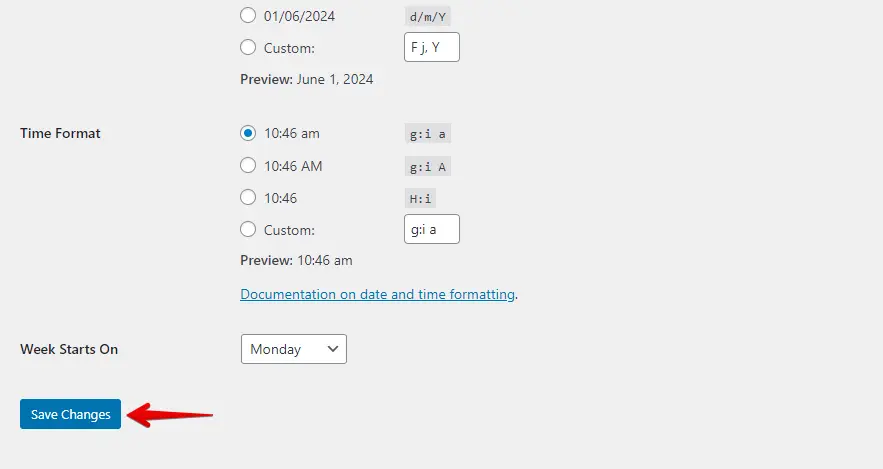
To save changes, scroll down and click “Save Changes” to apply modifications.
After saving, check your site to ensure it loads correctly with the updated URL. Confirm all links, images, and resources work as expected.
When you tweak your site address in WordPress settings, it keeps everything consistent and stops links from breaking.
3. Revise the Site URL Using the WordPress Database
To revise the site URL via the WordPress database, you directly edit the URL entries in the database using phpMyAdmin or a similar tool. Here’s how to do it:
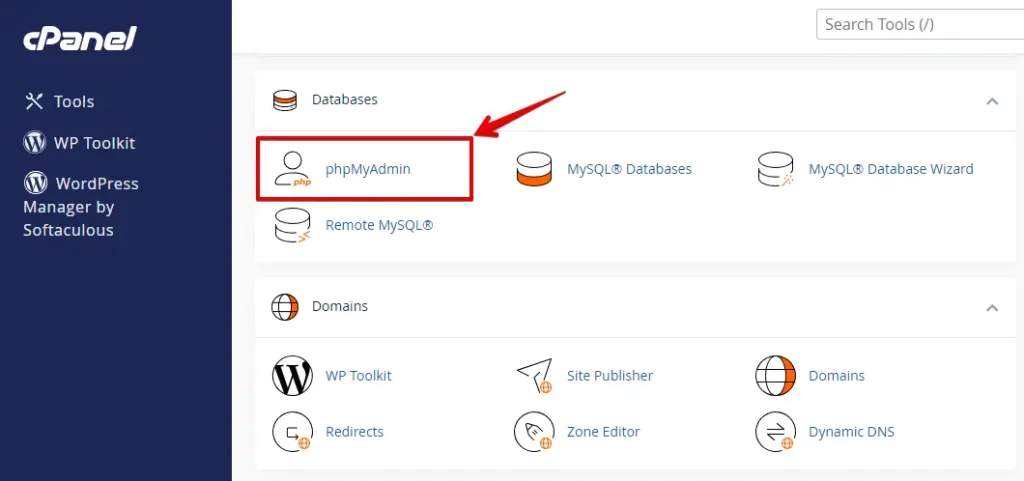
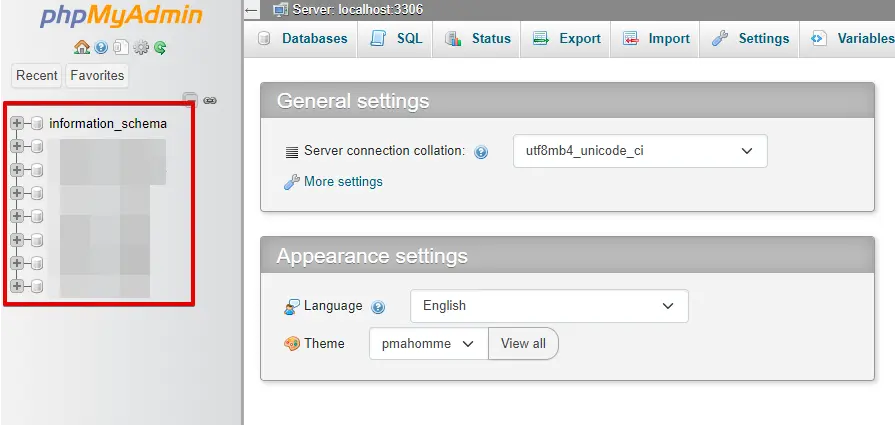
Log in to your web hosting control panel, navigate to phpMyAdmin, or access it through your hosting provider’s dashboard.
In phpMyAdmin, locate and select the database associated with your WordPress site from the list on the left sidebar.
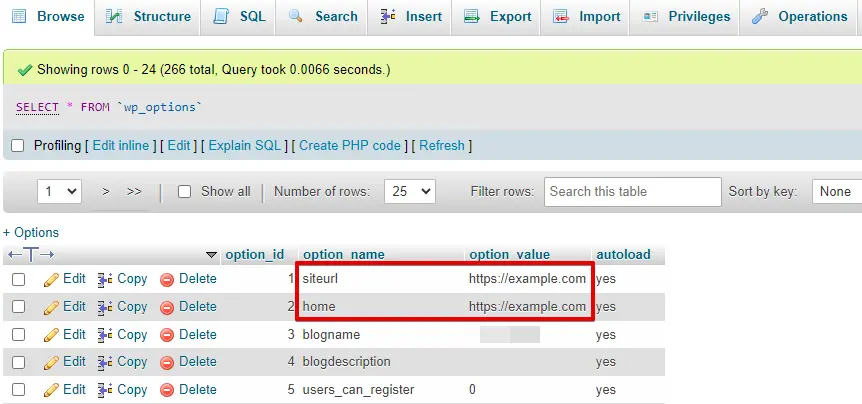
Within your WordPress database, look for a table named. wp_options (the table prefix wp_ may vary if you’ve customized it during installation).

In the wp_options table, look for rows with the option_name column value of siteurl and home.
Replace the existing URL in the option_value field with your new site URL. Ensure the URL is correct and complete, including the protocol (e.g., http:// or https://).
Visit your site to verify that the updated URL loads correctly.
Modifying the site URL in the WordPress database can help when dashboard access is limited. However, it’s risky and can cause problems if done incorrectly.
4. Regenerate the .htaccess File
The .htaccess file controls how URLs are processed on your WordPress site. If your site isn’t working after a migration, regenerating this file can fix permalink and URL issues. Here’s how to do it:
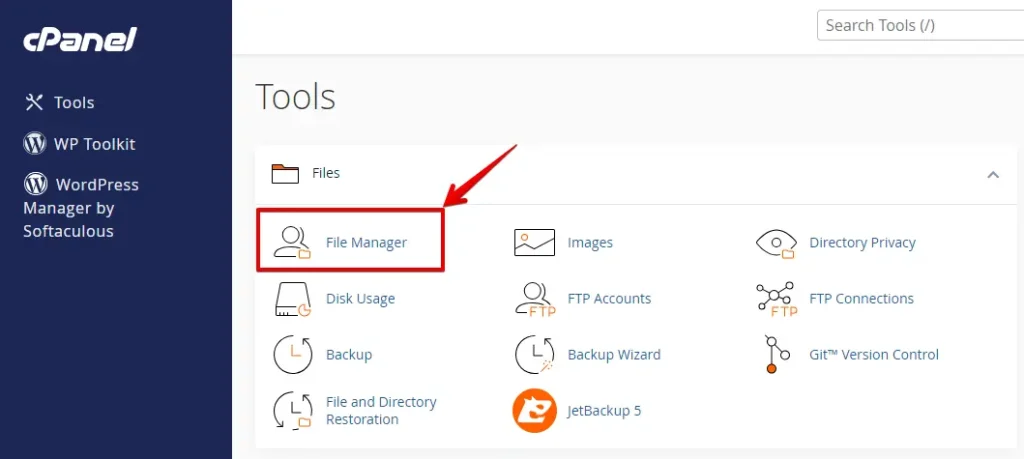
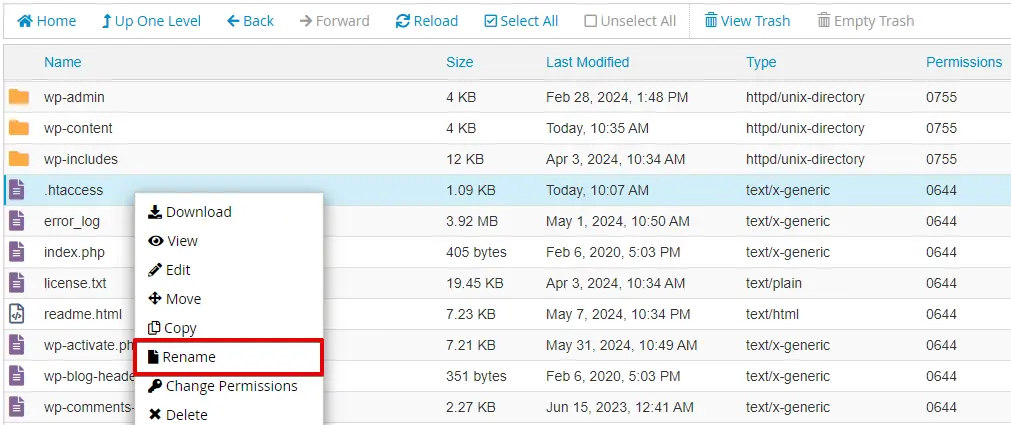
Log in to your web hosting control panel and open the file manager, or use an FTP client to connect to your server.
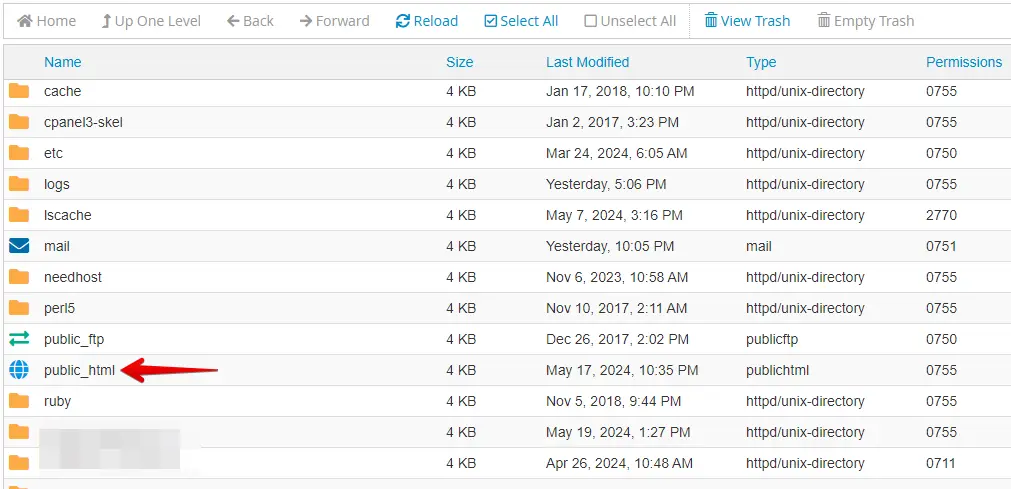
Go to the root directory of your WordPress installation (usually public_html or www).
Find the .htaccess file in the root directory, right-click on it, select the “Rename” option, and rename it to something like “.htaccess_old.”
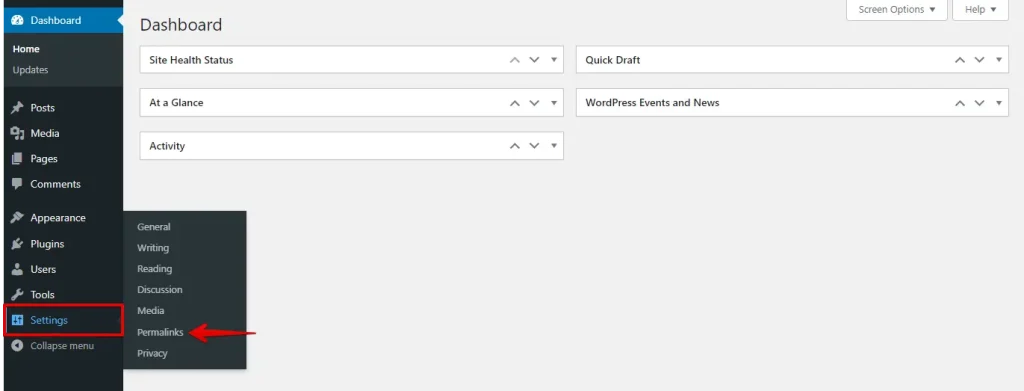
Now, log in to the WordPress dashboard. In the sidebar, hover over or click on “Settings.” From the drop-down menu, select “Permalinks.”
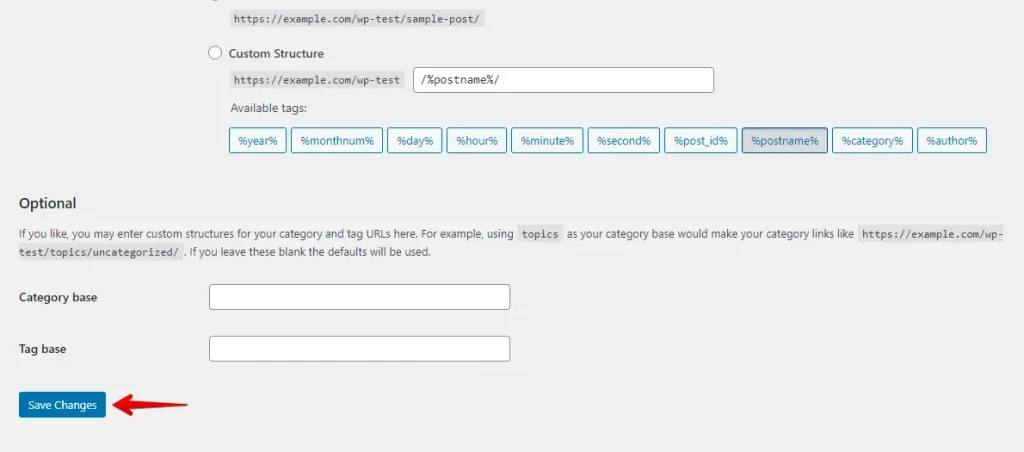
You don’t need to change any settings on this page. Just scroll down and click “Save Changes” to regenerate the .htaccess file.
By following these steps, you can regenerate the .htaccess file and resolve common issues related to permalinks and URL structure after migrating your WordPress site.
5. Set Correct File Permissions
Correct file permissions are important for your WordPress site to work correctly and stay safe. Wrong permissions can prevent file uploads, script execution, or accessing parts of your site. Here’s how to set them correctly:
Access your hosting control panel (cPanel, Plesk, etc.), then find and open the File Manager tool provided there.
Navigate to the root directory of your WordPress installation, typically named public_html or www.
Select all folders within your WordPress installation in the File Manager or FTP client. Then, right-click on the selected folders and choose “Permissions” or “Change Permissions.”
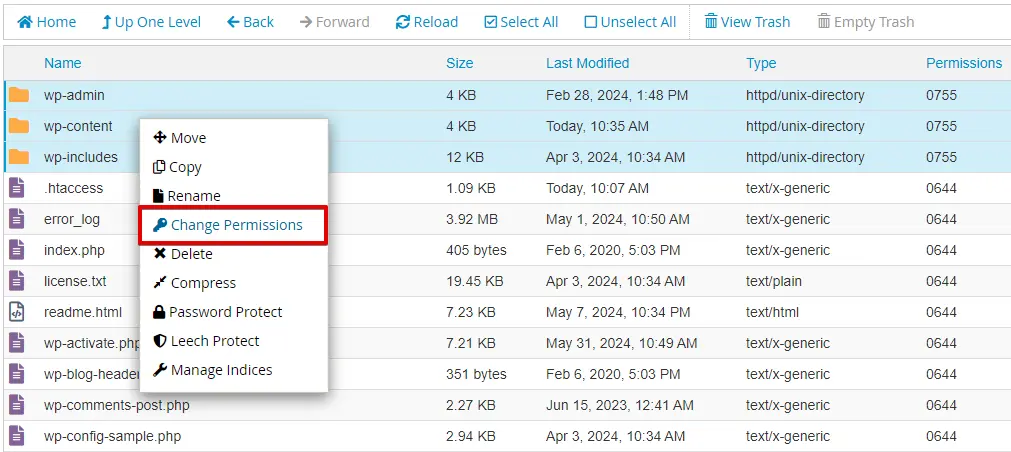
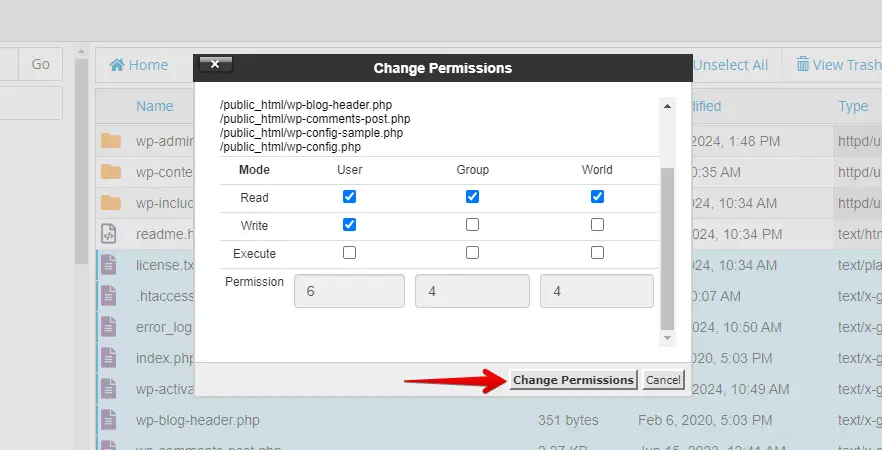
Enter 755 or check the appropriate boxes to set permissions to 755, then click the “Change Permissions” button.

Now, select all files within your WordPress installation. Right-click on the selected files and choose “Permissions” or “Change Permissions.”
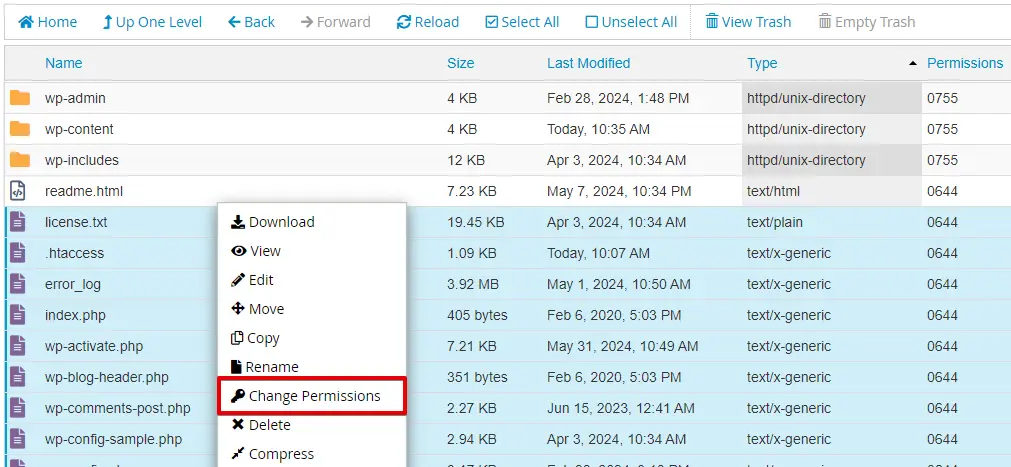
This time, enter 644 or check the appropriate boxes to set permissions to 644, then click the “Change Permissions” button.
By following these steps, you can ensure that your WordPress site has the correct file permissions, enhancing its security and functionality.
Conclusion
Fixing your WordPress site after a move is simple. Start by clearing the cache to get rid of old data. Then, update your site address in the WordPress settings and database. Regenerate the .htaccess file to solve link issues and set the file permissions correctly.
Follow these steps, and your site should be up and running smoothly. If you still have issues, it might be time to seek professional help.