
Are you contemplating a migration from [SiteGround](https://www.siteground.com/index.htm?afcode= ae4bdb3cbe862bb1a69ef76cac82828b) to WordPress.com? We understand that transitioning your website can be a crucial decision, and we are here to guide you through the process seamlessly.
This comprehensive guide will provide step-by-step instructions, ensuring a smooth migration without compromising your website’s integrity or SEO ranking.
Contents
Why Migrate from SiteGround to WordPress.com?
Migrating from [SiteGround](https://www.siteground.com/index.htm?afcode= ae4bdb3cbe862bb1a69ef76cac82828b) to WordPress.com can be a strategic move with some advantages that can elevate your website to new heights in the vast landscape of hosting options.
- Streamlined Management and Easy Navigation: Effortlessly navigate an intuitive dashboard, prioritizing content creation over technical complexities.
- Built-In Security Measures: Benefit from regular updates, SSL certification, and a dedicated security team, ensuring robust protection against potential threats.
- Scalability for Growth: Upgrade resources effortlessly to meet evolving website needs and ensure responsiveness during peak traffic.
- Global Reach with Reliable Uptime: Enjoy impressive server uptime, guaranteeing 24/7 accessibility for international audiences and enhancing website reliability.
- SEO-Friendly Foundation: Boost rankings with clean code, customizable permalinks, and SEO plugins.
Getting Ready for the Site Transfer
Before making any adjustments, creating a backup of your current SiteGround content is essential. This ensures the preservation of data during the migration process. Here’s how:
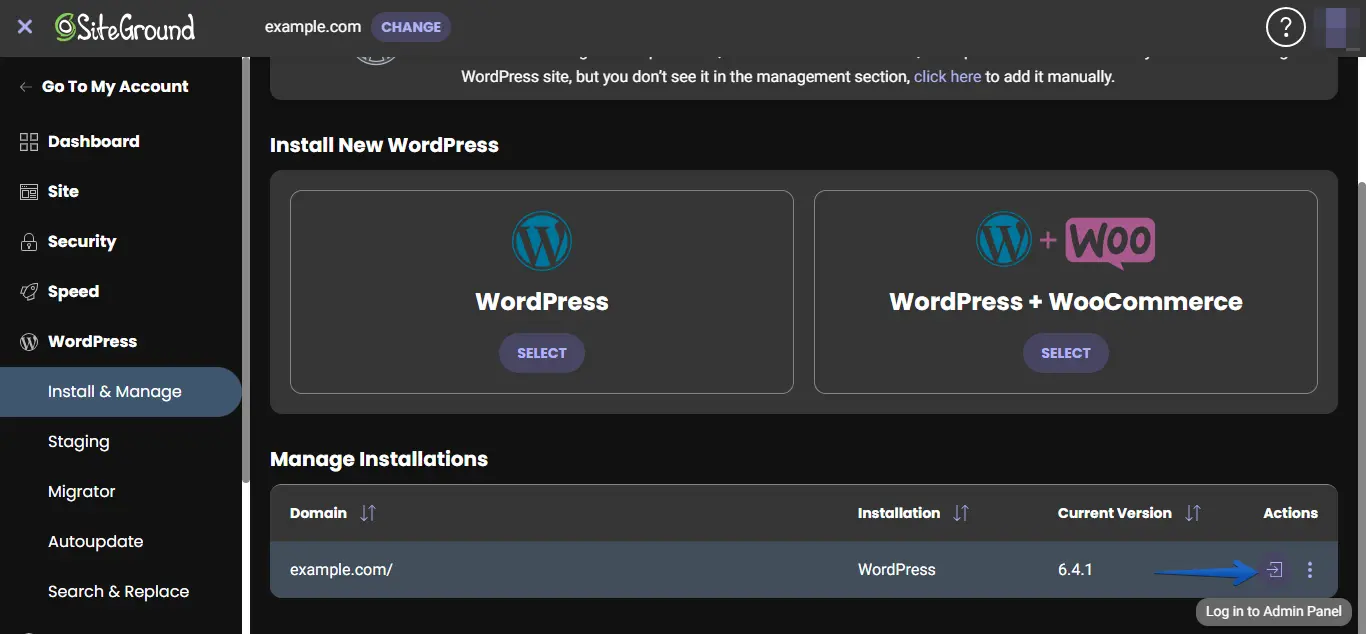
- Log in to your SiteGround WordPress website using your username and password, or access the admin panel through SiteGround.
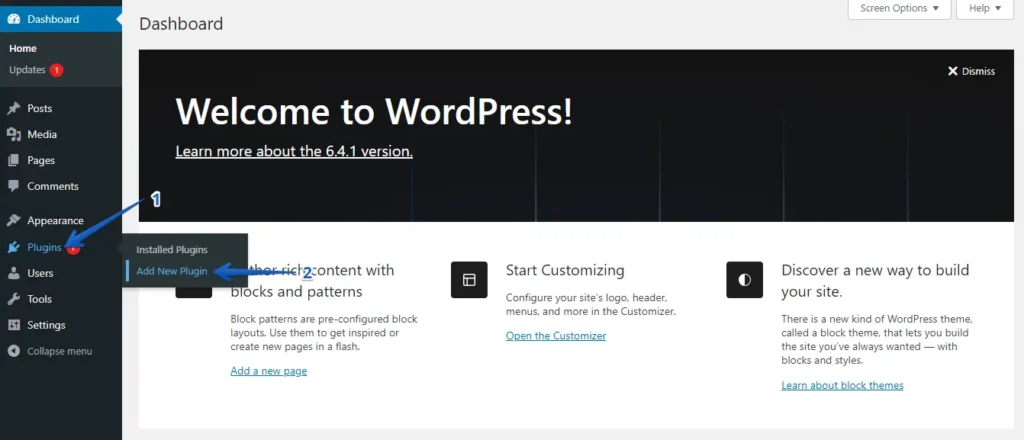
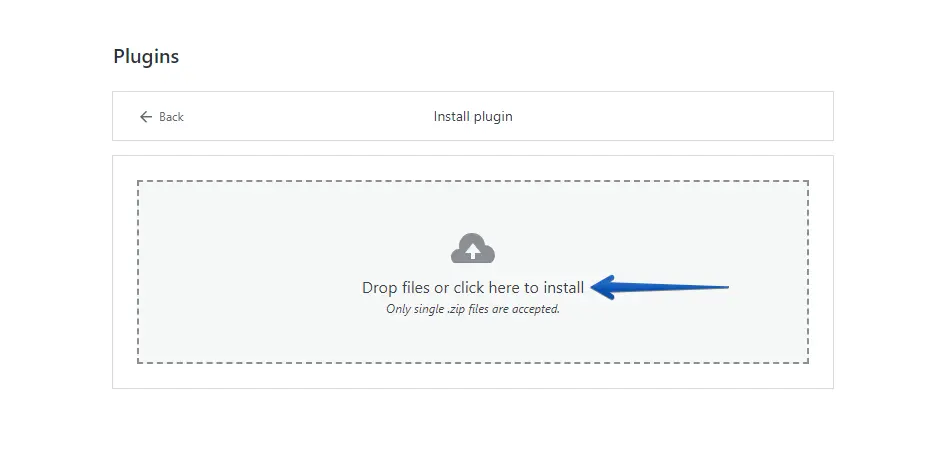
- Go to "Plugins" in the left menu and click the "Add New" button.
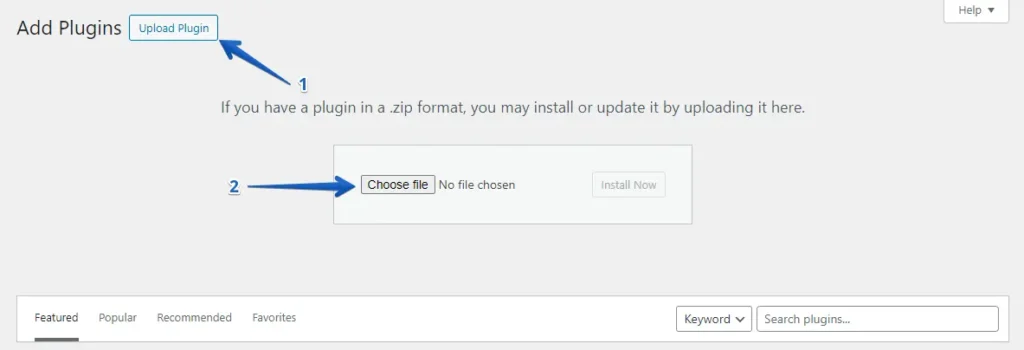
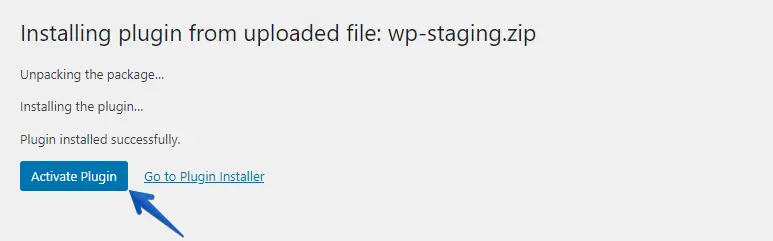
- Click the "Upload Plugin" button and "Choose File" to upload the WP Staging | Pro plugin.
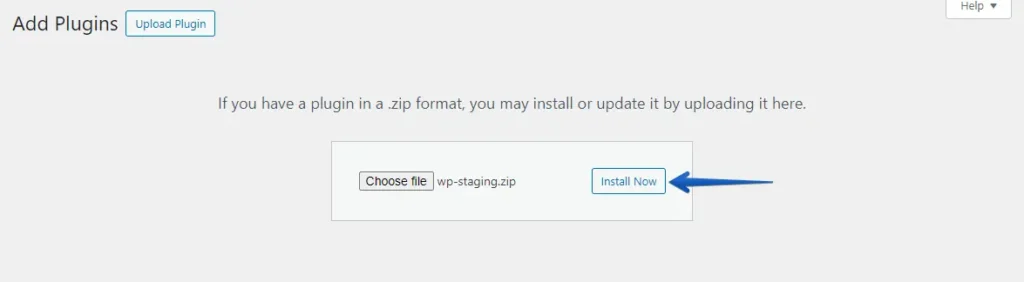
- Click the ‘Install Now’ button.
- Once the plugin is installed, activate it.
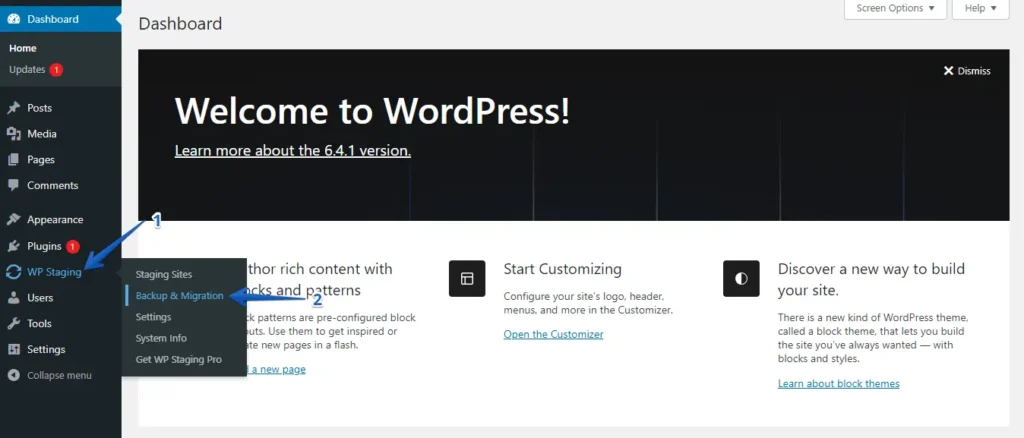
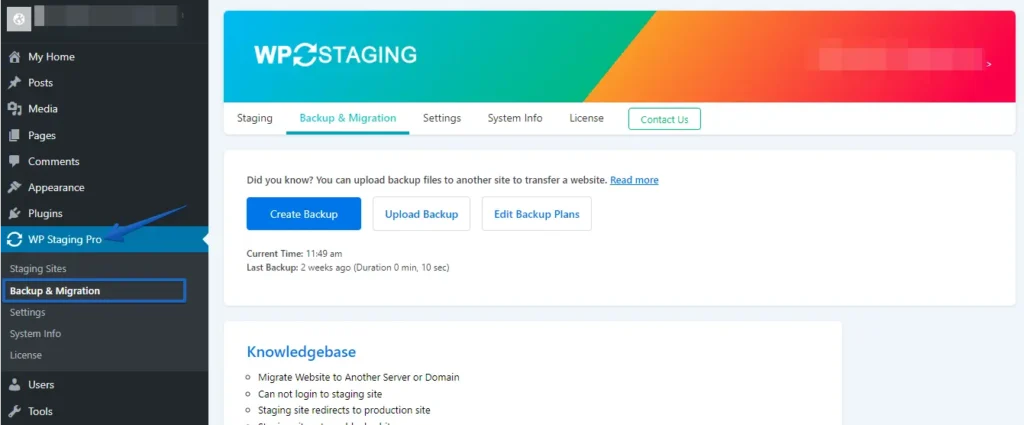
- Go to the left-hand menu, find ‘WP Staging | Pro,’ and click the ‘Backup & Migration’ option.
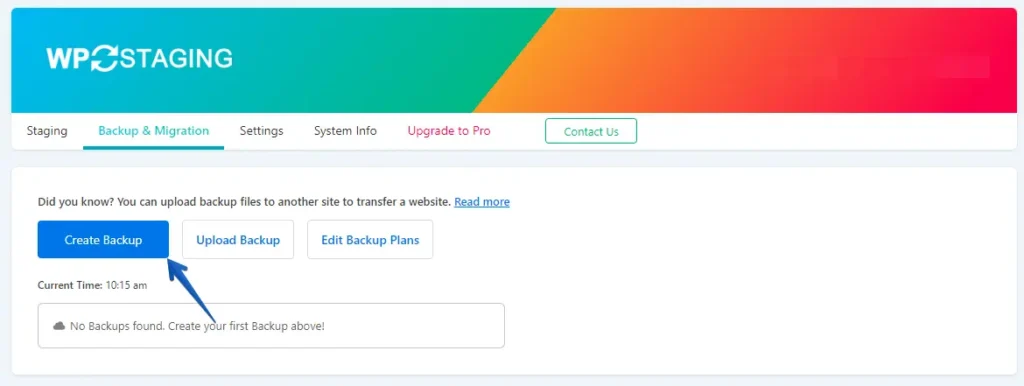
- Suppose you don’t have an existing backup, no worries. Click the "Create Backup" button to generate a new one.
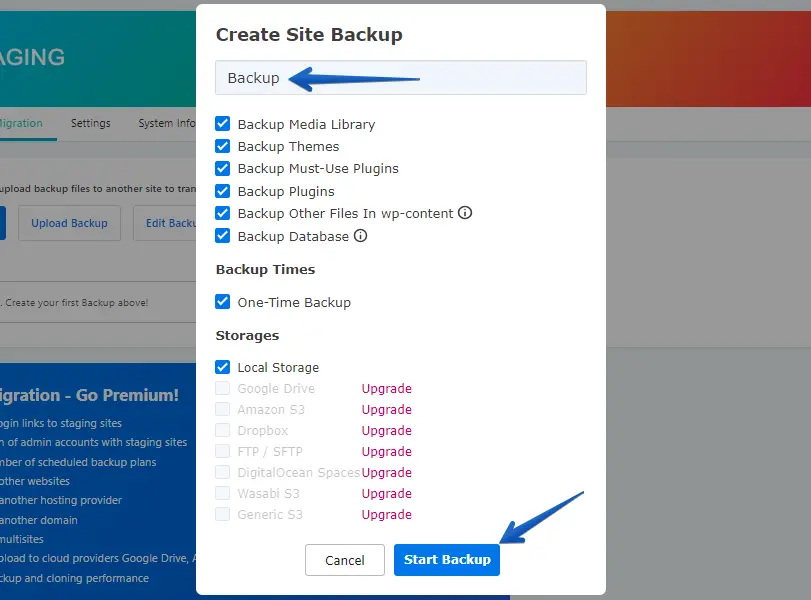
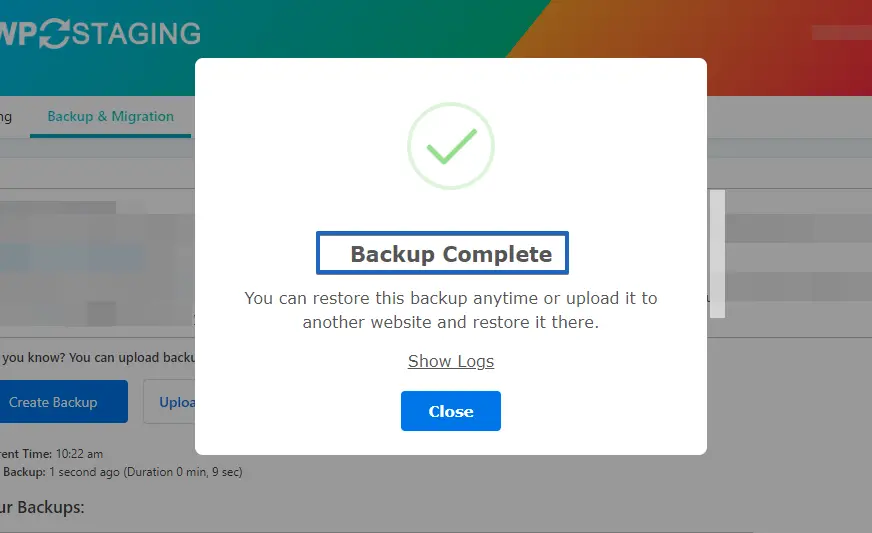
- Provide a name for your backup, and then click the "Start Backup" button.
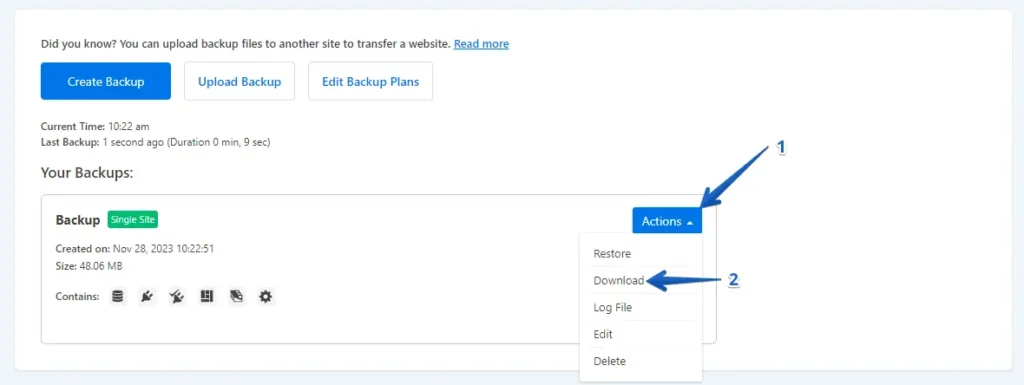
- The backup has been completed successfully.
- Upon completion of the backup process, you will typically find a "Download" option under the "Action" button. Ensure that you save this backup file in a secure location on your computer.
The Migration Process
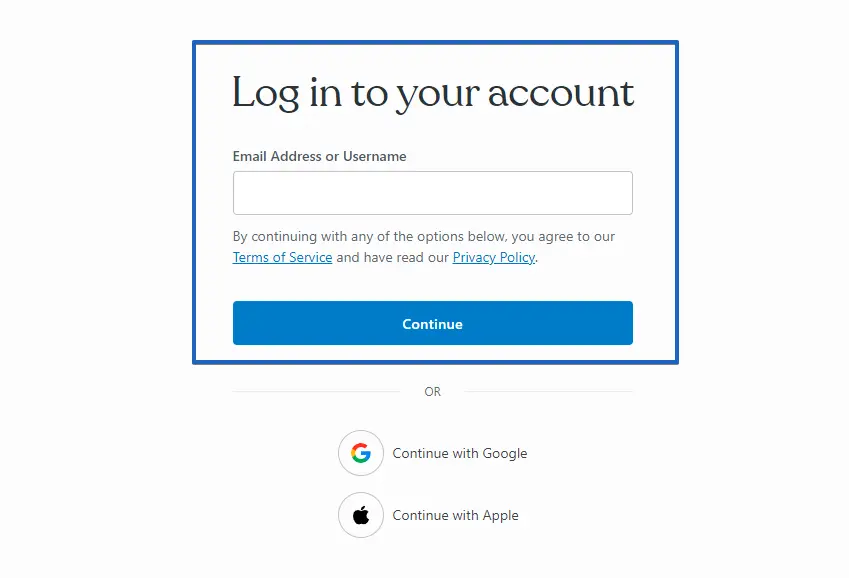
- Log in to Your WordPress.com Account
- Go to "Plugins" in the WordPress dashboard and click the "Upload" button.
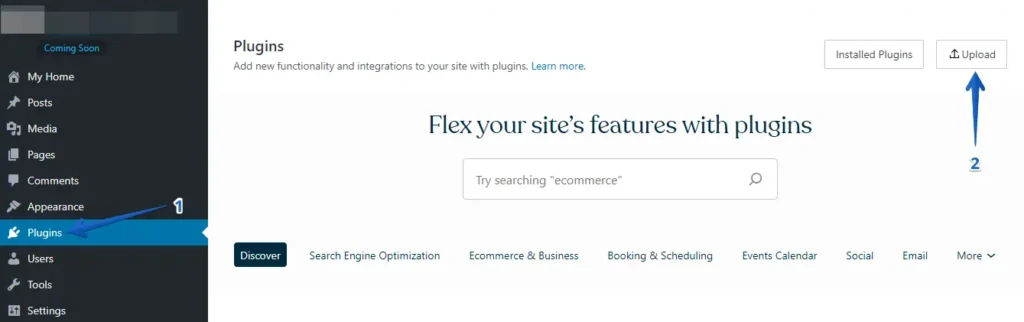
- Afterward, upload your WP Staging Pro.
- Once installed and activated, go to the "Backup & Migration" section in the WordPress dashboard under "WP Staging Pro."
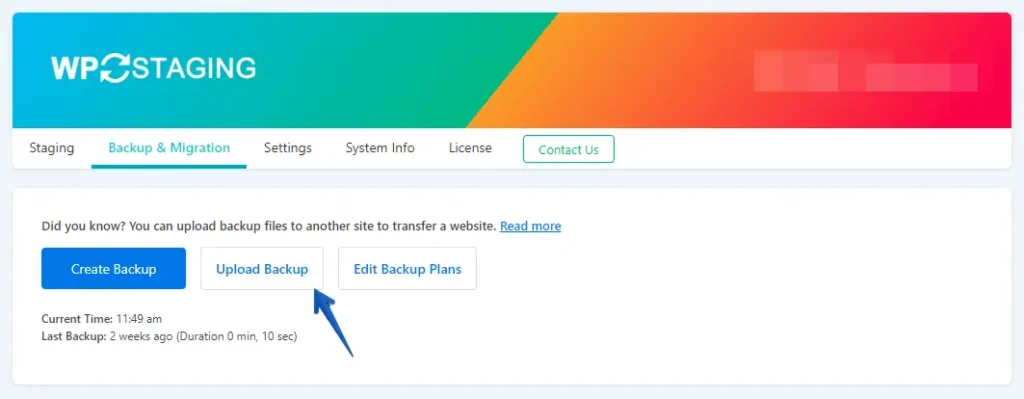
- Next, click the ‘Upload Backup’ button.
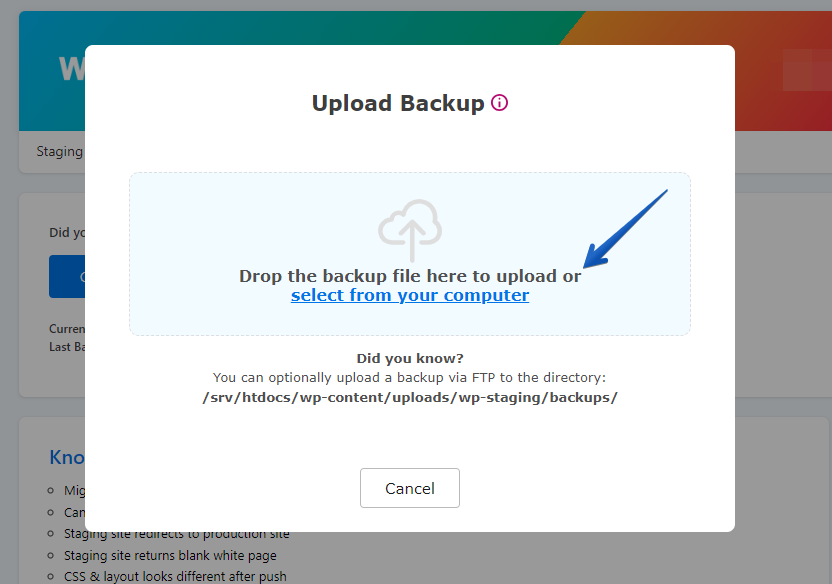
- Currently, upload the backup file exported from your SiteGround website.
- The backup has been successfully uploaded.
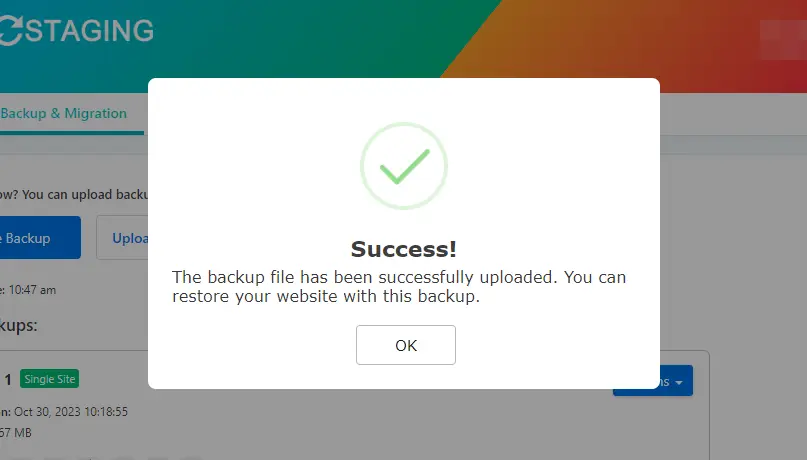
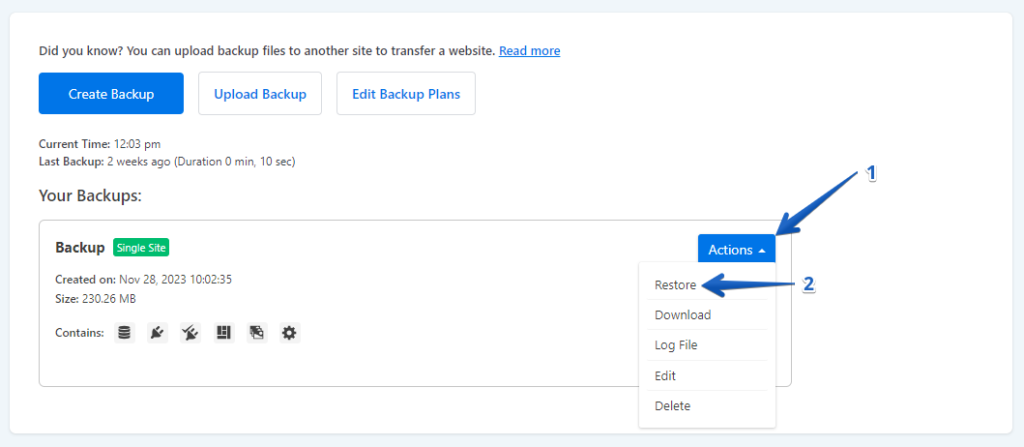
- Following that, click the ‘Action’ button and then click on the ‘Restore’ option.
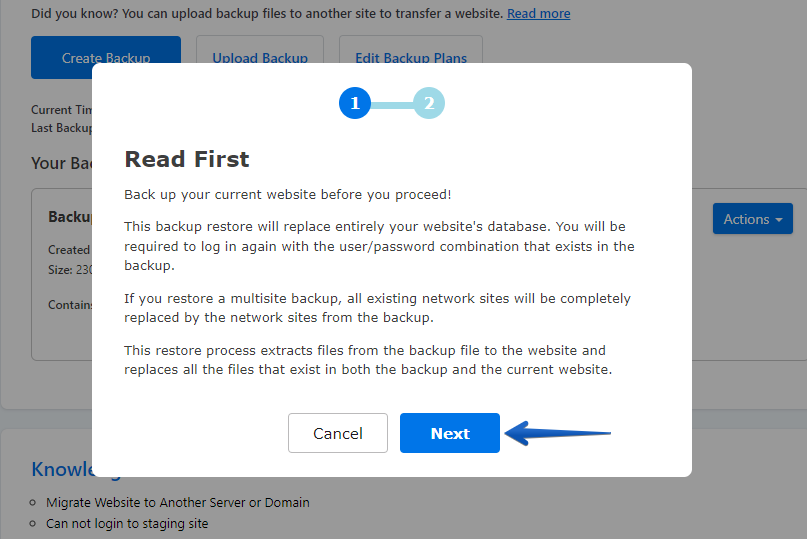
- Click the ‘Next’ button.
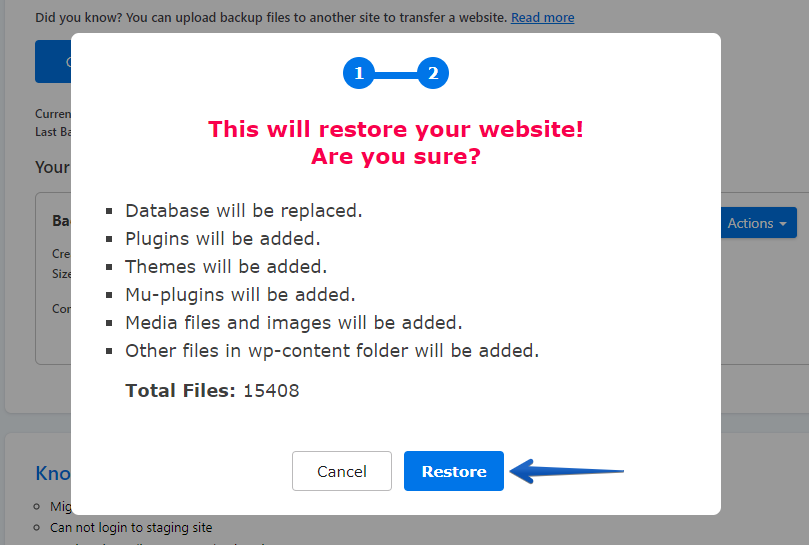
- Afterward, click the ‘Restore’ button.
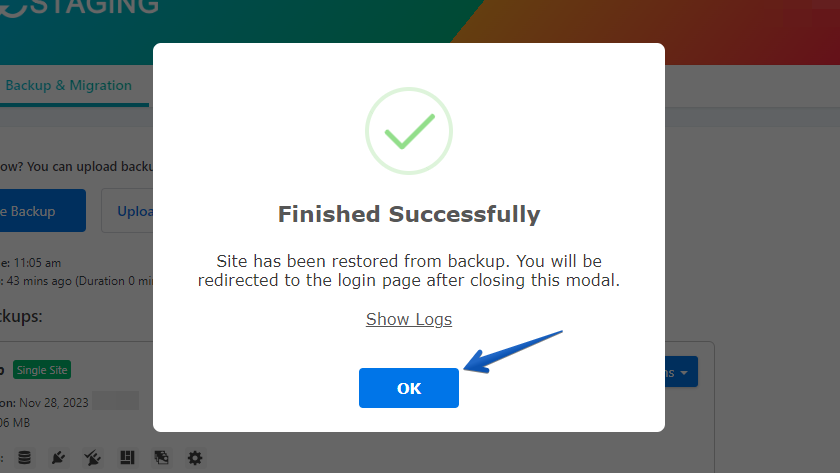
- The backup has been successfully restored.
- Click the "OK" button.
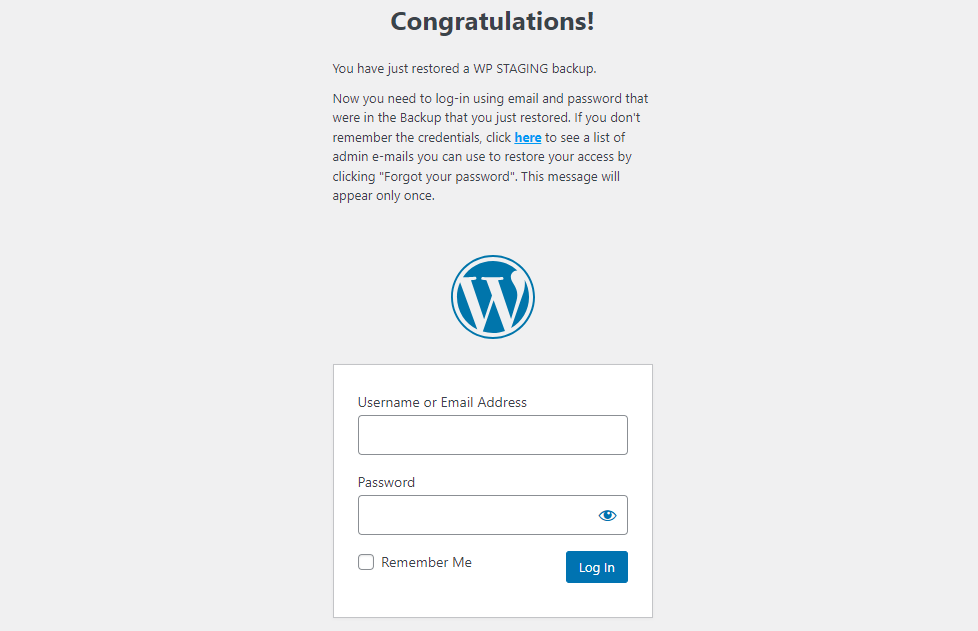
- Log in to your WordPress website again.
Conduct a comprehensive website test on WordPress.com to ensure all components function as intended and review content for accuracy and formatting.
Conclusion
Congratulations! You’ve successfully migrated from SiteGround to WordPress.com, ensuring a seamless transition for you and your audience. By following these meticulously crafted steps, you’ve preserved your website’s integrity and positioned yourself for potential improvements in SEO ranking and overall performance.