Running multiple WordPress sites can be challenging, especially when updating and testing changes without disrupting the live websites. Fortunately, with the help of the WP Staging plugin, managing multiple WordPress sites becomes more manageable and efficient.
This article explores the benefits of using the WP Staging plugin, step-by-step guidelines on how to use it, and its role in streamlining website development and maintenance.
Table of contents
Understanding WP Staging Plugin
What Is WP Staging?
WP Staging is a powerful WordPress plugin that allows website owners and developers to create a replica or staging environment for their live websites. In this staging environment, users can make changes, test updates, and experiment with new themes and plugins without affecting the live site. Once the testing is complete and the changes are deemed satisfactory, they can be easily pushed to the live site.
Why Is It Important To Manage Multiple Sites?
Ensuring seamless updates and avoiding disruptions is crucial when managing multiple WordPress sites. WP Staging provides a safe and risk-free testing environment, allowing users to test changes on staging sites first.
This ensures that updates, new features, or design changes don’t cause unexpected issues on the live websites. It also helps save time and resources, as developers can identify and resolve potential issues before they impact the live sites.
Benefits Of Using WP Staging
WP Staging provides a range of benefits that make it an indispensable tool for managing multiple WordPress sites:
- Safe Environment for Testing – The plugin creates a staging environment that replicates your live site, allowing you to test changes, themes, and plugins without affecting your live website. This eliminates the risk of breaking your site during the development process.
- Time and Cost-Efficient – WP Staging streamlines the development process, reducing the time and resources required for testing and deploying updates. With WP Staging, you can save valuable time while ensuring a seamless user experience.
- Easy to Use and Beginner-Friendly – Whether you are a seasoned developer or a WordPress beginner, WP Staging’s user-friendly interface makes creating and managing staging sites easy. No coding knowledge is required.
- Avoids Potential Live Site Disruptions – Testing updates on a staging site allows you to identify and resolve any issues before they reach your live site. This ensures a smooth and uninterrupted user experience for your visitors.
How To Install WP Staging?
Here’s a step-by-step guide to installing WP Staging:
- First, go to your WordPress Dashboard.
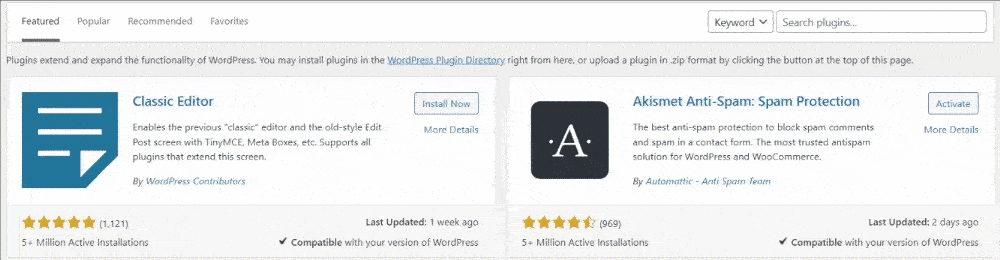
- Navigate to the "Plugin" section, and click the "Add New" button.
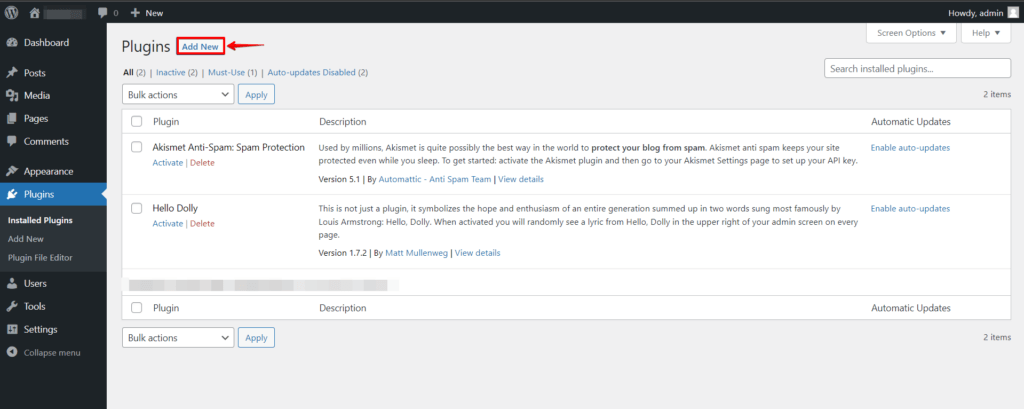
- Search for "WP Staging" and "Activate" the plugin.
Creating A Staging Site
Once you have successfully installed and activated WP Staging, you can create a staging site with ease:
- Go to WP Staging in the WordPress Dashboard.
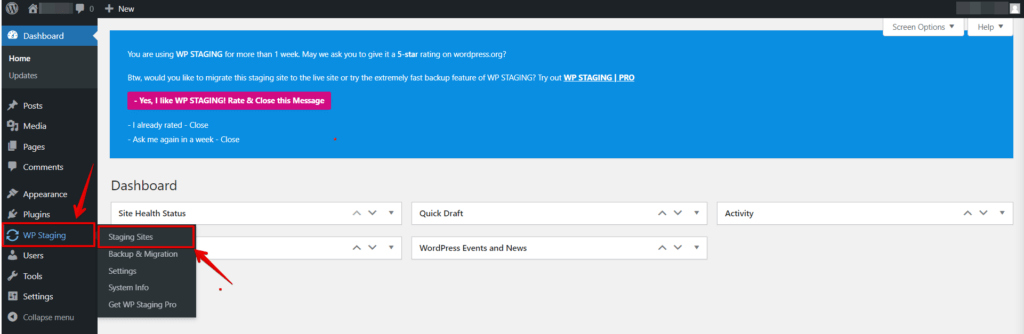
- Click "Staging Site."
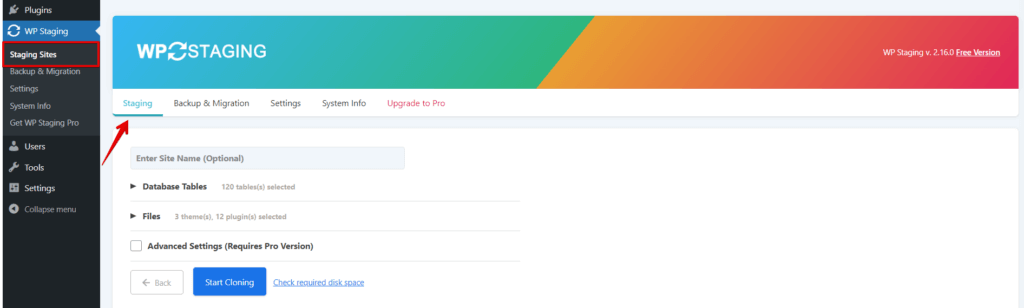
- Configure Staging Site Settings.

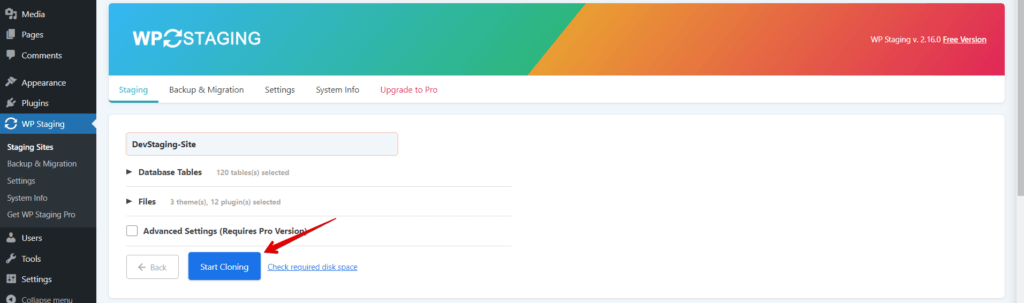
- Click "Start Cloning".
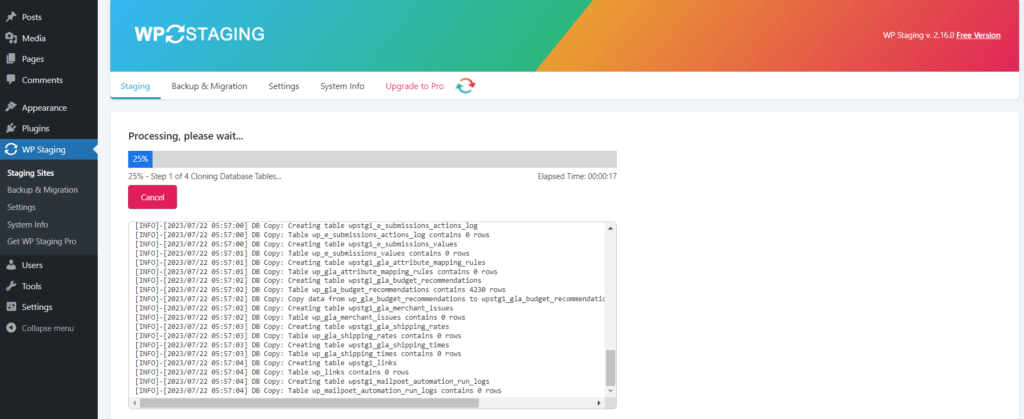
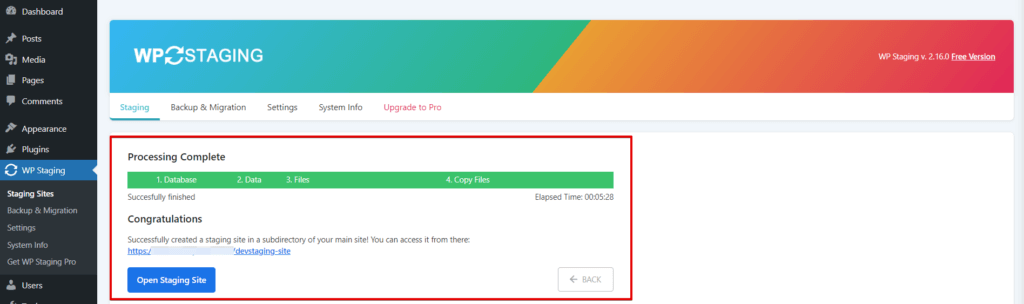
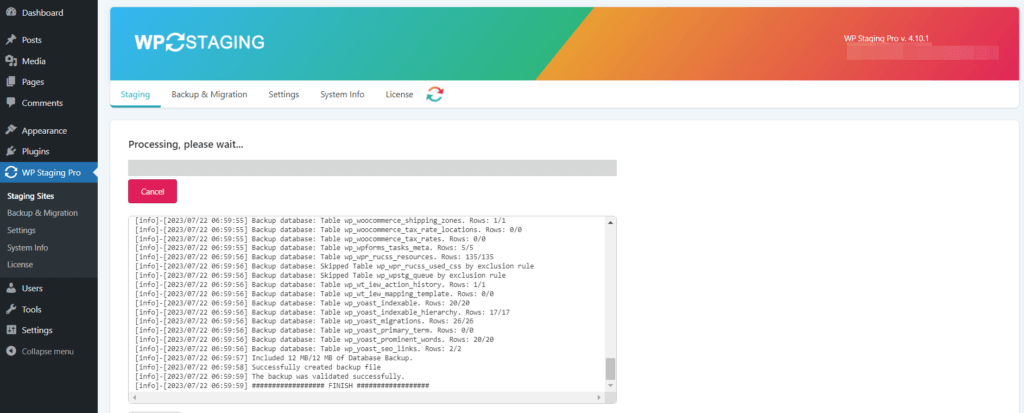
- Wait to Complete the Processing of the staging site.
- Congratulation Your Staging Site is ready.
Updating Staging Site
Using WP Staging, you can easily update and test changes on your staging site before pushing them to your live website:
Make Necessary Changes on the Staging Site:
Access your staging site and make the necessary changes, such as updating themes and plugins or adding new content.
Test Plugins, Themes, and Updates:
Thoroughly test all the changes you made on the staging site to ensure everything functions as expected.
🔥PLAY SAFE:GET STARTED WITH WP STAGING TO MANAGE BACKUPS EFFICIENTLY.
Push Changes To Live Site
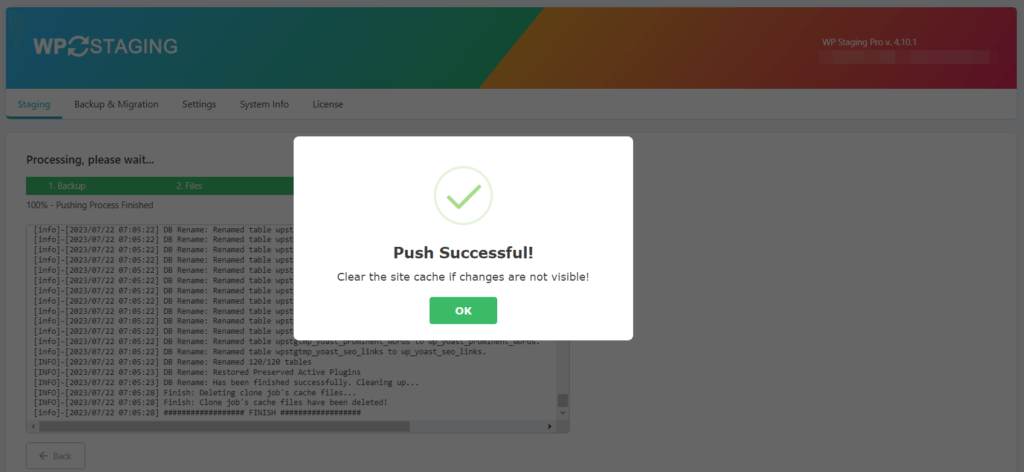
If you are satisfied with the changes and want to deploy them to your live site, click "Push Changes."
Note: You need "WP-STAGING PRO" to "Push Changes" to the live site.
To get started with WP Staging Pro to "Push Changes" to the live site, follow these simple steps:
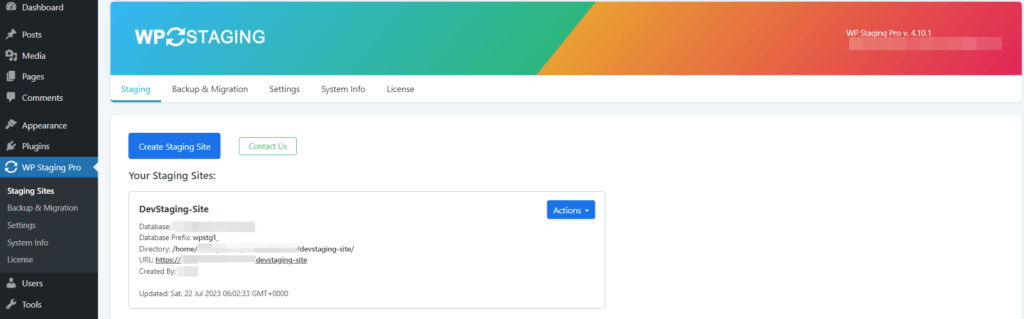
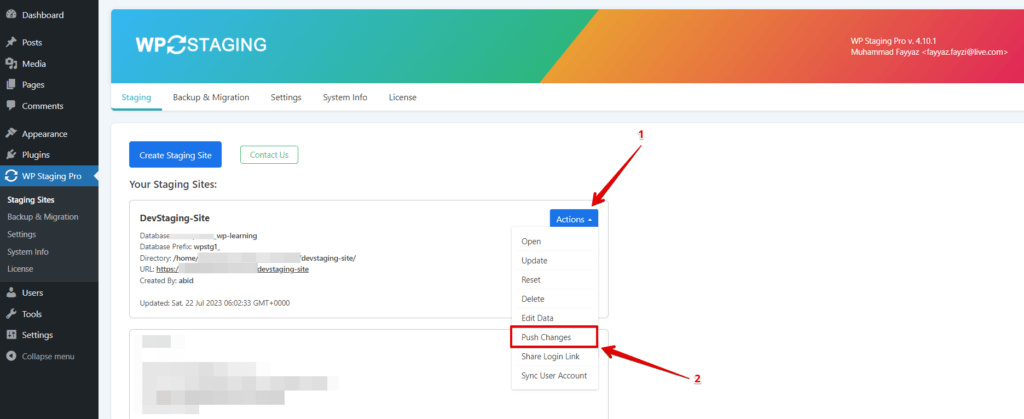
- Go to WP Staging in the WordPress Dashboard.

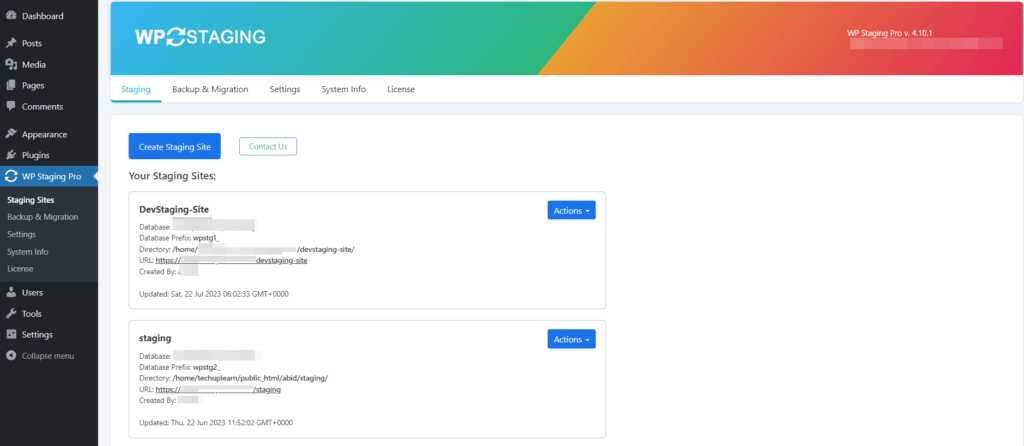
- Once you click the "Staging Sites" option, a new section will appear and show you all your staging sites.
- Click the "Action" Button and then click the "Push Changes" Option.
- Once you click the "Push Changes" option, then the new model will appear and ask to allow you to push changes to the live site.
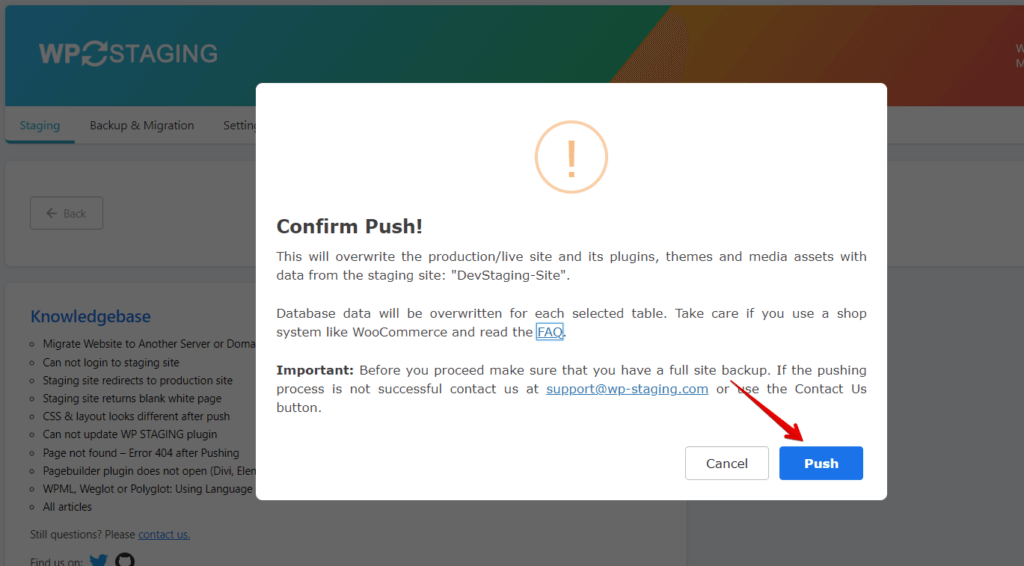
- Once you click the "Push", then start processing.
- Congratulation, your site is ready.
Manage Multiple WordPress Sites From One Dashboard
WP Staging allows you to manage multiple staging sites from one dashboard with ease:
View All Staging Sites In One Place
From the WP Staging dashboard, you can view a list of all your staging sites in one convenient location.
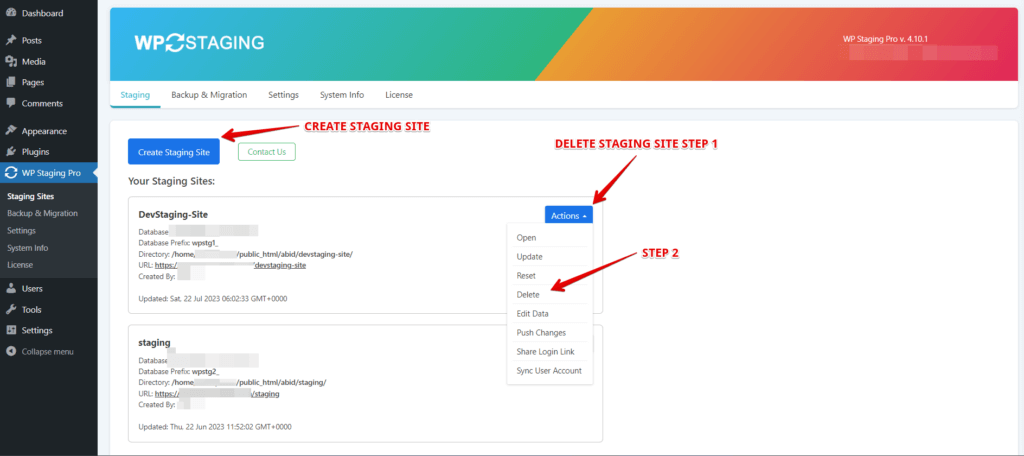
Delete Or Create New Staging Sites
You can quickly delete existing staging sites that are no longer needed or create new ones for different projects.
Conclusion
Managing multiple WordPress sites can be a breeze with the help of the WP Staging plugin. Creating a safe staging environment allows you to experiment, test, and update your websites without disrupting the live versions. The ease of use and time-saving benefits make it an essential tool for any WordPress website owner or developer.