A dynamic and user-friendly website is essential for success in today’s digital landscape. WordPress.com has long been a popular platform for bloggers and website owners, but if you want to take your online presence to the next level, migrating to SiteGround can be a smart move.
SiteGround offers superior hosting services and the flexibility to customize your website to your heart’s content. This comprehensive guide will walk you through the step-by-step process of migrating from WordPress.com to SiteGround, ensuring a smooth transition and improved performance.
Contents
Why Migrate to SiteGround?
Before we delve into the migration process, let’s explore why SiteGround is a preferred choice for many website owners. SiteGround offers a myriad of benefits, including:
- Blazing Fast Loading Speeds – SiteGround guarantees blazing-fast website loading speeds for an improved user experience and better SEO rankings.
- Top-Notch Customer Support – SiteGround provides 24/7 customer support to keep your website running smoothly.
- Enhanced Security – SiteGround prioritizes website security and offers free SSL certificates for enhanced protection.
- Easy Scalability – SiteGround offers easy scalability to accommodate growing website traffic and content without disruptions.
Preparing for the Migration
Before making any changes, it’s crucial to back up your existing WordPress.com content. This ensures that you don’t lose any data during the migration process. Here’s how to do it:
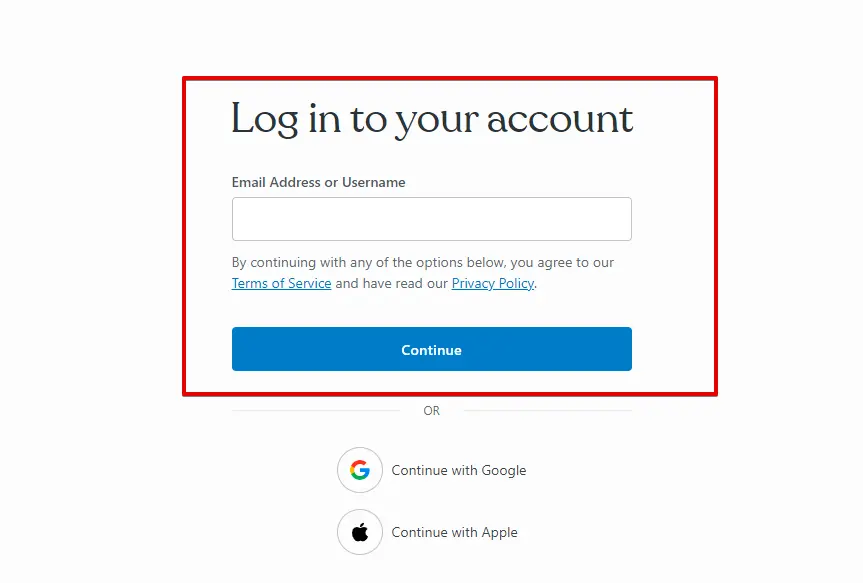
- Sign in to Your WordPress.com Account
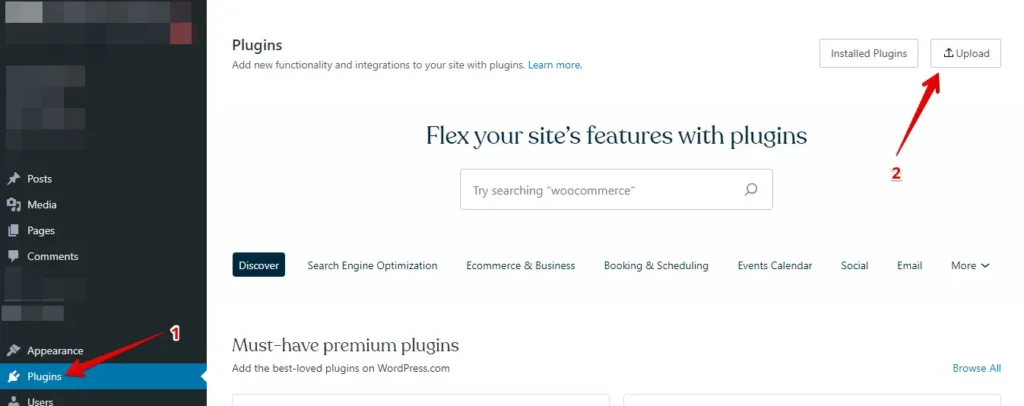
- Within the WordPress dashboard, navigate to “Plugins” and click “Upload.”
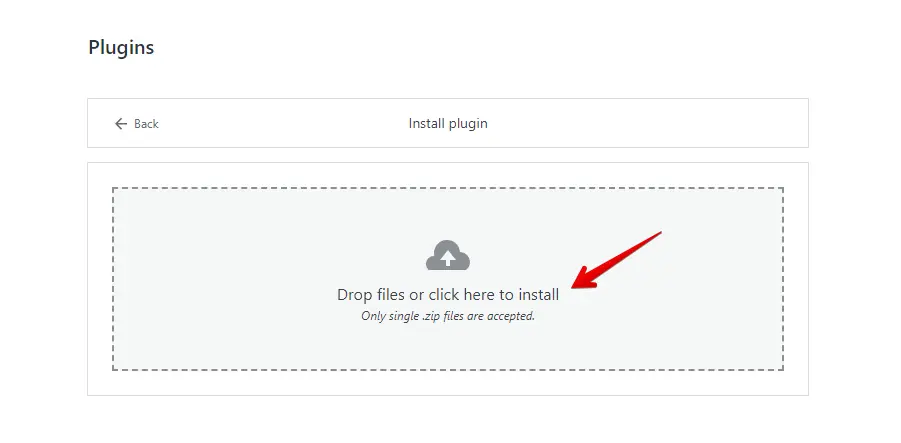
- Next, upload your WP Staging | Pro.
- After you’ve installed and activated it, go to the “Backup & Migration” section, typically found in the WordPress dashboard under “WP Staging | Pro.”
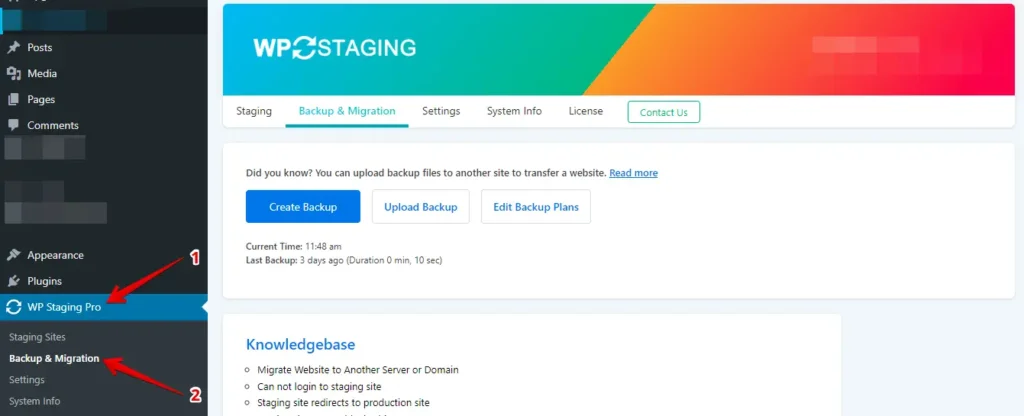
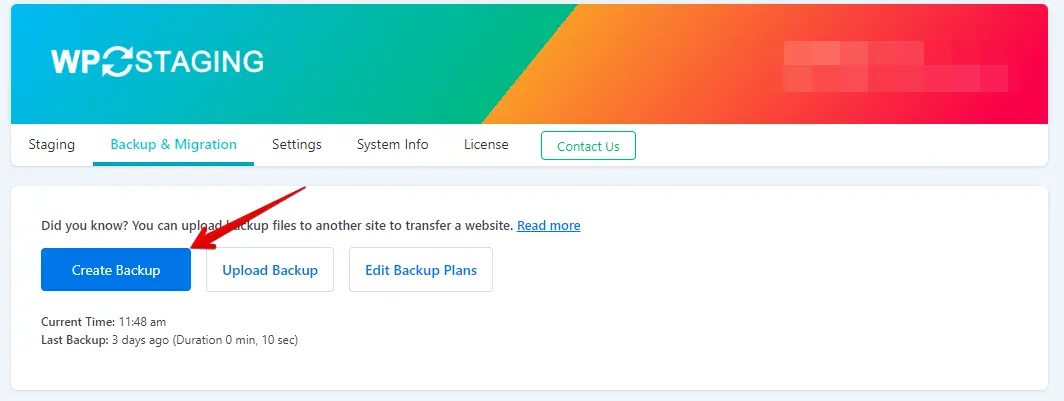
- If you already have an existing backup, that’s great. If not, click the “Create Backup” button to generate a new backup.
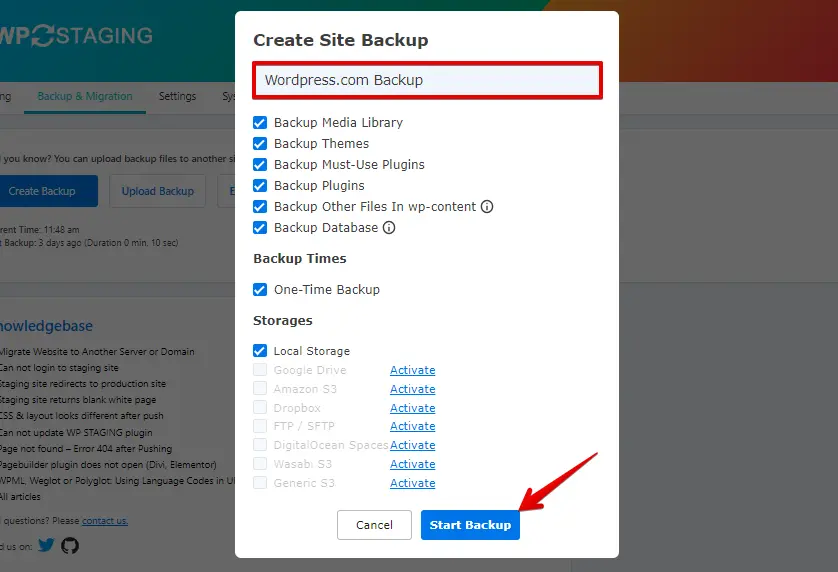
- Enter a name for your backup, and then click the “Start Backup” button.
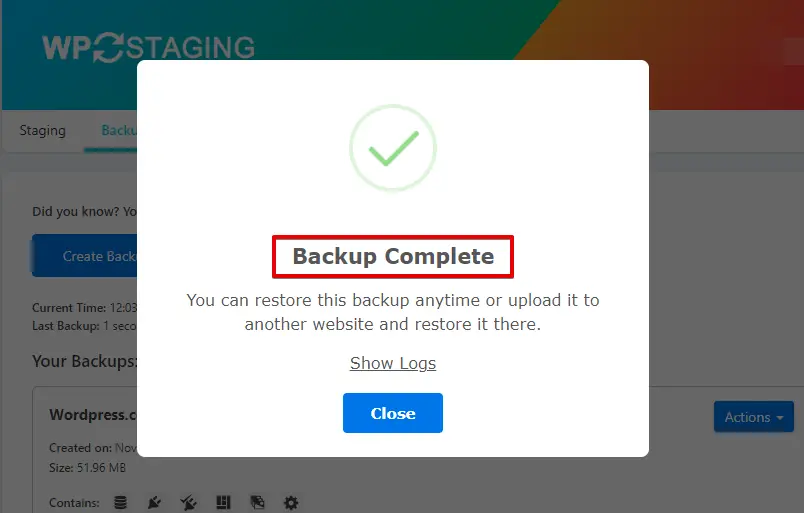
- The backup has been completed successfully.
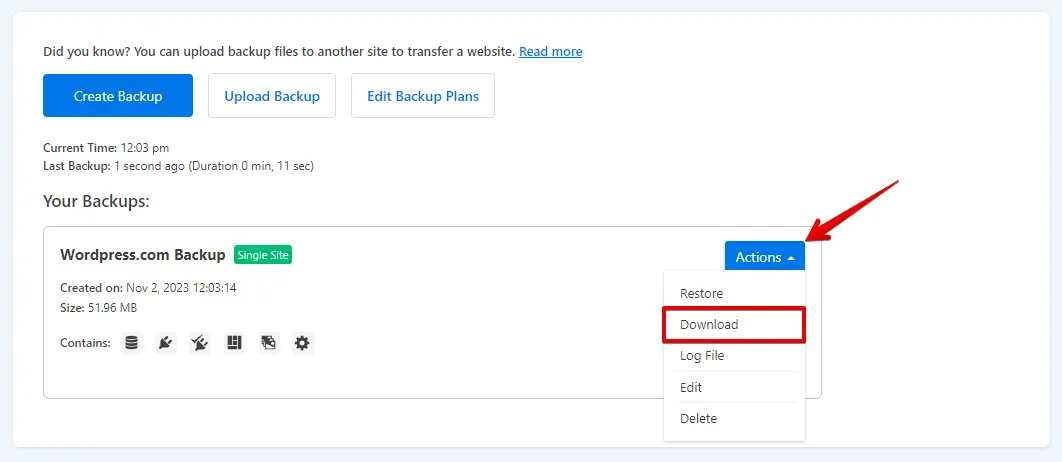
- Once the backup process is finished, you’ll generally discover a “Download” option under the “Action” button. Be sure to save this backup file to a secure location on your computer.
The Process of Migration
- Log in to your SiteGround WordPress website by using your username and password or by accessing the SiteGround admin panel.
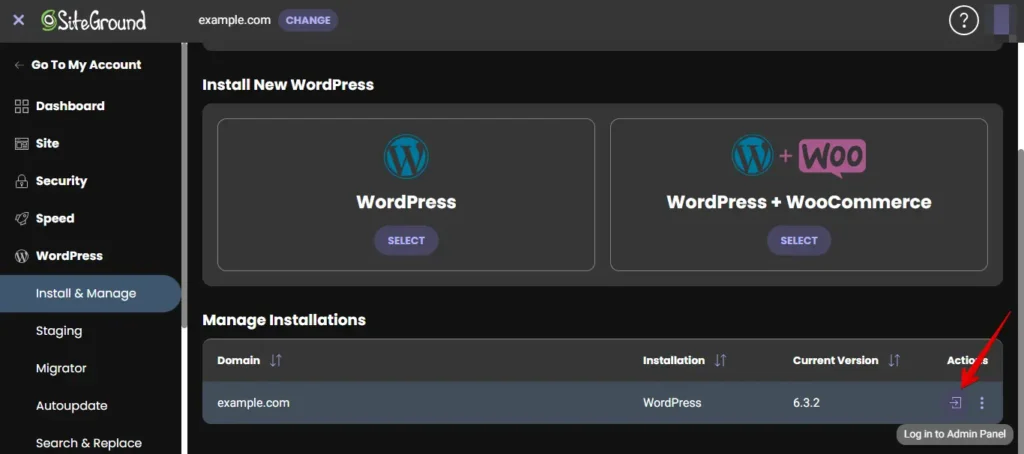
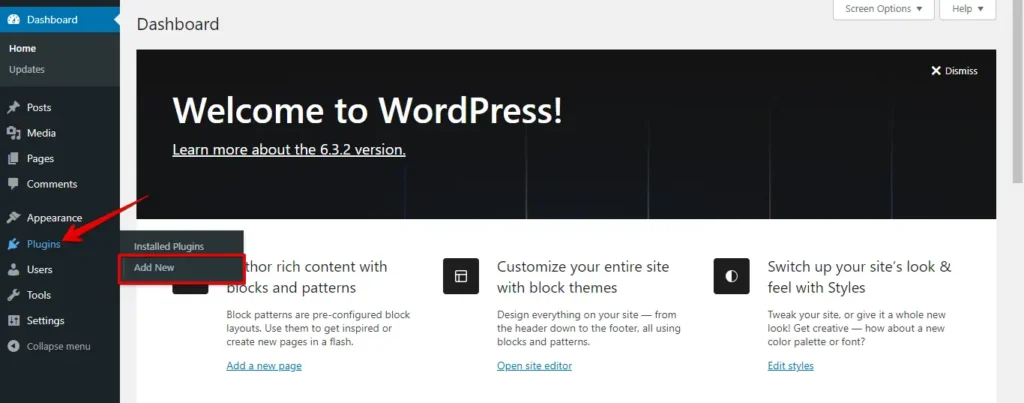
- On the menu to the left, navigate to “Plugins” and click “Add New.”
- Select the “Upload Plugin” button, then click “Choose File” to upload the WP Staging Pro plugin.
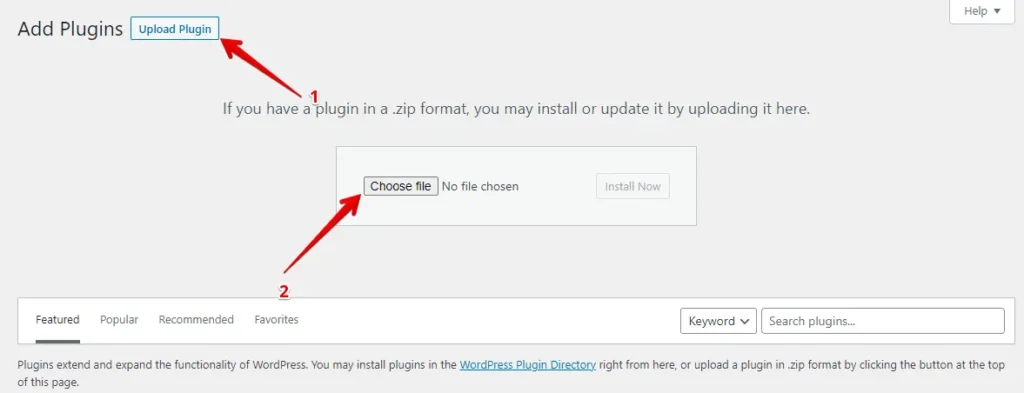
- Now, click the ‘Install Now’ button.

- After the plugin is installed, activate it.

- Navigate to the left-hand menu, locate ‘WP Staging Pro,’ and select the ‘Backup & Migration’ option.
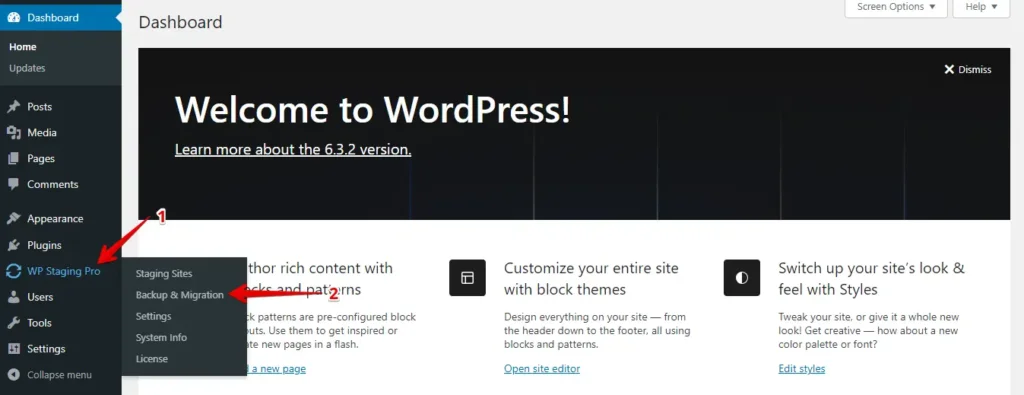
- Subsequently, click the ‘Upload Backup’ button.
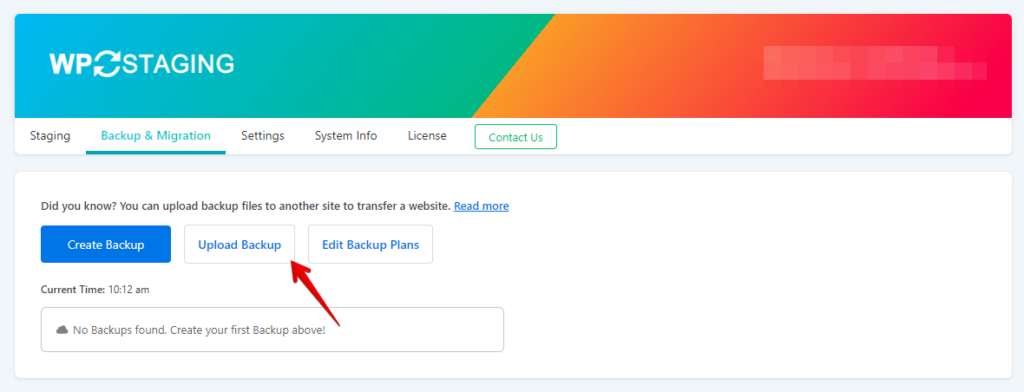
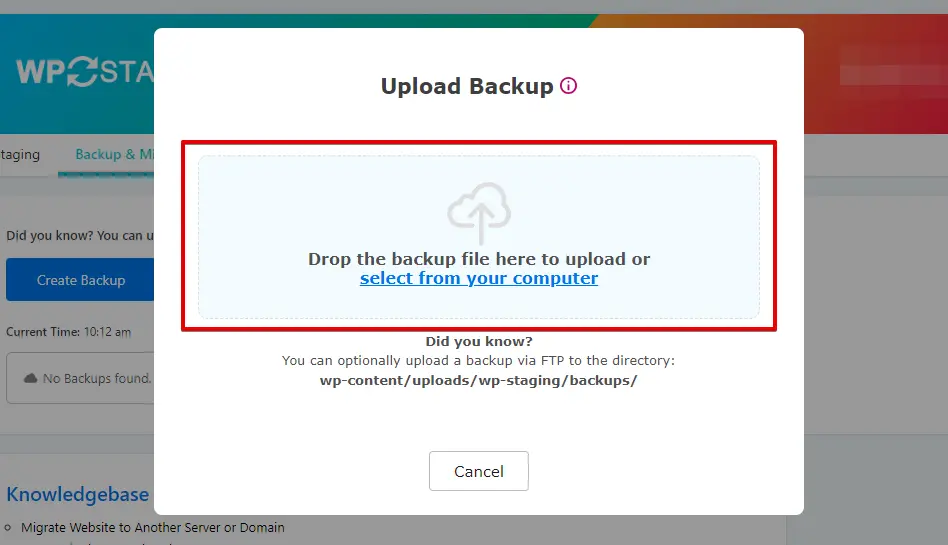
- Now, upload the backup file that you exported from your WordPress.com website.
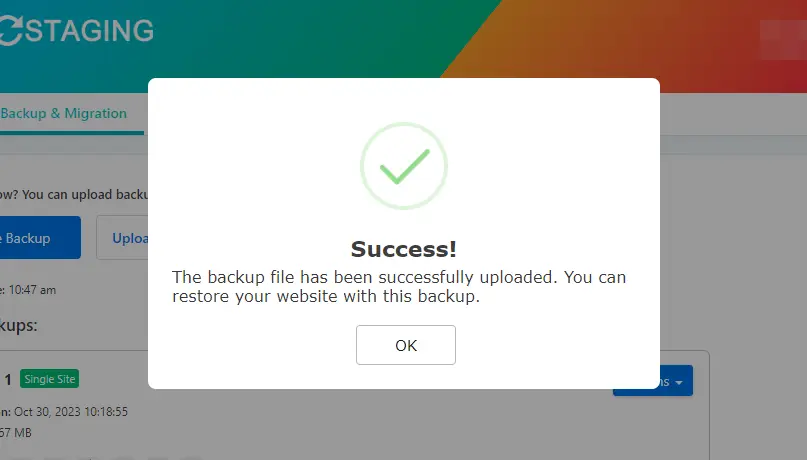
- The backup has been successfully uploaded.
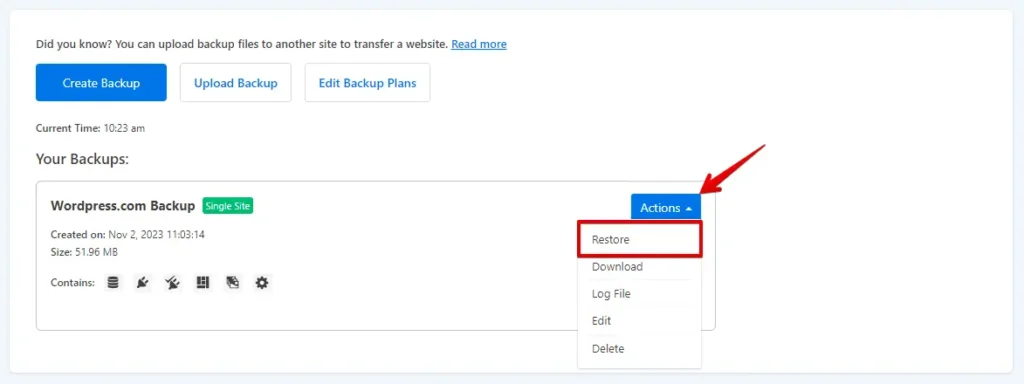
- Next, select the ‘Action’ button, and then click the ‘Restore’ option.
- Press the ‘Next’ button.
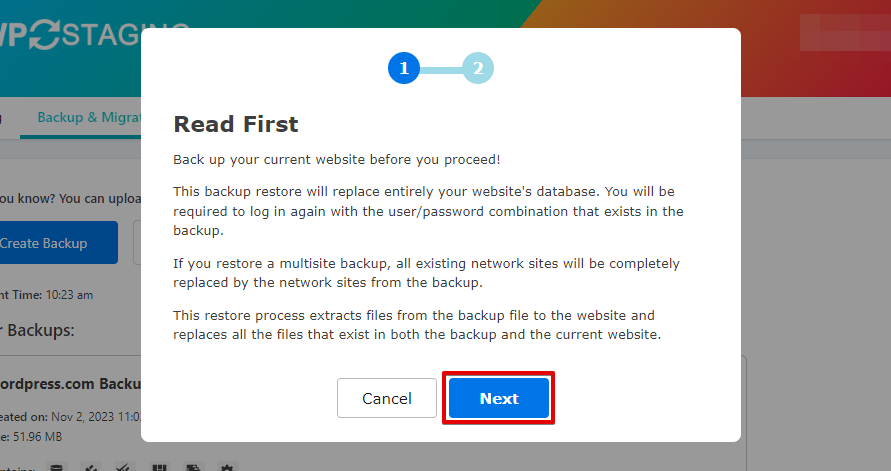
- Following that, click the ‘Restore’ button.
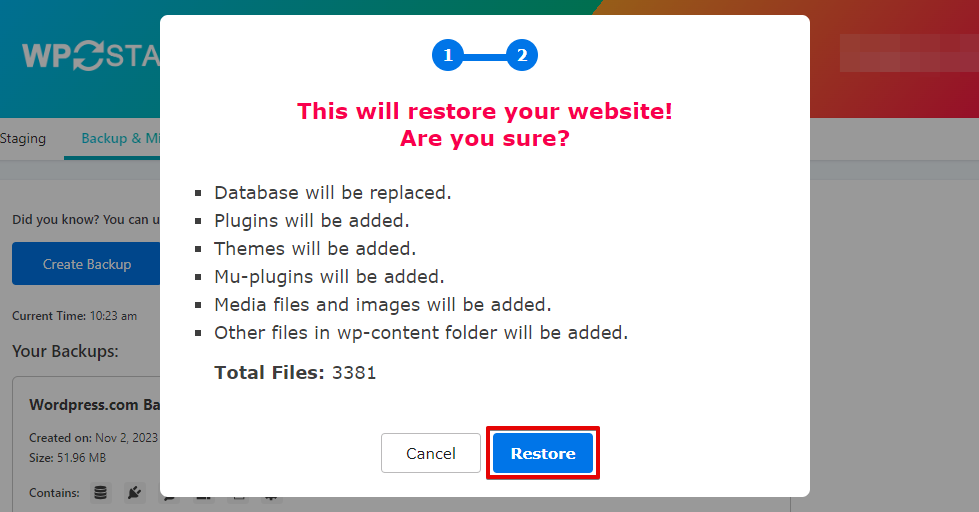
- The backup has been successfully restored.
- Click on the “OK” button.
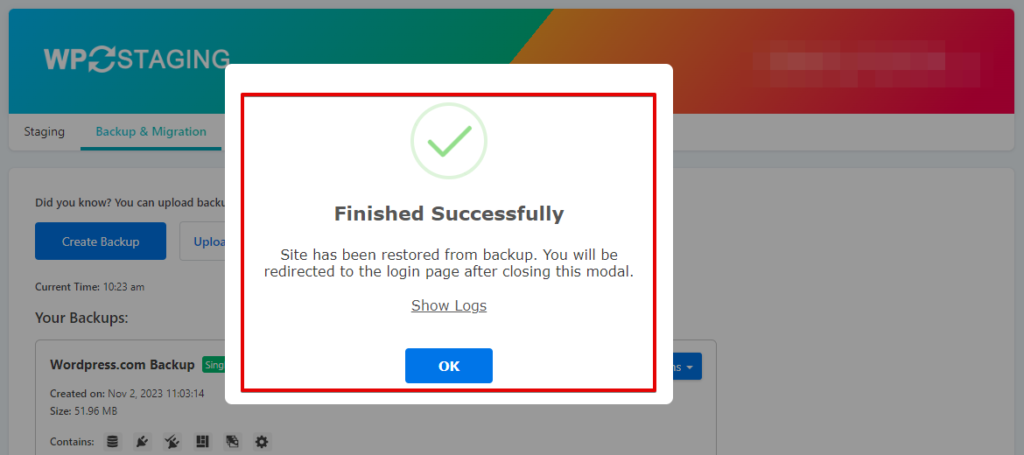
- Log in to your WordPress website once more.
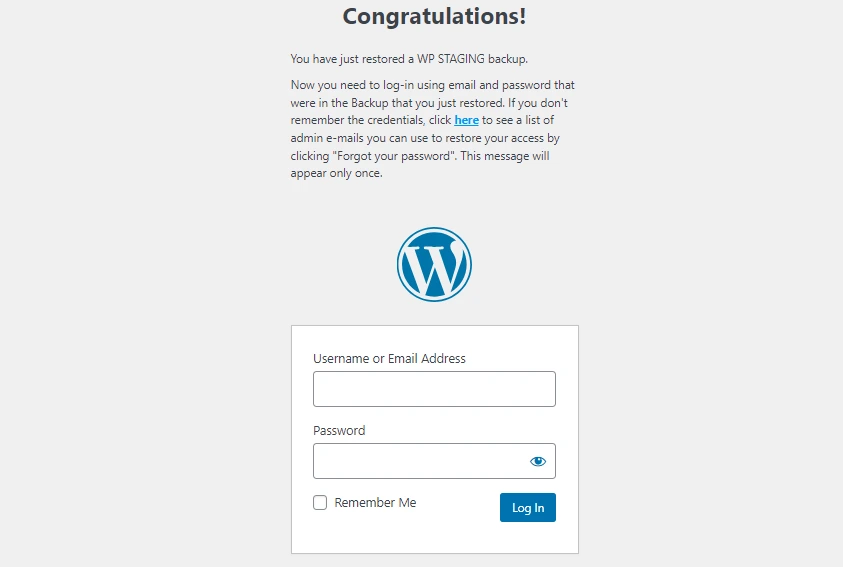
Perform a thorough website test on SiteGround to confirm that all components function as intended and review all content for accuracy and formatting.
Conclusion
Migrating from WordPress.com to SiteGround might seem daunting, but with this step-by-step guide, you can make the transition smoothly and efficiently. SiteGround’s powerful hosting services and excellent support will give you the foundation for a successful website. By following these steps, you’ll be well on your way to improving your website’s performance and user experience.
