
WordPress plugins are a great way to add new functionality to your website. However, sometimes a plugin may cause issues that can’t be resolved through the WordPress dashboard. You may need to disable a WordPress plugin from the database in such cases.
What are the Top Reasons for Disabling WP Plugins from Database?
You might want to disable a WordPress plugin from the database for several reasons. For instance:
- The plugin is causing your site to crash or behave abnormally, and you cannot access the WordPress dashboard to deactivate it.
- The plugin is incompatible with your WordPress version or other installed plugins, and you want to remove it to avoid conflicts.
- The plugin’s code interferes with your website’s functionality or security, and you must disable it immediately.
- The plugin is no longer needed, but you cannot delete it because it stores important data in the database.
Whatever the reason, disabling a plugin from the WordPress database can help you resolve the issue quickly and efficiently.
How to Disable a WordPress Plugin from Database?
Before proceeding, it’s important to note that changing your WordPress database can be risky if you’re unfamiliar with the process. We recommend you completely backup your website and database before you begin. This way, you can restore your site to its previous state if anything goes wrong.
Top 4 Methods
Contents
Method 1: Disable all Plugins Using Cpanel
You can disable all WordPress plugins from the database using cPanel by following these steps:
- Log in to your cPanel account.
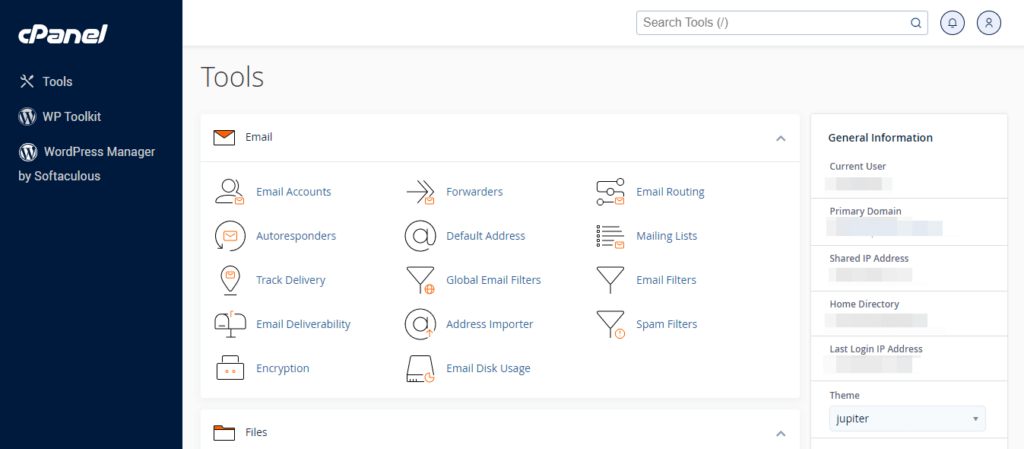
- Navigate to the "Databases" section and click on "phpMyAdmin."

- Select the database that’s associated with your WordPress installation from the left-hand side.
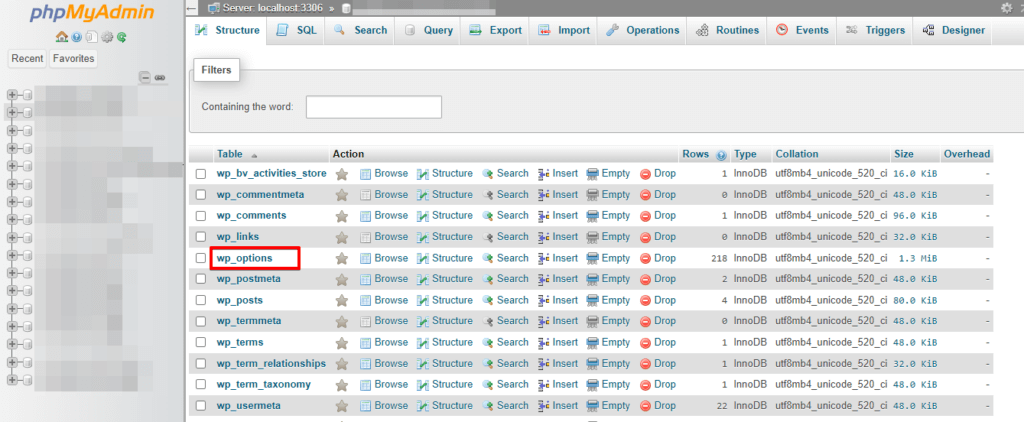
- Click on the
wp_optionstable, and then click on the "Browse" tab.
- Look for the
active_pluginsrow and click on the "Edit" button.
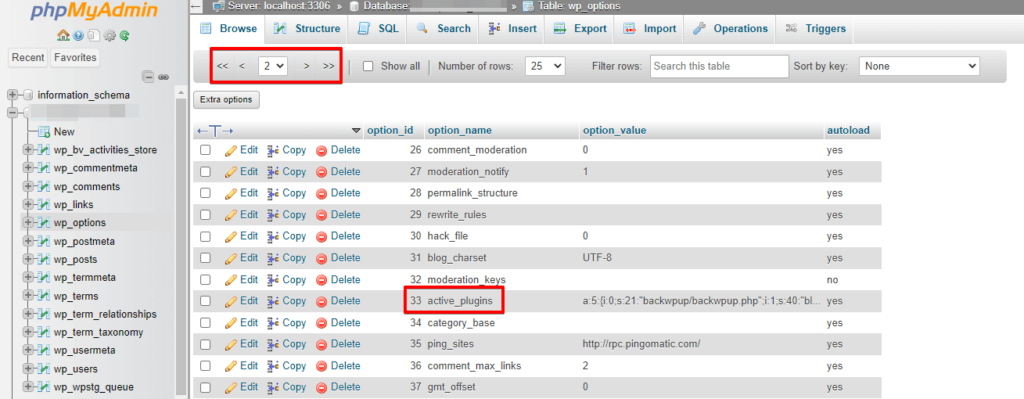
- Delete the text in the
option_valuefield.
This will disable all active plugins on your WordPress site. If you want to enable the plugins again, replace the text you deleted in Step 6 with the original plugin list and save the changes.
It’s important to note that this method will disable all plugins simultaneously, so it’s unsuitable if you want to disable a single plugin.
Method 2: Disable a Single Plugin Using Cpanel
- Log in to your cPanel account.
- Navigate to the "Databases" section and click on "phpMyAdmin."
- Select the database that’s associated with your WordPress installation from the left-hand side.
- Click on the
wp_optionstable, and then click on the "Browse" tab.
- Look for the
active_pluginsrow and click on the "Edit" button.
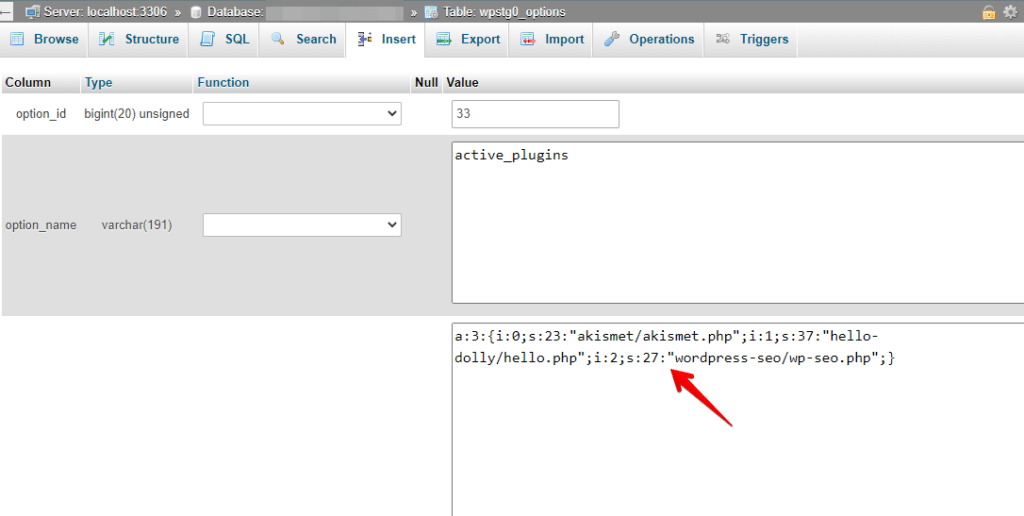
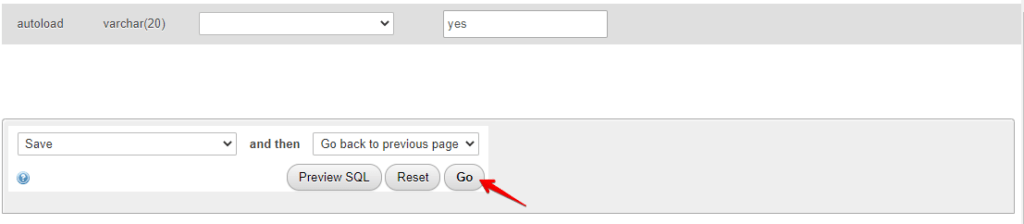
- Disable the plugin
You’ll see a long string of text that looks like this:
a:3:{i:0;s:23:"akismet/akismet.php";i:1;s:37:"hello-dolly/hello.php";i:2;s:27:"wordpress-seo/wp-seo.php";}
A line in this string represents each plugin. To disable a plugin, you must find its corresponding line and remove it. For example, if you want to disable the Akismet plugin, you need to remove this line:
i:0;s:23:"akismet/akismet.php";
To remove the line, delete it from the string.
Be careful not to delete other lines or characters, which can cause errors! As it is easy to make errors here, using an online service that can automatically handle such serialized string changes is highly recommended. One of the most accessible and most popular free services is https://sciactive.com/phpserialeditor.php.
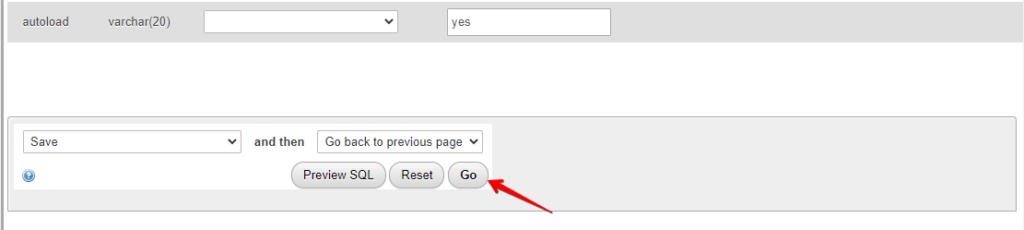
- Once you’ve removed the line, click the Go button to save your changes.
After disabling the plugin from the database, check your WordPress site to ensure it works properly. You can delete the plugin files from your WordPress directory if everything looks good.
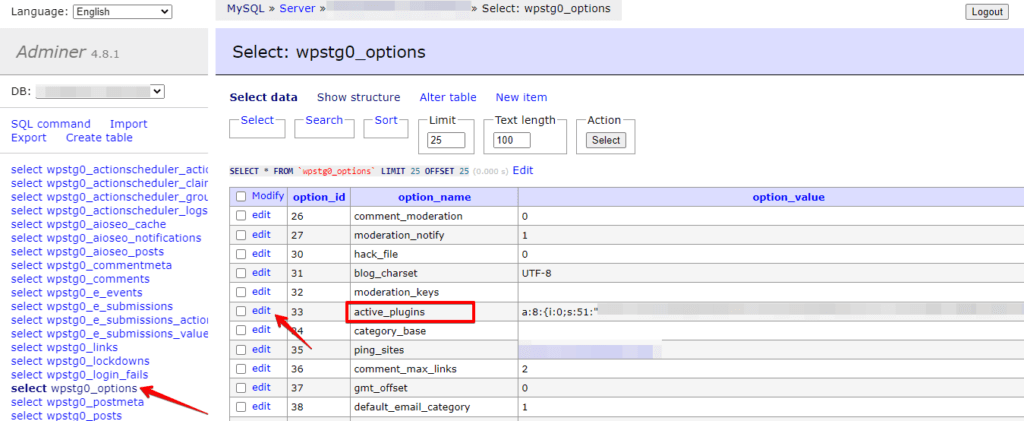
Method 3: Using Adminer
Adminer is a free and open-source web-based database management tool, designed to handle multiple database management systems. It allows users to manage their databases through a graphical user interface. It provides a simple and easy-to-use interface for creating, editing, and deleting database objects, executing SQL queries, and managing data.
You can disable WordPress plugins using Adminer by following these steps:
- Download the latest version of Adminer from the official website (https://www.adminer.org).

- Upload the downloaded file to your WordPress site’s root directory using an FTP client or CPanel.
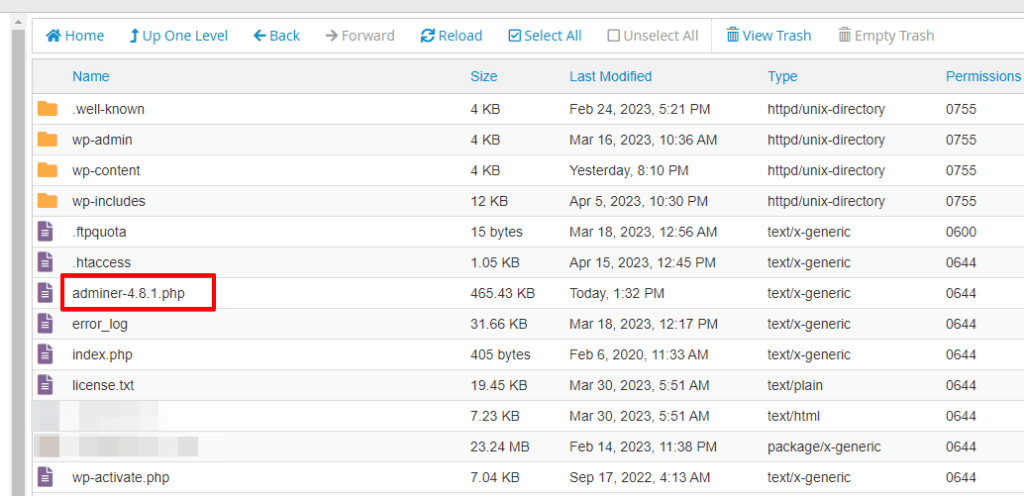
- Rename the file to something obscure; for example,
my_adminer_file.php.

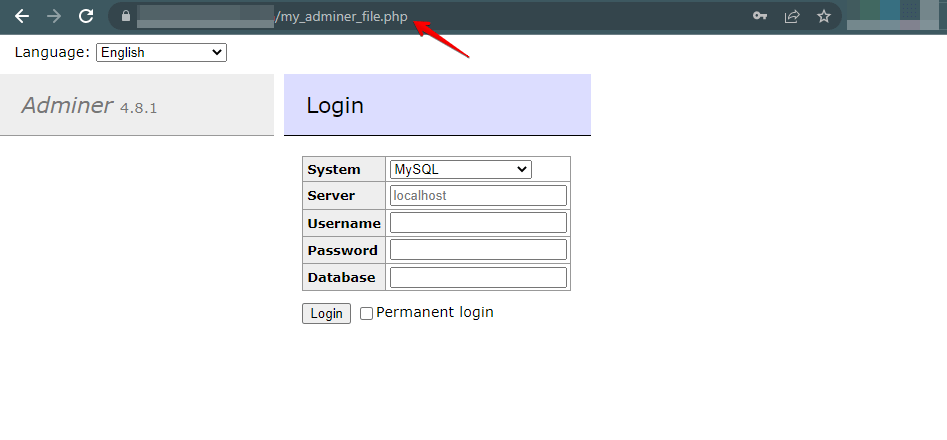
- In your web browser, navigate to [
yourdomain.com/my_adminer_file.php]. - You should now see the Adminer login page. Enter the database username and password to access the database.
- Select the database that’s associated with your WordPress installation.
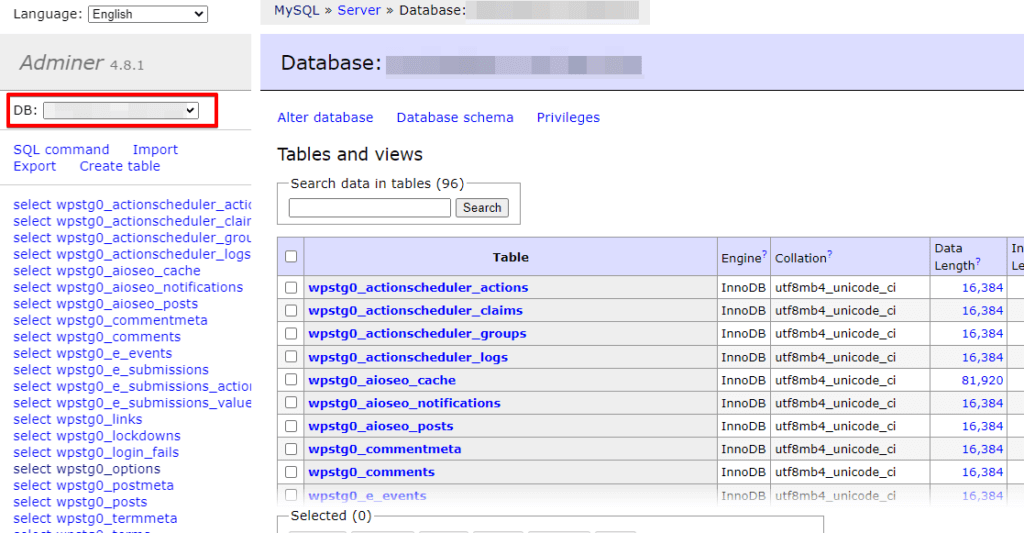
- Click on the
wp_optionstable, and then click on the "Edit" button next to theactive_pluginsrow.
- Delete the text in the
option_valuefield and click on the "Save" button to disable all plugins.
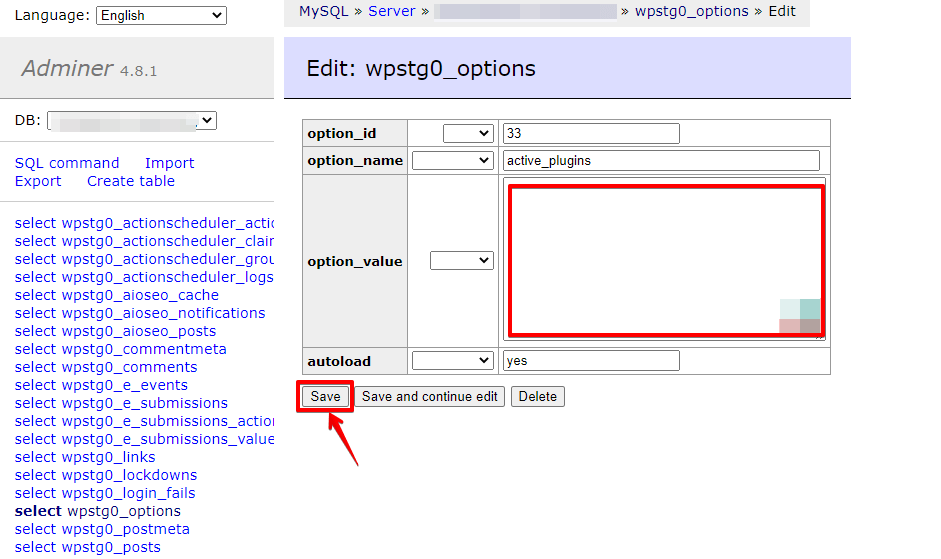
This will disable all active plugins on your WordPress site. To enable the plugins again, replace the text you deleted in Step 4 with the original plugin list and save the changes.
Adminer is a powerful tool for managing databases, but be careful when making changes to the database, as incorrect changes can break your site.
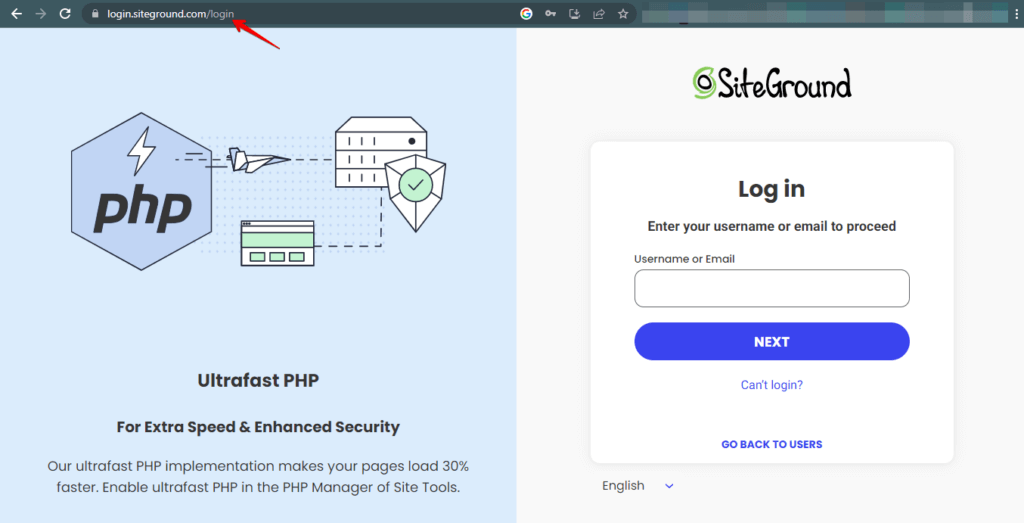
Method 4: Using Hosting Account Like SiteGround
Here are the steps to disable a WP plugin from the database using SiteGround’s hosting account:
- Log in to your SiteGround hosting account’s control panel.
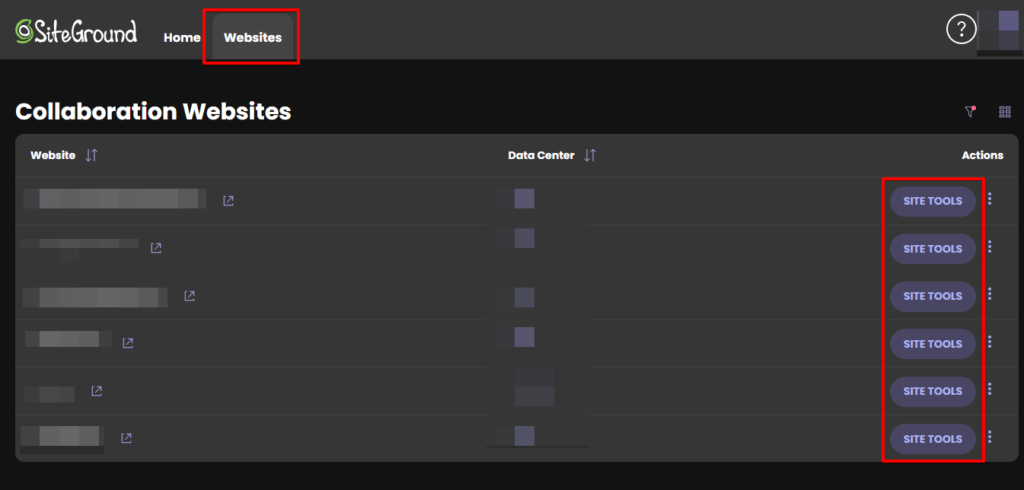
- Under the "Websites" section, click on the "Site Tools" button next to the website where the plugin is installed.
- Click on the "MySQL" option under the "Site" section.
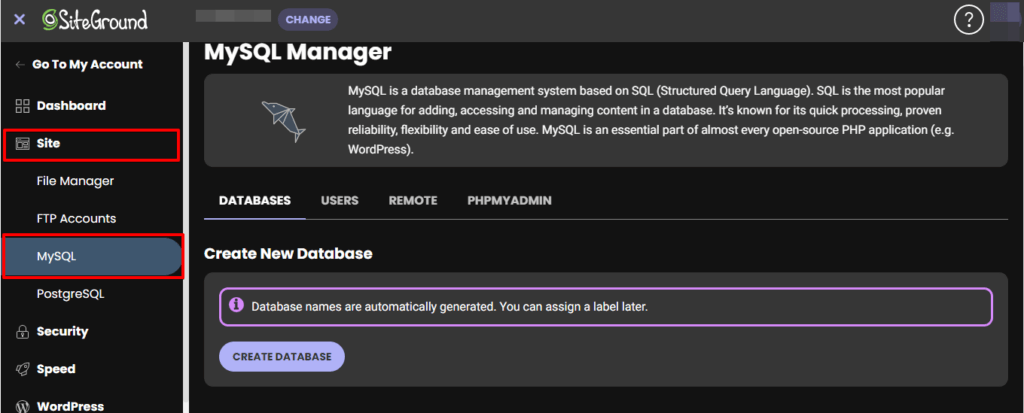
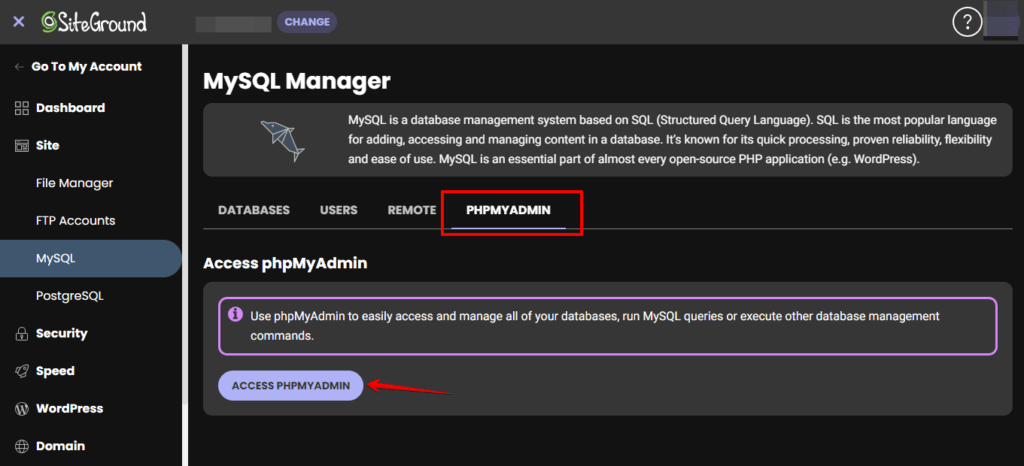
- Under the "Tools" tab, click the "phpMyAdmin" option to launch the database management tool.
- In the left-hand sidebar, click on the database for your WordPress website.
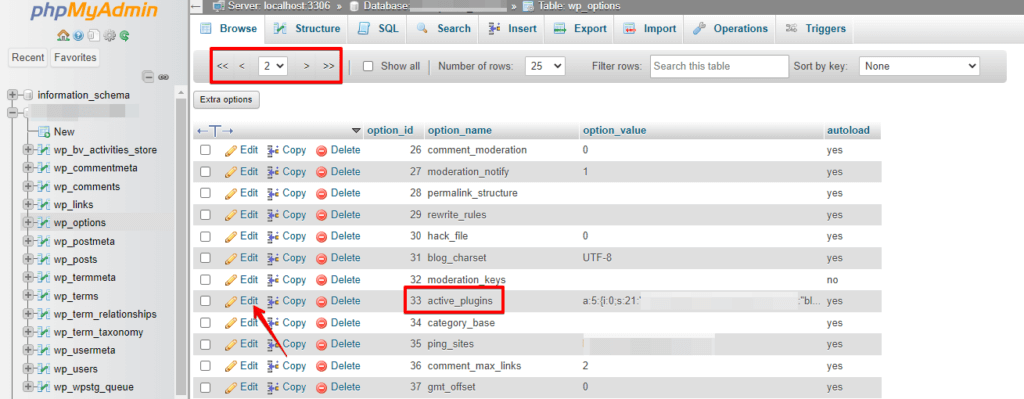
- Find the
wp_optionstable and click on it to open it.
- Look for the
active_pluginsoption and click on the "Edit" button next to it.
- This will open a window where you can edit the value of the "active_plugins" option. Delete the value that corresponds to the plugin you want to disable.
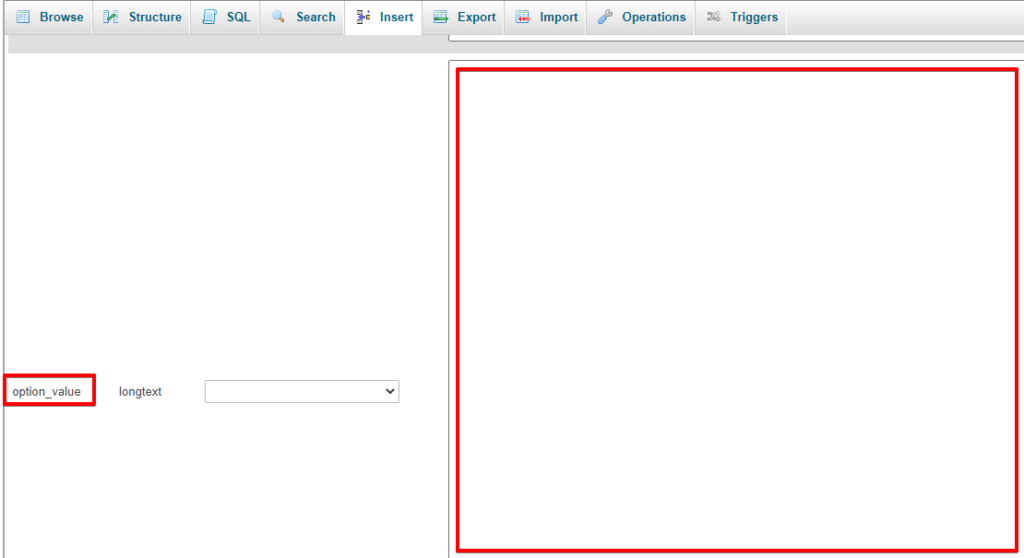
- Click the "Go" button to save your changes.
- Return to your WordPress website and check if the plugin has been disabled.
Conclusion
Disabling a WordPress plugin from the database can help you quickly resolve issues that cannot be fixed through the WordPress dashboard. However, it’s important to proceed cautiously and back up your website and database before making any changes. TRY WP STAGING FOR CREATING BACKUPS & STAGING ENVIRONMENT