With WP STAGING, you can create a WordPress staging site from an existing production website.
You can also clone again a Staging site you have created as a further development site. This is helpful if you need different development sites and want to test what happens if data from one site is copied to another test website without affecting the actual production website.
Although this article explains how to clone a staging site with WP STAGING, it does not matter if you created the staging site with WP STAGING or another tool.
Contents
It’s a good idea to have a clone of your entire website to test as much as possible on your WordPress site before making any changes to your production site.
WP STAGING allows you to create a site for testing purposes and is your specialized tool for copying a staging site and all of its data to the production site.
Even better, it allows you to create a clone of an existing staging site and copy the cloned site to the parent clone.
This allows you to create a development and staging website beside the production system, a structure that is widely common and used by professional developers all over the world:
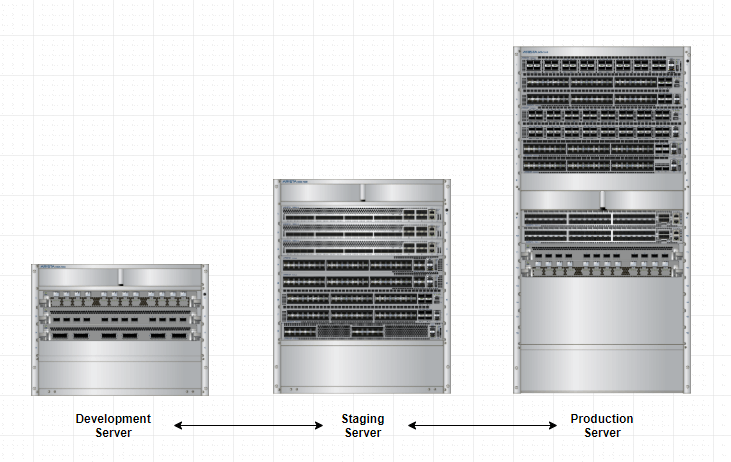
This development structure helps you test all the steps from cloning to pushing and ensure there are no errors in the process chain before repeating them on your production website.
How to Create a Dev > Staging > Production Environment
How to clone a staging site:
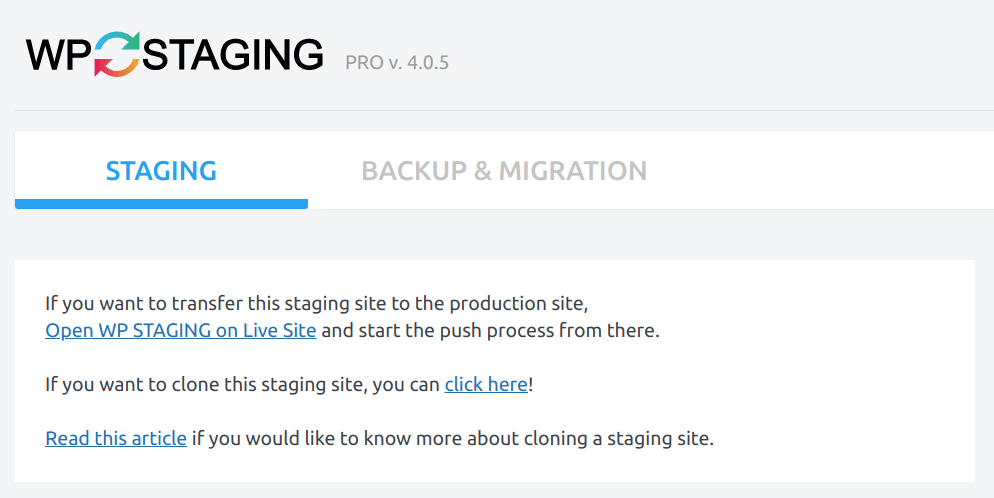
In the WP STAGING PRO, you can clone a staging site with one click:
- Login to the staging site
- Navigate to WP STAGING > Sites
- Click on click here and make the staging site cloneable
If you’ve made these changes, you can start creating a clone of the staging site by login to
Staging Site > wp-admin > WP Staging > Start
For instance, you can name your first staging site “Staging.”
Then log in to Staging > wp-admin > WP Staging> Start and label the clone “Development.”
Now, you can work on the “Development” site and modify anything without worrying about breaking anything on your production website. Do the test push from the “Development” to the “Staging” site.
- Log in to the “Staging.”
- Navigate to WP Staging PRO > Staging Sites > Click on the Action dropdown.
- Push the site “Development” to the “Staging” site.
When you are done, and you like to copy the staging site to the production site:
- Log in to your production site.
- Navigate to WP Staging Pro > Staging Sites > Click on the Action dropdown.
- Push the site “Staging” to the production site.
How to Push the Dev Site to the Staging Site
- Log in to a “Staging” site.
- Navigate to WP Staging Pro > Staging Sites > Click on the Action dropdown.
- Push the site “Development” to the “Staging” site.
How to Push the Staging Site to the Production Site
- Log in to your production site.
- Navigate to WP Staging PRO> Staging Sites > Click on the Action dropdown.
- Push the site “Staging” to the production site.
Option 2: Create Multiple Staging Sites. Then Use Backup & Migrate
Another option is to create two or even more staging sites from the live site. Then, work on one of these sites.
When you are ready with your updates, you can go to Backup & Migration and create a backup of the updated website.
Download the backup file and upload it to one or more of your other staging sites and restore it there. If the whole migration went well and the sites look good, you can finally use the “ACTIONS > Push Changes” button or the Backup & Migration feature again to migrate the dev site to the live site another time.