
With WordPress Multisite installations, you enjoy the advantages of managing multiple WordPress sites from one dashboard. Unfortunately, multisite systems are not only quite manageable but can also often seriously jeopardize your WordPress setup. If so, you should consider converting the network site to a single site. This can avoid programmatic conflicts, security holes, and the eventual downfall of your entire network.
Fortunately, WP STAGING enables you to convert a multisite network sub-site WordPress installation into an independent website with a few clicks.
NOTE: We assume you have created a backup to avoid data loss. (You can use WP STAGING, therefore.)
Why Convert a Multisite Network Site to a Single Site?
Programmatic Conflicts: Each plugin or theme is devoted to a single site and may conflict with the other in the multisite network. Similarly, any plugin or theme update implemented on all network sites can create compatibility issues.
Lack of Administration Control: Other admins of network sub-sites can’t deal with plugins and themes.
Risk of Network Downfall: Because all sub-sites are managed through the same dashboard, any hacker attack, data breach, server outage, or slow speed can eventually shut your websites down.
No Testing: It’s difficult for a single administrator to test new plugins or themes because of not having the privilege.
Difficult to Manage: Multisites are much more complex and challenging to maintain in the long run if you run a lot of custom plugins. Not all plugins work very well in multisite environments.
Multisite is a feasible solution if you need to control a lot of different network sub-sites. If you need hundreds or thousands of sites, go with a multisite network, but if you require only a handful of sites, you better choose a WordPress single-site installation.
How do you convert a WordPress Multisite to an independent single site?
Contents
Step 1: Install WP STAGING | PRO (On the Multisite Main Site)
Login to your WordPress multisite and install WP STAGING | PRO.
Activate the WP STAGING | PRO plugin on the network sites you want to convert to a single site. You can even activate it on the main multisite to convert that site to a single site.
- Go to WP Staging Pro > License.
- Add your license key and click on ACTIVATE LICENSE to validate.
Continue with this article: How to create a backup and restore it on another website.
Step 2: Create a Staging Site of a Network sub-site
- Log in to the network site you want to convert to a single site.
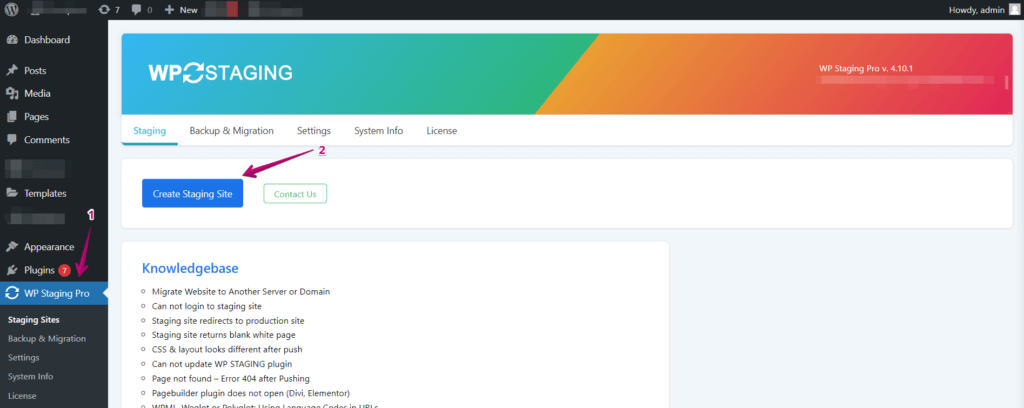
- Go to WP Staging Pro > Staging Sites.
- Click on Create Staging Site.
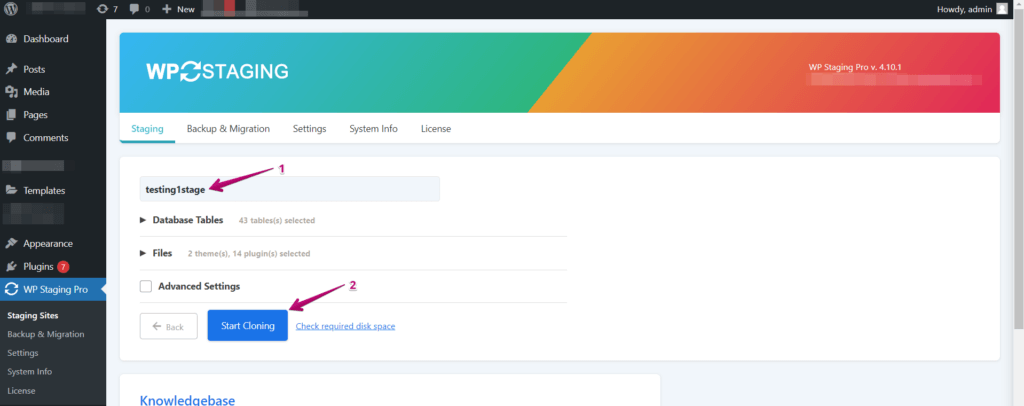
- Click on Start Cloning.
NOTE: If your site is hosted on the same server as your live website, you can stage it in a subfolder (https://domain.com/staging), a subdomain, or a new domain (https://staging.domain.com, https://domain.com).
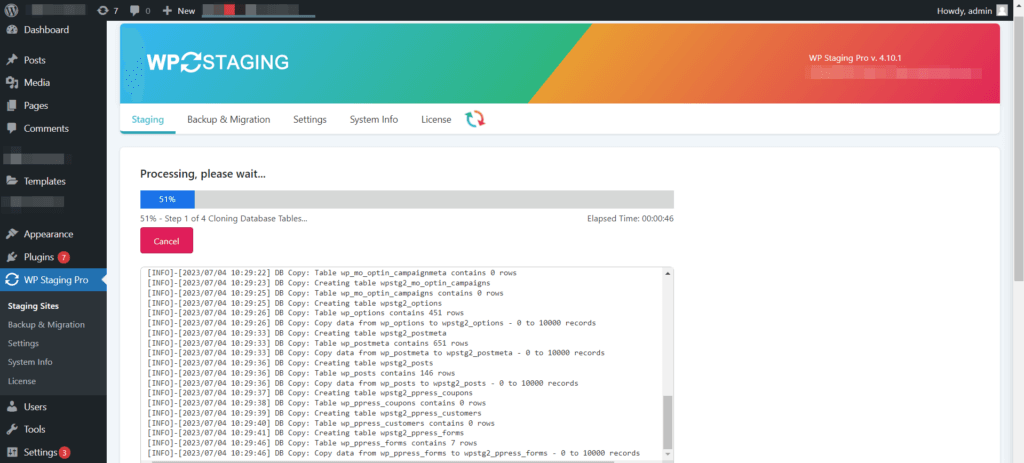
DURING THIS PROCESS, WP STAGING will already convert the multisite network site to a single site.
Now, you can replace the existing multisite with the single converted site by following the steps below or using it to create a new single site.
Step 3: Backup & Download the Staging Site
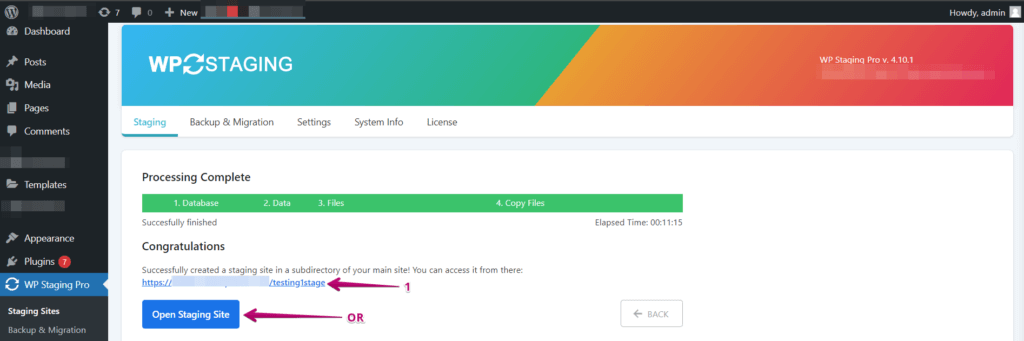
After creating the staging site, please open it and log in to its admin dashboard with the same credentials you used for the multisite network site.
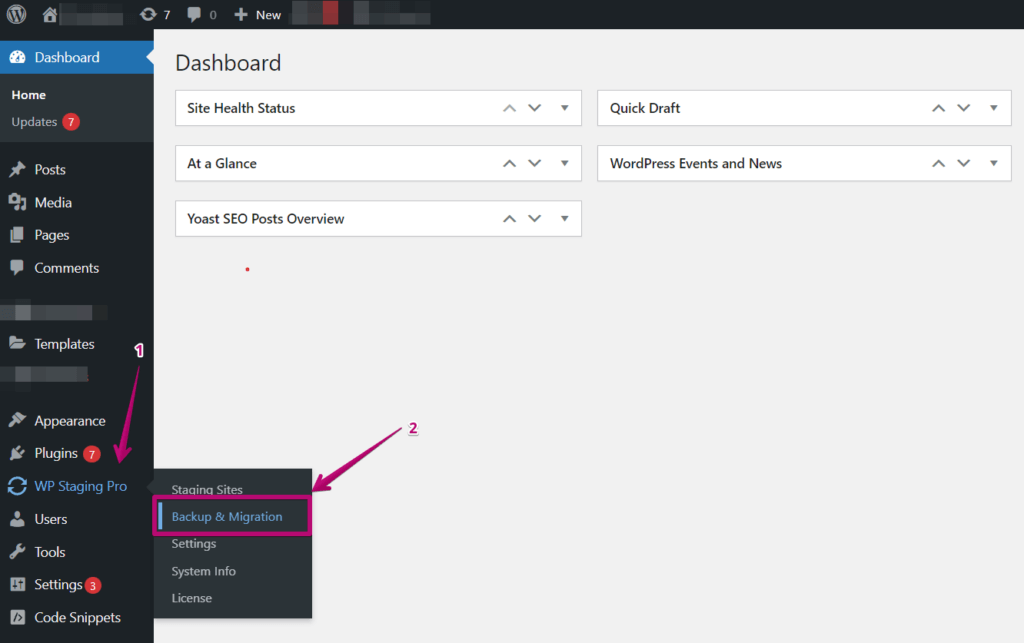
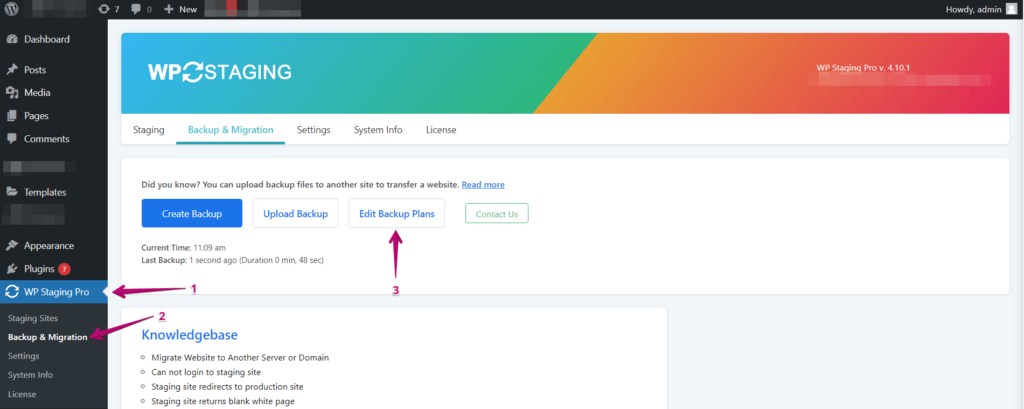
- Go to WP Staging Pro > Backup & Migration
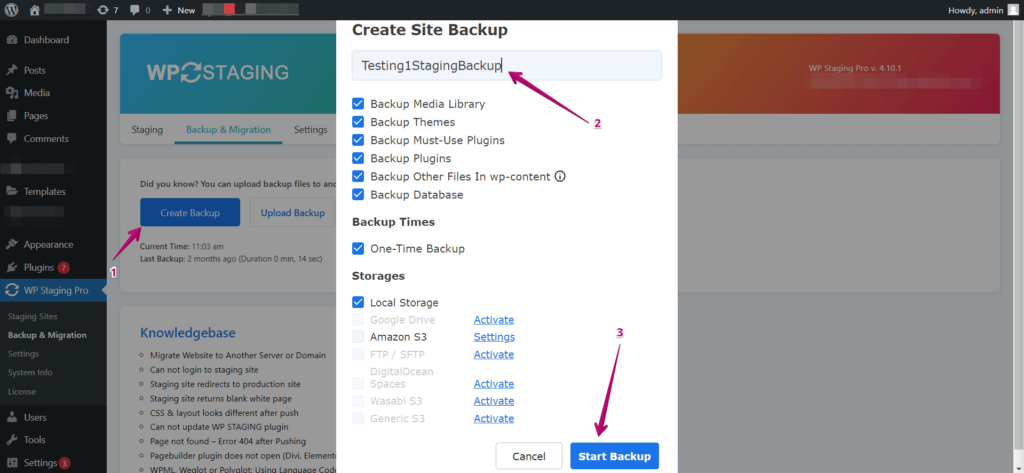
- Select Create New Backup, name it, and click Start Backup.
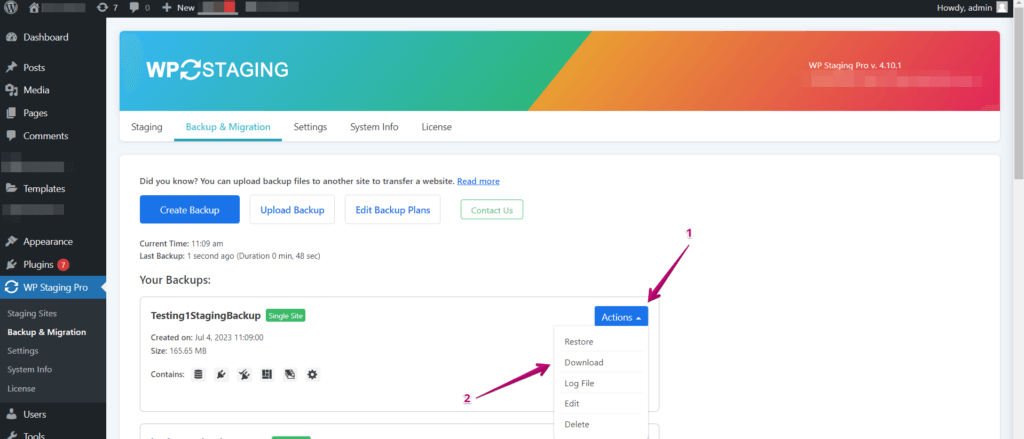
If the backup process is done, click the Actions button and Download the backup file to your local computer.
IMPORTANT: Deactivate the license key for WP STAGING | PRO on the staging site before you delete the staging site. Then, activate the license key again on your production site.
If you forgot to deactivate the license key on the staging site before deleting the site, you have to switch the license key on your account page.
With that said, let’s get to our final step.
Step 4: Build the Single Site by Restoring the Cloned Site Backup
You can import the backup file into a new default WordPress site on another domain or use the existing domain. To use the current domain, delete the available multisite network first and install a default WordPress single site from scratch.
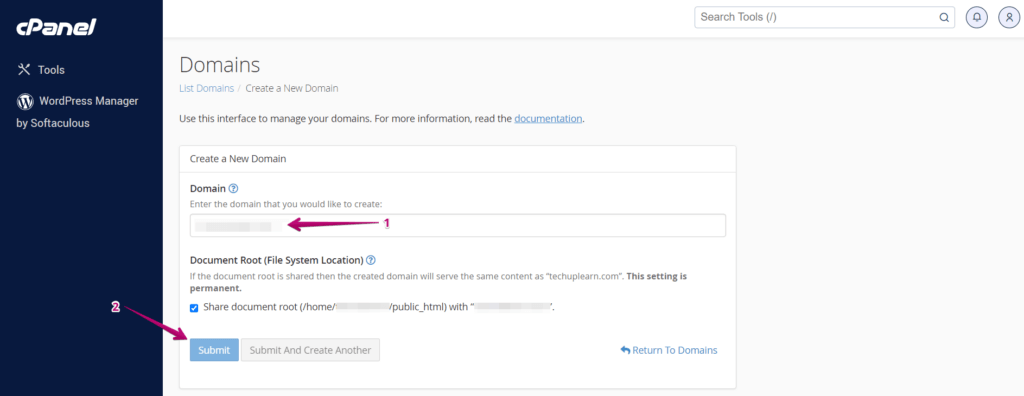
You might need to access your hosting cPanel to add the domain.
- Login to cPanel > Domains > Add New Domain.
- Go to the Software Category in cPanel and install WordPress on the newly added domain.

NOTE: You can install via ‘Softaculous’ or use any other feature your hosting provider provides.
- Once the default WordPress installation is done, log in to your WordPress dashboard.
- Next, follow the same procedure as in step 1 to install and validate the WP STAGING | PRO plugin (you can use the same license key).
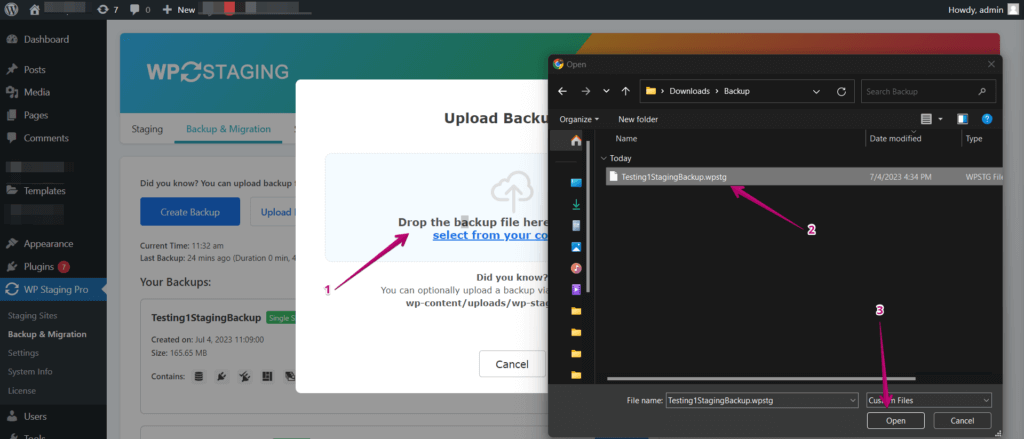
Upload the backup file we’ve just downloaded in step 3.
Locate the backup file on your computer and upload it.
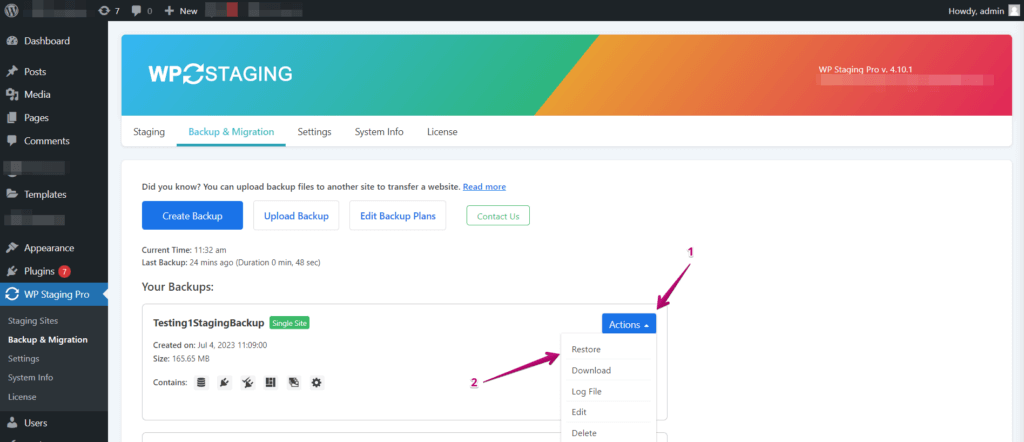
A new window with the actions button will appear after the backup has been uploaded successfully.
- Click Actions > Restore
The process will take some time to complete.
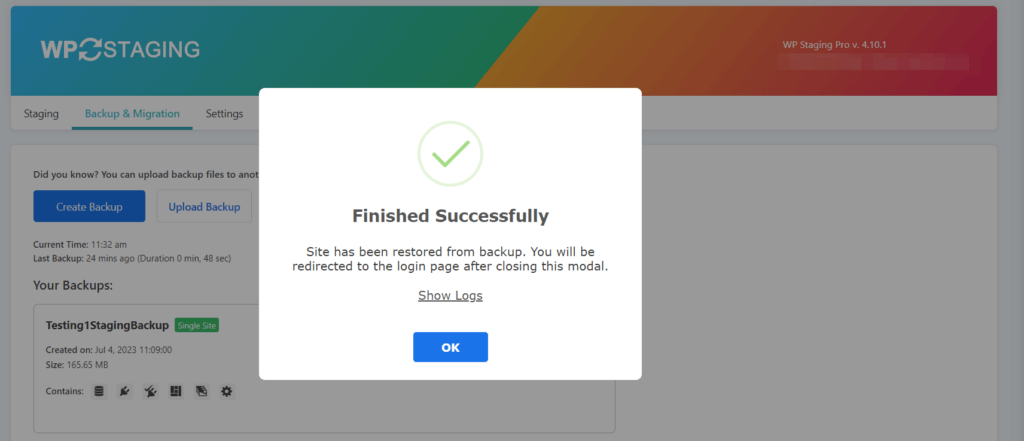
All done! Once done, check if your live site is working as well as expected.
Support
We hope that the conversion went well with WP STAGING. Please open a support ticket for prompt assistance if you encounter any problems.