Creating a staging site is an important step in the website development process. It allows you to test changes, plugins, and themes without affecting your live site. This guide will cover the basics of creating a staging site using the WP Staging plugin.
This is a quick start tutorial! You’ll find the full guide here.
Installing WP Staging Plugin
The first step is to install the WP Staging plugin on your WordPress site. You can do this by going to the Plugins page in your WordPress dashboard and searching for "WP Staging." Once you find the plugin, click the "Install Now" button and then activate the plugin.
- Click "Create Staging Site."

- Click the "Enter Site Name (Optional)" field.
- Give the site a descriptive name like "Staging" or "Dev."
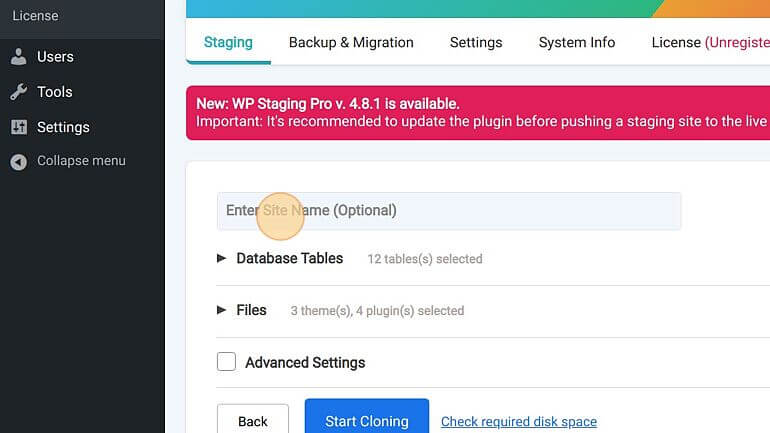
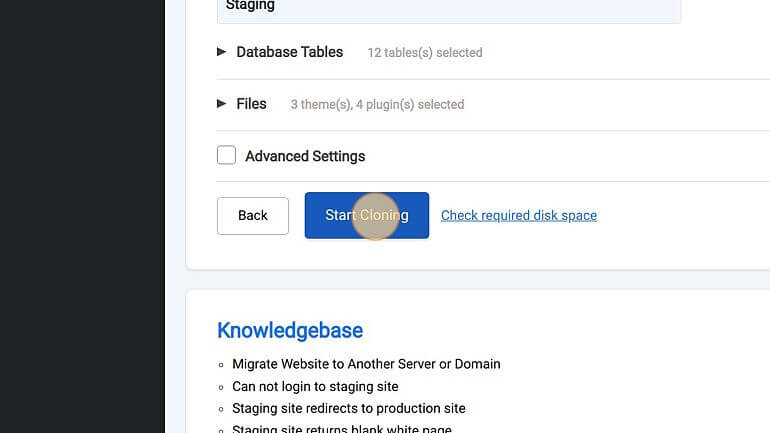
- Click "Start Cloning."
The WP Staging plugin will then create a new staging site based on your live site. This can take some time, depending on the size of your site.
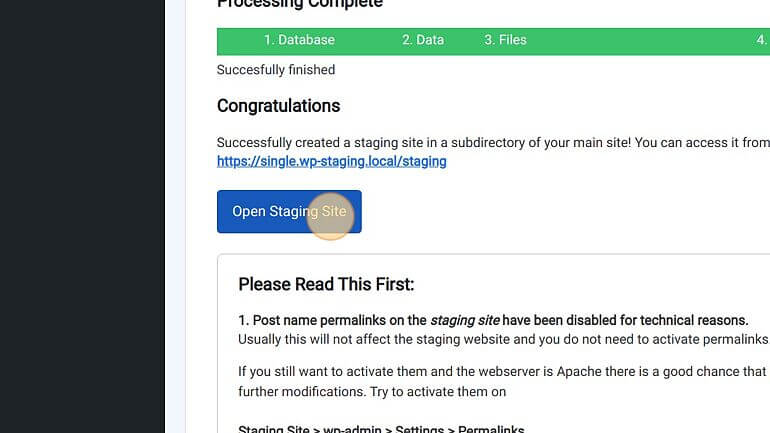
- Click "Open Staging Site". That’s it!
Accessing Your Staging Site
Once the cloning process is complete, you can access your staging site by clicking the "Go to staging site" button on the WP Staging page. This will take you to the staging site, where you can make changes and test plugins and themes without affecting your live site.
Conclusion
Creating a staging site using the WP Staging plugin is an easy and effective way to test changes before implementing them on your live site.
Related Articles
- How to Migrate WordPress to a New Server (Step-By-Step-Guide)
- Push a Staging Site to Live Production Site
- Quickstart: How to Push a new Theme on Staging Site to Production Site