Do you use a quality multilingual plugin like WPML, Weglott, Polyglot, or another, and you set up the language settings to use custom folders with the language code, e.g., yourdomain.com/en/?
You may encounter an issue where opening a page on a staging site results in an error 404. That can happen if the staging site permalinks are disabled.
Contents
- Option 1: Create the staging site in a subdomain
- Option 2: Change WPML language URL format
- Option 3: Activate Post Name Permalinks
- Option 4: Creating a Staging Site with Different Domains per Language
- Preserve WPML License Key After Pushing a Staging Site to the Live Site
- WPML Troubleshooting Options
- Related Articles
Option 1: Create the staging site in a subdomain
You can clone your WordPress website to a subdomain. If you do this, you will no longer encounter any link structure issues, as the URL structure mimics the URL structure on the production website.
Option 2: Change WPML language URL format
You can switch the WPML language settings on your WP Staging staging site to URL-based language like yourdomain.com/staging-site?lang=en
You can change this under WPML > Languages.
Note: If you push the staging site back to live, it’s recommended to revert this setting on the staging site before doing the push to prevent changing the permalink structure on the live site.
Option 3: Activate Post Name Permalinks
You can try to activate post name permalinks on the staging site by following this article.
Option 4: Creating a Staging Site with Different Domains per Language
Let’s say you have a live site with the “example.com” domain for the English version, “example.fr” for the French and “example.de” for the German, and you want to create clones of the sites to staging.example.com, staging.example.fr and staging.example.de.
What you need to do is to use this code snippet as mu-plugin: (Modify it to adapt to your domains):
function wpstg_cloning_custom_params($args)
{
      $args['search_for'] = array_merge(
         $args['search_for'],
         ['example.fr', 'example.fr']
      );

      $args['replace_with'] = array_merge(
         $args['replace_with'],
         ['staging.example.fr', 'staging.example.de']
      );

      return $args;
}

add_filter('wpstg_clone_searchreplace_params', 'wpstg_cloning_custom_params'); Then, create your staging site on the subdomain “staging.example.com” following this guide. Of course, the subdomain must first be created via your hosting control panel.
Don’t forget to point these new subdomains (staging.example.fr, staging.example.de) to the main staging site’s IP via the domain’s DNS manager.
Preserve WPML License Key After Pushing a Staging Site to the Live Site
If you want to preserve the WPML license data of the live site as it is and not override it with the staging site’s data after the pushing process, you can create a mu-plugin file and add this code snippet to it:
<?php
/*
Plugin Name: mu-plugin to keep the WPML license of the live site
Description: After you push the staging site to the live site, the live site's WPML license won't change
Version: 1.0
Author: WPSTAGING
*/

function wpstg_push_preserve_options($options){
    $preserveOptions = ['wp_installer_settings'];
    return array_merge($options, $preserveOptions );
}
add_filter('wpstg_preserved_options','wpstg_push_preserve_options');Then, push the staging site to the live site, and you will preserve the same WPML license key and it will not be overwritten.
WPML Troubleshooting Options
After pushing or cloning your WordPress site with WP Staging, the WPML translations might not work as intended. The internal cache handling of WPML often causes that. Gladly, WPML offers you a few powerful troubleshooting options that you can use to purge and refresh the WPML cache.
The information on this page is for advanced WPML users. If you are unsure what to do, please contact the WML support before executing any WPML troubleshooting options.
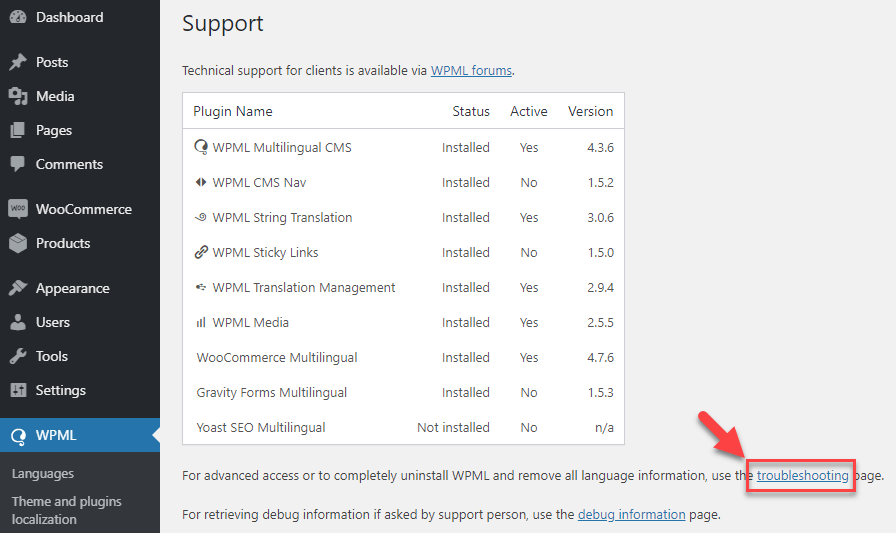
You can open the WPML troubleshooting page from WPML > Support.
Click the link for troubleshooting.

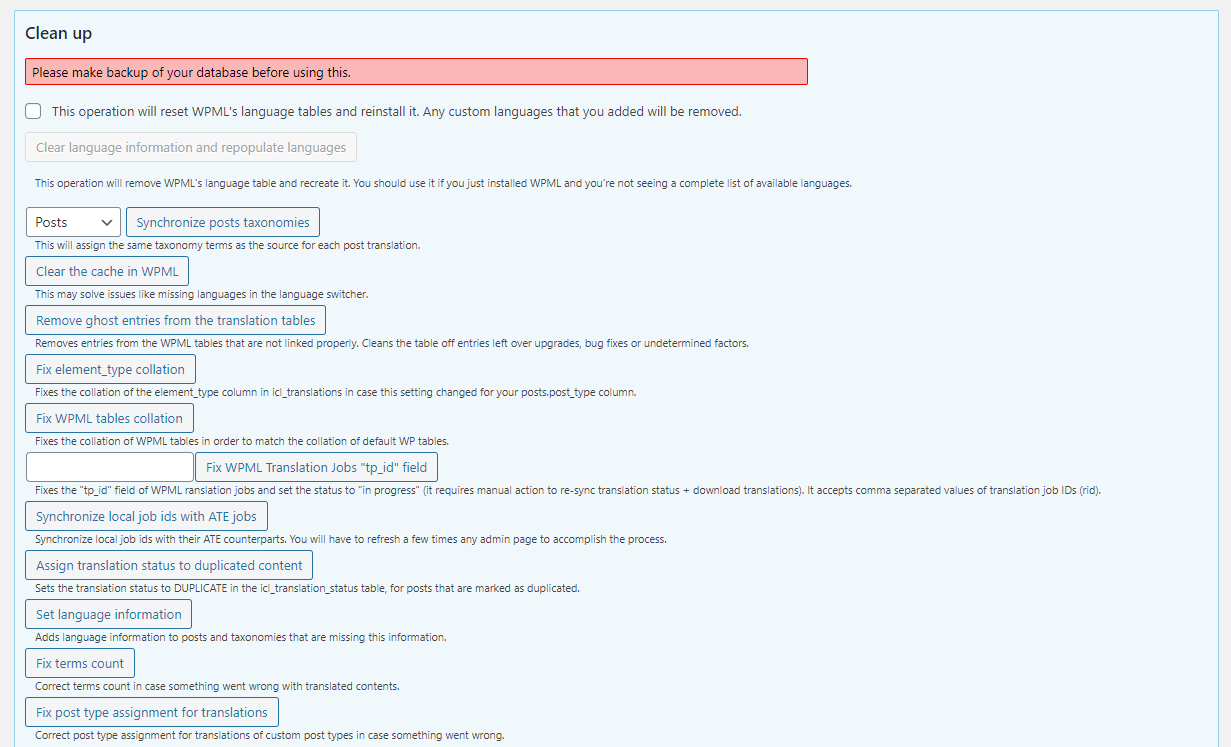
Create a WordPress website backup before executing any listed action from that options page.

In the table below, you see a description of the most important commands and possible use-case scenarios:
| Command | When to use it |
| Clear the Cache in WPML |
|
| Remove ghost entries from the translation tables |
|
| Fix element_type collation |
|
| Fix WPML table collation |
|
| Set language information |
|
| Cleanup and optimize string tables |
|
Source:
https://wpml.org/documentation/support/wpml-troubleshooting-options/
