What is the reason for the error "Another Update in Progress"?
Updating the WordPress core will show you this error message: Another update is in progress. During the core update process, WordPress automatically sets a value in the database that locks further updates. This database option prevents you from running simultaneous updates on your website.
This message is automatically set to disappear after 15 minutes or when the update process has finished. However, if you are stuck on that message or don’t want to wait, you can manually reset it.
Let’s look closer at fixing WordPress’s "Another update currently in progress" error.
Contents
Fixing the Error "Another Update in Progress":
To quickly get rid of the message "Another update currently in progress," you must delete the core_updater.lock option from your WordPress database. We will show you how to do that using two different methods. You can choose the one that works best for you.
Method 1: Removal of the Error with the Help of a Plugin
Install and activate the plugin Fix Another Update In Progress from the WordPress plugin page.
After activation, open the sidebar menu and go to Settings, then click on the "Repair another update in progress" tab in the menu. If updates are blocked on your site, this message will appear:
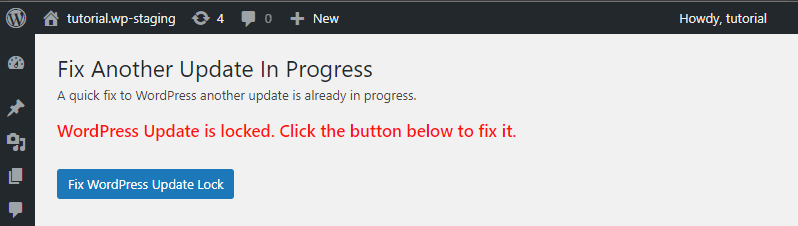
The "Fix Another Update In Progress" plugin will display this message before resolving the error. Click the "Fix WordPress Update Lock" button to fix the issue.
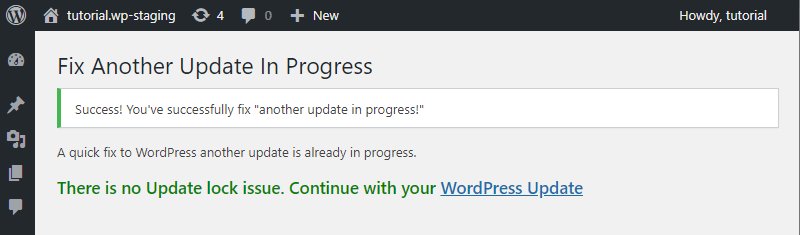
After fixing the error, the plugin "Fix another update in progress" will show you the message "Success! You’ve successfully fixed "another update in progress!"
Now, You can go back to your dashboard and continue as usual.
Method 2. Fix the Error Message Manually
This method requires you to use phpMyAdmin or Adminer to run a query directly in your WordPress database. In both applications, whether "phpMyAdmin" or "Adminer," the same steps, which we will explain briefly, are required. Depending on the application, the user interface may have graphical differences.
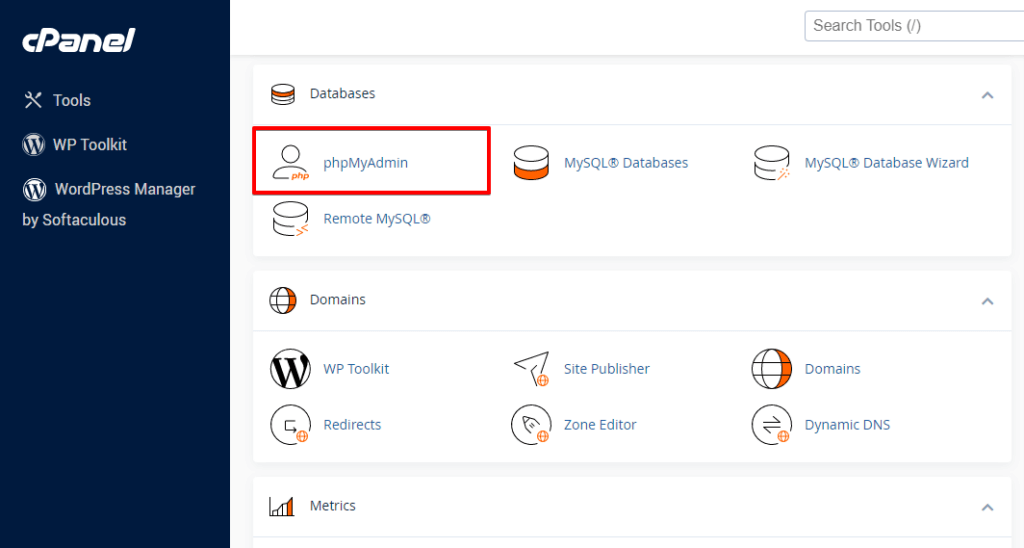
The first step is to open phpMyAdmin. You can usually find it in your cPanel account under the databases section. If your web host doesn’t use cPanel, look for the phpMyAdmin or Adminer database management tool in your Webhosting account.
Then, select your WordPress database in phpMyAdmin. This step will present all the tables inside your WordPress database to you. Click on the Browse button next to the WordPress options table wp_options.

This search will show all the options in the table rows. You need to find the line with the option name core_updater.lock and click the Delete button. PhpMyAdmin will then delete the row from your WordPress database.
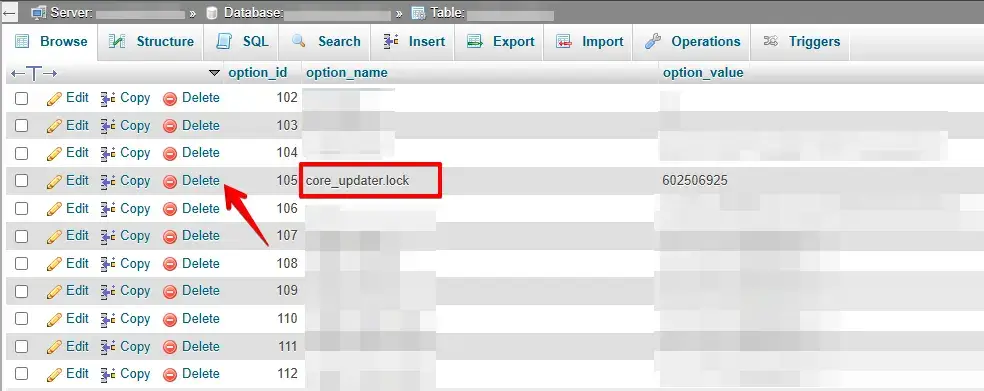
Delete the "core_updater.lock" entry. Now, return to your WordPress site and update it without seeing the "Another update in progress" error.
Let’s Connect
Connect with us on X (Twitter) and Facebook.
Final Thoughts
The "Another update in progress" error in WordPress is a minor issue with a simple fix. Whether you choose a plugin or manually edit the database, resolving it takes just a few minutes. Once fixed, you can continue updating your website without interruptions. Keeping your site well-maintained will also help prevent similar issues in the future.
Related Articles
- How to Fix ‘Another Update is Currently in Progress’ in WordPress
- How to Backup a WordPress Website Manually Using cPanel
- How to Repair mySQL Database with phpmyadmin and adminer
- phpMyAdmin Repair and Optimize Database Tables Tutorial