Are you considering a shift from HostGator to WordPress.com? Embarking on a migration journey can be daunting, but fear not! This comprehensive guide will walk you through the entire process, ensuring a seamless transition without compromising your integrity or losing precious data.
Contents
Why Migrate to WordPress.com?
Switching to WordPress.com elevates your online presence and provides numerous benefits. Let’s dive into why transitioning from your current platform is savvy.
- User-Friendly Interface – Enjoy an interface designed for easy navigation and content creation on WordPress.com.
- Diverse Array of Themes for Visual Appeal – Select from a wide range of professionally designed themes on WordPress.com to enhance visual appeal and captivate your audience.
- Plugin Ecosystem for Enhanced Functionality – Access an extensive plugin ecosystem on WordPress.com for flexible functionality without needing custom development.
- Robust Security Measures – Benefit from robust security measures, including automatic updates and monitoring.
- Seamless Mobile Responsiveness – Experience seamless mobile responsiveness for an optimal user experience.
Preparing for the Migration
Before initiating the migration process, it’s crucial to follow several key steps:
- Log in to your HostGator website.
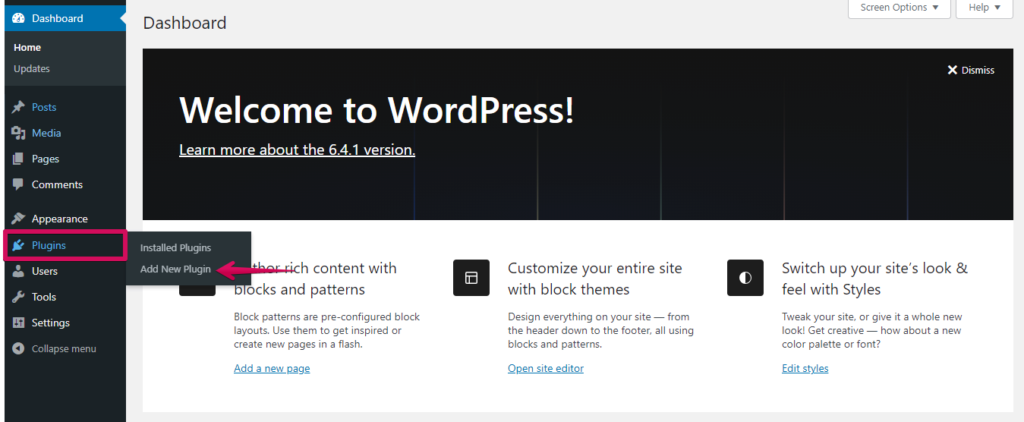
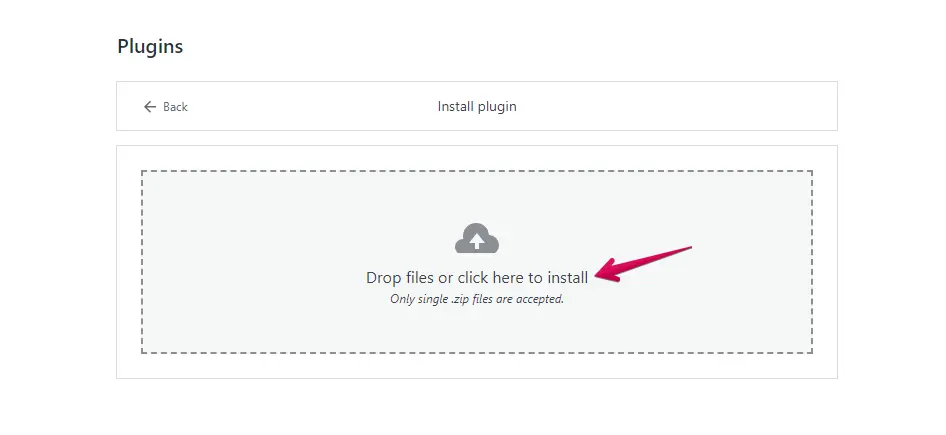
- Navigate to the menu on the left side, select "Plugins," and click "Add New."
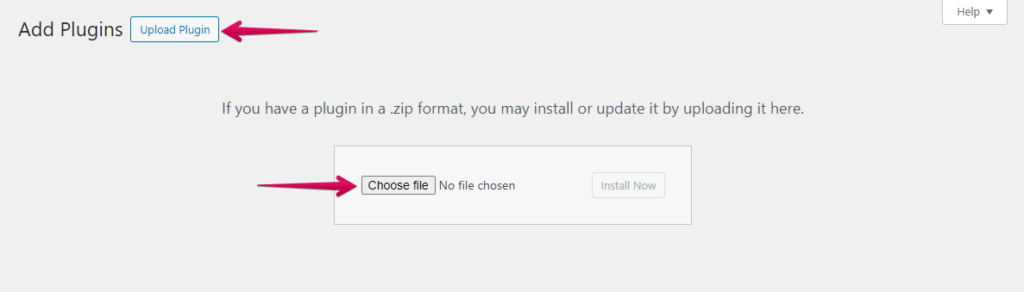
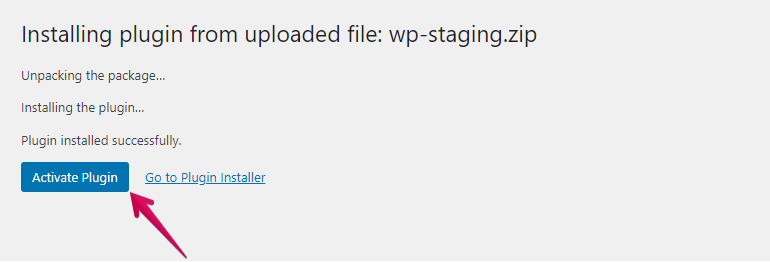
- Press the "Upload Plugin" button, and then select "Choose File" to "upload the WP Staging | Pro plugin.
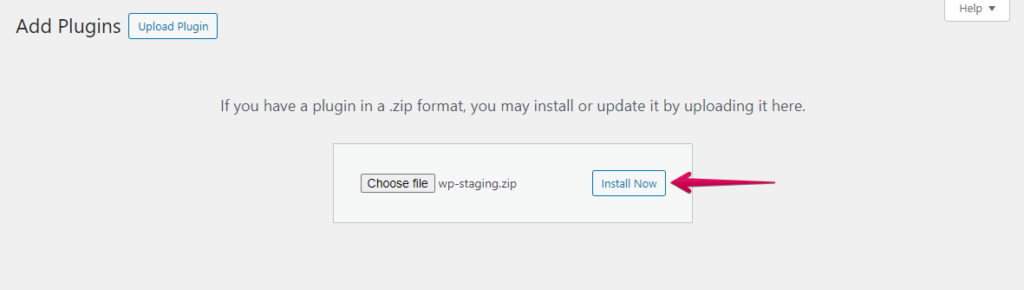
- Subsequently, click the ‘Install Now’ button.
- After installing the plugin, proceed to activate it.
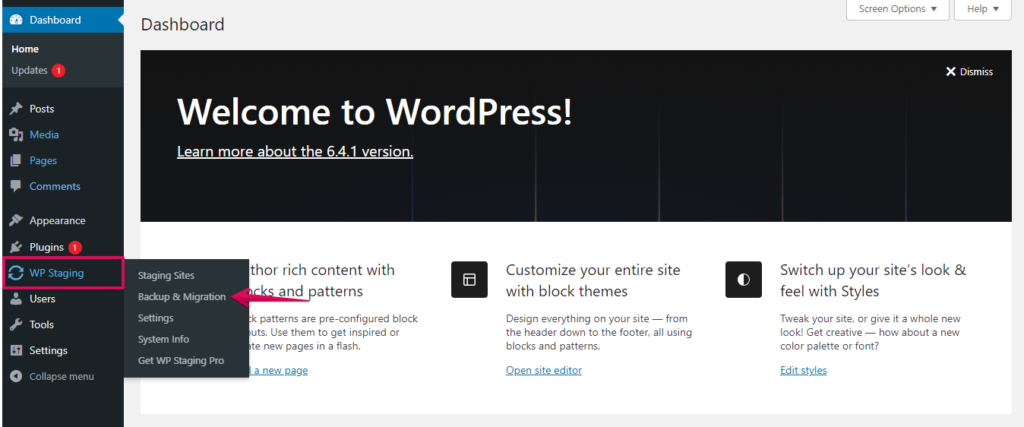
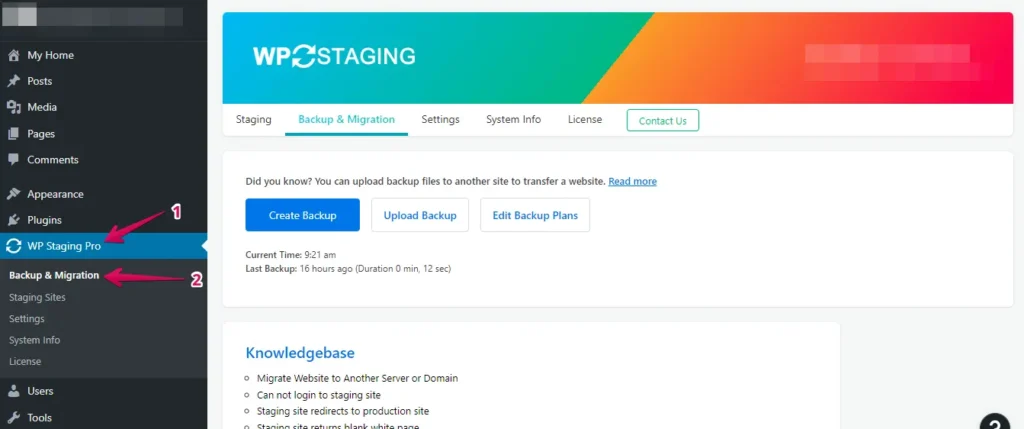
- After installation and activation, go to the "Bac" up & Migration" section, typically found in the WordPress dashboard under "WP Staging | Pro."
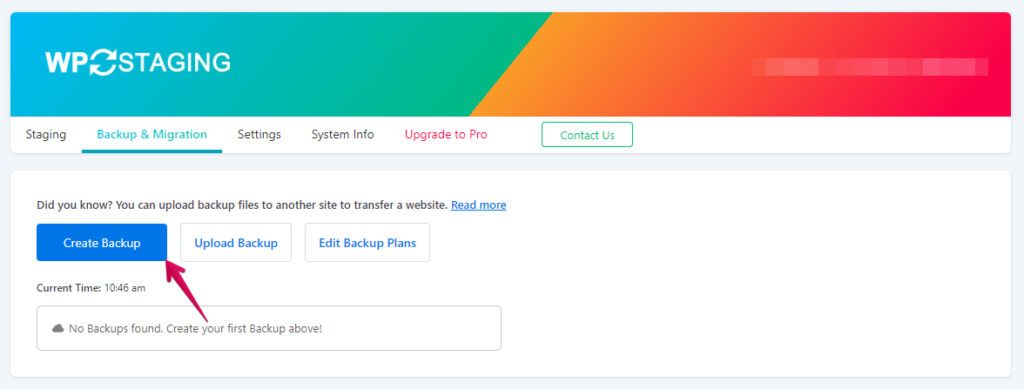
- If "you already have an existing backup, use that. Otherwise, to create a new backup, click the "Create Backup" button.
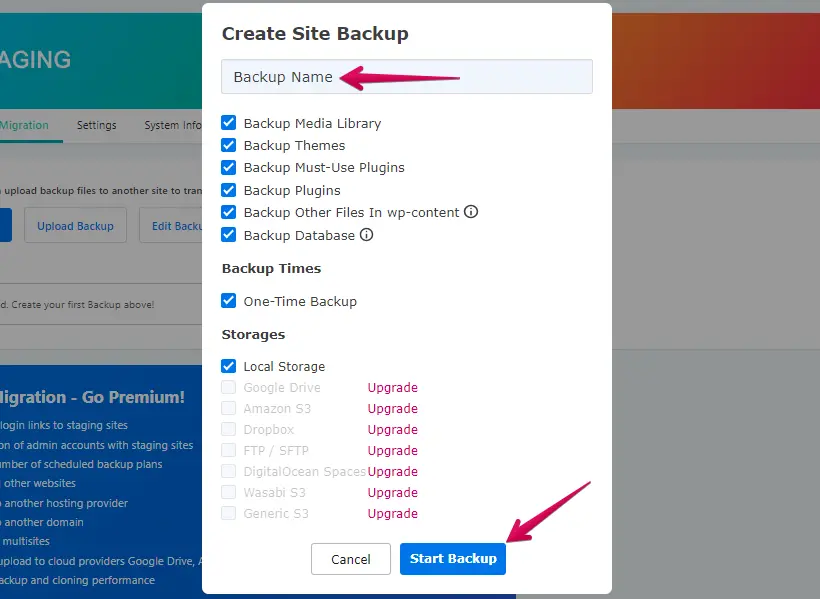
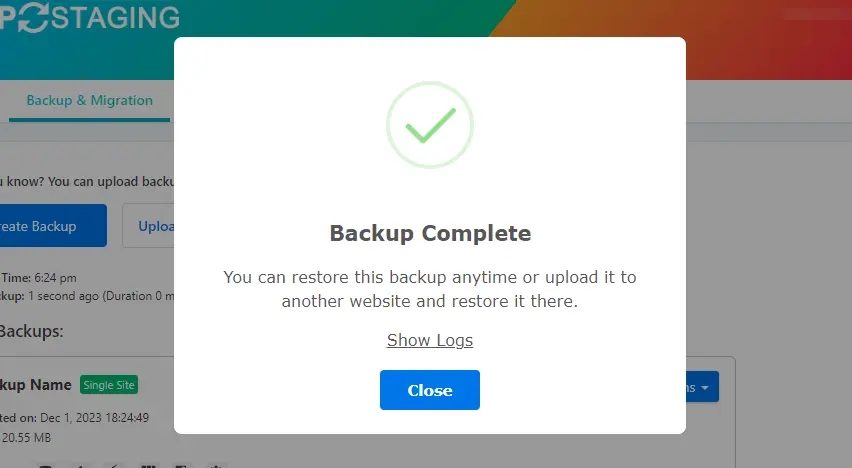
- Enter a name for your backup, then click the "Start Backup" button.
- The backup has been successfully completed.
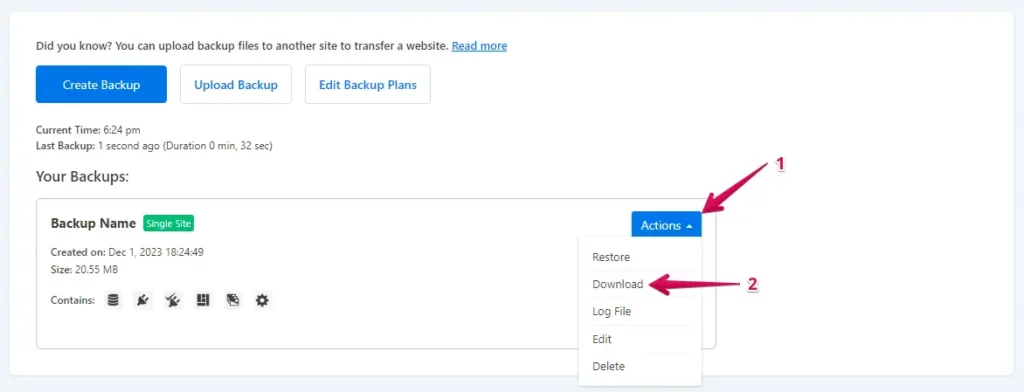
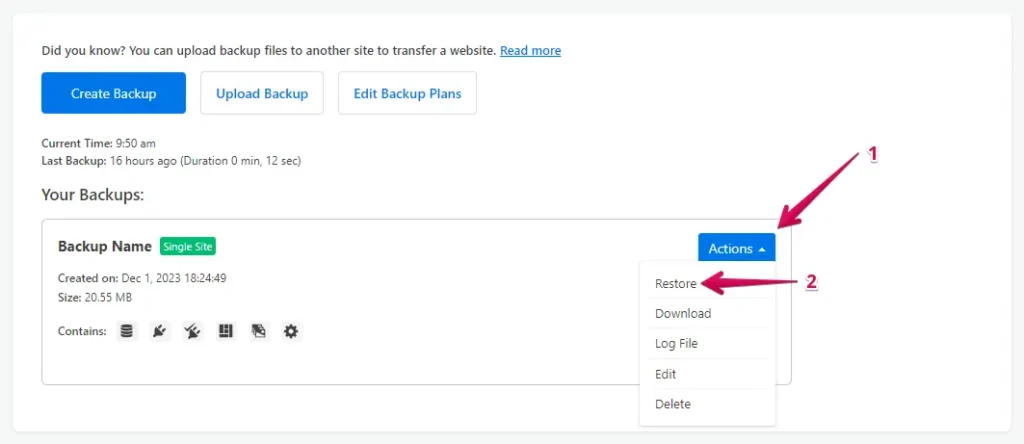
- Once the backup process is finished, you’ll see a "Download" option under the "Action" button. Be sure to save this backup file securely on your computer.
The Migration Process
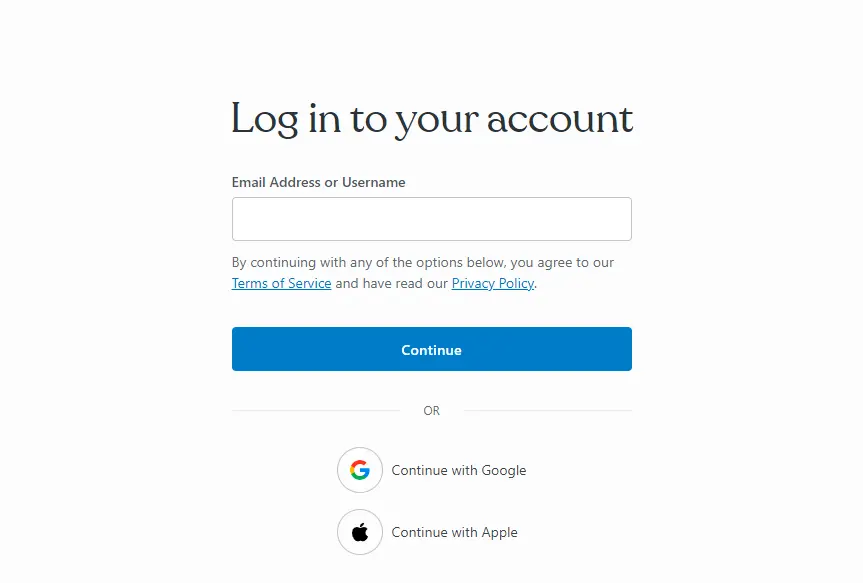
- Log into your WordPress.com account.
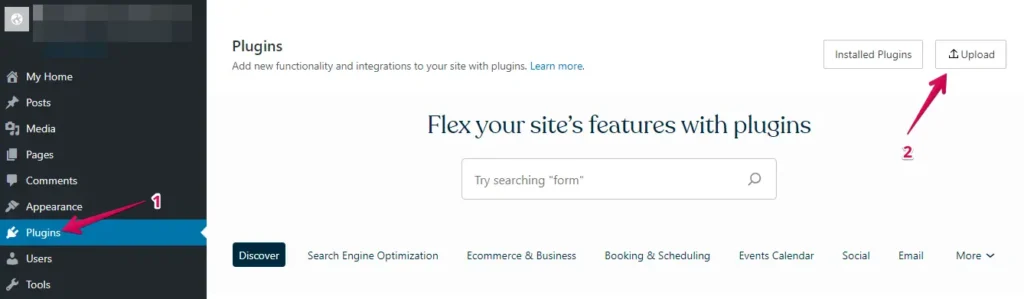
- Navigate to the "Plugins" section in the WordPress dashboard and click the "Upload" button.
- Next, proceed to upload your WP Staging Pro.
- After installation and activation, go to the "Bac" up & Migration" section, typically found in the WordPress dashboard under "WP Staging Pro."
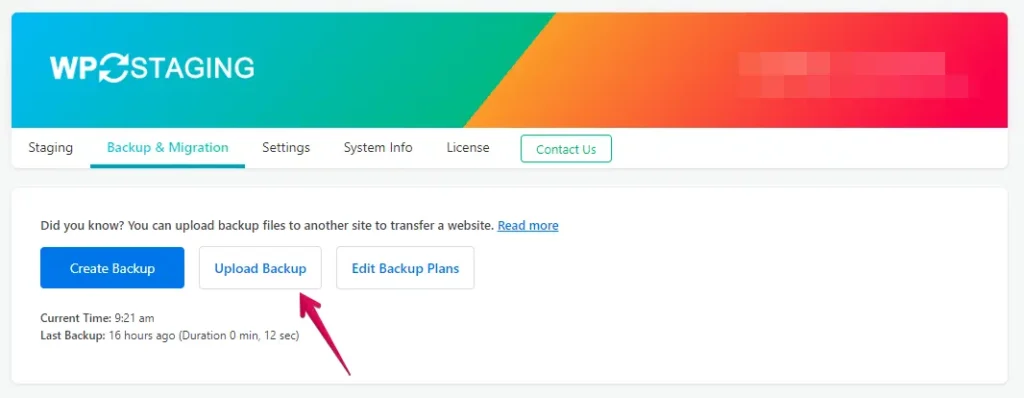
- Click the ‘Upload Backup’ button.
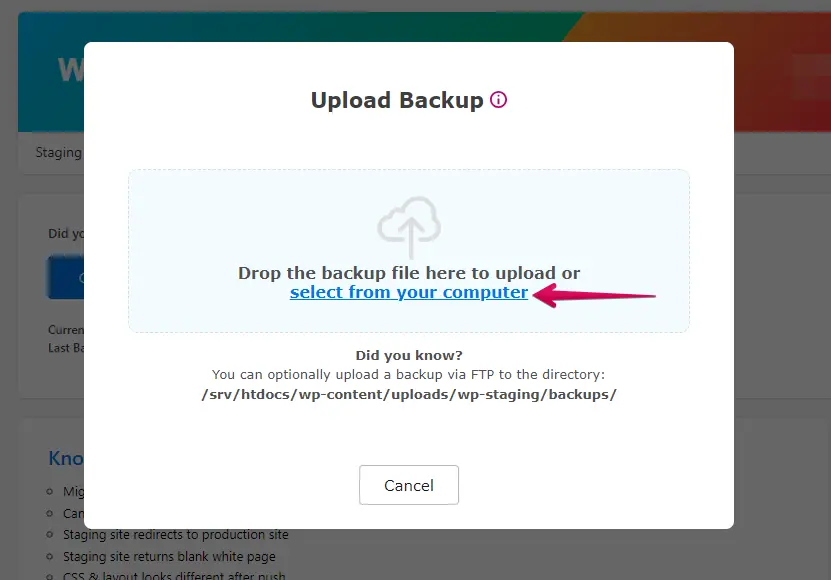
- Upload the backup file you exported from your HostGator website.
- The backup has been successfully uploaded.
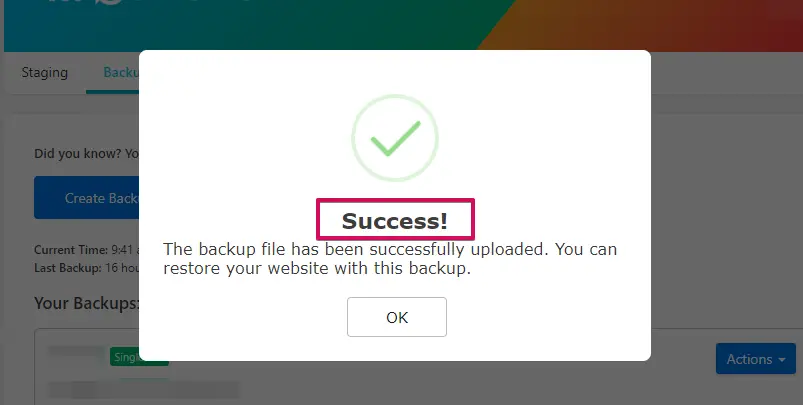
- After that, click the ‘Act’on’ bu’ton and then click the ‘Restore’ op’ion.
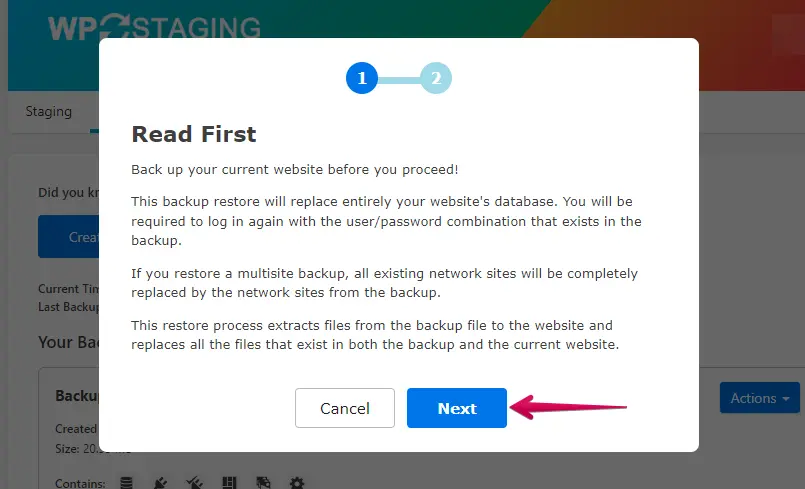
- Press the ‘Next" button.
- Following that, click the ‘Restore’ button.
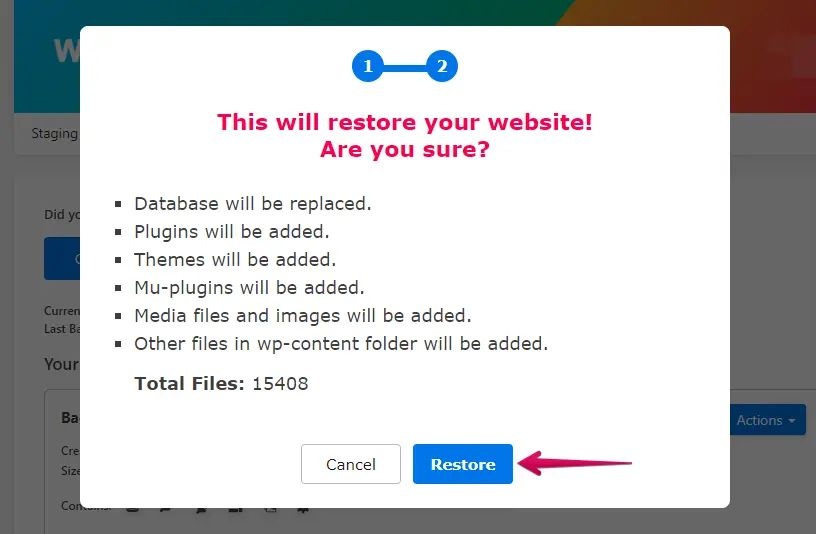
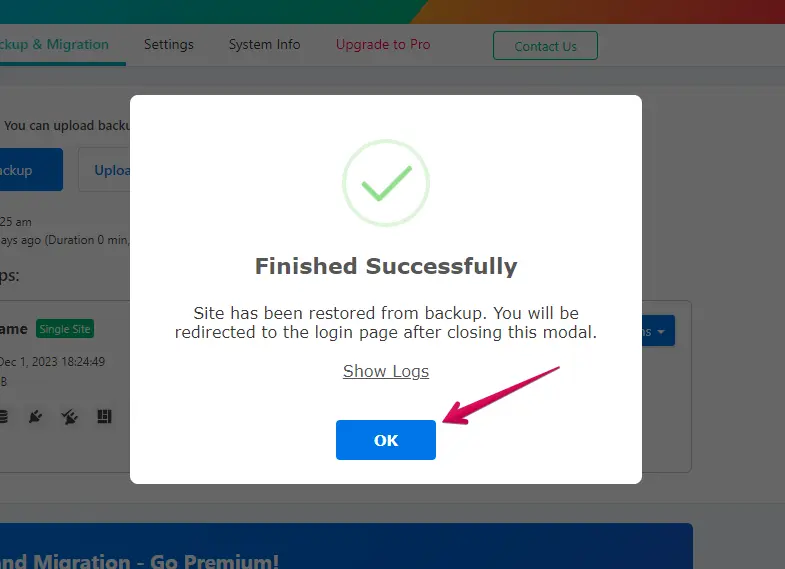
- The restoration of the backup was successful.
- Click the "OK" "button.
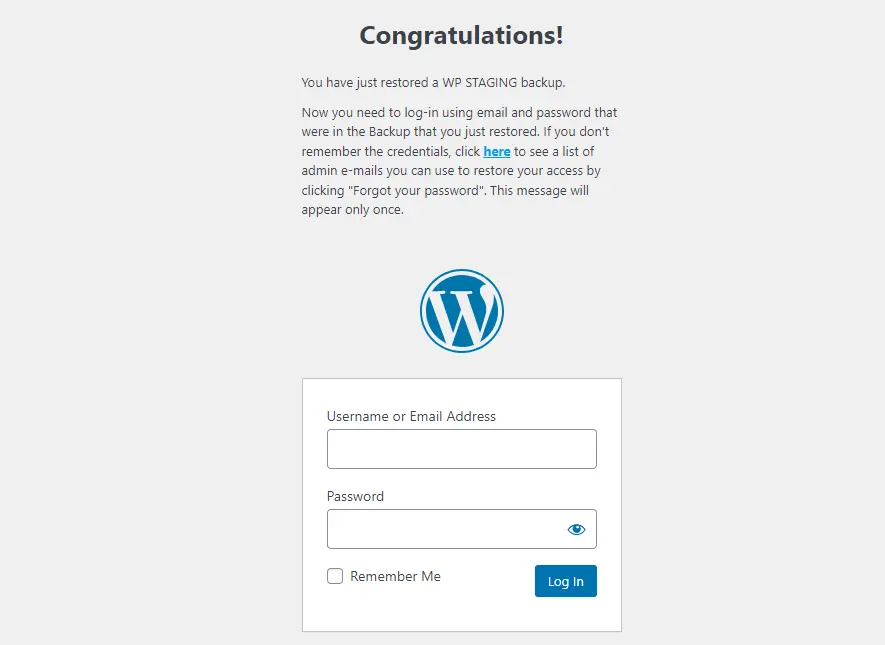
- Regain access to your WordPress website.
Perform a thorough website test on WordPress.com to verify the proper functioning of all components. Additionally, check all content for accuracy and formatting.
Conclusion
Congratulations! You successfully migrated from HostGator to WordPress.com. By following this comprehensive guide, you’ve ensured a seamless transition and positioned yourself for continued success in the digital realm.