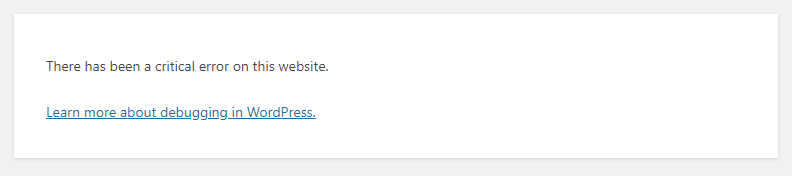
Your website looks great, you have outstanding traffic, and you are overall satisfied. However, all of this is worthless if your website is hacked, and you lose content, customers, and access to your site.
To prevent this from happening, I’ve written this comprehensive security concept for your WordPress website.
I’ve worked through the entire article Hardening WordPress to show you how to implement all the security recommendations in an easy step-by-step guide to make your WordPress website bulletproof against hacking attempts.
Contents
Video: How to Secure your WordPress Website
If you prefer watching a video instead of reading this article on how to secure your WordPress site, you can watch this video:
I’ve divided this article into three steps.
- First, we look at the basis for a secure WordPress website, the hosting provider.
- In the second step, we install the “WP STAGING” plugin to create a safety net when installing new plugins or themes. We will also set up a backup plugin to restore the WordPress website quickly, in the worst case, due to a successful hacking attack.
- In the last step, we set up the “Solid Security” security plugin to prevent attackers from accessing our website.
Choosing the Right Hosting Provider
Let’s start with your website’s security foundation: the hosting provider.
There are so many web hosts out there, and most meet the minimum requirements for WordPress, but choosing one from the crowd can be time-consuming.
1. PHP version 7.4 or greater.
2. MySQL version 8.0 or higher OR MariaDB version 10.5 or higher.
3. HTTPS support
[This is valid for WordPress 6.7 – March 2025]
In any case, verify that your provider meets these requirements.
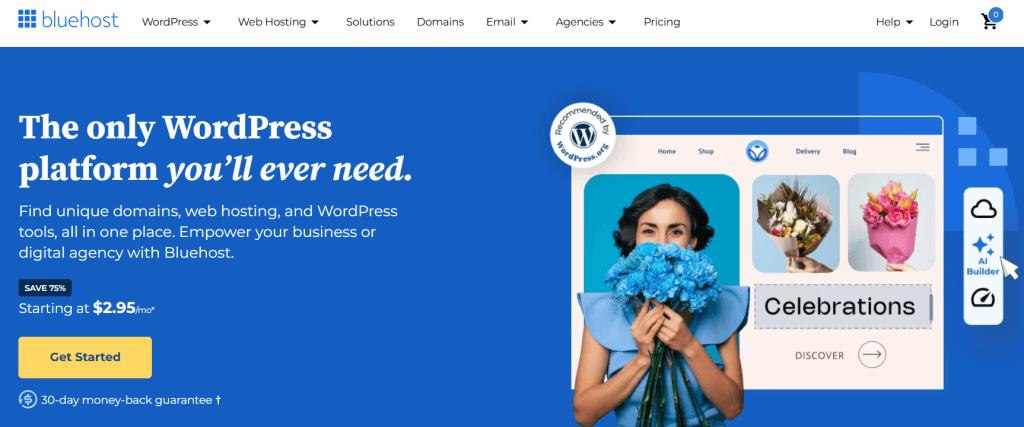
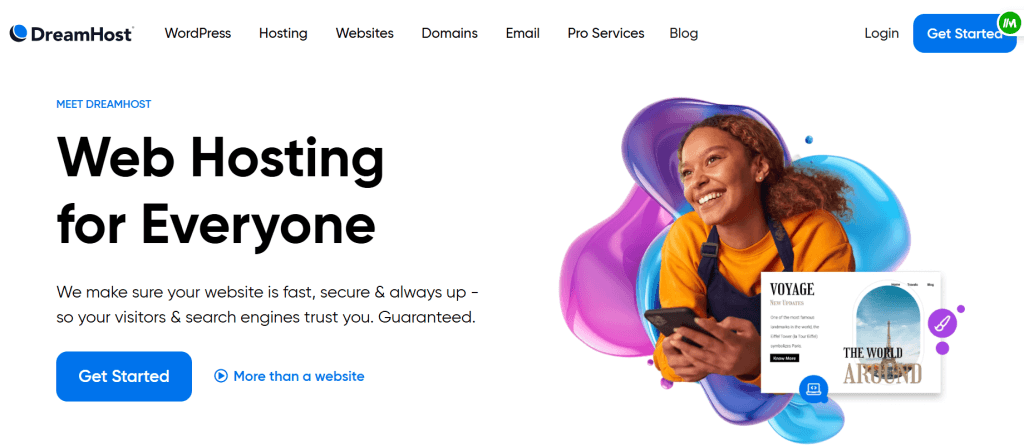
If you are unsure which provider you should choose, choose one of the hosting providers recommended by WordPress.org.

You can continue securing your site if you have already used one of the recommended providers or have verified your provider’s security criteria.
Secure Updates and Creating a Backup
Updating WordPress core and plugins regularly is recommended to fix security issues and errors because outdated software no longer receives security updates, and your website becomes much more susceptible to malicious hacking attempts.
So ensure that you keep the WordPress core and the plugins and themes up to date. Open the WordPress Dashboard and click on “Updates.” You will receive an overview of the WordPress core system’s updates, the plugins, and the themes.

Some WordPress users are afraid to update their WordPress sites. They fear that doing so will damage their website.
We deal with this topic in a separate article called “Why & How You Should Disable WordPress Automatic Updates.”
Secure Updating with “WP STAGING”
To prevent damage to your website during testing and making adjustments, you can use the free plugin “WP STAGING“.
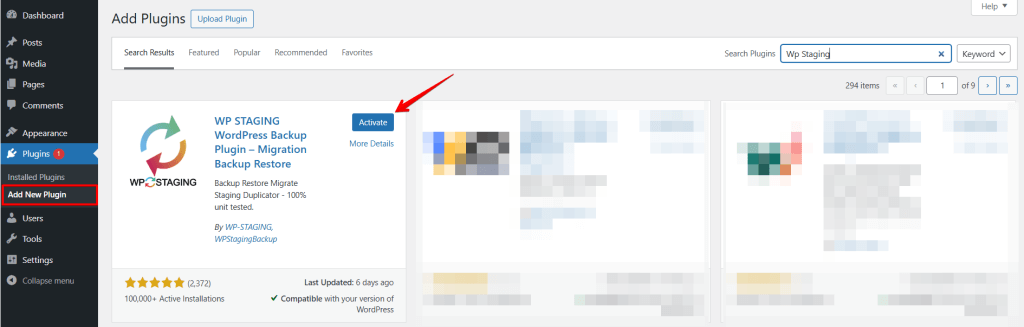
Open the “Plugins” area in the side menu and click “Add new”. Then, type “WP STAGING” in the search bar. Install and activate the plugin.
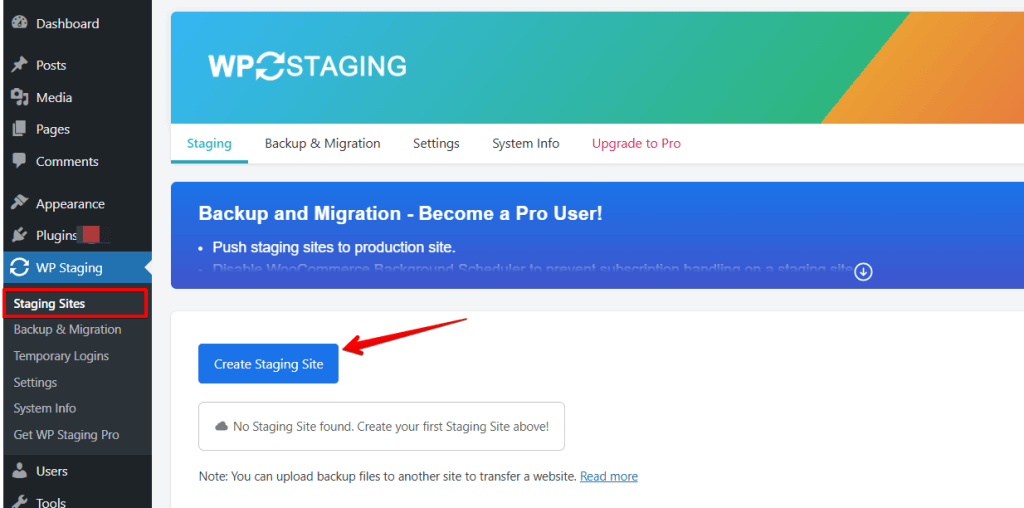
Open the WP STAGING plug-in. Then click “Create Staging Site,” assign a name, and click “Start Cloning.” The plugin creates a copy of your site. Then, you can use the “Open Staging Site” button to access your staging site and try out all changes in a secure environment without endangering your production site.
I recommend going straight into the implementation and testing the article adjustments on a staging site instead of working directly on your website.
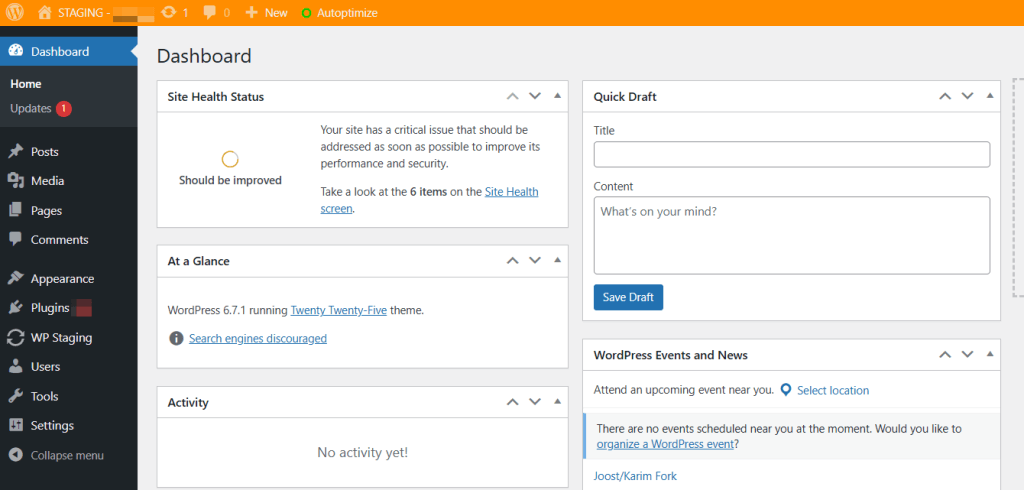
You can recognize from the orange menu bar that you are working on the staging site created by WP STAGING.
Creating a Backup with “WP Staging”
Backing up your website is a fundamental process for any WordPress site. To avoid losing all progress, data, and orders, in the worst case, when your website gets hacked, you must have a WordPress site backup.
Let’s start.
Go to WordPress > Plugins > Add New and search for “WP STAGING”
If you are unsure how to install the plugin, look at our “How to install WP STAGING | PRO” article.
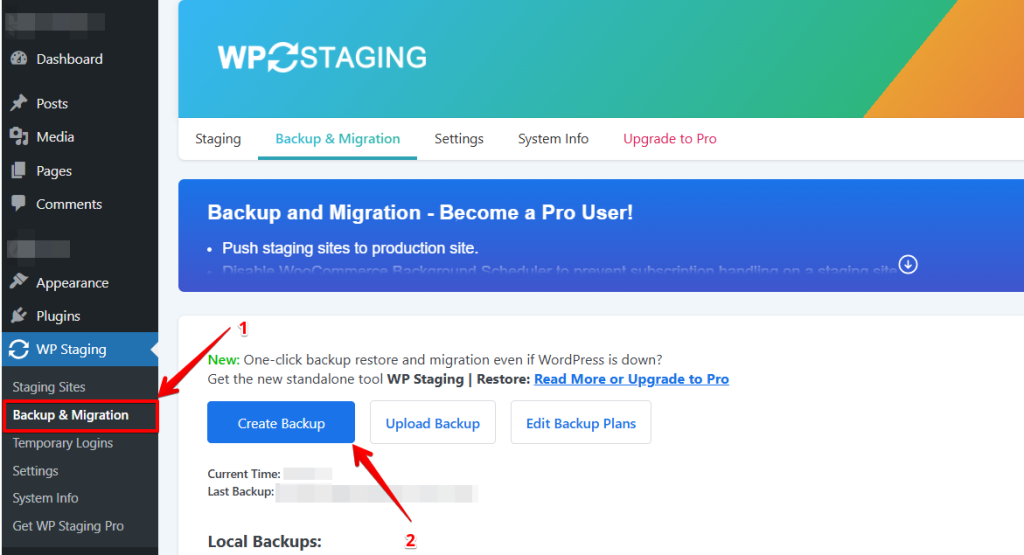
Now click on the “Backup & Migration” button. WP STAGING | PRO will search for existing backups.
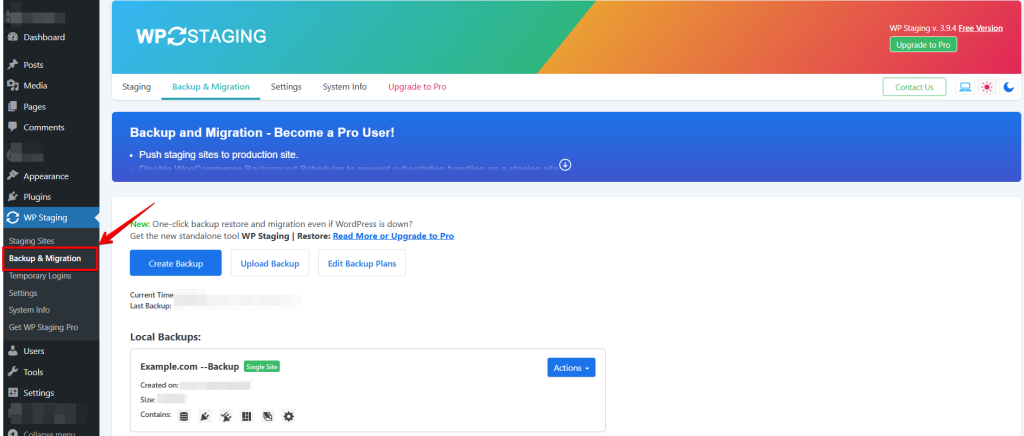
The options are “Create Backup” and “Upload Backup.”
Click on “Create a backup.”
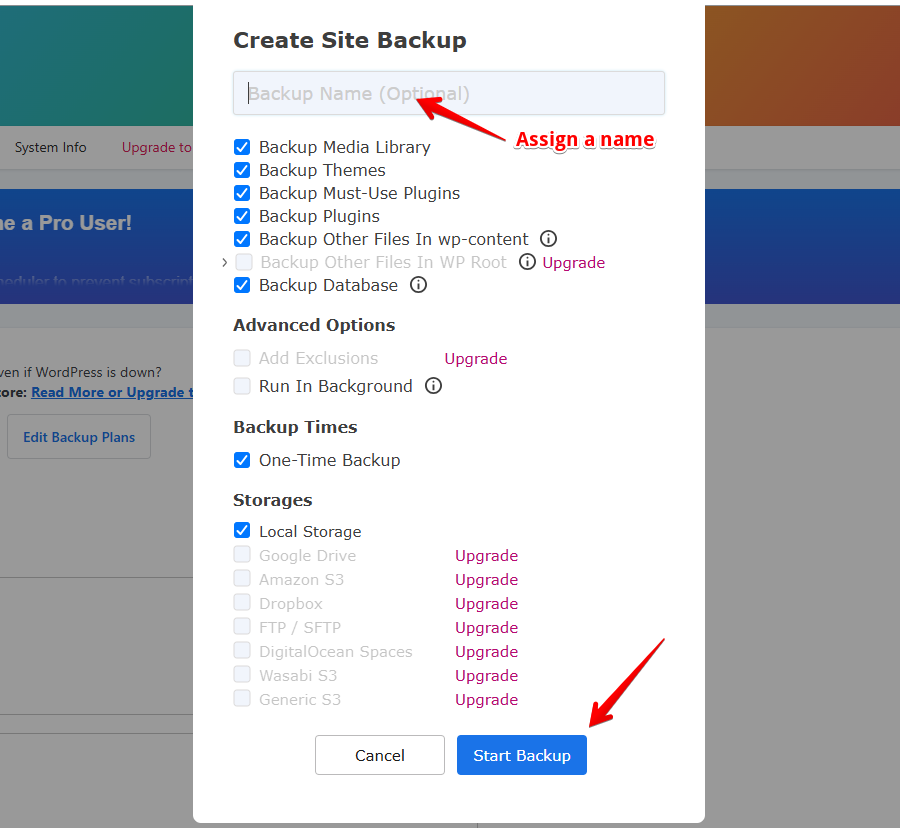
You can optionally assign a name with which you can identify the backup.
So, for instance, if you plan to update WooCommerce or any other plugin, you can name your backup “Backup before installing WooCommerce.”
Then select the components of your website that WP STAGING | PRO should include in the backup. Leave all the boxes checked unless you want to carry out a particular test. Now click on “Start Backup.”
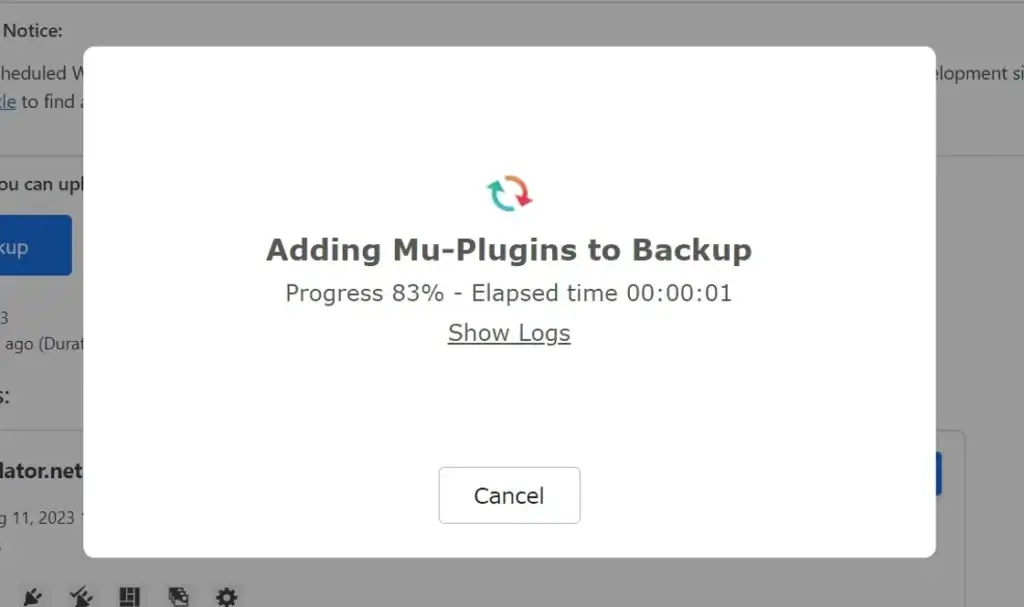
The time it takes to create a backup differs and depends on the size of your website, but the WP STAGING backup function is pretty fast and usually much faster than other backup tools. So, especially for massive sites, you will notice a considerable performance advantage compared to other tools.
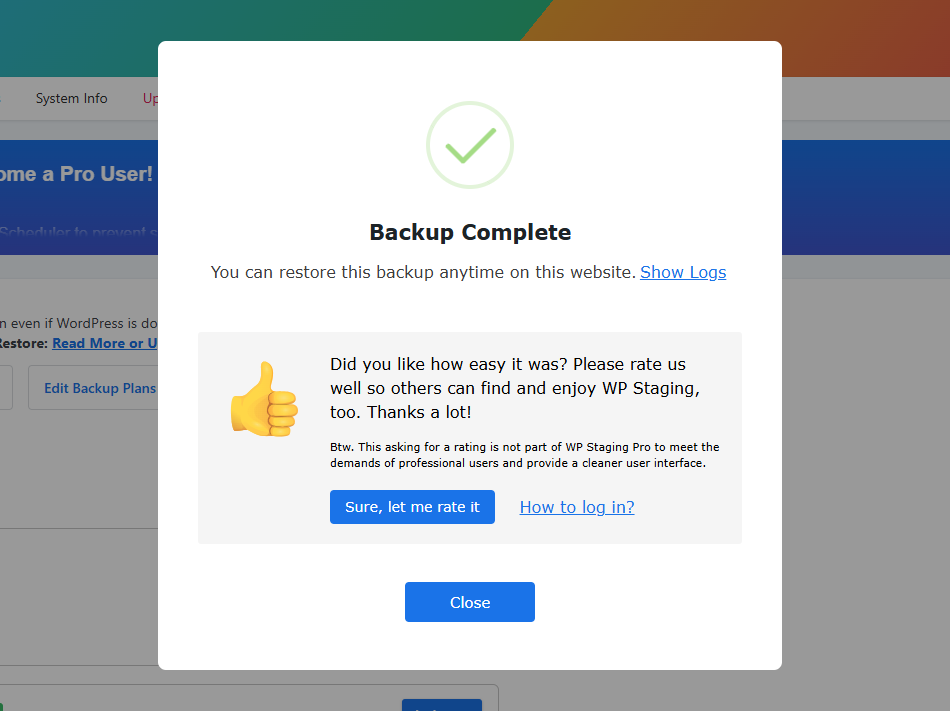
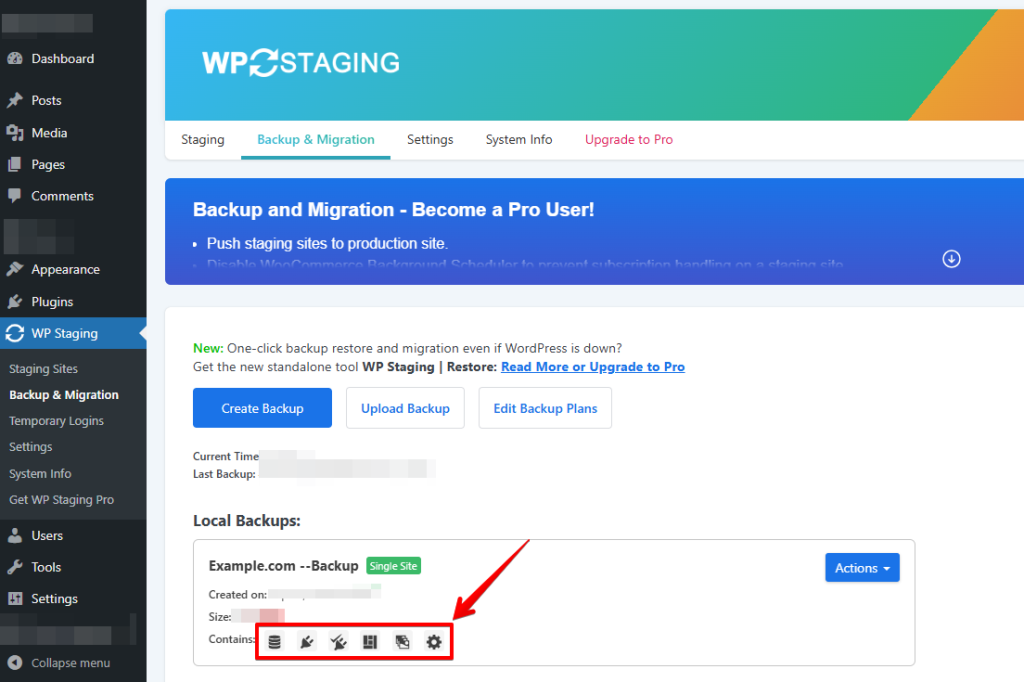
You will find the newly created backup in the “Your Backups” list when the backup is ready. The icons indicate which components the backup includes.
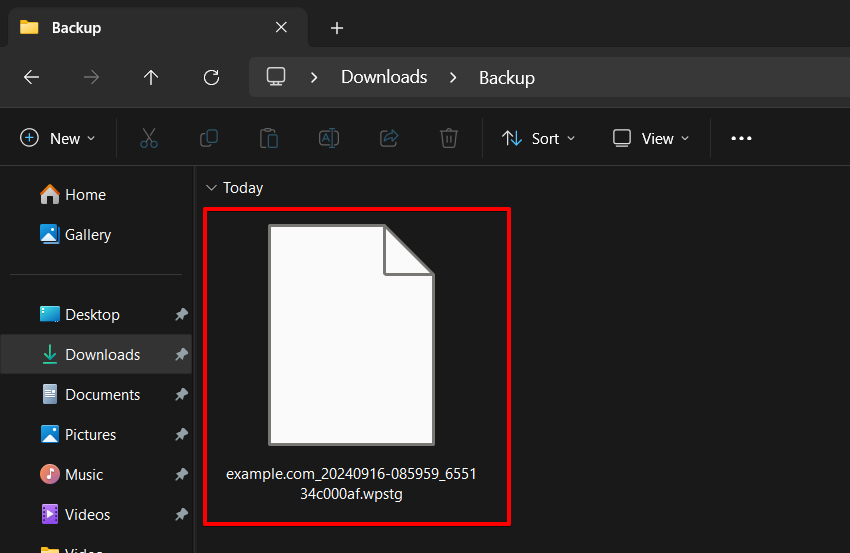
Download the Backup File
To download the backup, click Actions and Download. That will download a file with the extension “.wpstg.”
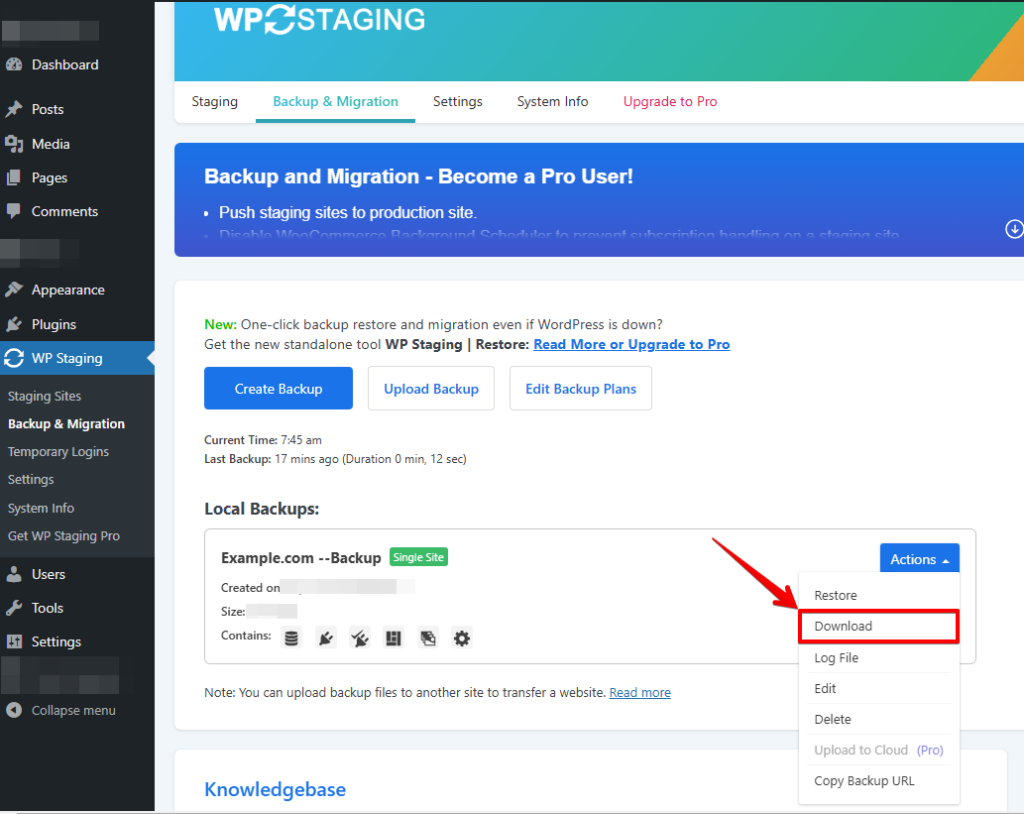
Downloading the backup file to a local computer is always recommended because you want to ensure that you always have access to the backup file. For instance, If an attacker hacks your website, he could delete the backup file from there, and you would not be able to restore the site anymore.
Restore the Backup File
So, to restore the backup in the event of a broken website, you can either select the backup from the list of existing ones or, as recommended, upload the backup file from your local computer.
A great feature is that you can even upload the backup file to any other existing WordPress website and use that backup file to clone your website to another server or site.
Go back to WP STAGING and click the “Upload Backup” button.
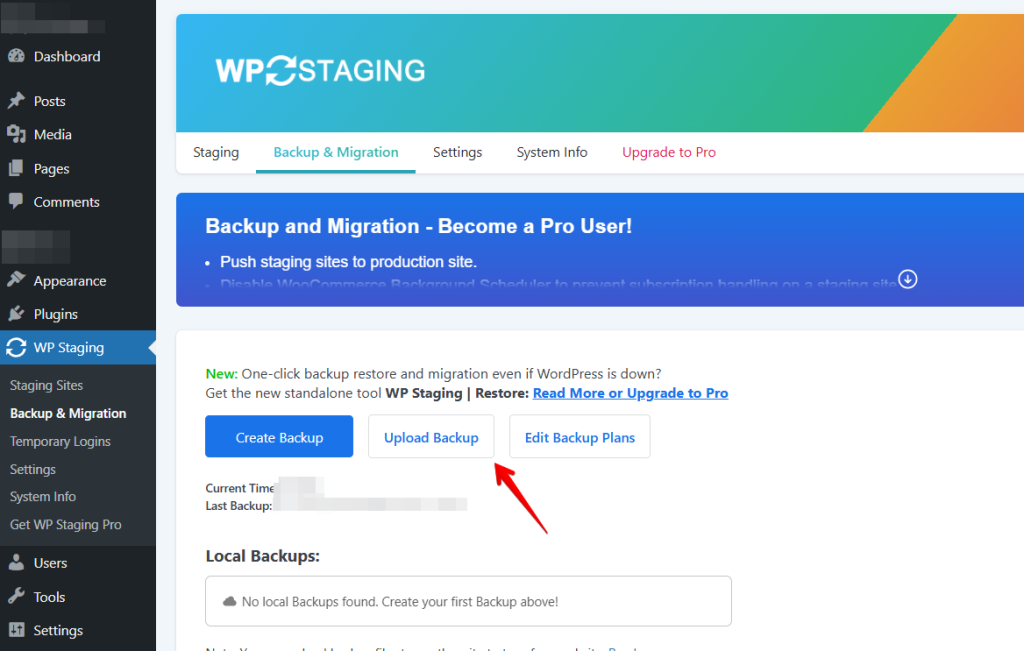
Select the downloaded backup from the file explorer and upload it.
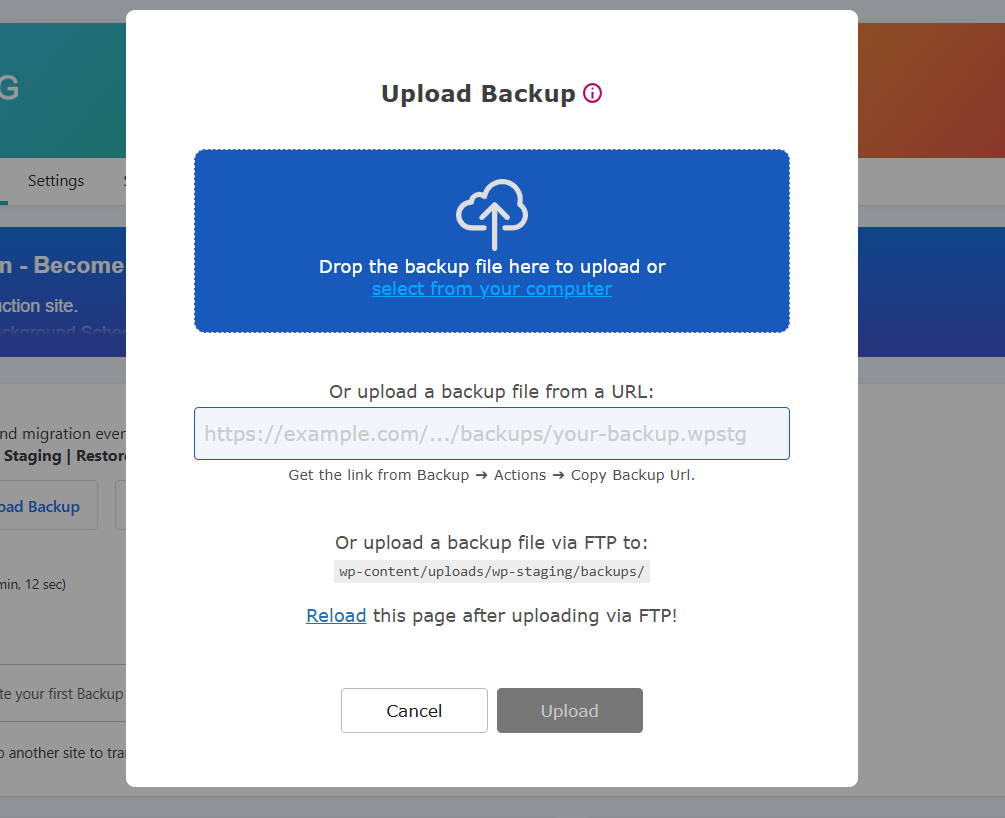
Once the backup is uploaded, click on the Actions and “Restore” button, and a popup will appear. “Upload” your backup file by dragging and dropping it, entering a “URL”, or uploading via “FTP” to the provided directory. Inside, you’ll see two buttons: “Cancel” and “Next”. Click on “Next” to proceed.
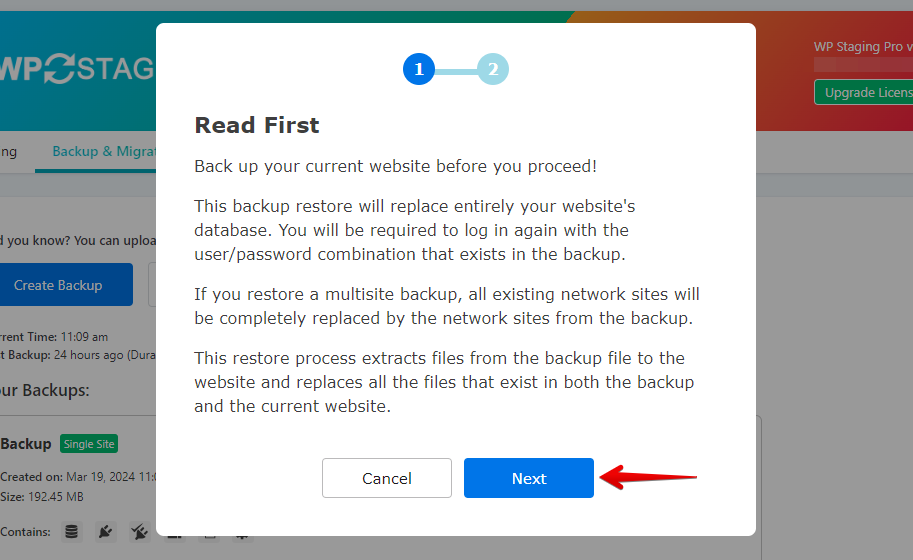
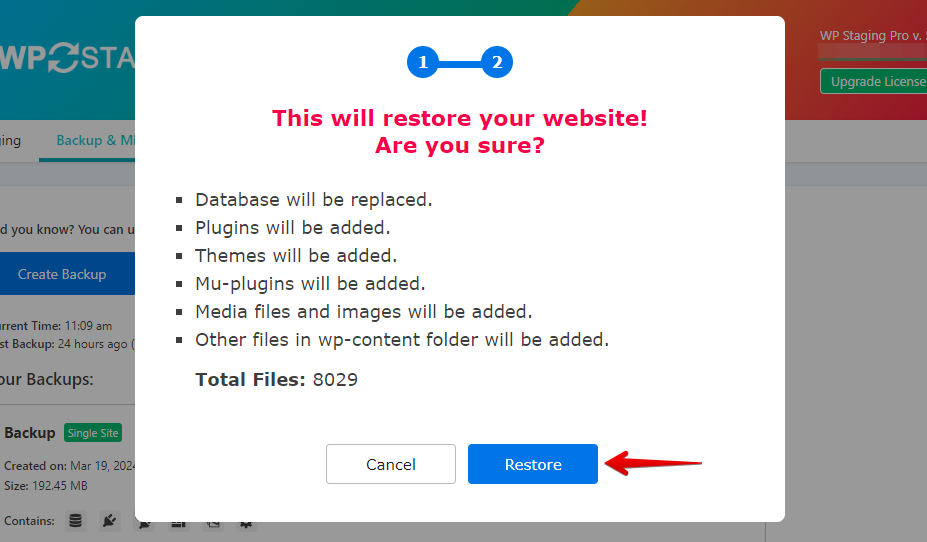
After you click “Next,” a new box will pop up. Then, click “Restore” to start restoring.
If the restore succeeds, you will see the “Finished Successfully” modal.
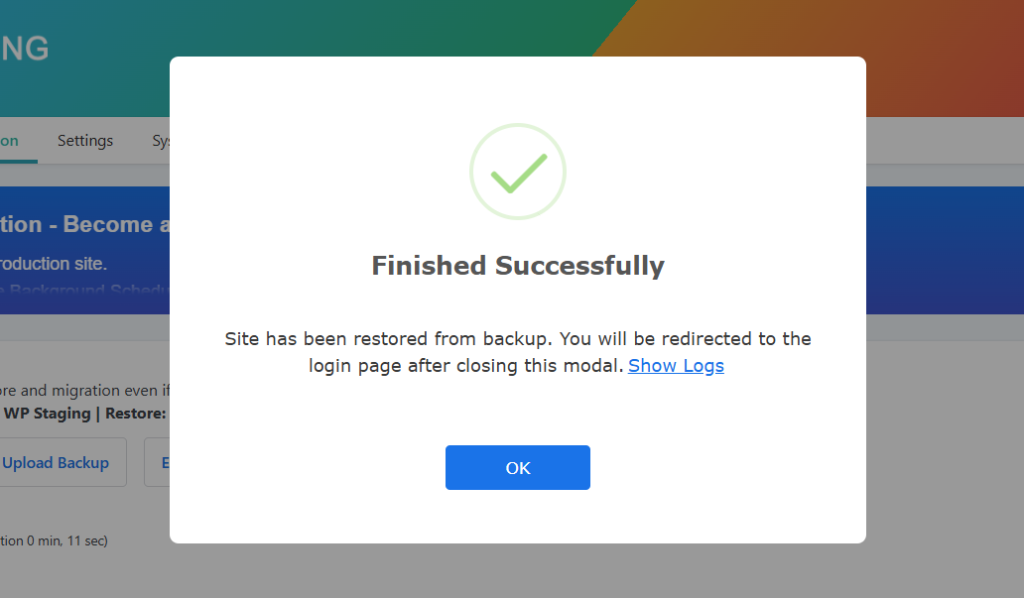
Open your website and test whether the website works as intended and is entirely functional.
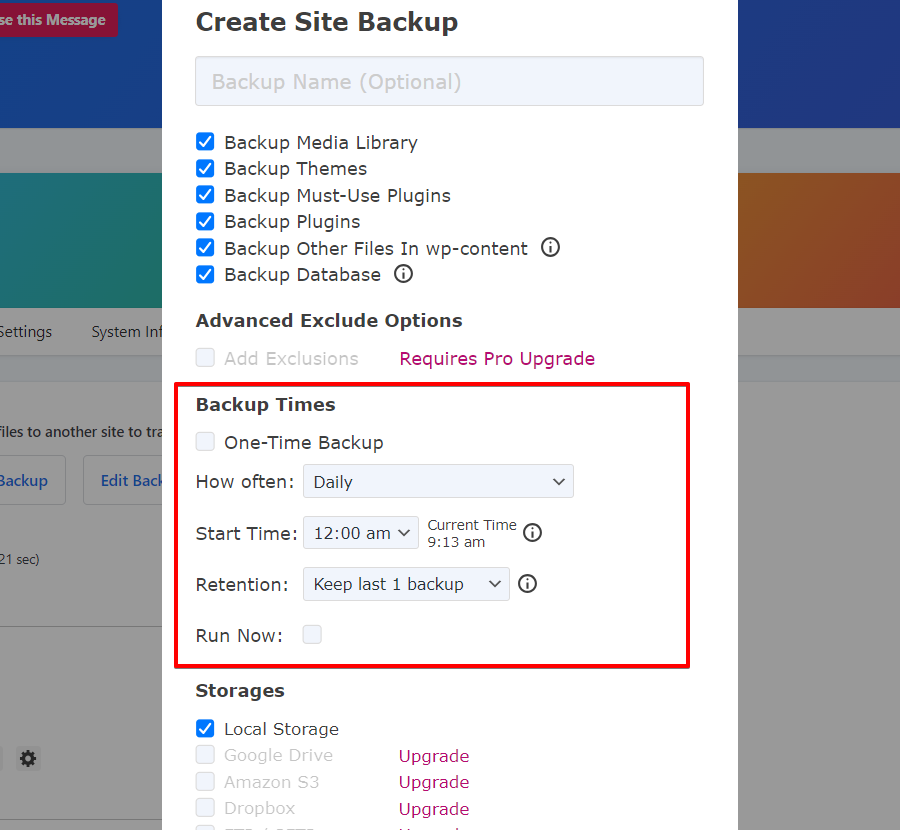
Scheduling Automatic Backups
With WP STAGING, you can save time and hassle by setting backups to run automatically. No more having to remember to back up your site every time you make a change. You can chill, knowing your website is always backed up and safe.
Backup “Create Backup,” uncheck “One-Time-Only,” and then choose from the options displayed how often backups happen, when they start, and how many backups to keep.
That’s it. With the help of WP STAGING | PRO, you have created and restored a backup of your entire WordPress website.
Hardening your Website with a Security Plugin
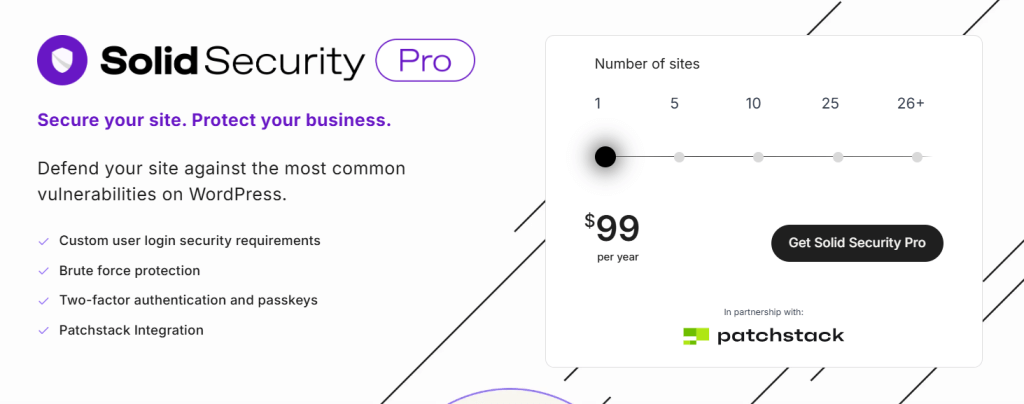
To prepare this article, I’ve checked out the most popular security plugins: “WordFence” and “Solid Security.”
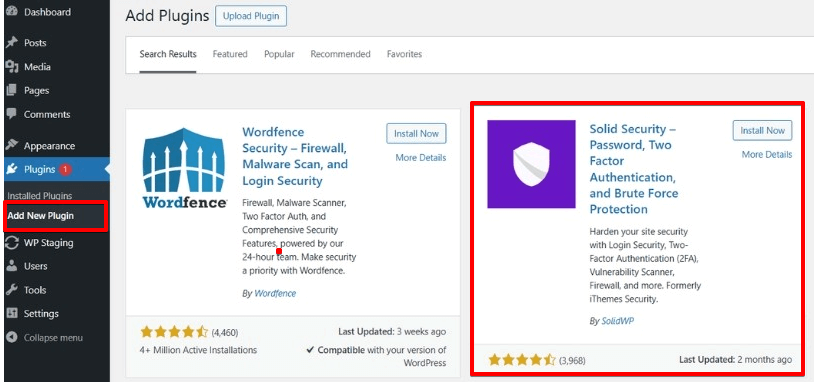
Both are excellent plugins, but I’ve decided to choose Solid Security because of the more straightforward setup and the additional features for hardening the WordPress website.
Install the Plugin “Solid Security”
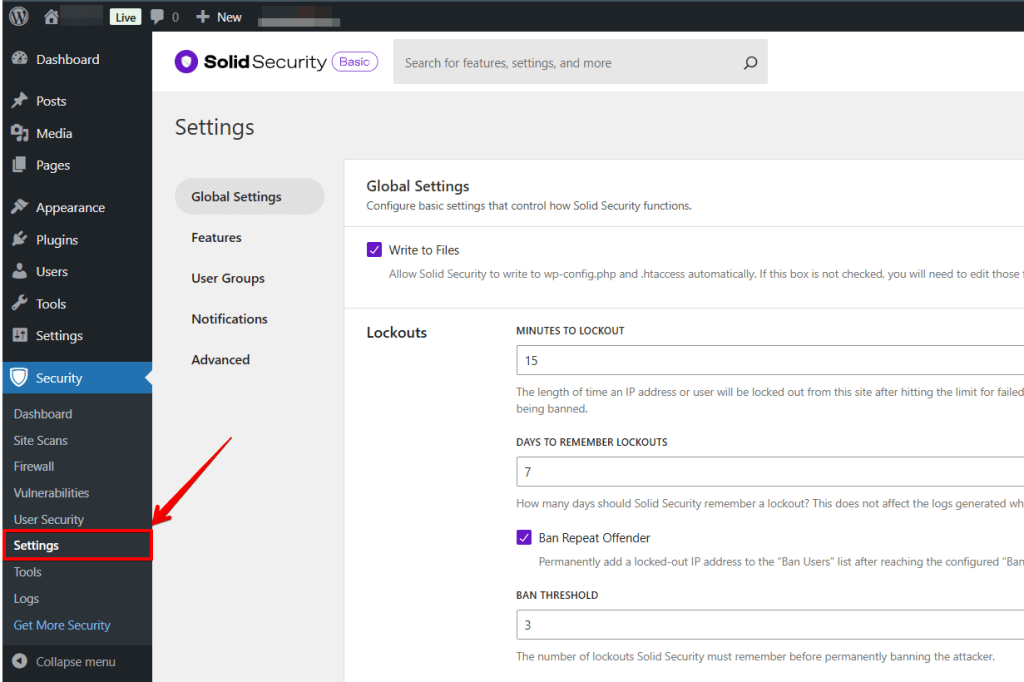
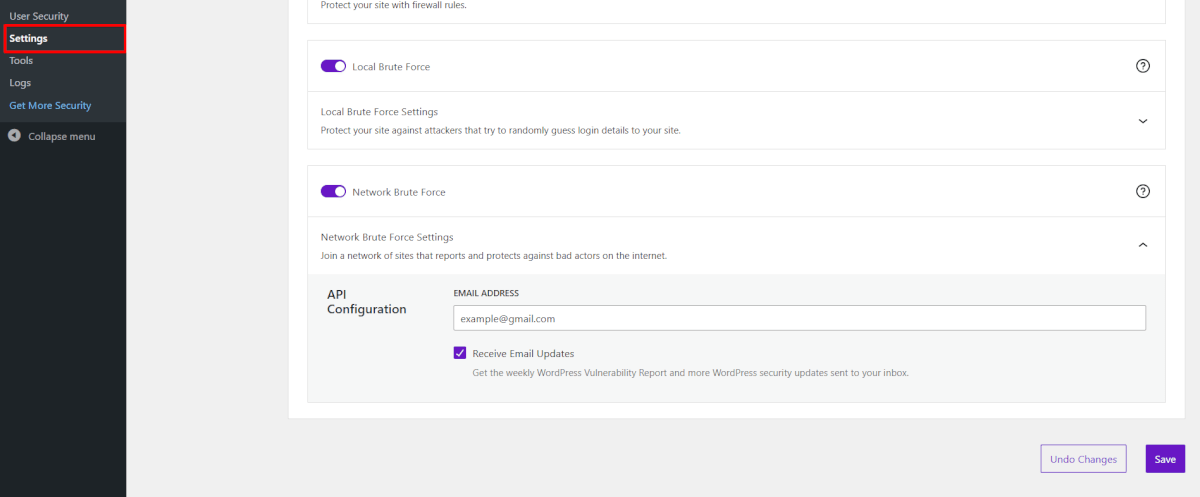
Install and activate the plugin. Now we can open the new ” Security “ tab in the sidebar menu by clicking “Settings”.
Start an Initial Security Check
The Solid Security “Security Check” then opens. This “Security Check” is a one-click tool that installs the modules required on every WordPress site. These include, for example, the “Brute Force Protection” or the enforcement of “Strong Passwords.”I will explain the functions of the different modules directly after the “Security Check.”
Select the “Security Check Scan” to continue.

Two more clicks are required to complete the process.
Solid Security: SSL, Network Bruteforce Protection
The one-click confirms the “redirection of HTTP requests to HTTPS requests.”. This function ensures that there are no non-encrypted pages available to your visitors.
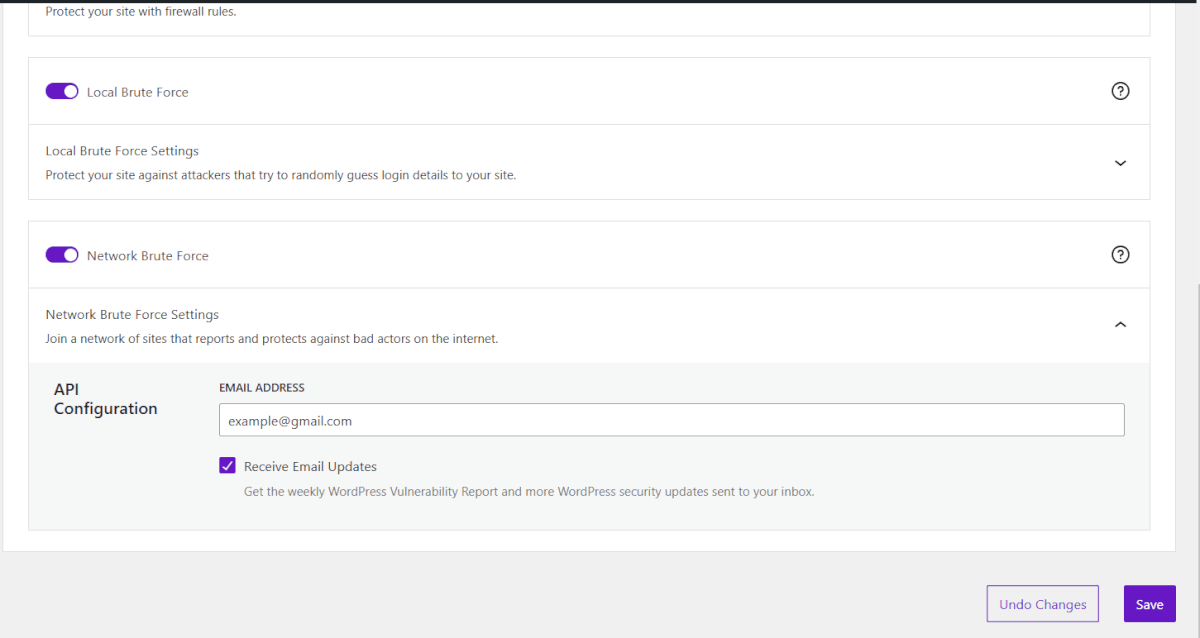
The other click activates the “Network Brute Force Protection.”

A brute-force attack is a method that tries to find out passwords or keys through automated, random testing. Solid Security protects the website with “Local Brute Force Protection” and through a network of “Brute Force Protection.” You add your WordPress site to the network, and Security protects your website against attacks that have already reached another site.
The admin email address is selected here by default.
You can also authorize me to be informed about the news; I’ll leave this option on “No.”
Confirm the activation and close the security check.
Malware Scanner
Like many plugins, Solid Security offers free and pro versions. You can decide in the course of the article whether you consider the Pro version to be useful. If a feature from the premium version makes sense for you, I will mention it.
First, let’s take a look at the malware scan.
WordPress.org points out that it is important not to shift all security responsibility to the web host but to take this into your own hands. In doing so, they refer, in particular, to the installed applications.
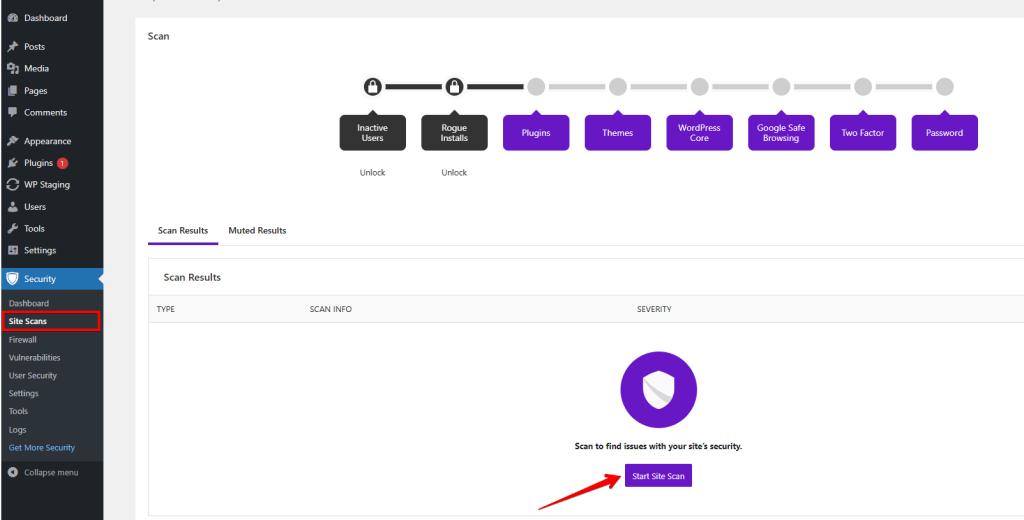
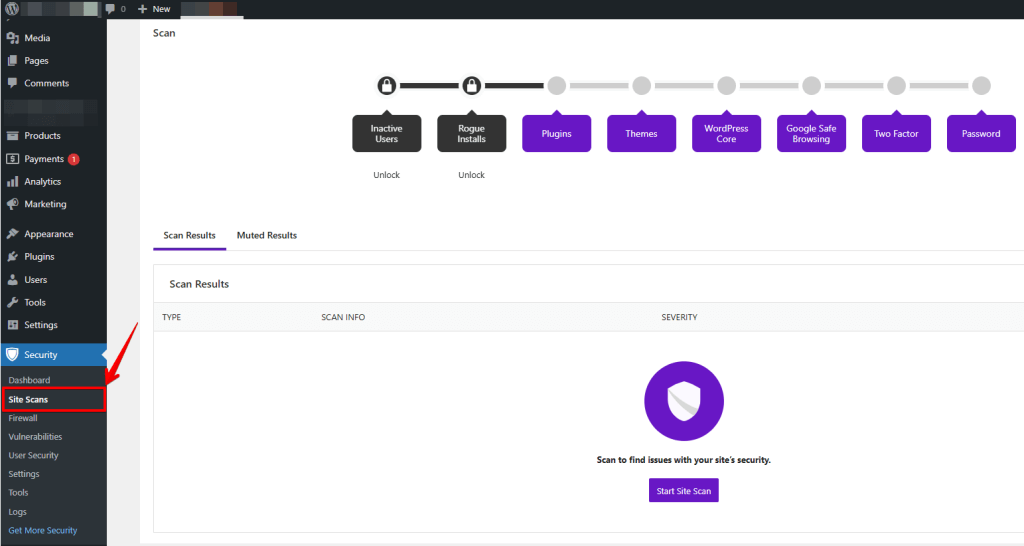
We use the Solid Security malware scanner to check if any applications you have installed are classified as malicious by Solid Security.
To do this, we scroll down and find the scanner on the right. The free version of Solid Security also has a malware scanner, although it is manual. The Pro version has an automatic malware scanner.
Click “Run Scan” to scan your website. Then, go to the “logs page” to check for the results.
Installing plugins only from trustworthy sources to avoid giving malicious applications a chance to get on your website.
The Recommended Modules of “Solid Security”
Now, we come to the individual modules of Solid Security. There are two display views, the “block view” and the “list view.” It is easier to go through the different modules step by step in the list view; we change the display view in the upper left corner from “block-“to “list view.”
Security Check
The “Security Check” module only lists the standard precautions we confirmed at the beginning of the set-up.
Global settings
“Write to Files”: If you deactivate this option, you have to manually add the configuration options to the “wp-config.php” and “.htaccess” files. Therefore, I do not recommend removing this tick.
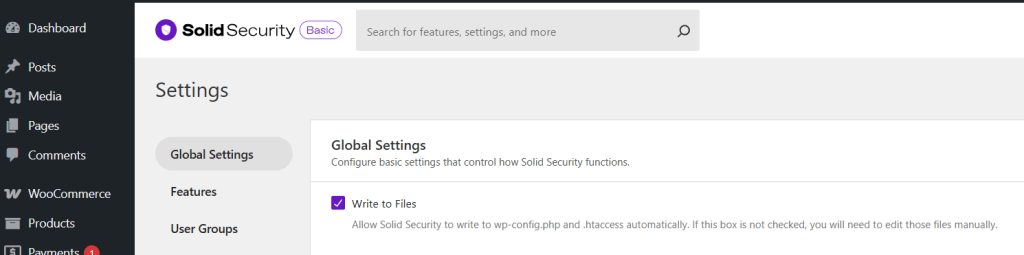
Since we will adjust the file permissions later, we will revoke the write permissions for these files anyway, making sense to let Solid Security make the adjustments up to this change.
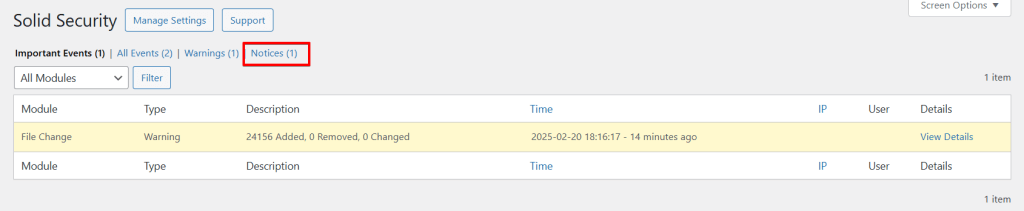
“Lockout messages” are displayed to the host, user, or community if Solid Security locks them out of your WordPress site or marks their IP address as malicious. You can edit these messages to make them more friendly if you have customer accounts on your website.
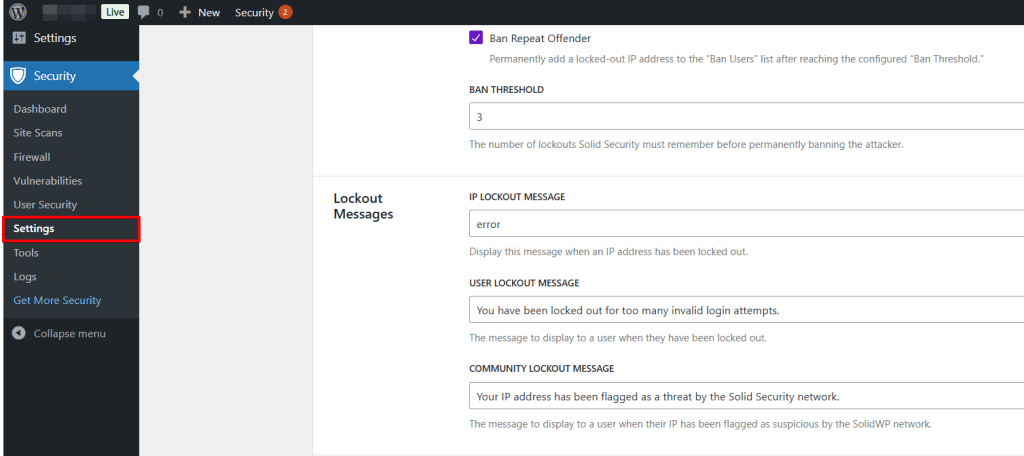
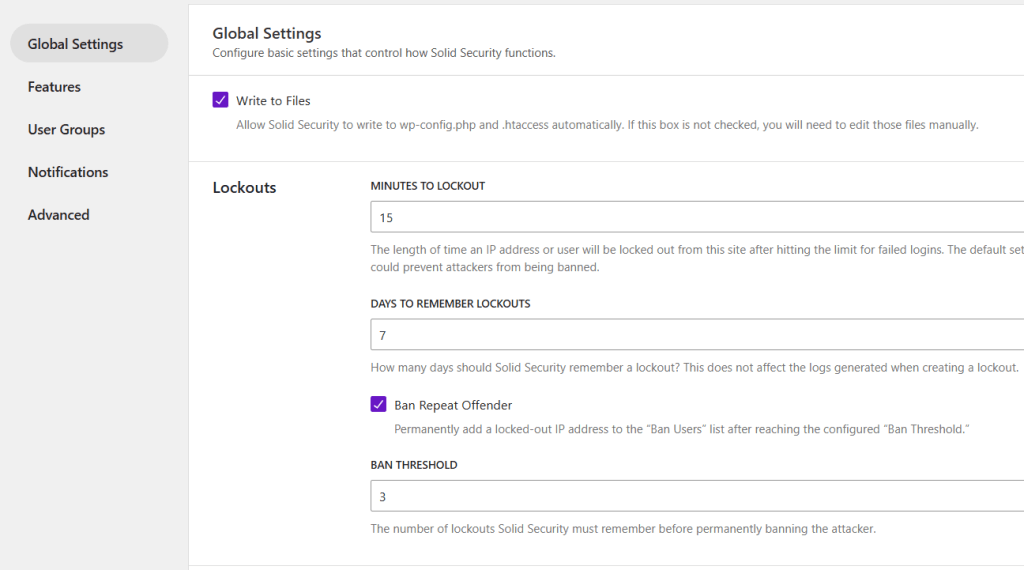
Below are the specific settings for the lockouts. The “Lockout Period” indicates how long WordPress will block the user / IP address after reaching the maximum limit of incorrect login attempts.
The “Ban Lookback Period” regulates how long Solid Security remembers and adds the locks. “Ban Threshold” determines how many lockouts a user or IP address may receive before he is permanently blocked.
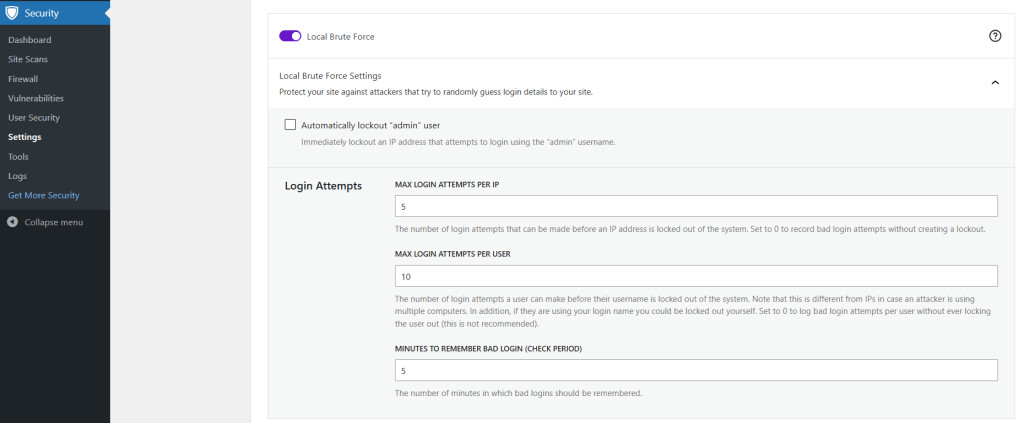
Solid Security: Lockout settings to specify how many login attempts a user / IP address has before he is blocked. We scroll to the module “Local Brute Force Protection.”
“Minutes to Remember Bad Login” indicates when Solid Security adds up the incorrect login attempts. Solid Security will count two shots if the user / IP address enters inaccurate login data at 5:05 and 5:07 pm. If the attacker makes the next incorrect login attempt at 6:00 pm, the counter starts again at 1.
In the “Max Login Attempts Per User” area, you can specify how many attempts a username has before it is blocked.
“Max Login Attempts Per Host” sounds very similar. This area comes into play if an attacker uses several computers within one IP address. The IP address is blocked as soon as the attacker reaches that value.
According to your website, adjust the settings in “Local Brute Force Protection” and “General settings.” If you have customer accounts on your website, you can set the maximum value for incorrect login attempts a little higher or shorten the block’s duration. You can allow fewer login attempts for websites you only sign in to.
Example: A user tries to log into your WordPress site five times within five minutes. “Local Brute Force Protection ” blocks the user for 15 minutes. Solid Security permanently blocks the user if this block is repeated twice within seven days.
Let us continue with the “Global Settings” module.
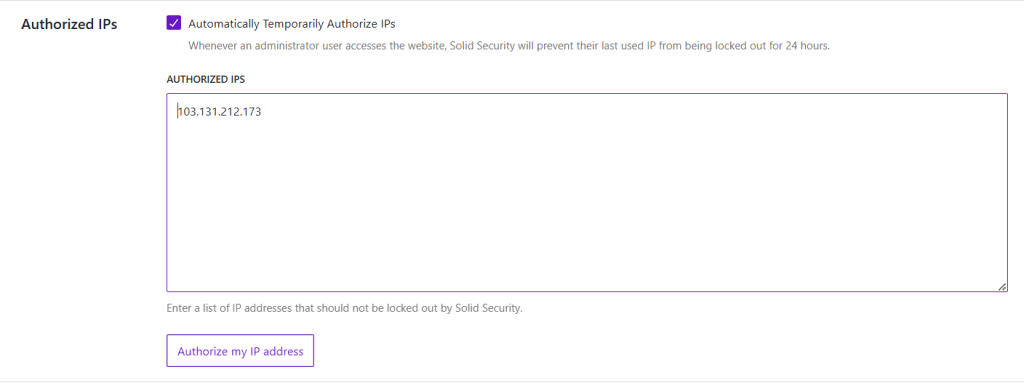
The “Authorized Hosts List” allows you to add hosts that Solid Security will not exclude from the WordPress site. This option prevents you from losing access to your site if you should trigger a lock.
To do this, click “Add my current IP to the Authorized Hosts List.”
WordPress.org recommends that you dig deeper into your WordPress website’s logging to troubleshoot problems or find out what happened and recover your site after being hacked.
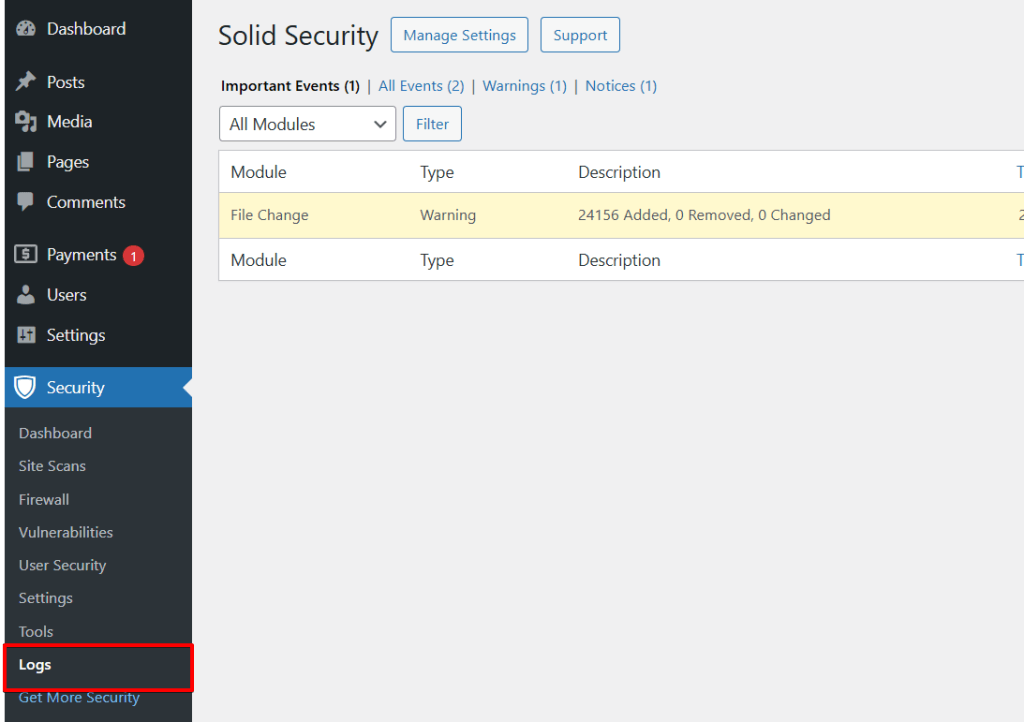
Solid Security can save both “File Logs” and “Database Logs.” As mentioned during the “Site Scan” module, you can access the logs via the sidebar menu by clicking “Logs.”
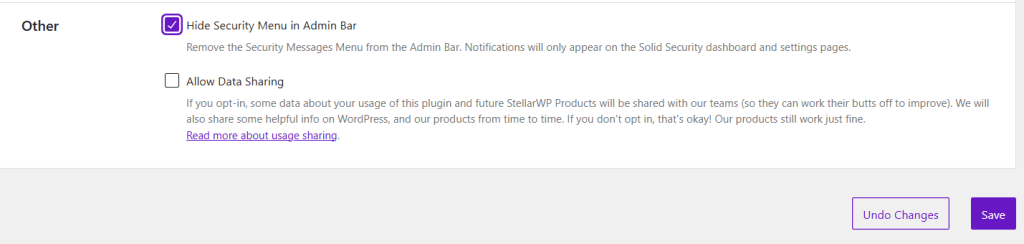
If you already use many plugins and like to keep your WordPress menu tidy, you can do this by ticking the box under “Hide Security Menu in Admin Bar.”
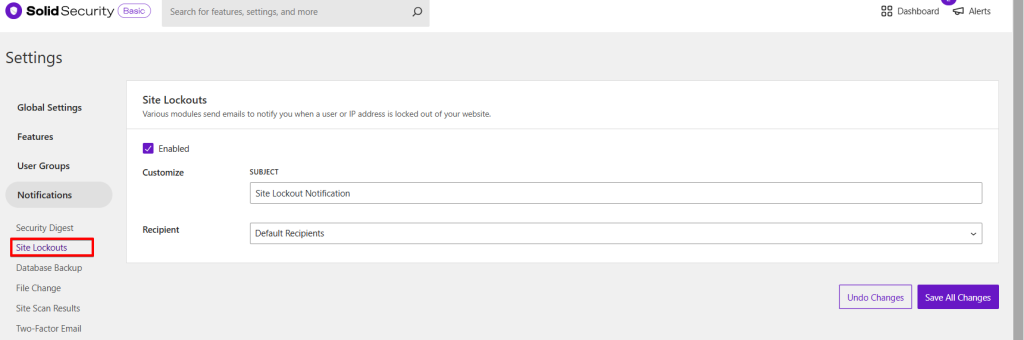
Notification Center
In the “Notification Center” module, scroll down to “Site Lockouts.” This setting is activated by default, meaning you will receive an email notification every time a user or host is blocked. The configuration depends individually on your website. It would be best to deactivate this option for websites that customers or many WordPress users access, as someone often forgets their password. However, if you only use this site, you can activate it with a clear conscience, as Se can notify you directly of a possible hack attack.
User Groups
We don’t need to adjust any settings under “User Groups.”
Away Mode
I recommend activating the “Away Mode” cautiously, as this makes the WordPress dashboard inaccessible to all users for a selected time.
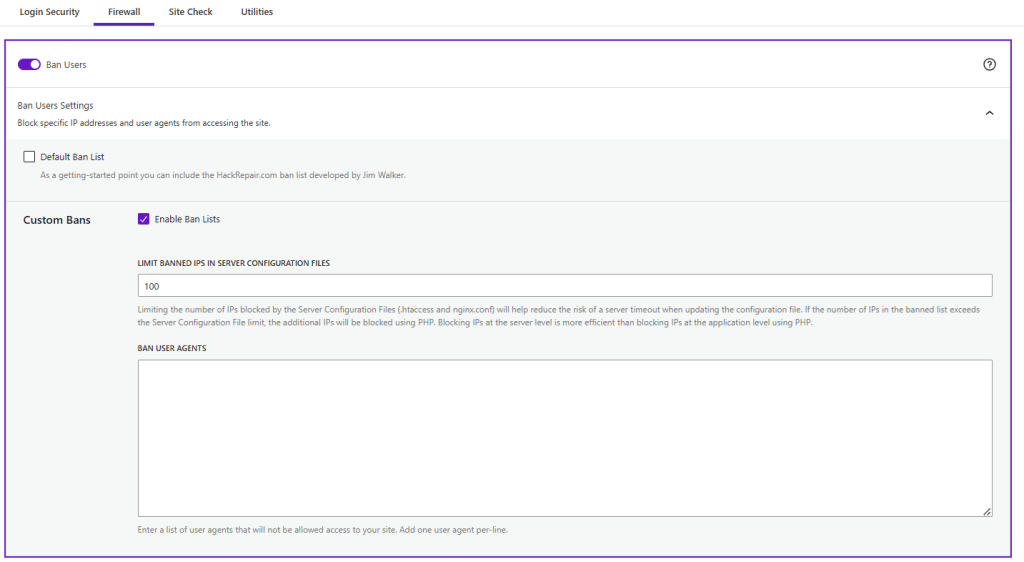
Banned User
Under the tab “Banned User,” you can block the IP addresses of specific users or hosts. This option means that you immediately and completely deny this IP address access to your website. The list works in the same way as the “Authorized Hosts List” but vice versa. Instead of never blocking specific IP addresses, this list blocks them completely.
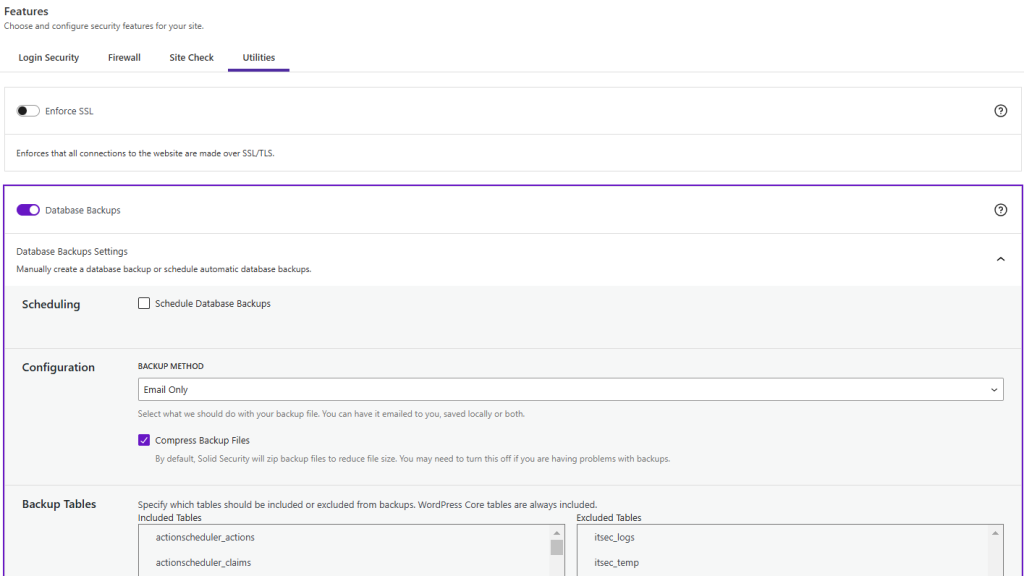
Database Backup
You can deactivate the “Database Backup” function because we have already installed a backup plug-in that creates both database and file backups.
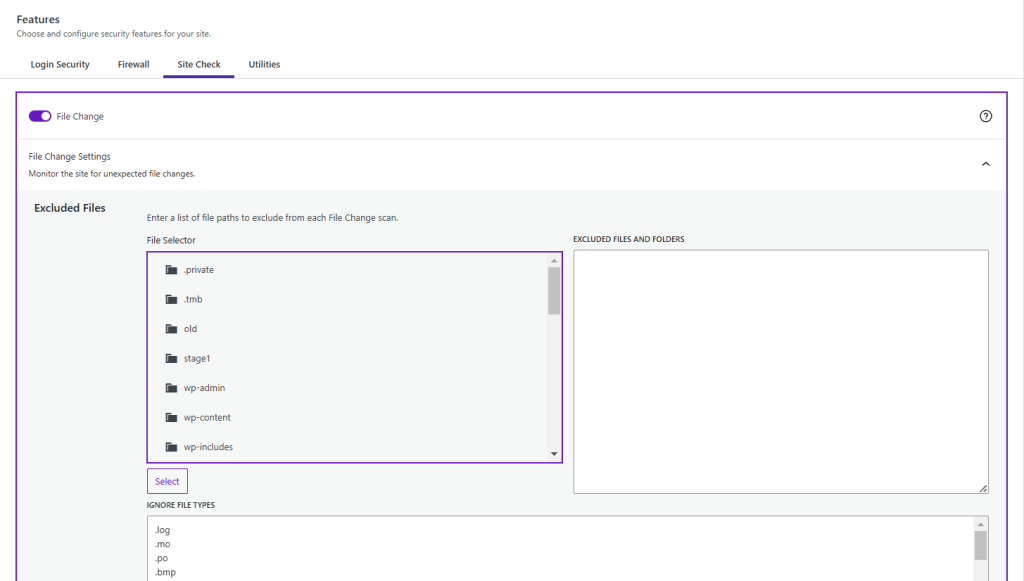
File Change Detection
I recommend activating “File Change Detection.” If, for example, an attacker has hacked your hosting provider’s server and tries to change or delete your WordPress core data, you will receive an email notification. WordPress.org recommends enabling the monitoring of changes to files.
File Permission
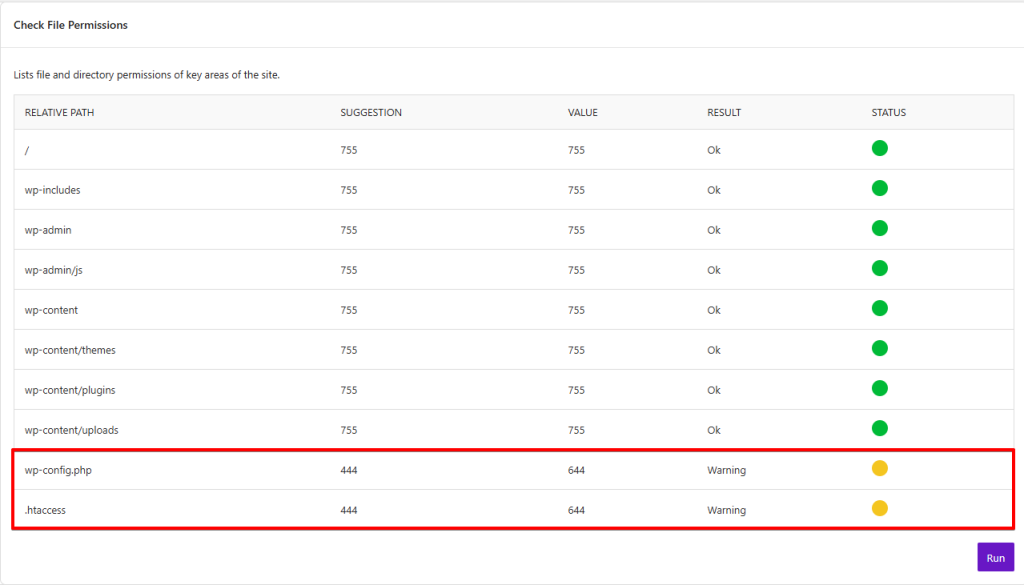
The “File Permission” module offers us some fascinating insights into the core of our WordPress site. It’s recommended that you check the file permissions.
Open the module window and click on “Load File Permission Details.” Solid Security now shows the file paths of the security-relevant WordPress files and the access rights of the files or folders. Both the actual value and the target value are displayed. In my case, Solid Security suggests a change in two positions: the “wp-config.php” and the “.htaccess” files.
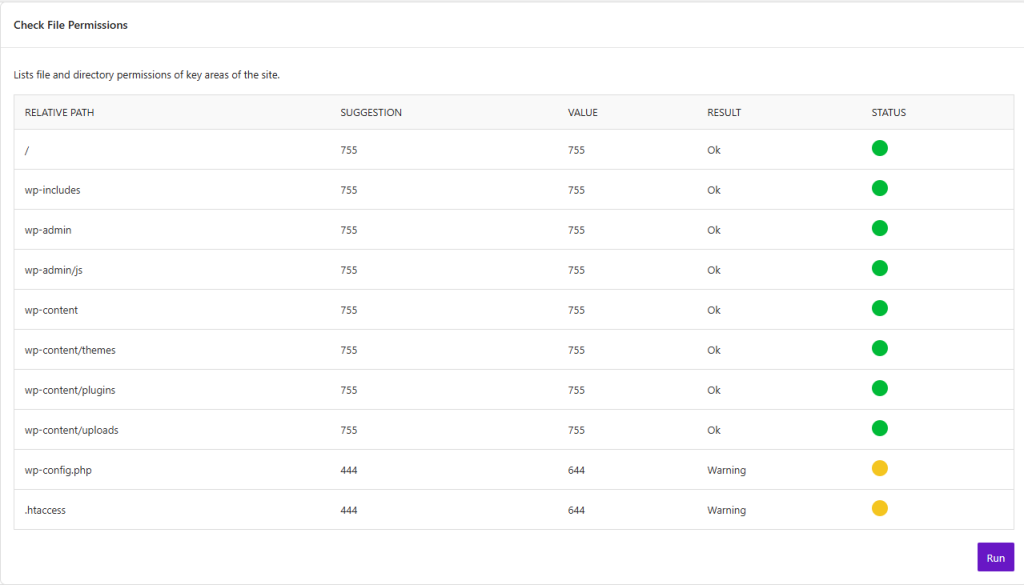
A three-digit number regulates the file permission. The first number regulates the permissions for the “user”; this is the website’s administrator. Several people can have administrator rights. The second number regulates the permissions for the “Group”; this includes the other users of your website, for example, editors, contributors, or other user roles. The last number describes the rights for “World,” which includes everyone on the Internet who accesses your site.
The wp-config.php is the configuration file of your WordPress application. Since this is one of the most critical files, you must ensure that you have adequately protected it.
Solid Security recommends the “444” here; everyone has read access, but no one can write.
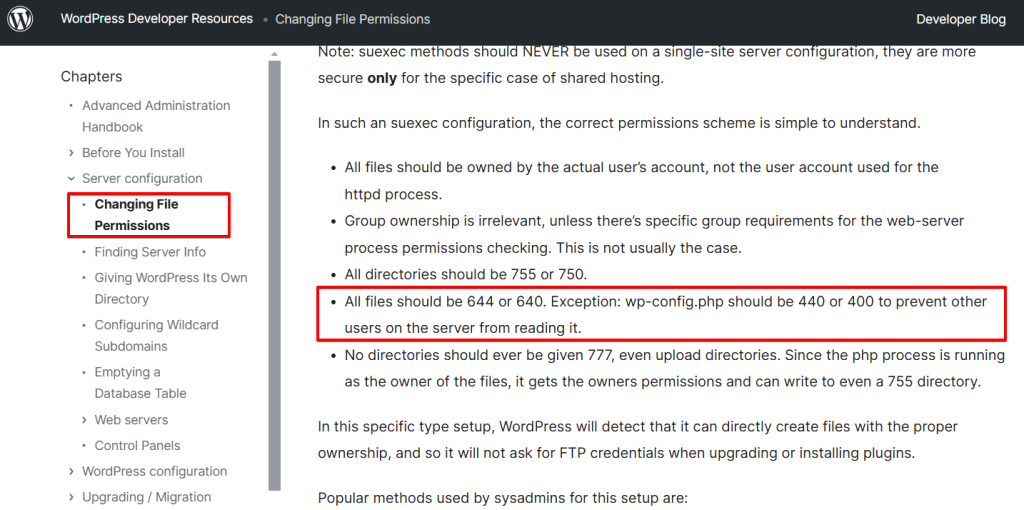
WordPress.org recommends protecting the file with “400” / “440”. With the value “440,” you, the administrator, and the user have read access but no visitor. With “400”, only you as the administrator,r have read access; this is the most secure option.

It is crucial to understand that these file permissions refer to the actual website; you, as the site owner, can adjust these permissions at any time via FTP / cPanel and never lose real access.
The value to choose depends on the server setup. WordPress.org recommends locking your file permissions as much as possible and only losing these restrictions if you need to allow write access. This means starting with the “400” or “440” permission and increasing the value from there until WordPress works. Use a maximum of “600” or “640”.
Now you understand how the file permissions are made up and which permissions we need to adjust.
However, it would be counterproductive to immediately implement the file permissions adjustment, as we would then deny Solid Security write permissions, which would mean that we would have to manually add the changes to the “wp-config.php” file at the end of the set-up.
We’ll adjust the file permissions while covering the “System Tweaks” module.
Local Brute Force Protection
The next module is “Local Brute Force Protection.”We have already done these settings in the general settings.
Network Brute Force Protection
We also made the “Network Brute Force Protection” settings at the beginning during the “Security Check.”
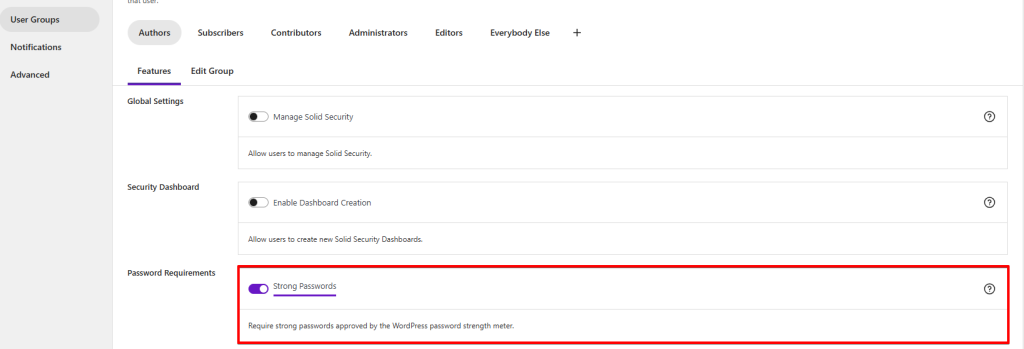
Password Requirements
Using a secure password is another crucial aspect of avoiding potential vulnerabilities.
You should prevent the following when choosing a password:
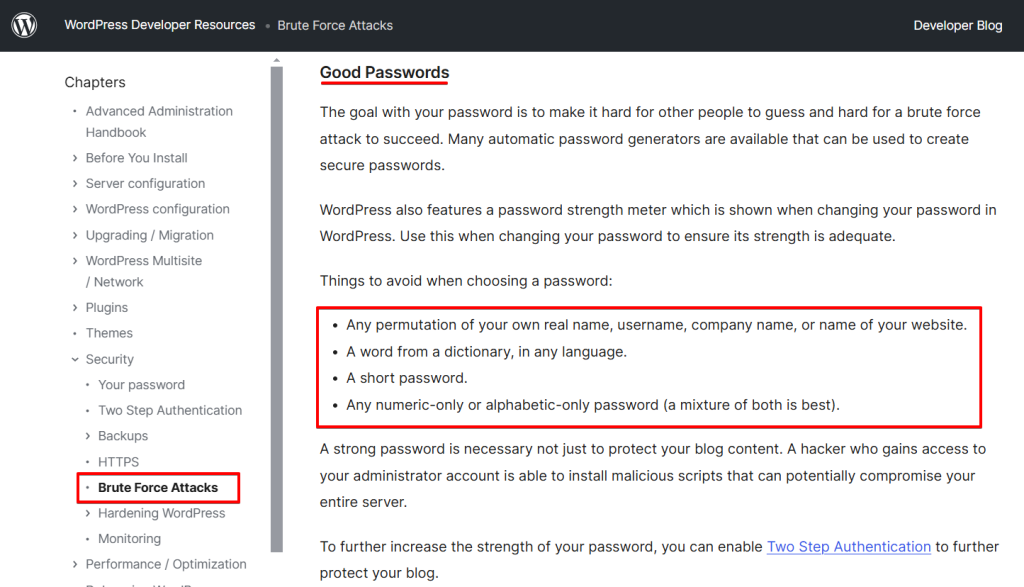
The “Strong Password” module helps to implement these requirements.
By default, Solid Security activates this setting for all user roles. You should adjust these settings based on your website. For example, you can only enforce strong passwords for the Administrator user role.
Two-factor authentication is also recommended.
The two-factor authentication technique requires users to log in using a two-step authentication method. The first step is the username and password, and the second factor is authentication, which is a code coming from a separate device or app.
This feature is available in the Pro version of Solid Security. Alternatively, you can search for the free two-factor authentication plugin “WP2FA” plug-in in the plug-in repository.
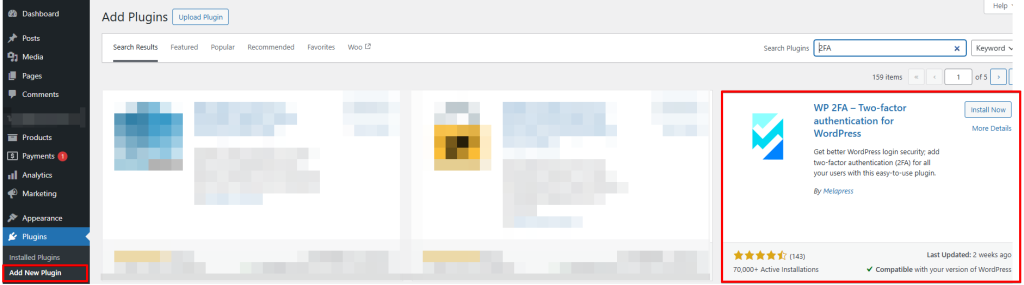
First, you need to install and activate the Two-Factor Authentication plugin. After activation, click in the WordPress plugins under “WP 2FA – Two-factor authentication for WordPress on “Configure 2FA Settings”. This will lead you to the “setup wizard.”
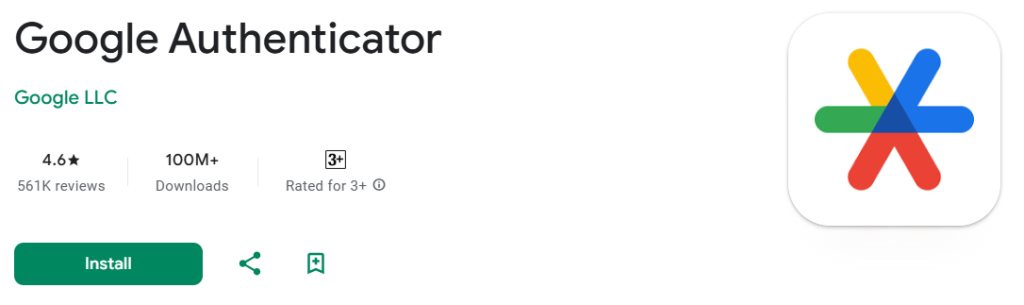
Next, install a 2FA app on your phone. I recommend the “Google Authenticator”.
Open your authentication app and scan the QR code in the “Setup wizard.”
Enter the code shown in the app on your smartphone.
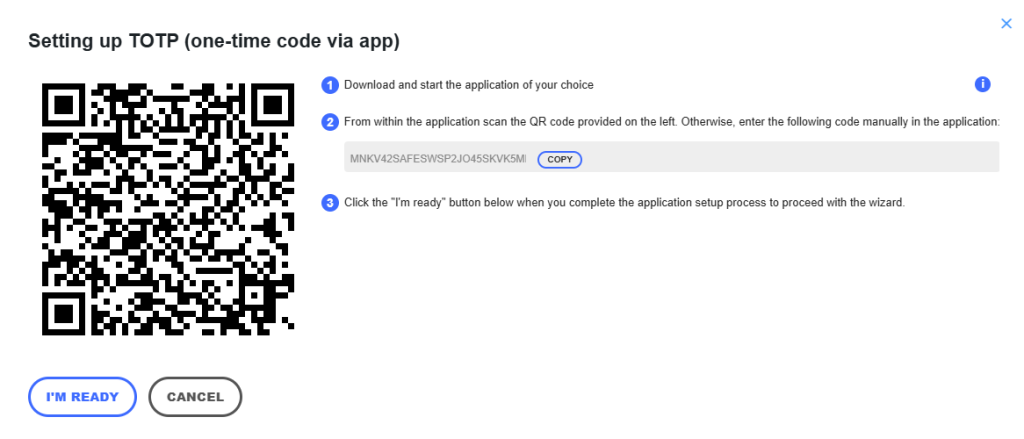
If you need further help setting up the app, click “For detailed guides for your desired app, click below.”
That’s all; your authentication app will now save the code sent once by “WP2FA”. Now, make the settings that match your WordPress site.
The next time you log into your website, the plugin will ask you for the two-factor authentication code after entering your password.
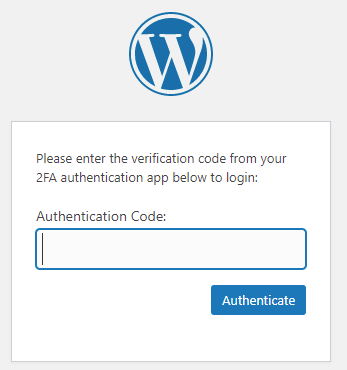
To do this, open the authentication app on your phone again and enter the code you see on it.
Let´s go back to Solid Security.
SSL
The “SSL” module redirects all “HTTP” requests to HTTPS requests if an SSL certificate is available. Solid Security activated this module in the “Security Check.”
System Tweaks
Open “System Tweaks” and click “Enable.” We need to check some boxes. The “System Tweaks” and the “WordPress Tweaks” modules have several optimizations to improve your WordPress site’s security even further. However, some of these options can conflict with your website; it depends on your website. Therefore, please check the full functionality after each activation by ticking the box, clicking “Save Settings,” and reloading the page’s front end.
Directory browsing: Hackers can use searching directories to find out if there are files with known vulnerabilities on your WordPress site so that the attackers can use these files to gain access to your website.
Browsing through directories can also be used to look into your files, copy pictures, find your directory structure, and get other information about the website. For this reason, I highly recommend that you enable “disable directory browsing.”
To test whether your site’s directory browsing is already deactivated, enter example.com/wp-content. If you receive a blank page, everything is fine, but there is a significant security issue if your website allows visitors access to the directory.
File write permissions: As mentioned in the “File Permission” module, Solid Security only allows setting file permissions to the value “444”.
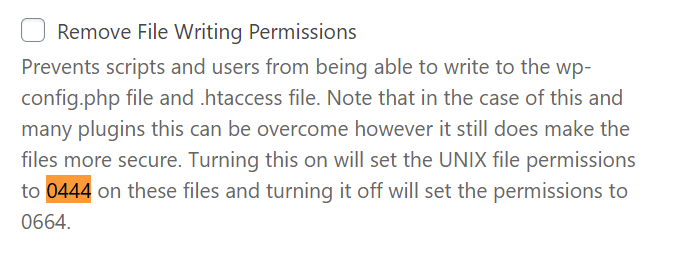
However, since WordPress.org recommends using “400” or “440”, we manually change this via FTP.
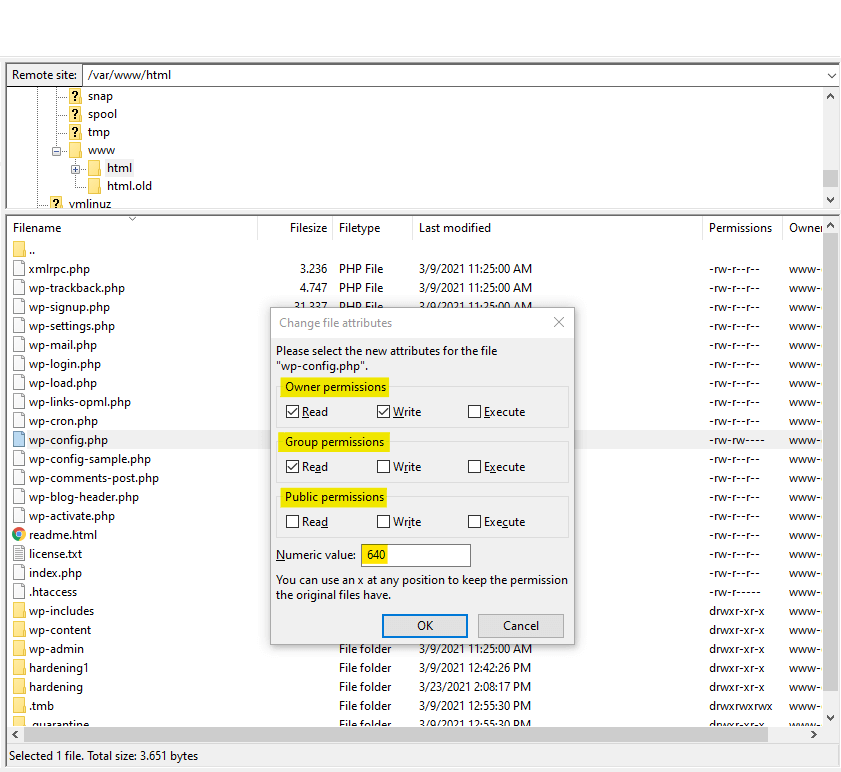
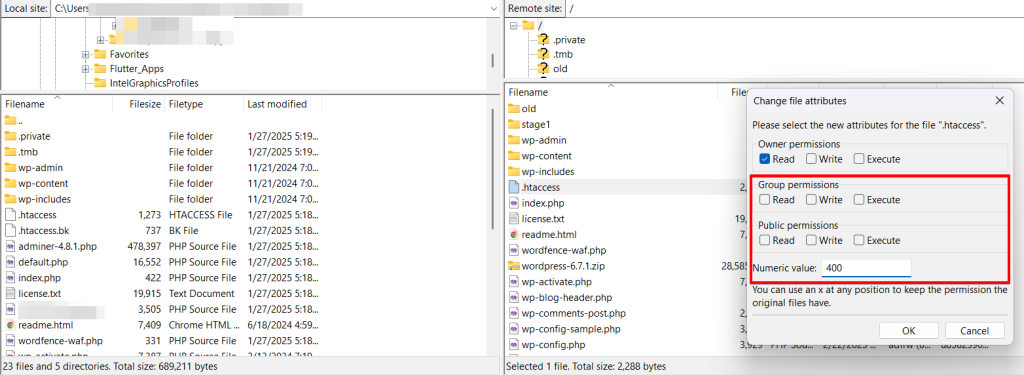
I use “FileZilla” to access the WordPress installation database via FTP on the hosting provider’s server. Alternatively, you can also do this via cPanel.
Connect to the server; you´ll get the “Host,” “Username,” and “Password” from your hosting provider.
It’s recommended to use SFTP encryption when connecting to your server. If you’re unsure whether your web host is providing SFTP, ask them. Using SFTP is the same as FTP, except that your password and other data are encrypted and transmitted between your computer and your website.
Open the “HTML” folder. There you will find the file wp-config.php.
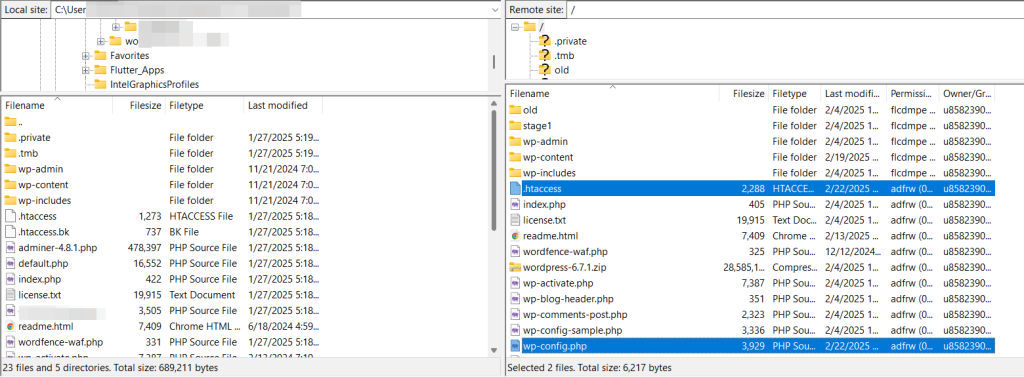
Select the “wp-config.php” file and right-click on it to open the context menu. Click on “file permission.”
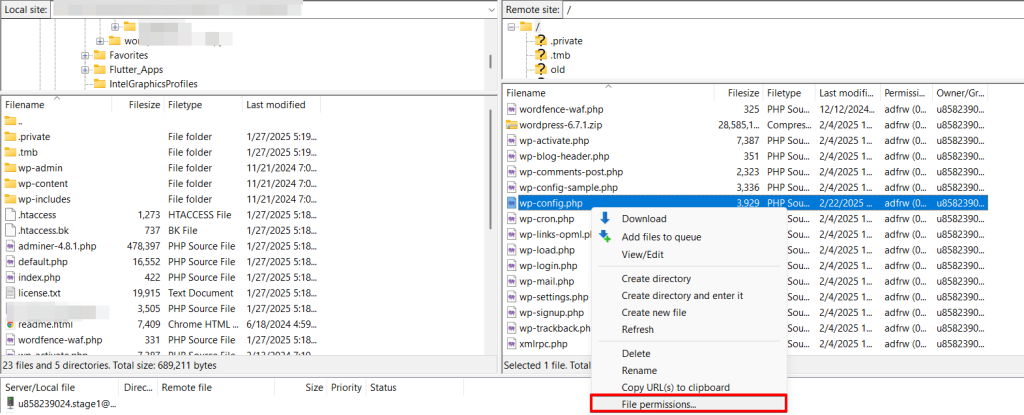
Now, you can assign the desired file permissions. I revoke read permissions from “public” and “group” and revoke write permissions from the “owner,” also known as “admin.”
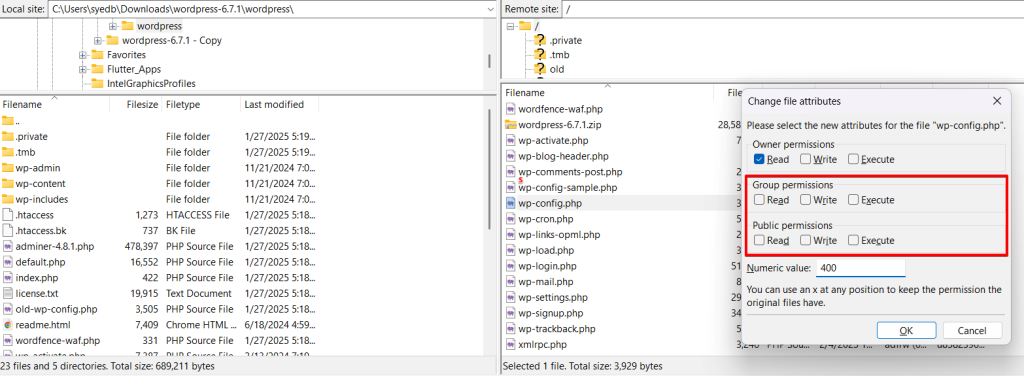
Click OK, and FileZilla will save the new permissions.
Make these same changes for the “.htaccess” file again. Revoke read permissions from “public” and “group” and revoke write permissions from the “owner.”
Do not change the other file paths, for example, the “wp-content” path; otherwise, WordPress will no longer function correctly.
Let’s return to the “System Tweaks” module in Solid Security.
“PHP in uploads, PHP in plugins, PHP in themes.” if someone tries to upload a PHP file to the front end of your website, including the media, plugins, and themes area, there is almost always a possible attack. This option, therefore, prohibits the “PHP” file format for these directories.
WordPress Salts
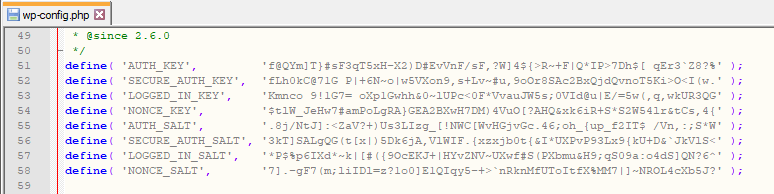
“WordPress Salts” protects the passwords you save in the browser. If you save your password in the browser when you log in, WordPress stores this password in two cookies. However, if WordPress saved your password in clear text, attackers could quickly decrypt it.
Security keys and salts avoid this problem by working together to cryptographically turn that plaintext password into a random jumble of characters.
You can find these security keys and salts in the wp-config.php file; four keys and four salts each.
By confirming “Change WordPress Salts” and saving the settings, Solid Security changes the WordPress Salts. However, this also means that all users are logged out of their current session and have to log in again. So think about when to make this change. Solid Security recommends changing the WordPress “Salts” at least once a month.
WordPress tweaks
Like the system tweaks, we can also make relevant changes to the “WordPress Tweaks” by ticking a few boxes. As with the “System Tweaks,” make sure to check the full functionality of your website after each activation.
First, we check the box next to “Comment Spam”; this reduces spam in the comment area.
We also ensure the File Editor is disabled; this is another recommendation. WordPress offers the option of editing both plugins and designs by default. This editor opens up another possibility for attackers to access your site.
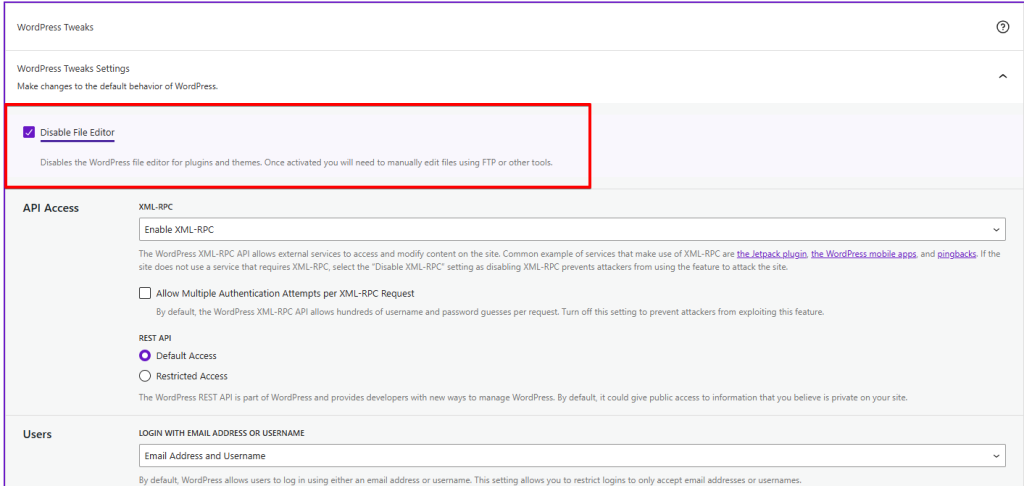
It is the same with”XML-RPC”. “XML-RPC” is a function of WordPress that you or plugins can use to transfer data. “XML-RPC” also offers attackers the opportunity to gain access to your site. This interface is relevant for using the WordPress app, trackbacks, pingbacks, and the JetPack plugin. If you use one of these functions, you cannot deactivate the “XML-RPC” interface; otherwise, select “Disable XML-RPC.”
Click on “Save Settings.”
The Advanced Modules of “Solid Security”
At this point, we are through with the “Recommended” modules by Solid Security.
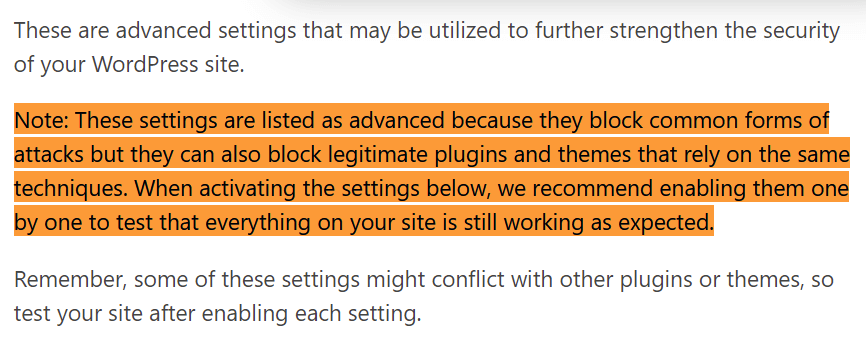
However, there are also “Advanced” modules that help to make simple one-click changes through these modules that we otherwise would have to do manually.
As mentioned
, I want to remind you to try all changes on a staging site. Otherwise, it could lead to complications on your website.
Admin User
The advanced module “Admin User” ticks off another WordPress.org recommendation.
WordPress.org recommends using the principle of “Security through obscurity” in two places.
The first is to rename the administrator account; the second is to change the “table_prefix.” Solid Security offers the possibility to make both adjustments; the change of the “table_prefix” takes place in the next but one step.
When installing WordPress, the admin username is “admin” by default. This default setting is often not changed, especially with one-click WordPress installations by the hosting provider. But even if you had installed WordPress, you might not have changed the username because you didn’t know anything better. That makes it much easier for attackers to gain access to the website, as they do not have to crack the name and password, only the password.
If your administrator username is “admin,” you will see the field “New Admin Username.” If you do not see the field, it indicates that you did everything correctly during the installation.
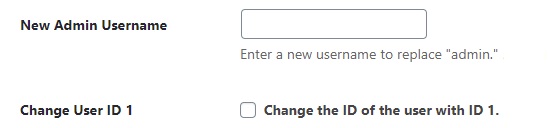
I skip the “Change User ID 1” field at this point, as it can lead to complications when using plugins.
Change Content Directory
The same goes for the next module, “Change Content Directory.”As the warning says, you should only use this module when installing WordPress.
Change Database Table Prefix
We now come to the second point where WordPress.org recommends the principle “Security through obscurity.”; the module “Change Database Table Prefix” makes this adjustment.
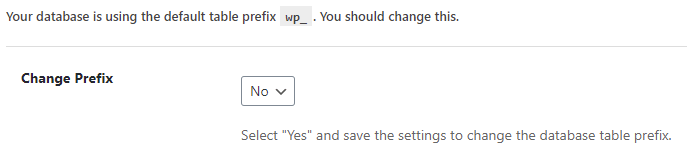
Many WordPress-specific SQL injection attacks assume that the “table_prefix” is the default value “wp_”. Changing this prefix can block some SQL injection attacks.
If your table prefix is “wp_” you´ll see the following message with the advice to change the prefix. “wpstg0_” is displayed as the table prefix because I´m on the staging site, and WP STAGING has created this table prefix.
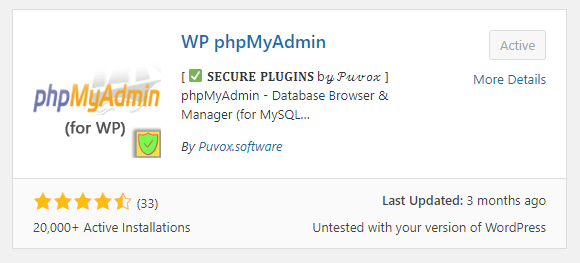
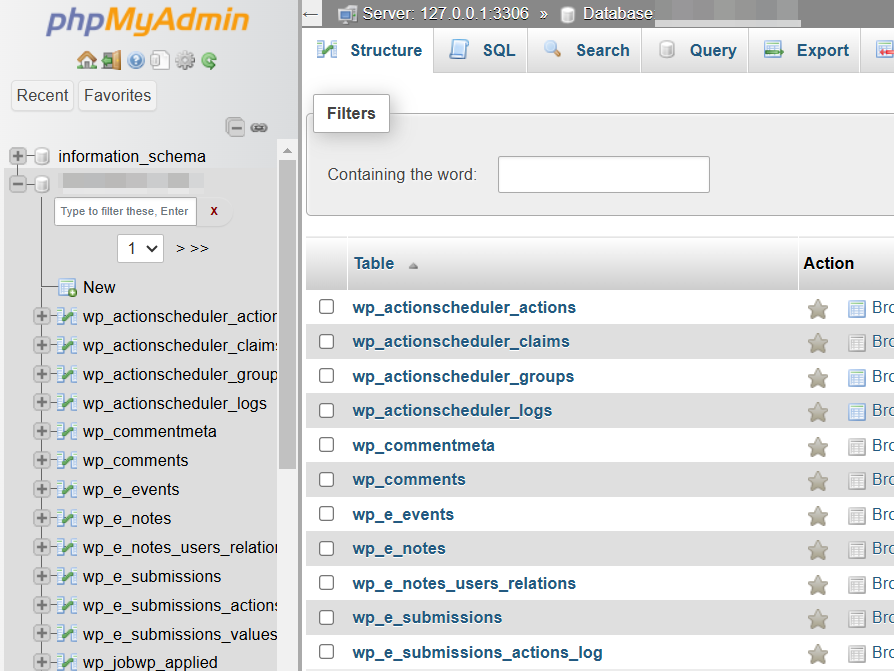
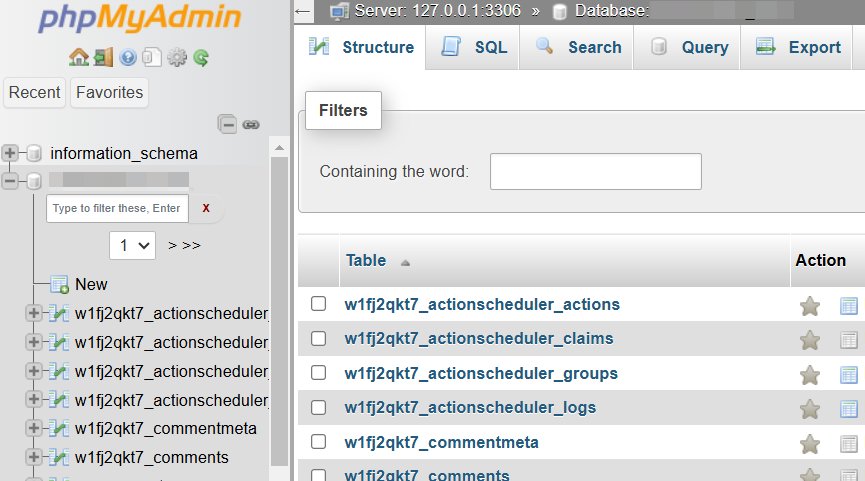
You can view the database via the “PhpMyAdmin” plug-in. Like the previous plugins, you can download it via “Plugin” and “Add New.” Then, open it via the sidebar menu.
Now you can see the tables with “wpstg0”; these are the tables on the staging site. Below are the tables of the production site with the prefix “wp_”.

I´ll go back to Solid Security. By selecting “Yes” and “Save Settings,” Solid Security will assign a new, more complex prefix to the tables.
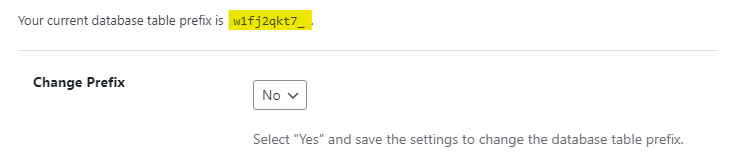
I switch to the “PhpMyAdmin” tab again, and after refreshing the page, I see the new prefix in front of the tables.
Hide Backend
The “Hide Backend” module makes it difficult for attackers to access the WordPress login area. Everyone can reach the login page through “example.com/wp-admin” and “example.com/wp-login.php” by default.
Since this configuration is identical for all WordPress sites, attackers can immediately identify the login area where they start their brute force attack.
Before I explain the login permission, I’d like to mention that I have not activated the module because it can lead to login issues when using specific plugins.
Under “Login Slug,” you can see your current login extension, change the extension, and make a note of it. The next time you access your website, enter “example.com/new extension.”
The module can be useful to prevent cheap brute-force attacks. If desired, try out whether the module leads to complications.
wp-config.php Rules
In the last module, “wp-config.php Rules,” Solid Security can check whether all modules can act correctly.
If Solid Security cannot find any changes required, you will receive the message, “There is nothing that needs to be written to your wp-config.php file.”
Otherwise, you will get the message, “The following rules need to be written to your wp-config.php.”
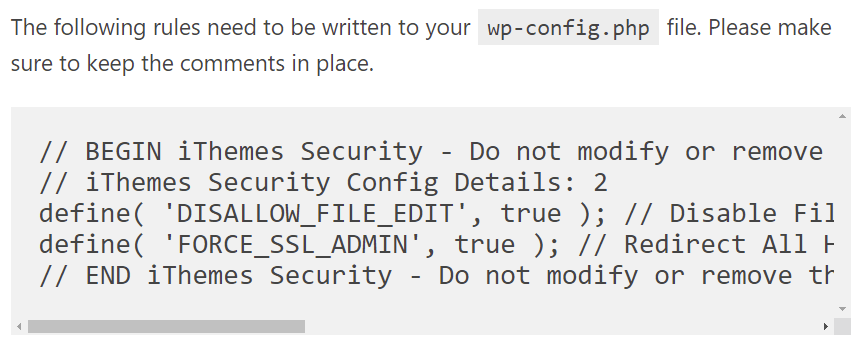
Solid Security: “wp-config.php” Rules. This message appears if doesn’t have “Write” file permission for the “wp-config.php” file.
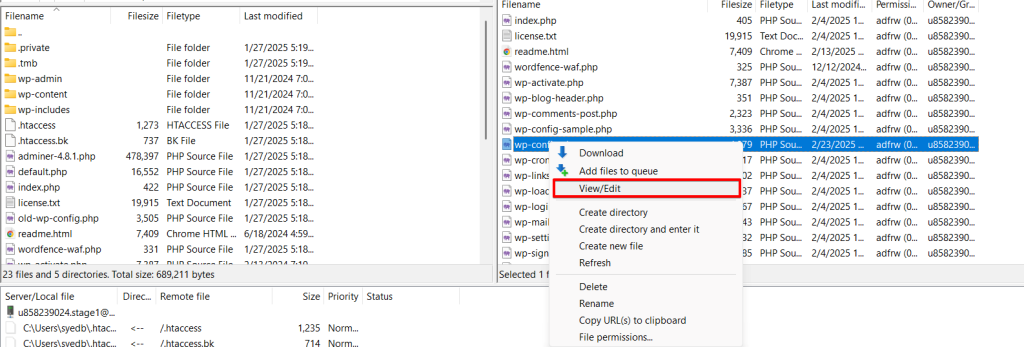
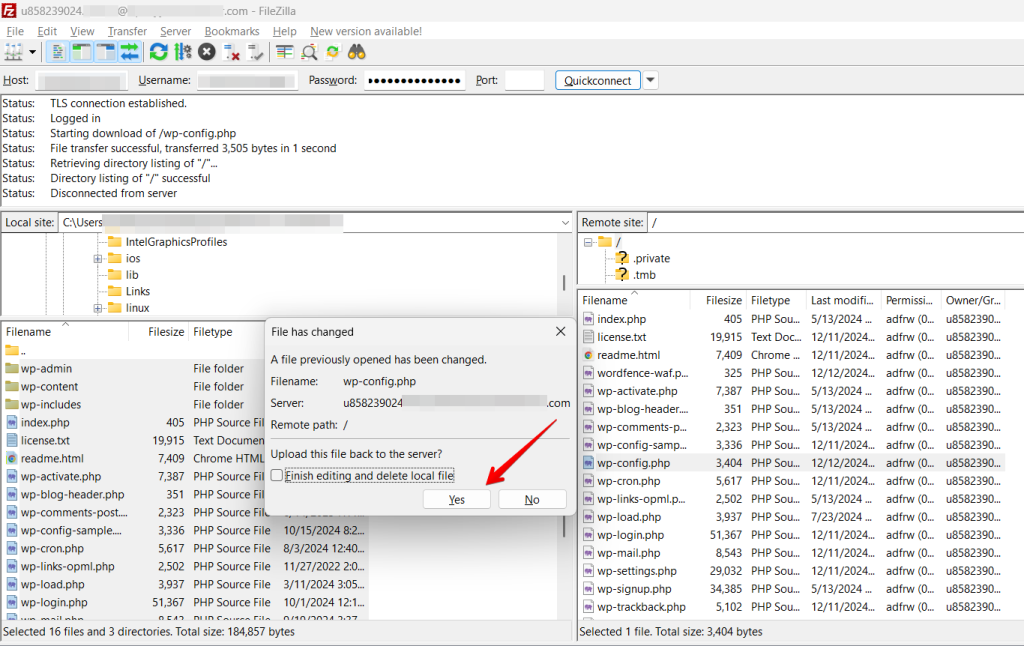
We use FileZilla to reaccess the WordPress site’s database via FTP to write the rules required by Solid Security in the “wp-config.php” file. As you already know from customizing the file permissions, the “wp-config.php” file is located directly in the “HTML” folder. Right-click to select “View / Edit” and then open the text editor.
Copy and Paste the rules listed by Solid Security in the “wp-config.php” file directly under “<? PHP”.
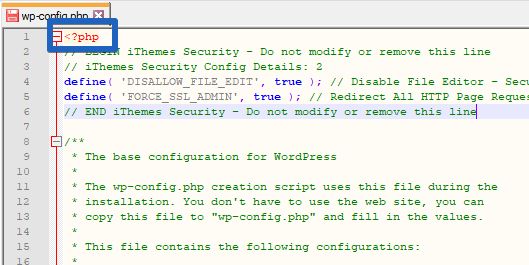
To explain, the rule “DISALLOW_FILE_EDIT” ensures that the deactivation of the file editor, which we made in the “WordPress tweaks” module, takes effect.
“FORCE_SSL_ADMIN” means that SSL encryption is also effective at the admin level. Solid Security applied that setting in the “Security Check” at the beginning.
Save the changes and close the file, then confirm the new file upload via FileZilla.
After inserting these rules in the “wp-config.php” file, please check whether your WordPress site’s staging site is still functional. Click “View Site” in the WordPress Dashboard.”
After testing the changes, push your staging site to the production site by using WP STAGING PRO or repeat the settings on the production site.
Wow, that was a lot of adjustments! Glad you made it to the end.
Now, your website is excellently positioned in terms of security by choosing the right hosting provider, automatically creating a backup, and adapting the “Solid Security” plugin.