I understand you’re facing issues with WP Staging failed backups. Even though WP Staging is a popular and trusted plugin with over **100k+**active installations for backing up WordPress websites, errors can sometimes occur. It can be frustrating, but don’t worry; there are solutions!
This article will guide you through the most common reasons WP Staging backups might fail and provide clear steps to fix them. Following these steps, you should quickly get your backups up and running.
Contents
Causes of WP Staging Failed Backups
Failed backups of WP staging can occur for various reasons, including network failures, insufficient server resources, plugin conflicts, file permission issues, and using an aged WP staging plugin. Understanding these causes is essential for troubleshooting effectively.
During the backup process, the WP Staging plugin experienced interruptions in the network connection at various stages. These interruptions could have been displayed in several ways, including:
- Network Failures
It occurs when data packets sent between your server and the backup destination fail to reach their planned recipient. It can cause the transfer process to slow or become incomplete.
- Update Plugin and Address Conflicts
Are backups failing on your website? An outdated WP Staging plugin often causes this issue. Although older versions may still work, neglecting your WP Staging plugin updates can result in various problems, including backup errors.
- Insufficient Server Resources
One common cause of failed backups is insufficient server resources. When the server lacks sufficient memory or processing power, it may struggle to complete the backup process, resulting in failures.
- Plugin Conflicts
Plugins play an important role in WordPress functionality, but conflicting plugins can disrupt the backup process. Conflicts may occur when two or more plugins have overlapping features or incompatible code.
- File Permission Issues
Incorrect file permissions can also lead to failed backups in WordPress staging environments. More permissions or misconfigurations may prevent the backup process from accessing and copying necessary files.
6 Ways to Fix WP Staging Failed Backups
Resolving WP staging failed backups involves several troubleshooting steps to address underlying issues effectively.
1. Connection Issue or Remote Storage Capacity Reached
You’re good to go if you save your files on your computer. However, you might need to reconnect to your storage account if you use cloud storage services like Amazon S3, Dropbox, OneDrive, or Google Drive.
Additionally, check your remote storage space availability. If there is insufficient space, consider deleting unnecessary files or purchasing additional storage.
After making these adjustments, remember to save your changes and attempt another backup.
For further details, you can check the dedicated guides on each cloud storage:
- How to Back up your WordPress Website on Amazon S3
- How to Back up your WordPress Website on Google Drive
- How to Back up your WordPress Website on Dropbox
2. Update Plugin
First, make sure you’ve got the newest WP Stagingversion. Regularly updating fixes bugs and ensures it plays nicely with other plugins and WordPress versions. You can find info about the version in the changelogs.
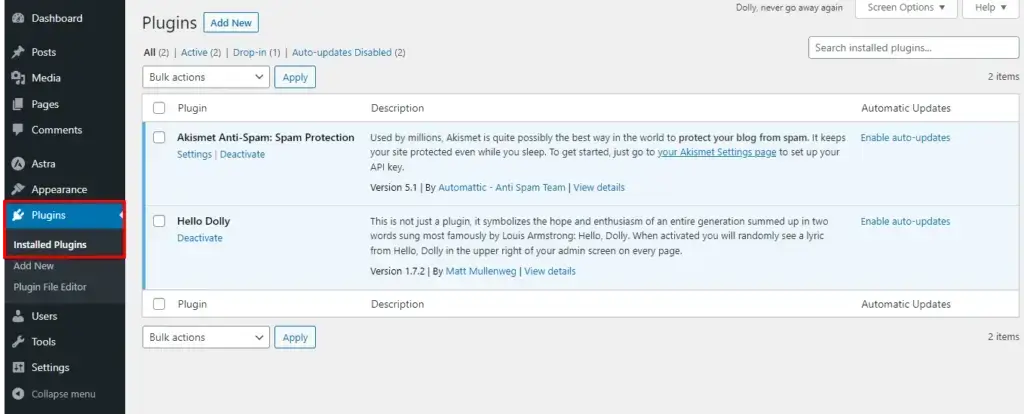
To update the plugin:
- Navigate to your WordPress dashboard.
- On the left-hand panel, locate the "Plugins" option.
- Click on it to expand the menu, then select "Installed Plugins."
- Find the WP Staging plugin in the list. You’ll see a notification prompting you to update if an update is available.
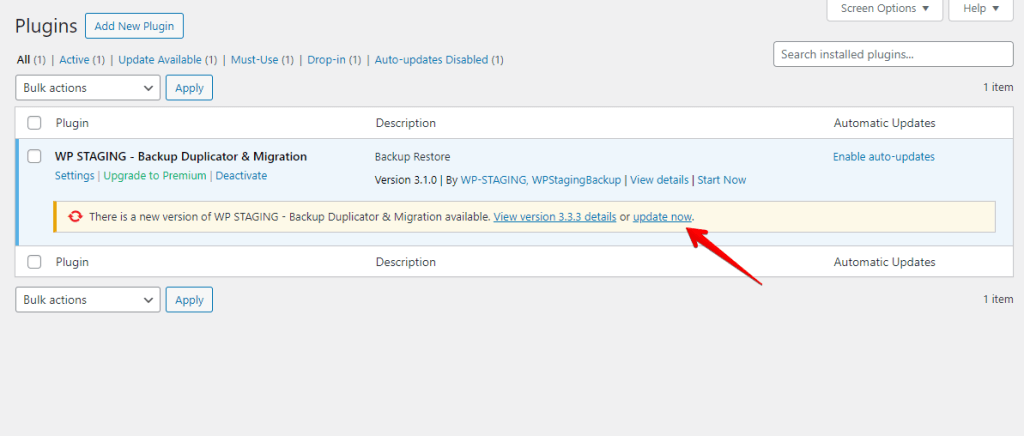
- Click the "update now" button to proceed with the update process.
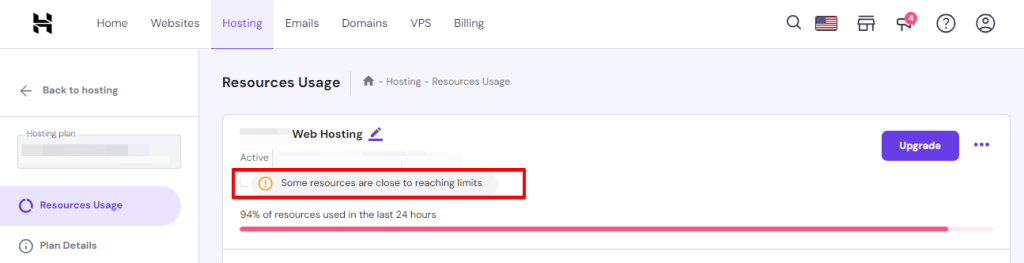
3. Check Server Resources
First, check your server’s memory and processing power. If your server doesn’t have enough of these resources, backups can fail.
You might need to upgrade your server or adjust some settings to make it work better for backups. Doing this can fix backup failures caused by insufficient resources on your server.
4. Deactivate Conflicting Plugins
When encountering backup issues or conflicts with specific plugins on your WordPress website, it may be necessary to disable them temporarily.
By deactivating plugins, you can separate and troubleshoot the problem without affecting the overall functionality of your website.
Here’s how to do it:
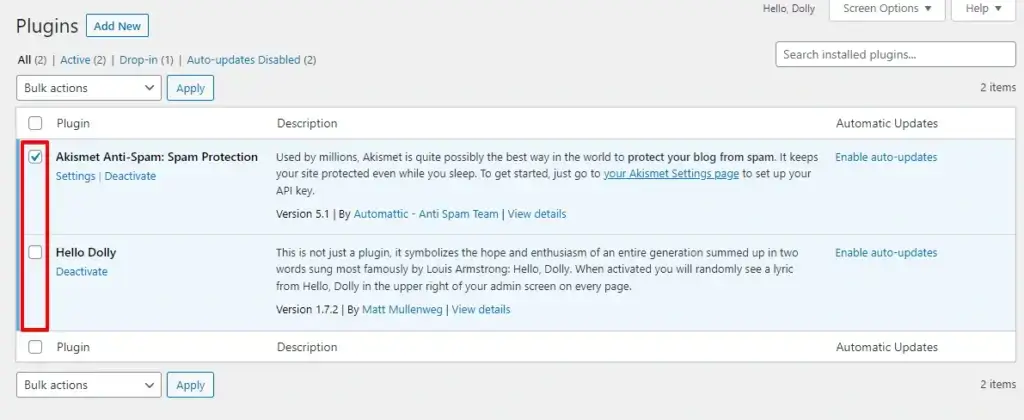
- Access your WordPress admin dashboard by logging in to your site.
- Go to “Plugins” from the sidebar menu and click on it.
- You will see a list of installed plugins.
- Select the plugins you want to disable by clicking the checkboxes next to their names. You can choose multiple plugins at once.
- Once you have selected the plugins, look for the “Bulk Actions” dropdown menu at the top of the list and select “Deactivate.”
- Click the “Apply” button next to the dropdown menu.
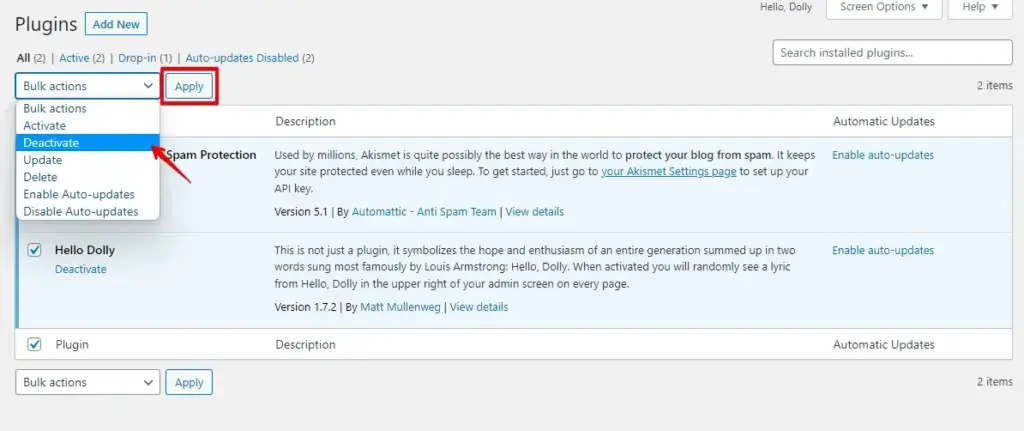
After deactivating plugins, refresh your website to see if updates instantly appear. Then, reactivate plugins one by one, refreshing your site each time to pinpoint the problematic one.
Repeat this process until you find the culprit, and consider updating, replacing, or contacting the plugin developer for help.
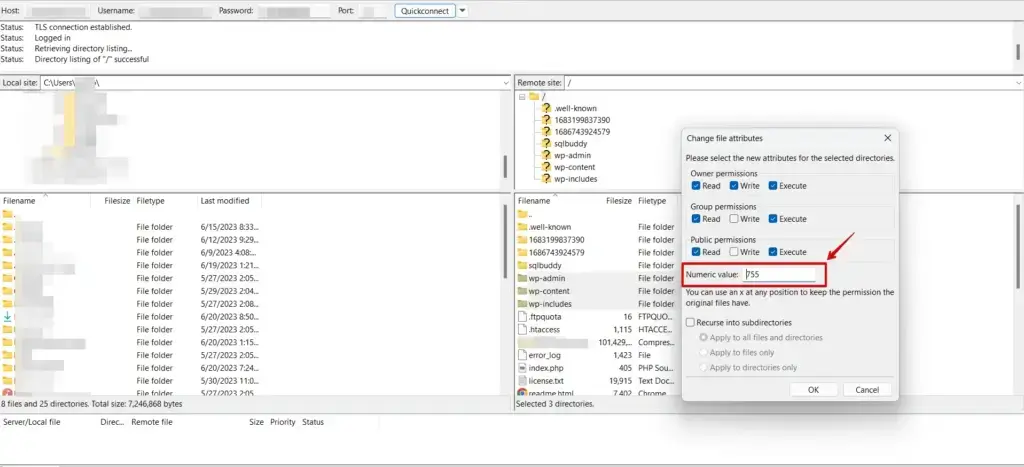
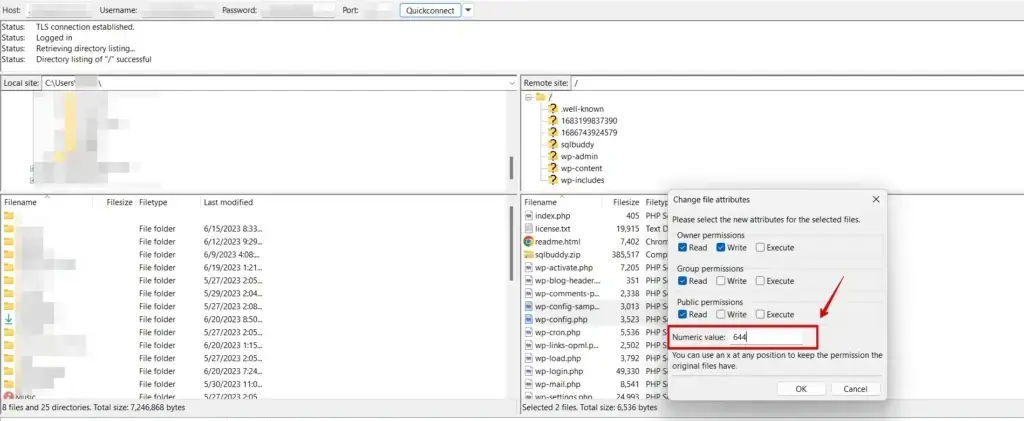
5. Adjust File Permissions
Improper file permissions can prevent resources from being loaded. Ensure the files and directories related to the resource have the correct permissions.
Generally, directories should have a permission of 755, and files should be set to 644.
6. Increase PHP Memory Limit
Increase the PHP memory limit in your server configuration or modify the wp-config.php file to allocate more resources to your site. Read more about increasing the PHP memory limit.
To increase the PHP memory limit in WordPress, you can follow these steps:
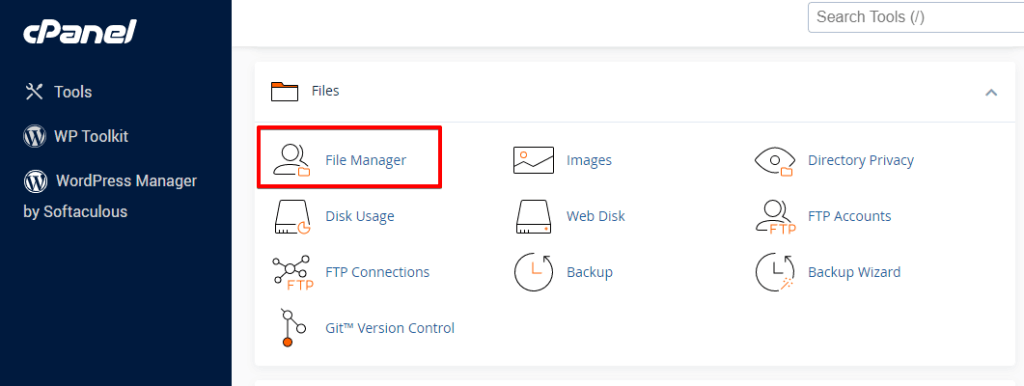
- Log in to your cPanel account provided by your hosting provider.
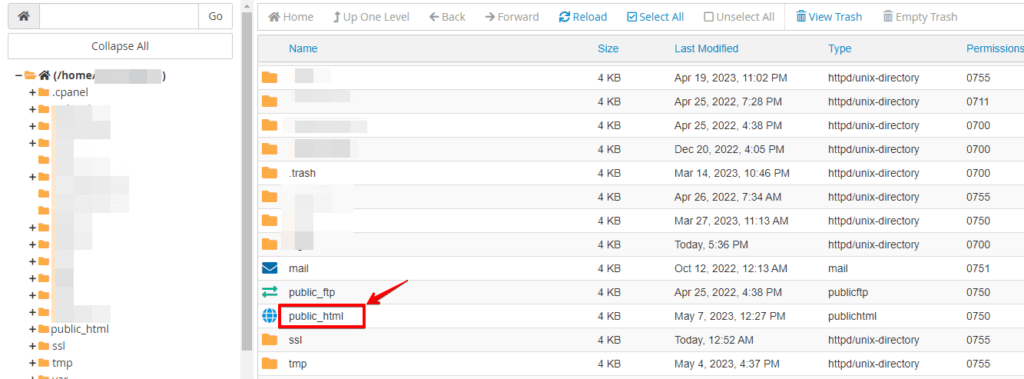
- Locate the root directory of your WordPress installation (usually named “public_html” or “www”).
- Look for the wp-config.php file and open it.

- Scroll down to the section that contains the PHP settings.
- Add the following line of code just above the line that says, “That’s all, stop editing! Happy blogging.”
define('WP_MEMORY_LIMIT', '256M');
You can adjust the memory limit value (e.g., ‘256M’) based on your specific requirements.
- Save the changes to the wp-config.php file.

Best Practices to Prevent WP Staging Failed Backups
Implementing best practices can help mitigate the risk of failing backups in WP staging environments.
- Regularly Monitoring – Server resources and upgrades as needed to accommodate backup processes.
- Keep Plugins Updated – Avoid using conflicting plugins simultaneously.
- File Permissions – Double-check file permissions and ensure they align with recommended configurations.
- Test Backups – regularly to verify their integrity and functionality.
Conclusion
While facing failed backups in WP staging environments can be challenging, understanding the underlying causes and implementing effective solutions can help resolve these issues efficiently.
Users can simplify the backup process by addressing server resources, plugin conflicts, file permissions, and old-aged plugins.
Try now!