The 503 Service Unavailable Error can be frustrating for both website owners and visitors alike, as it prevents access to your valuable content. However, the good news is that this error can be resolved with proper troubleshooting techniques.
This blog post will guide you through a step-by-step process to troubleshoot the 503 Service Unavailable Error in WordPress.
Contents
The “503 Service Unavailable” error can occur due to various reasons:
- Server Overload: If your server is overwhelmed with excessive traffic or resource-intensive processes, it may result in a 503 error.
- Maintenance Mode: Manually or through a plugin, putting your website into maintenance mode can trigger the 503 error.
- Plugin or Theme Issues: Incompatibilities or conflicts with plugins or themes can lead to the 503 error.
- Server Misconfiguration: Incorrect server configurations or settings can cause the 503 error.
- DDoS Attacks: Distributed Denial of Service (DDoS) attacks can overwhelm your server with a massive influx of malicious traffic, making it unavailable and displaying the 503 error.
- Backend Server Issues: A 503 error can occur if the backend services or databases supporting your WordPress website are experiencing technical difficulties or undergoing maintenance.
Identifying the cause of the error and taking necessary actions can resolve the issue.
- Clear Browser Cache
- Review .htaccess File
- Repair Database
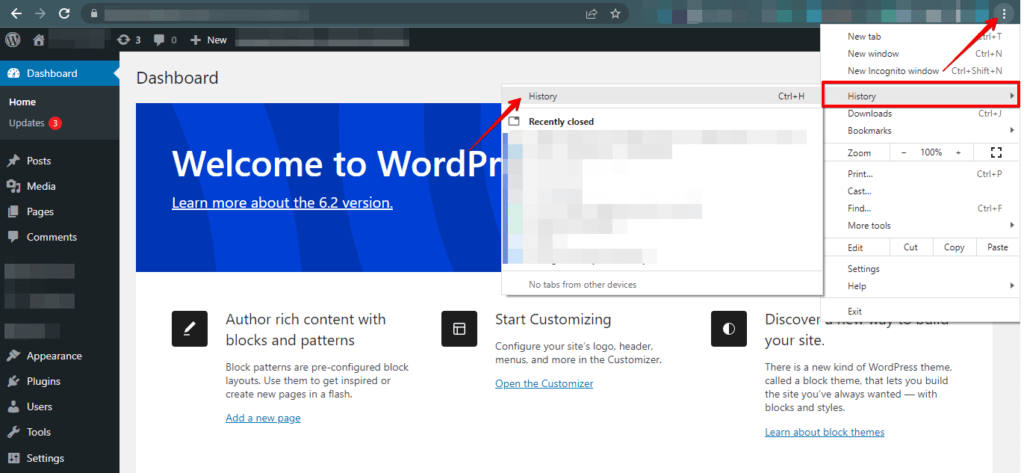
Method 1: Clear Browser Cache
Here’s a step-by-step guide on how to clear the browser cache.
- Launch your web browser and open the settings menu.
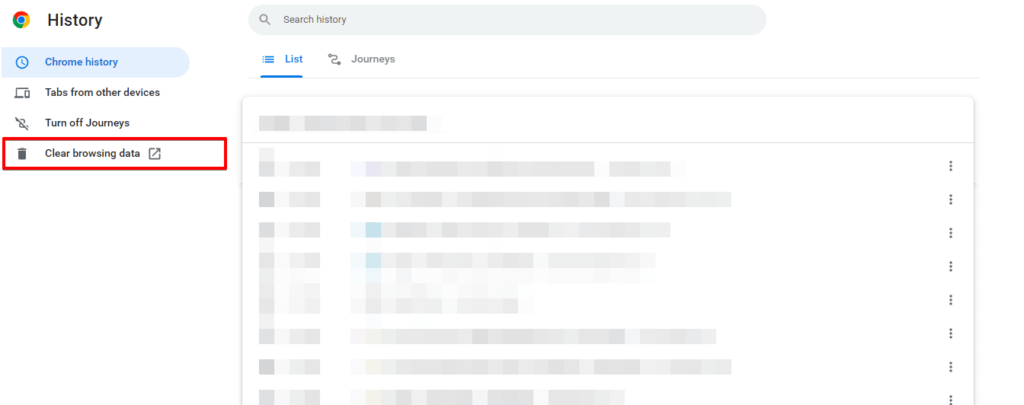
- Go to the option to browse history or privacy settings.
- Find the cache-clearing option and choose it.
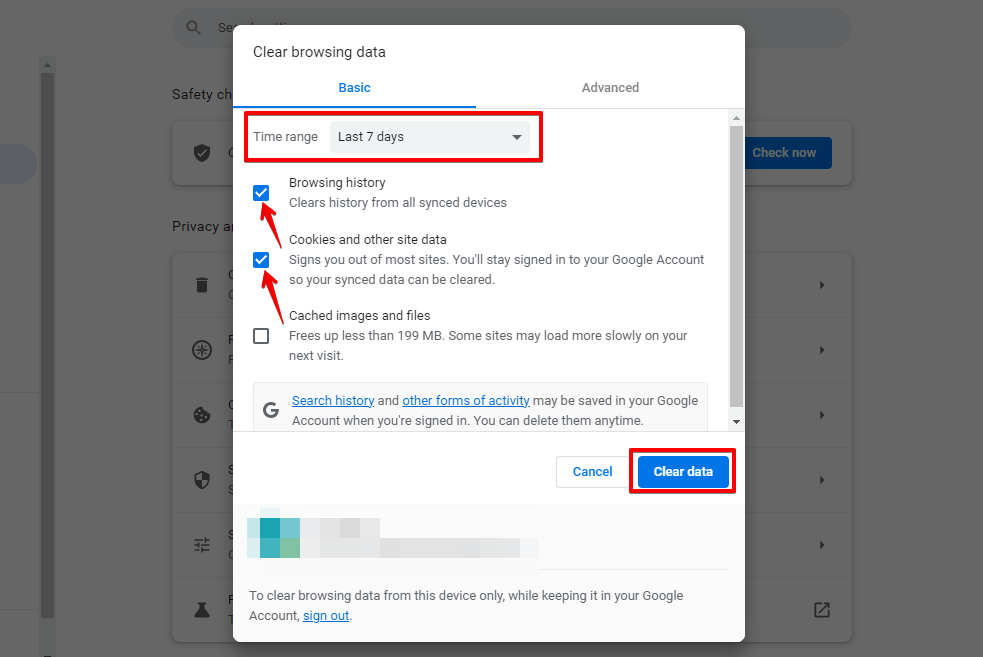
- Select the time range for which you want to clear the cache.
- Select the cache type you want to clear, such as cookies or history.
- Click the “Clear data” or “Clear cache” button to delete the selected data.
- Reboot your web browser to ensure the changes are applied.
Clearing the cache can resolve the 503 Service Unavailable Error by removing outdated or corrupted cached data. However, it may delete other saved data, such as login information and site preferences.
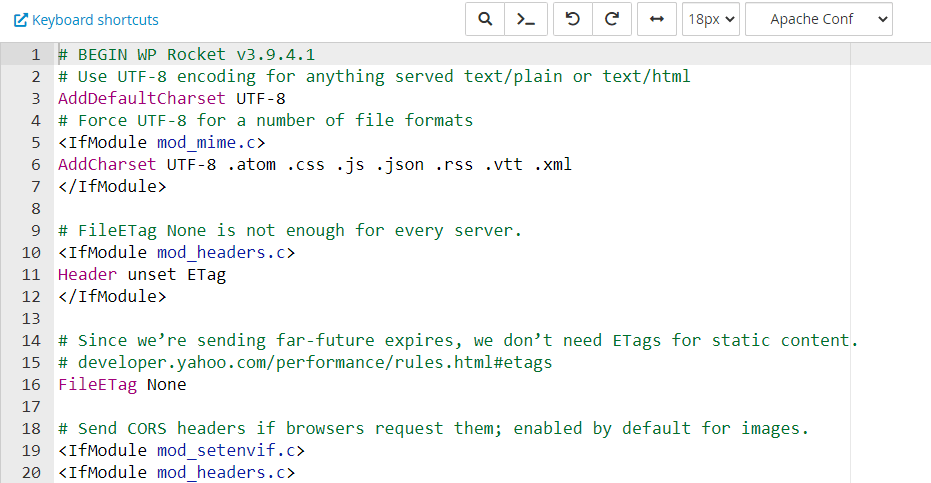
Method 2: Review .htaccess File
To review the .htaccess file in your WordPress site, you can follow these steps:
- Access your hosting control panel by visiting your website’s cPanel login URL and entering your credentials.
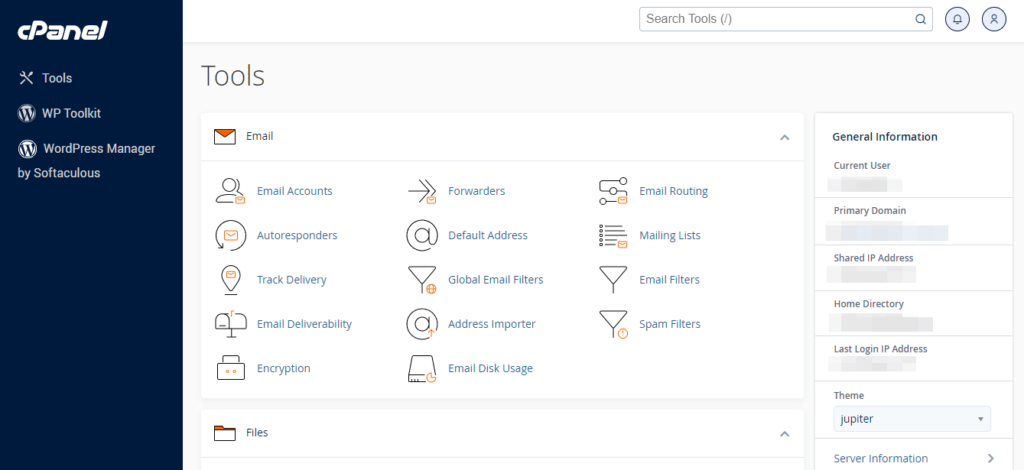
- Look for the “File Manager” or “Files” section within cPanel. Click on it to open the file management interface.
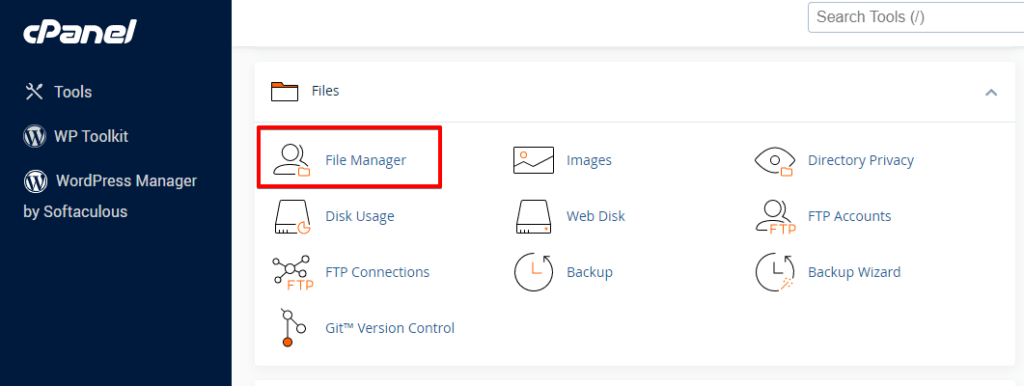
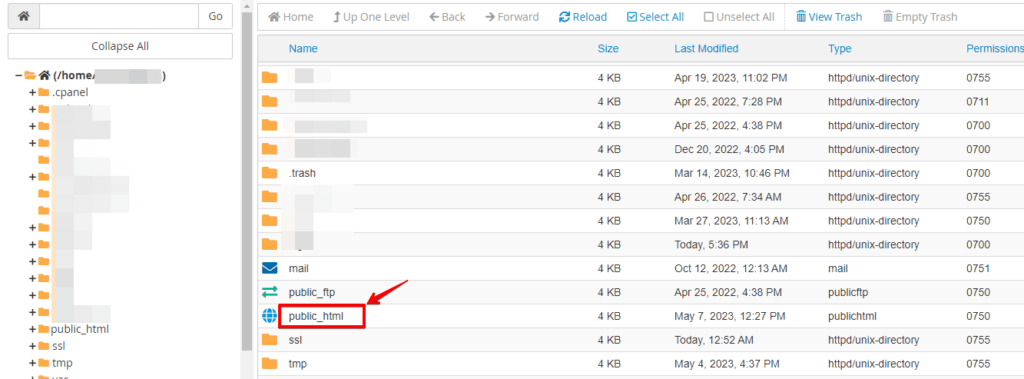
- In the File Manager, navigate to the directory where your WordPress site is installed. This is typically the “public_html” or “www” directory.

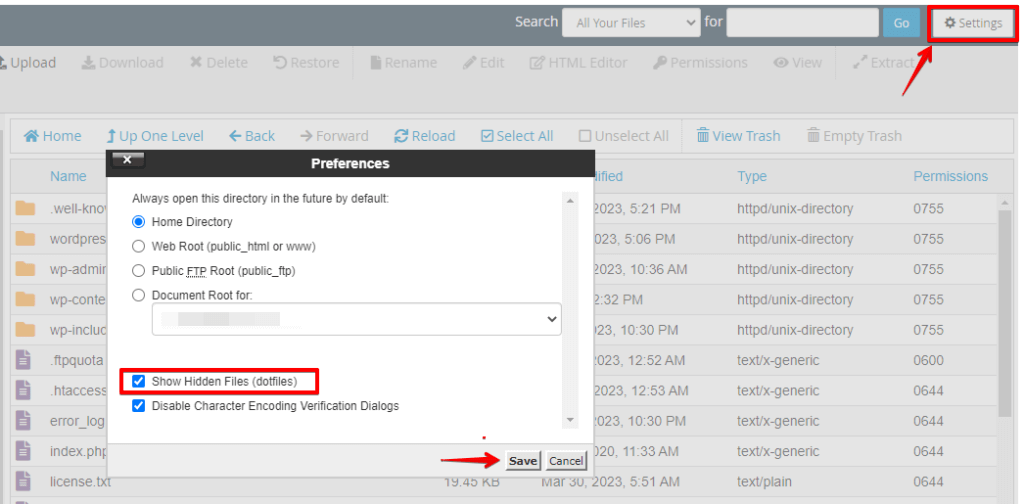
- To make hidden files like .htaccess visible in cPanel’s File Manager, go to “Settings” or “Preferences,” enable the “Show Hidden Files (dotfiles)” option, and save the changes.
- Once hidden files are visible, you should be able to locate the .htaccess file in the website’s directory. Right-click on the file and select “Edit” or “Code Edit” from the context menu.
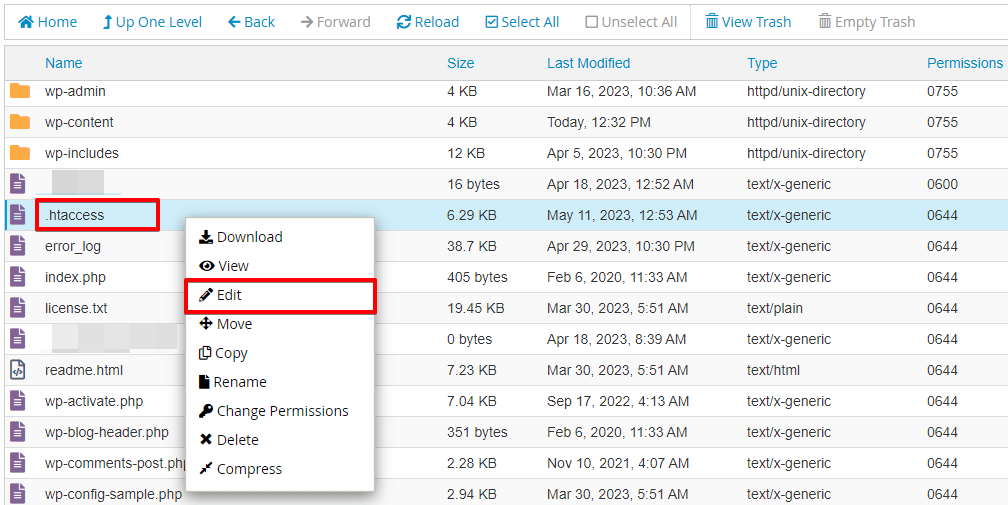
- Open the .htaccess file in cPanel’s text editor. Review the content for relevant rules or directives that could cause the 503 Service Unavailable error.
- If you find problematic rules or directives, make necessary modifications to the .htaccess file. Be cautious and understand the potential impact on your website.
- After making the modifications, click the “Save Changes” or “Save” button in the text editor within cPanel.
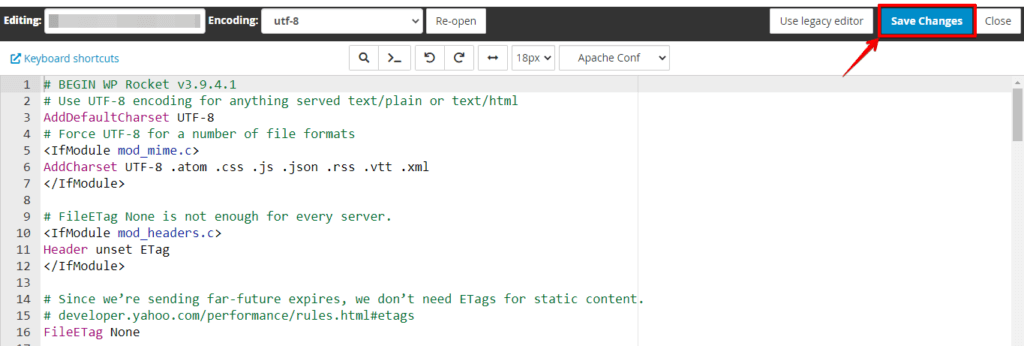
Visit your WordPress site and test its functionality. Check if the 503 Service Unavailable error has been resolved and if the website works as expected.
Method 3: Repair Database
To repair the WordPress database, you can follow these steps:
- Log in to your cPanel account.

- Locate the “File Manager” or “Files” section within cPanel and click on it to open the file management interface.

- In the File Manager, navigate to the directory where your WordPress installation is located. Typically, this is the “public_html” or “www” directory.
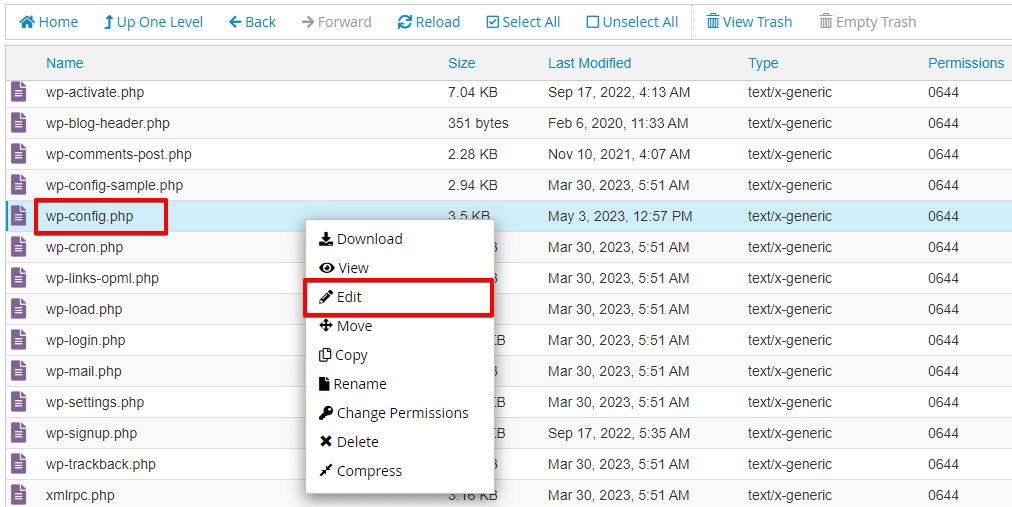
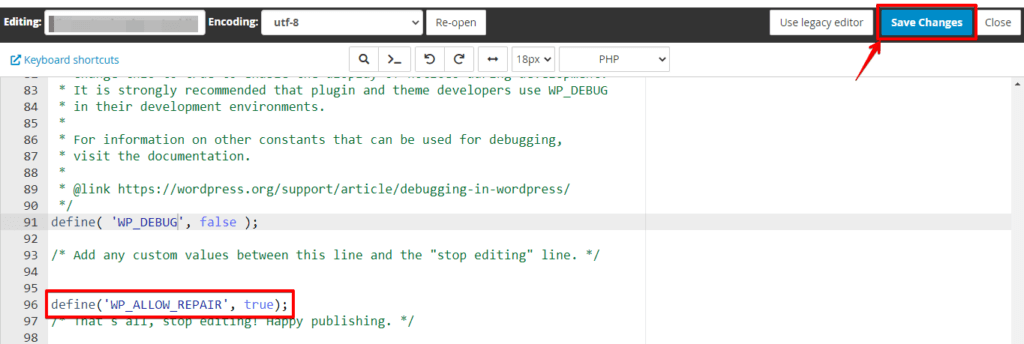
- Look for the wp-config.php file in the WordPress installation directory. It is usually located at the root of the directory.
- Right-click the wp-config.php file and select “Edit” or “Code Edit” from the context menu.
- Add the following line of code just above the line that says, “That’s all, stop editing! Happy blogging.”
- Save the changes to the
wp-config.phpfile.
- Next, open your web browser and go to http://yoursite.com/wp-admin/maint/repair.php. Click on the “Repair Database” button to initiate the repair process.
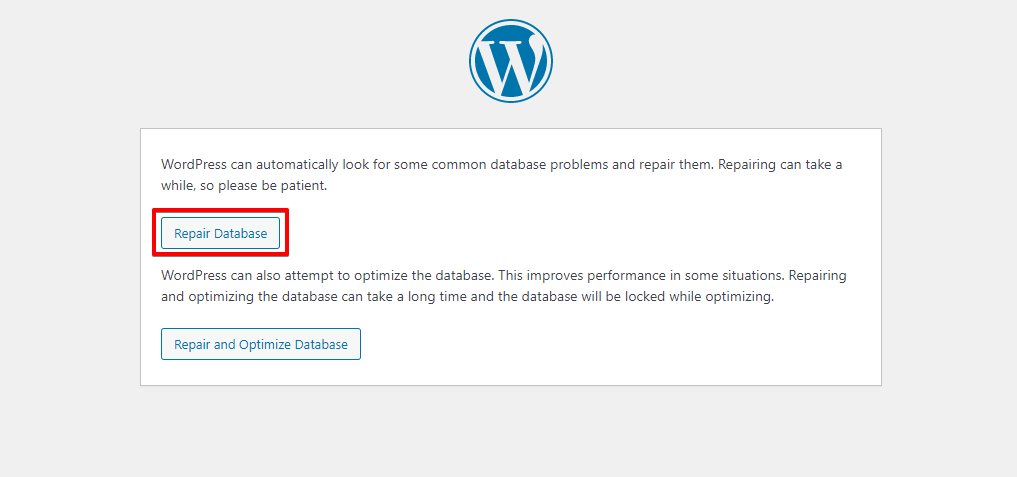
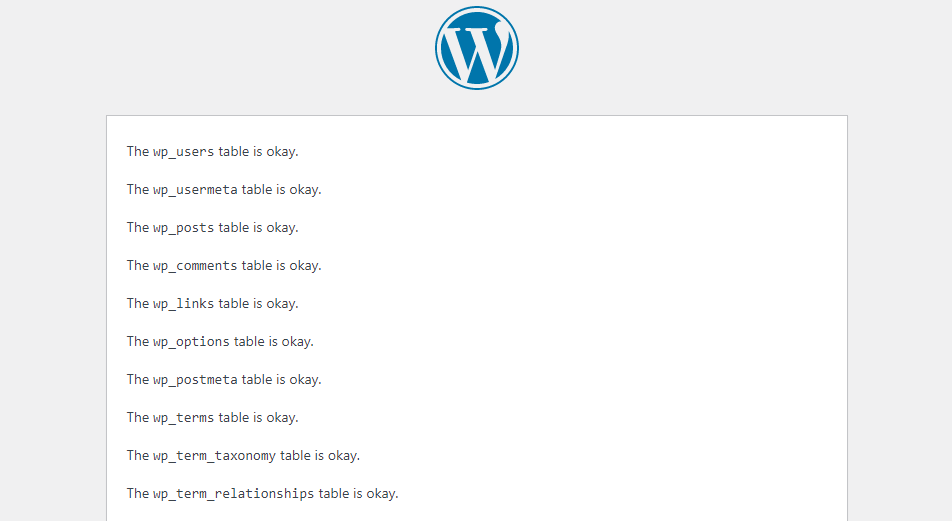
- Once the repair process is complete, you will see a message indicating the repair status.
Note that using define(‘WP_ALLOW_REPAIR’, true); temporarily enables the database repair feature in WordPress. After completing the repair process, remember to remove or comment out this line of code to prevent unauthorized access to the repair functionality.
Conclusion
The 503 Service Unavailable Error is a temporary disruption that can occur on websites due to server-related issues, maintenance activities, conflicts, or attacks.
Resolving the error involves identifying the underlying cause and implementing appropriate solutions. By addressing these factors, website owners can ensure a reliable and uninterrupted user experience.