
If you’re working with WordPress, you might have encountered the frustrating “Installation Failed: Could Not Create Directory” error. This message usually appears when trying to install or update plugins or themes.
Don’t worry; it’s a common issue and can be fixed quickly.
Contents
What Causes This Error?
The “Installation Failed: Could Not Create Directory.” error in WordPress can be caused by several server settings and permissions issues. Here are the most common causes:
- Incorrect File Permissions: Necessary files and directories don’t require read/write permissions.
- Incorrect Ownership: Files and directories aren’t owned by the correct user under which the server operates.
- Disk Space Limitations: Insufficient storage space on the server to create new files or directories.
- Security Plugins: Overly restrictive security settings that prevent file modifications.
- Server Configuration Issues: Settings in server configuration files like
php.inior.htaccessthat restrict file operations. - Hosting Provider Restrictions: Specific security or operational policies set by the hosting provider that limit file creation or modification.
Methods to Fix “Installation Failed: Could Not Create Directory.” Error
- Check File Permissions
- Increase PHP Memory Limit in wp-config.php
- Check Disk Space
- Review Your Server Error Log
- Verify .htaccess File
Note: It’s always a good idea to back up your website before making any changes. That way, if something goes wrong, you can quickly restore everything to its original state. WP Staging makes it easy to set up automatic backups. For more help, check out the backup and restore guide.
1. Check File Permissions
File permissions control access to files and directories on your server. Incorrect permissions can prevent WordPress from creating directories or uploading files, causing the “Installation Failed: Could Not Create Directory” error.
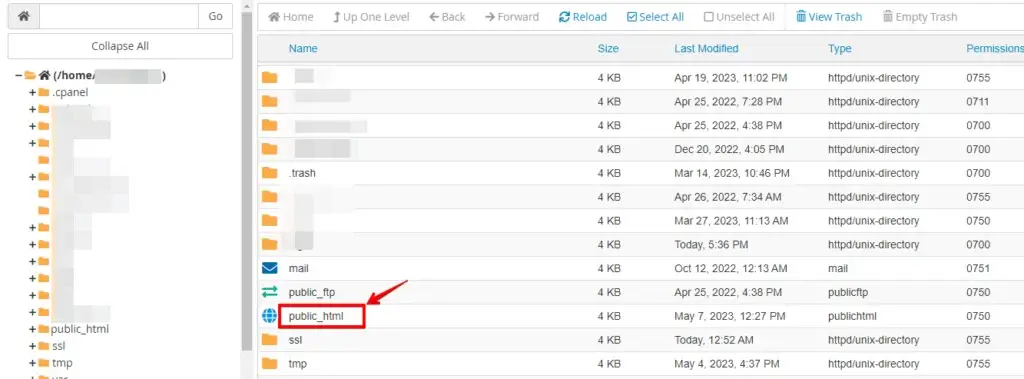
Access your WordPress files using an FTP client or the file manager offered by your hosting provider.
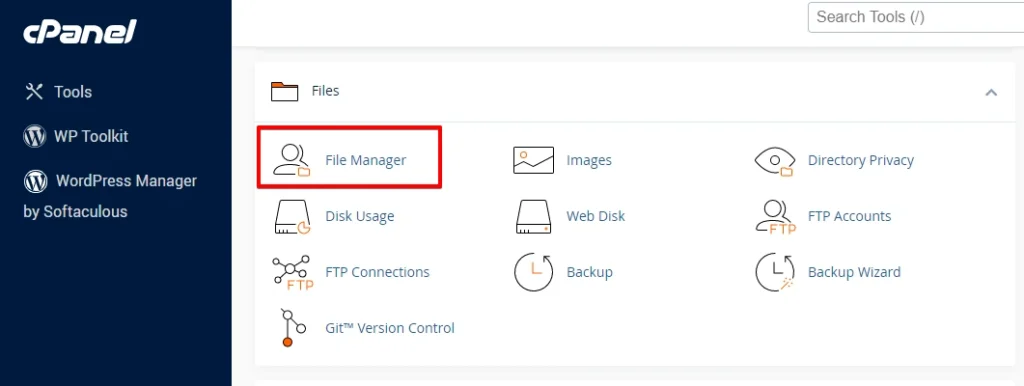
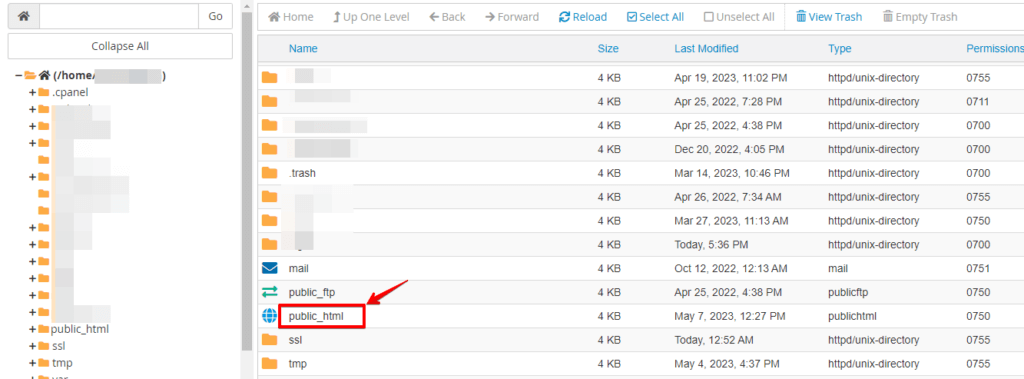
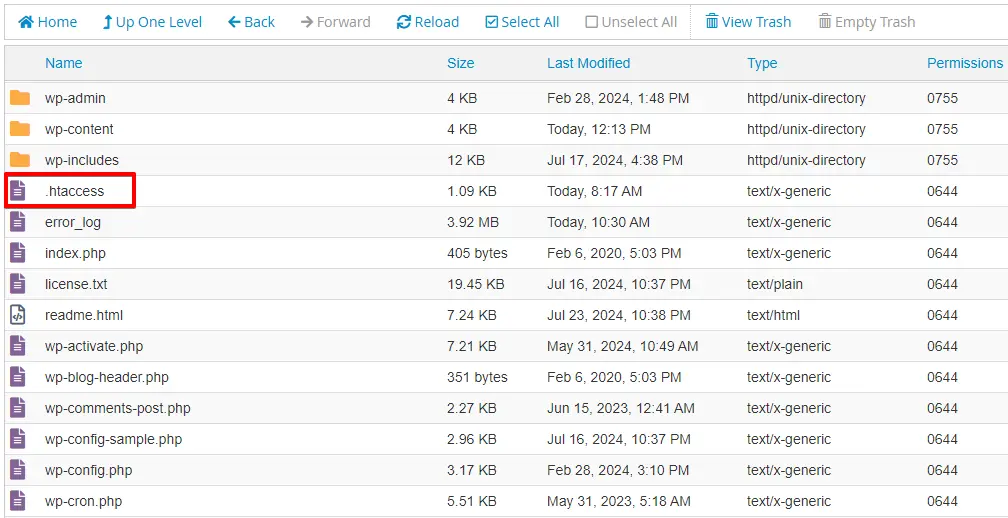
In the File Manager, navigate to the directory where your WordPress installation is located. This is usually the public_html or the “www” directory.
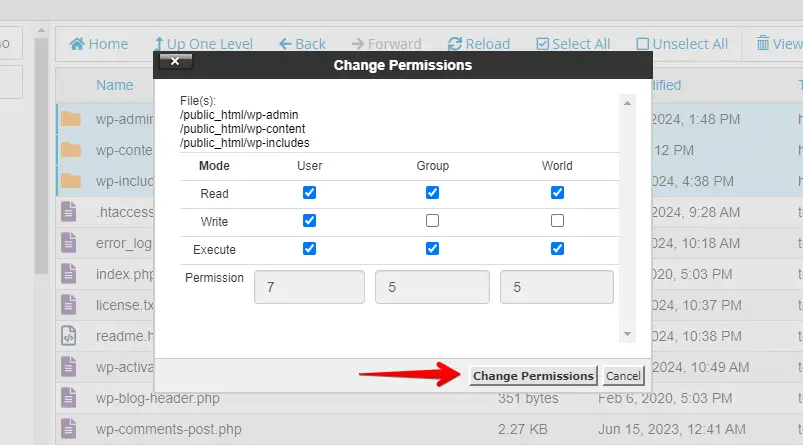
Locate the wp-content, wp-includes, and wp-admin directories. Right-click on each one and select “Change Permissions.”
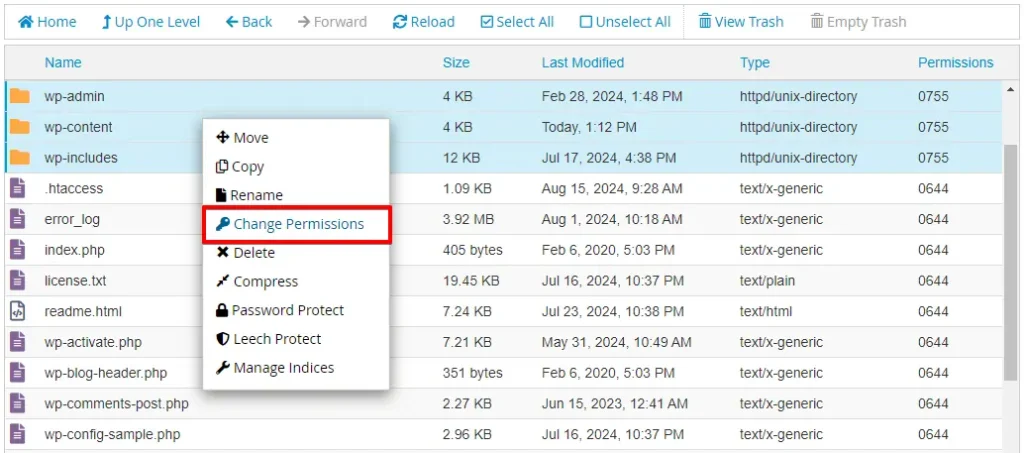
Set the permissions to 755. The owner can read, write, and execute, while the group and public can only read and execute. Then click the “Change Permissions” button.
Try your installation or update again to see if the error is resolved. Setting the correct file permissions ensures WordPress has access to create directories and upload files without issues.
2. Increase PHP Memory Limit in wp-config.php
Increasing the PHP memory limit can resolve the “Installation Failed: Could Not Create Directory” error by providing WordPress with more resources to handle installations and updates. Here’s how to increase the PHP memory limit:
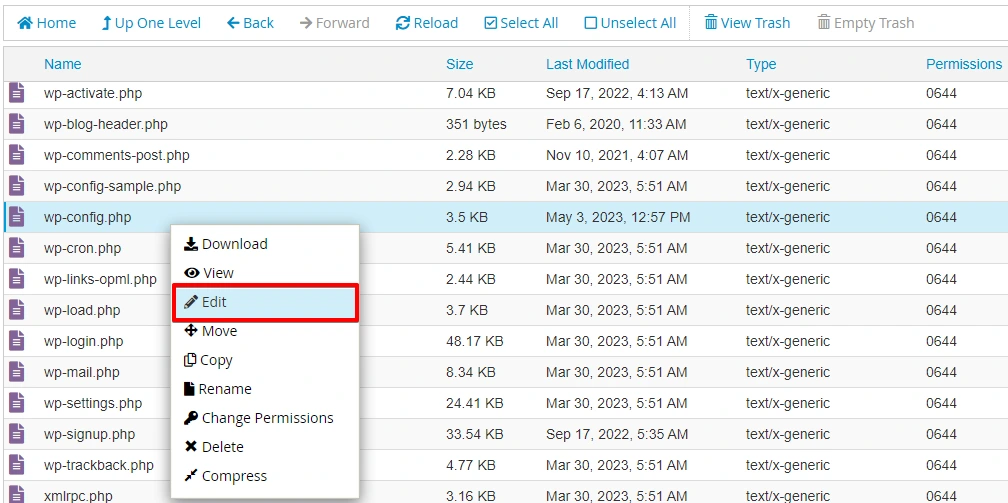
Access your WordPress files through FTP or a file manager provided by your hosting provider.
Find the root directory of your WordPress installation, typically called “public_html” or “www.”
Locate the wp-config.php file in your WordPress root directory, right-click on it, and choose “Edit.”
Scroll down to the section with the PHP settings. Add the following line of code just above the line that says, “That’s all, stop editing! Happy blogging.”
define('WP_MEMORY_LIMIT', '256M');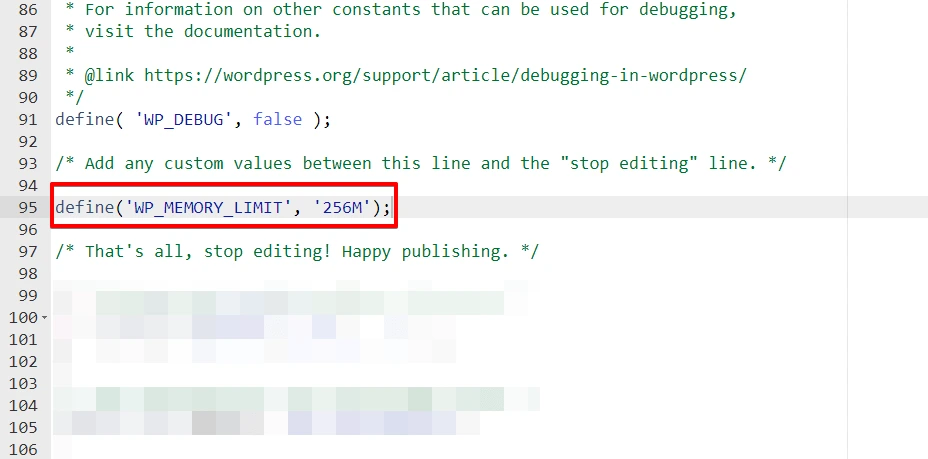
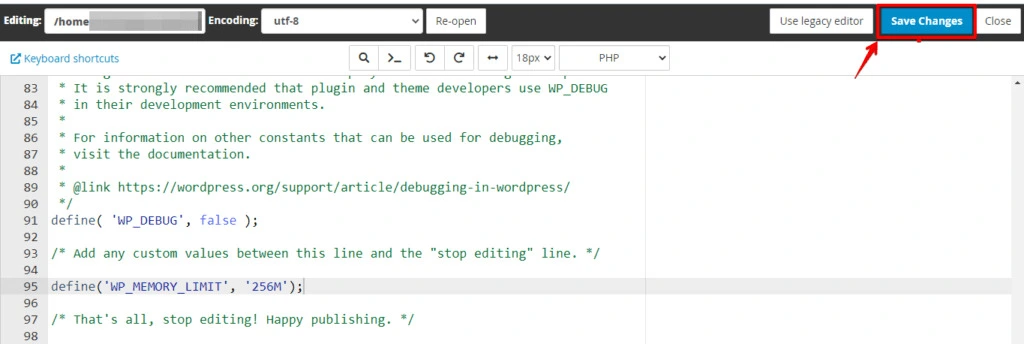
You can adjust the memory limit value (e.g., ‘256M’) based on your specific requirements. After that, click the “Save Changes” button to save the wp-config.php file.
Increasing the PHP memory limit helps WordPress handle larger processes and files, reducing the risk of running out of memory during installations or updates. If the error continues, consider other solutions.
3. Check Disk Space
Running out of disk space can prevent WordPress from creating directories or uploading files, leading to the “Installation Failed: Could Not Create Directory” error. Here’s how to check and manage your disk space:
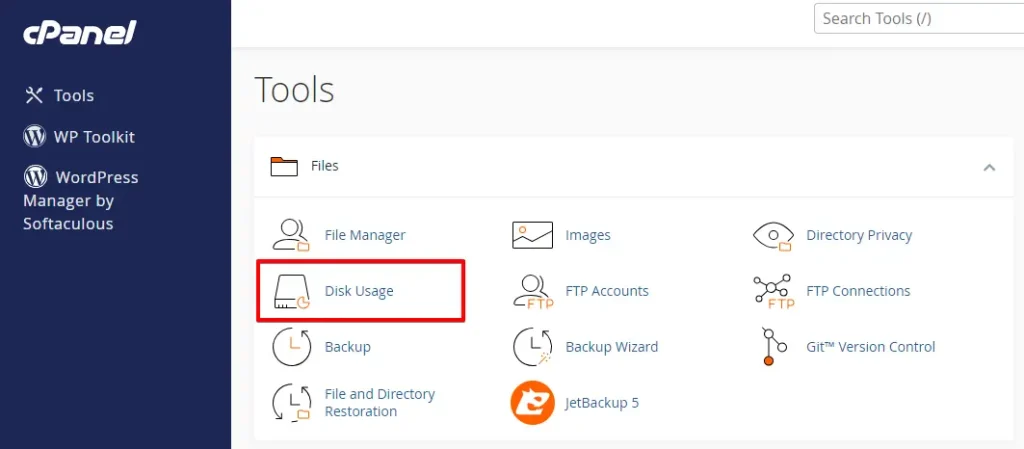
Log in to your hosting account’s control panel, like cPanel or a similar interface, and locate the section that displays your current disk usage. This may be labeled as “Disk Usage,” “Storage,” or something similar.
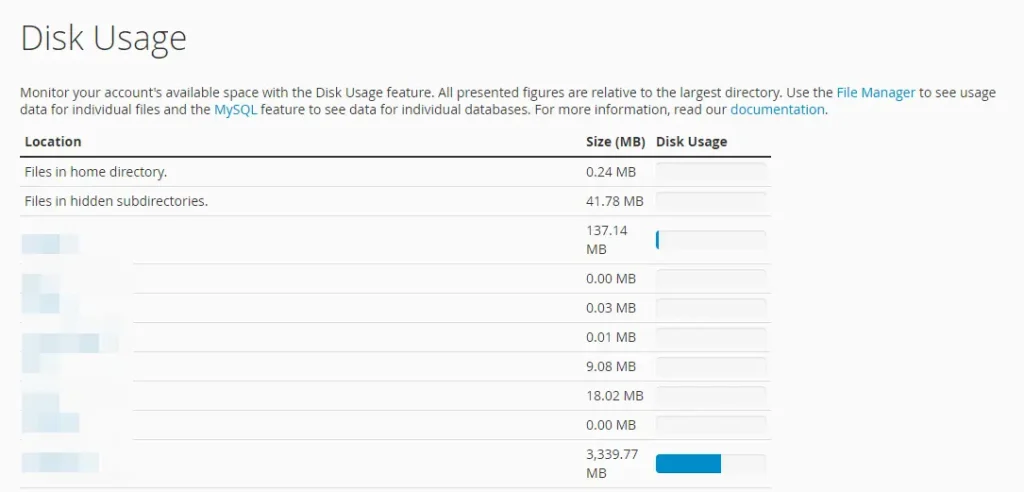
Review the available disk space on your account. If it’s low or complete, free up space by deleting unnecessary files or backups, removing unused themes or plugins, or upgrading your hosting plan.
After managing your disk space, try the installation or update again to see if the error is resolved.
4. Review Your Server Error Log
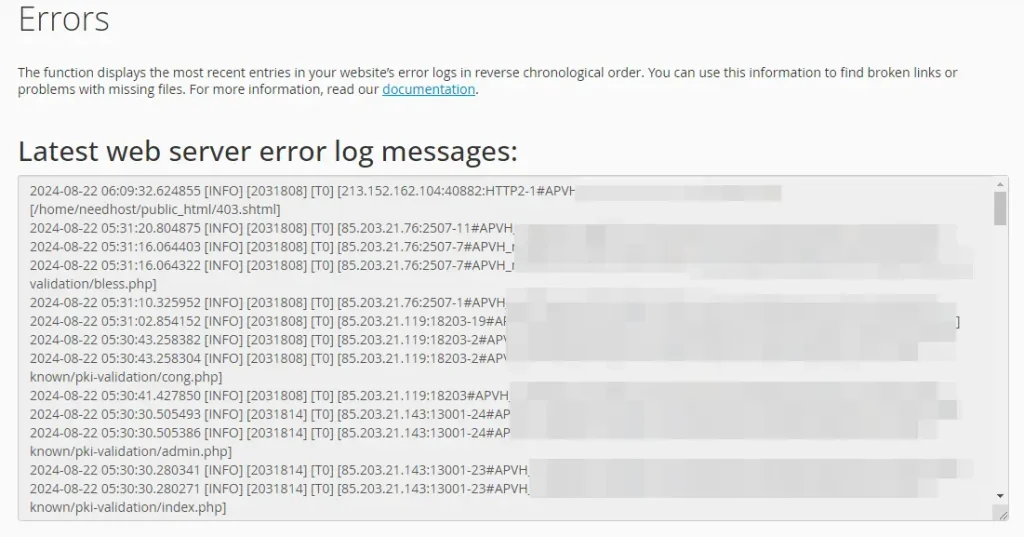
Reviewing your server’s error log can pinpoint the cause of the “Installation Failed: Could Not Create Directory” error in WordPress. The log provides detailed information on server issues, helping you find the right solution.
Log in to your hosting control panel, such as cPanel, Plesk, or a similar interface provided by your hosting provider.
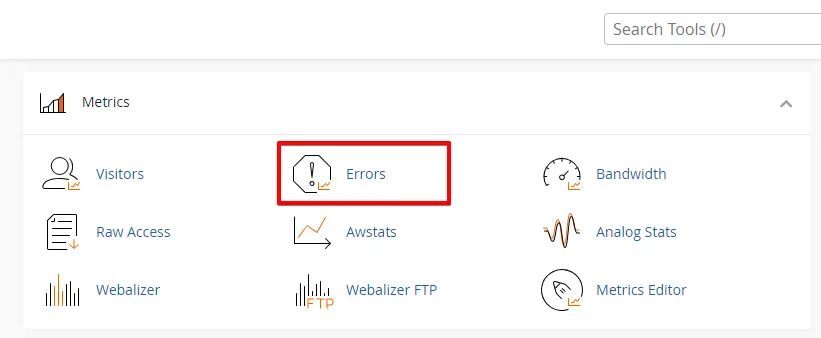
Look for a section labeled “Error Log,” “Errors,” or “Server Logs.” This is usually found under the “Metrics” or “Advanced” categories.
The logs reveal server errors, including file permissions, memory limits, or disk space issues. Use this information to identify and address the cause, such as permissions, resource shortages, or misconfiguration.
If you’re unsure how to resolve the errors in the log, or if the issue seems complex, contact your hosting provider for assistance. They can help you interpret the log entries and suggest solutions.
5. Verify .htaccess File
The .htaccess file controls essential settings for your WordPress site. A corrupted or misconfigured .htaccess file can cause the “Installation Failed: Could Not Create Directory” error. Here’s how to check and fix it:
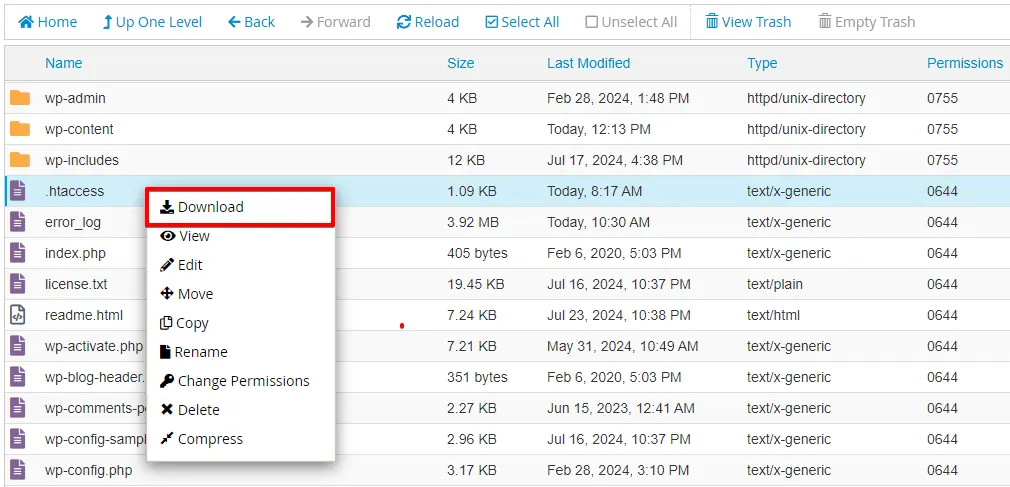
Use an FTP client or your hosting file manager to locate the .htaccess file in the root directory.
Right-click on the .htaccess file and select “Download” to create a backup on your computer.
After downloading the backup, right-click on the .htaccess file again and select the “Rename” option. This action will temporarily disable your .htaccess file.
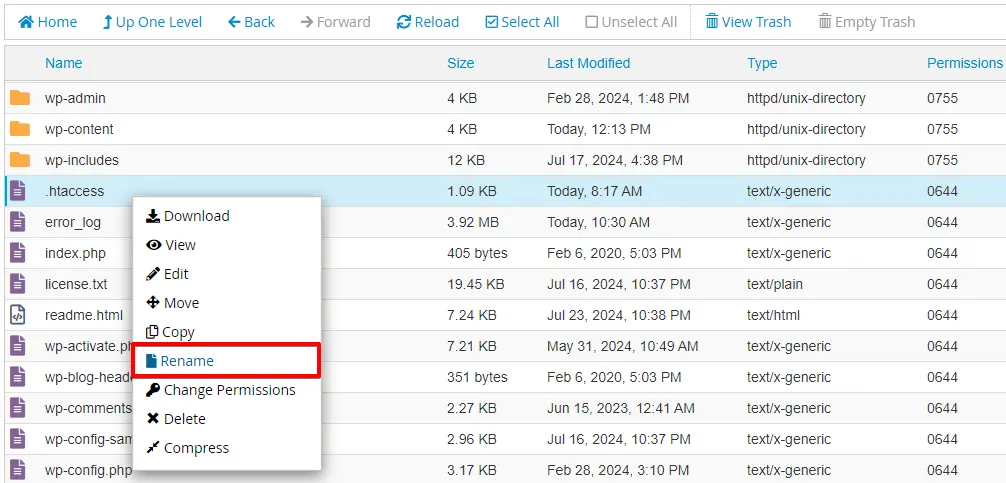
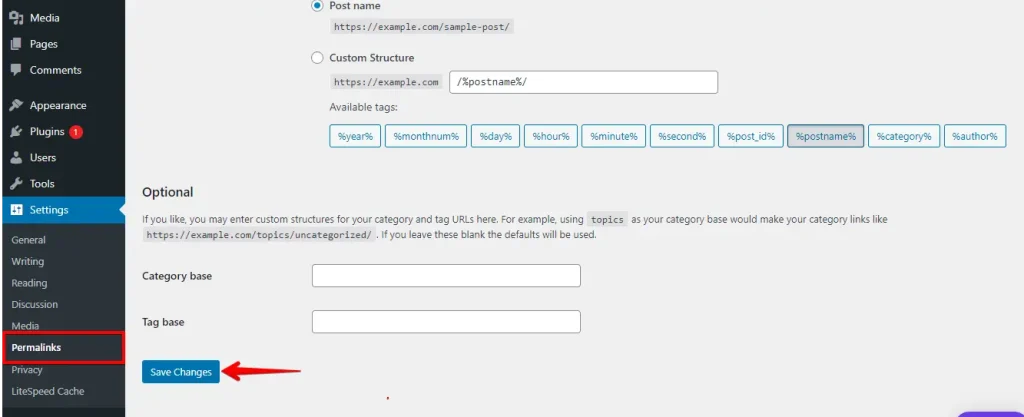
If renaming the file fixes the issue, regenerate a new .htaccess file by going to Settings > Permalinks in your WordPress dashboard and clicking “Save Changes.”
After regenerating the .htaccess file, try the installation or update again. A faulty .htaccess file can prevent WordPress from creating directories. Fixing it ensures smooth operation and resolves the error.
Conclusion
The “Installation Failed: Could Not Create Directory” error can be frustrating, but it’s usually fixable with a few adjustments. Start by checking file permissions settings to ensure WordPress has the necessary access.
Next, increase the PHP memory limit in your wp-config.php file to handle more extensive processes. Verify that you have enough disk space and review your server error log for specific issues. If necessary, check and regenerate the .htaccess file to resolve any configuration problems.
With these steps, you should be able to fix the error and continue managing your WordPress site smoothly.