In the dynamic landscape of website management, migrating from WordPress.com to Bluehost can be a game-changer for your online presence. This comprehensive guide aims to provide you with a step-by-step process to transition seamlessly, ensuring that your website retains its integrity and thrives in the new hosting environment.
Contents
Understanding the Benefits of Migrating to Bluehost
Switching to Bluehost offers website owners improved performance, flexibility, and control. Discover the benefits below to understand how this move can enhance your online presence.
- Enhanced Performance: Faster loading times and reliable uptime for a seamless user experience.
- Unmatched Flexibility: Tailor hosting to your website’s needs, from blogs to e-commerce.
- Robust Security Features: SSL certificates, automated backups, and malware detection ensure website security.
- Seamless Scalability: Easily upgrade hosting plans to accommodate growth in traffic and content.
- User-Friendly Interface: Intuitive control panel for efficient website management, suitable for all skill levels.
Getting Ready for the Migration
Before initiating the migration process, it’s crucial to adhere to a set of key steps:
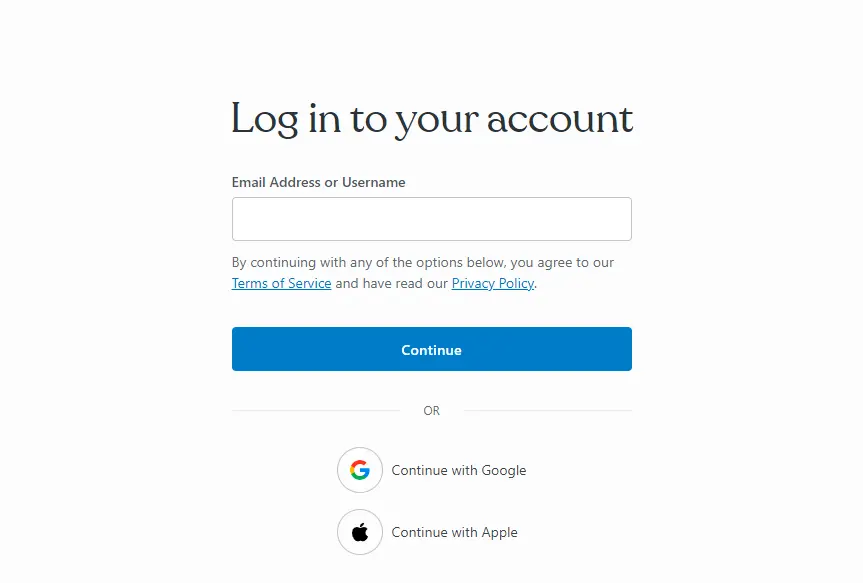
- Log into your WordPress.com account.
- Navigate to the "Plugins" section in the WordPress dashboard and click the "Upload" button.
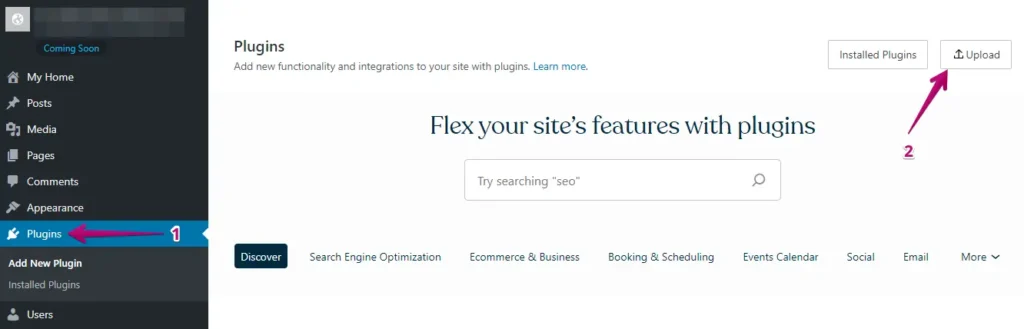
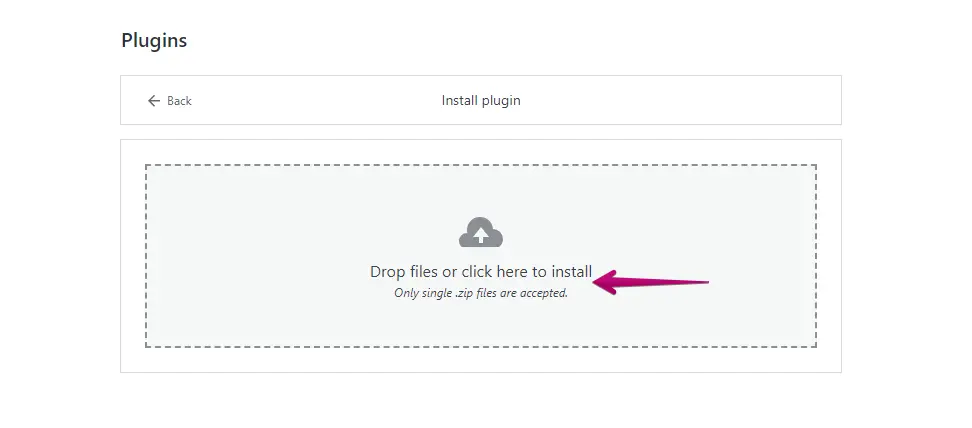
- Next, go ahead and upload your WP Staging | Pro.
- After installing and activating it, go to the "Backup & Migration" section, typically found in the WordPress dashboard under "WP Staging | Pro."
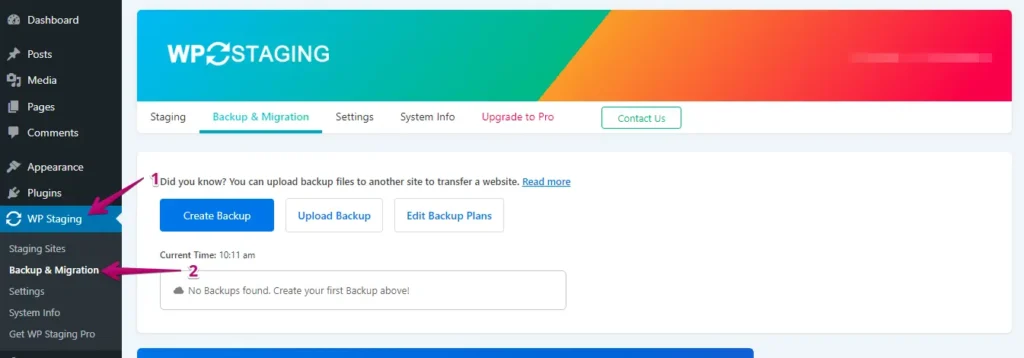
- If you already have an existing backup, that’s great. Otherwise, to create a new backup, click the "Create Backup" button.
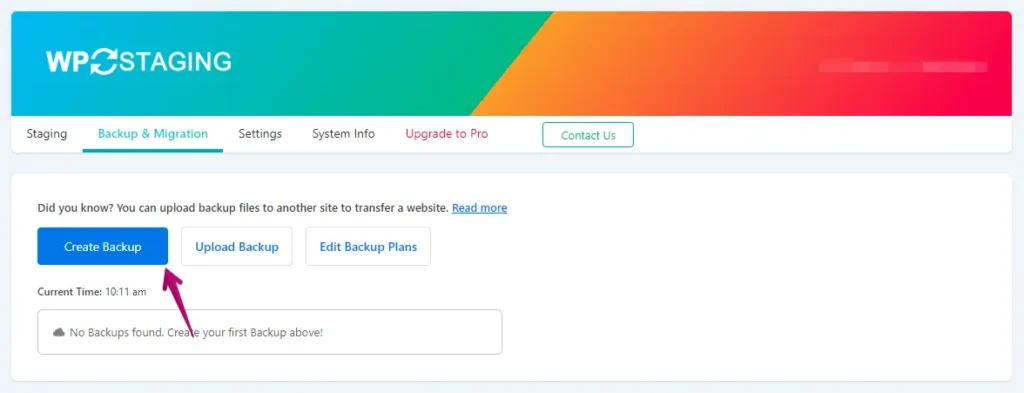
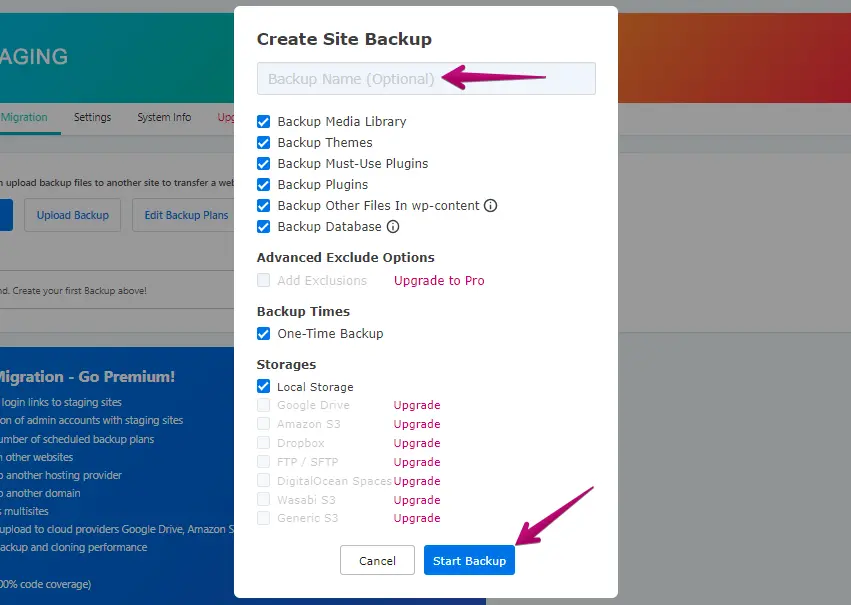
- Name your backup and then click the "Start Backup" button.
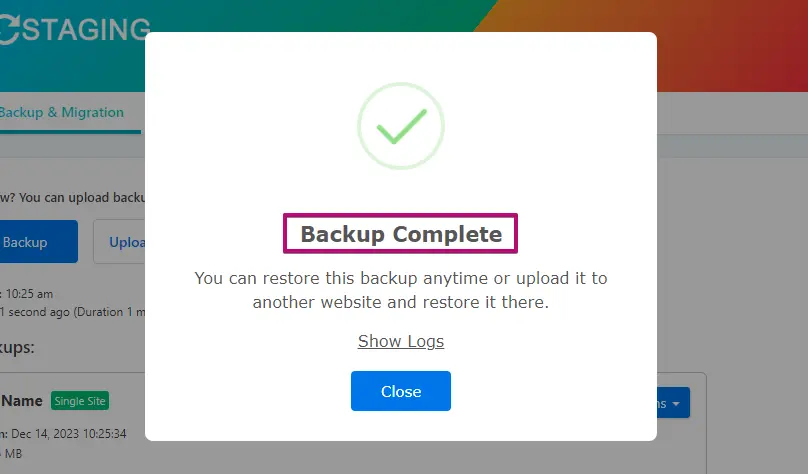
- The backup process has been successfully finished.
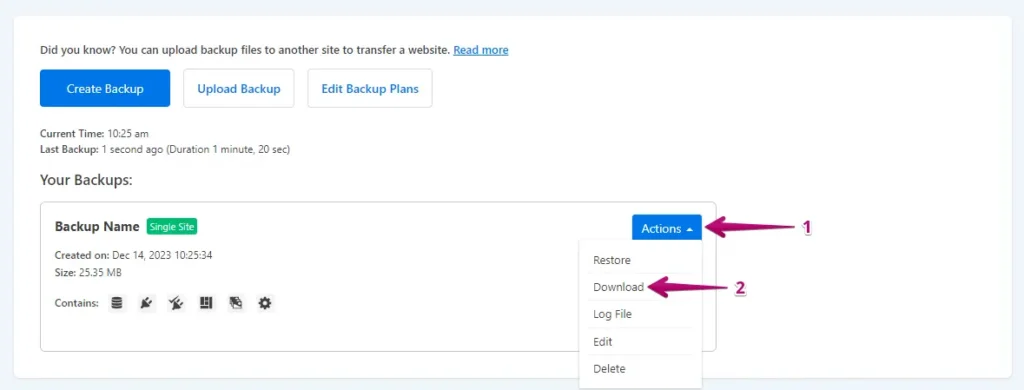
- Once the backup process is complete, you’ll usually see a "Download" option under the "Action" button. Make sure to save this backup file in a secure location on your computer.
The Process of Migration
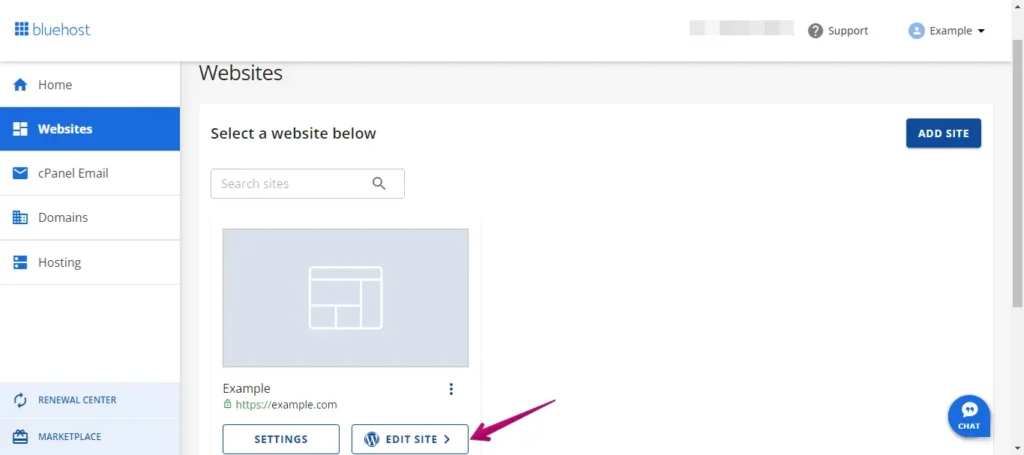
- Log in to your Bluehost WordPress website using your username and password or through the Bluehost admin panel.
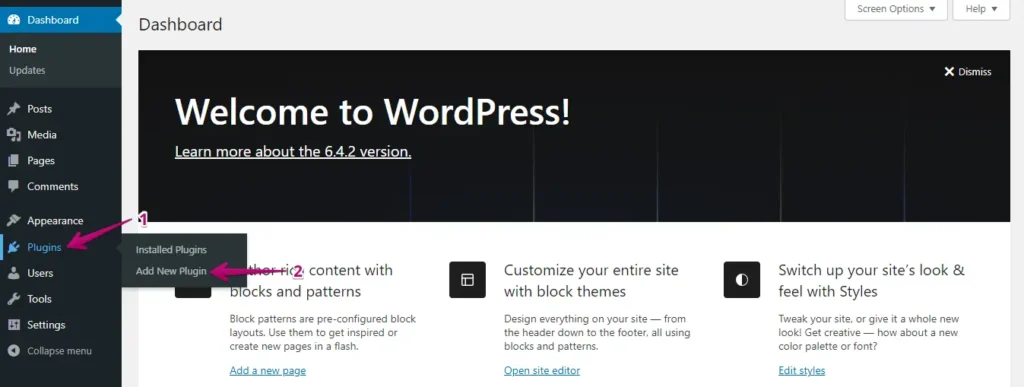
- Navigate to the menu on the left, click "Plugins," and then click "Add New."
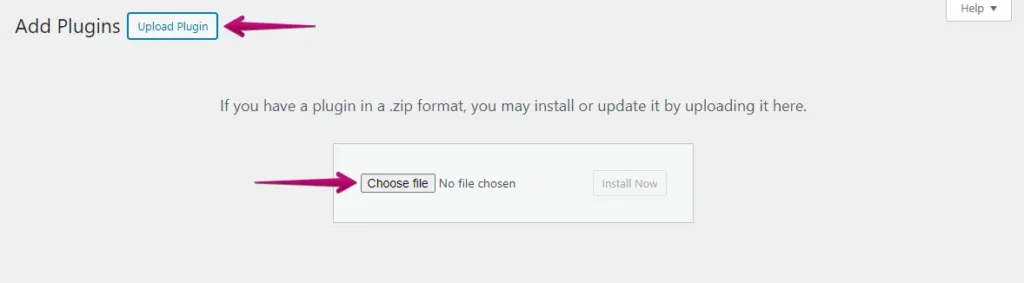
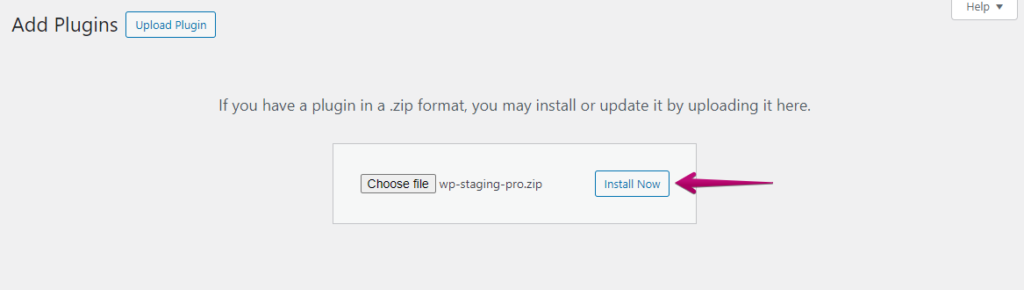
- Click the "Upload Plugin" button, and then "Choose File" to upload the WP Staging Pro plugin file wp-staging-pro.zip.
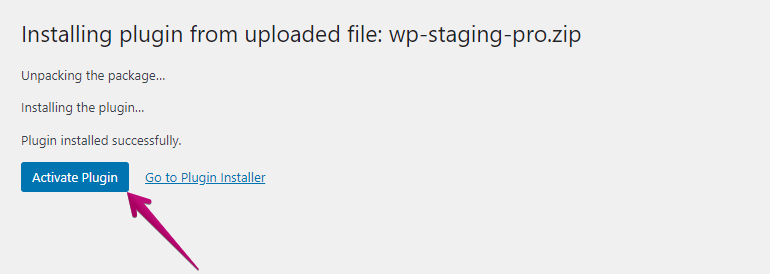
- Then, click the ‘Install Now’ button.
- After installing the plugin, activate it.
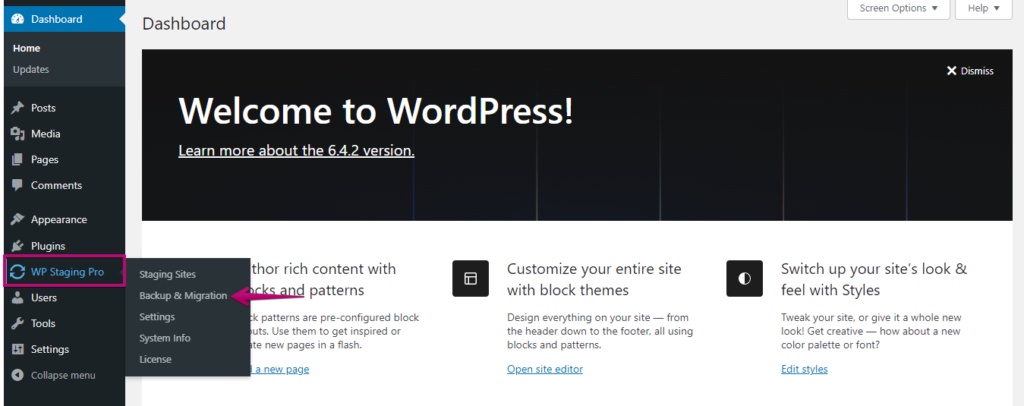
- Navigate to the left-hand menu, locate ‘WP Staging Pro,’ and select the ‘Backup & Migration’ option.
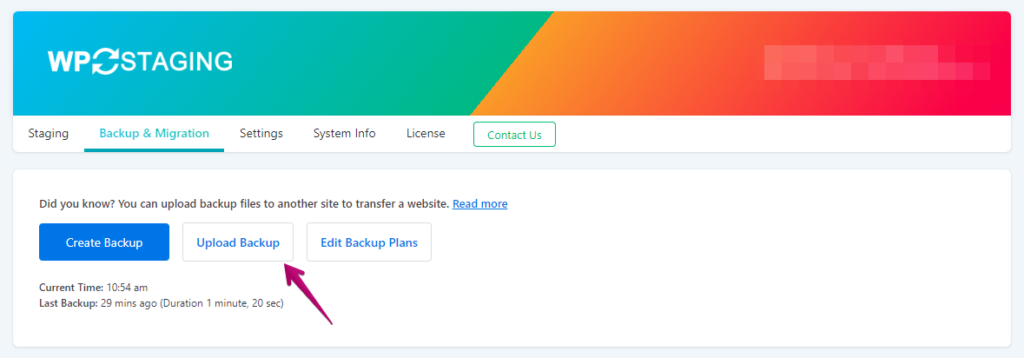
- Next, click the ‘Upload Backup’ button.
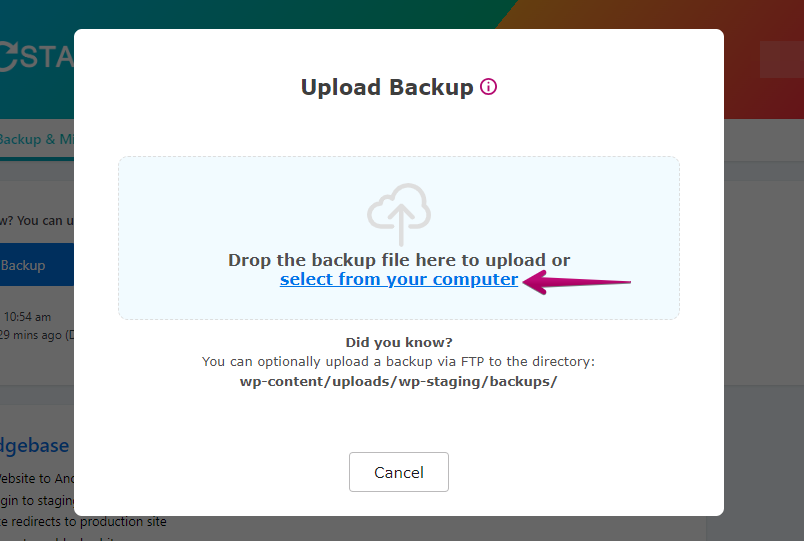
- Upload the backup file you exported from your WordPress.com website.
- The backup has been successfully uploaded.
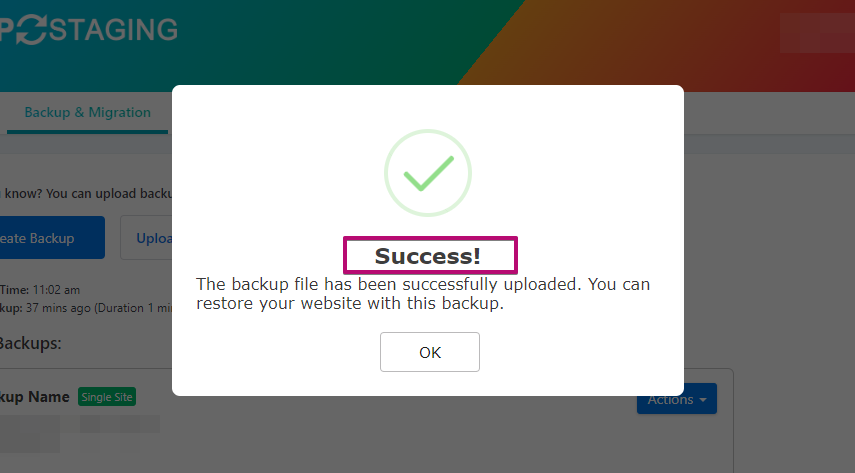
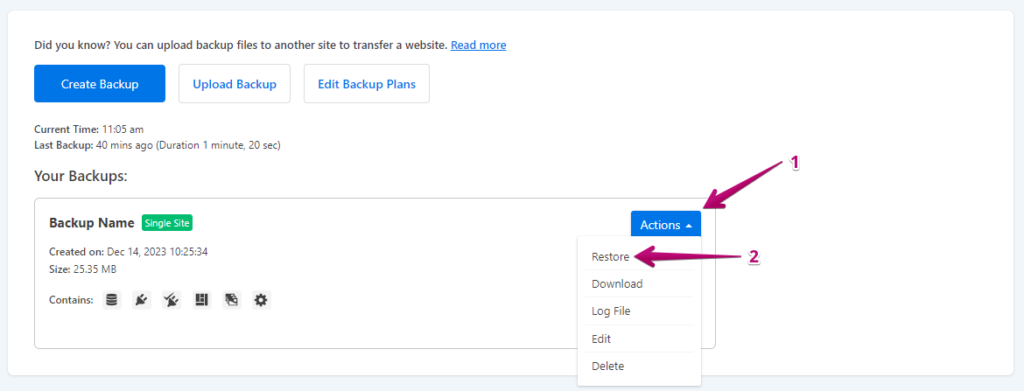
- After that, click the ‘Action’ button, and then choose the ‘Restore’ option.
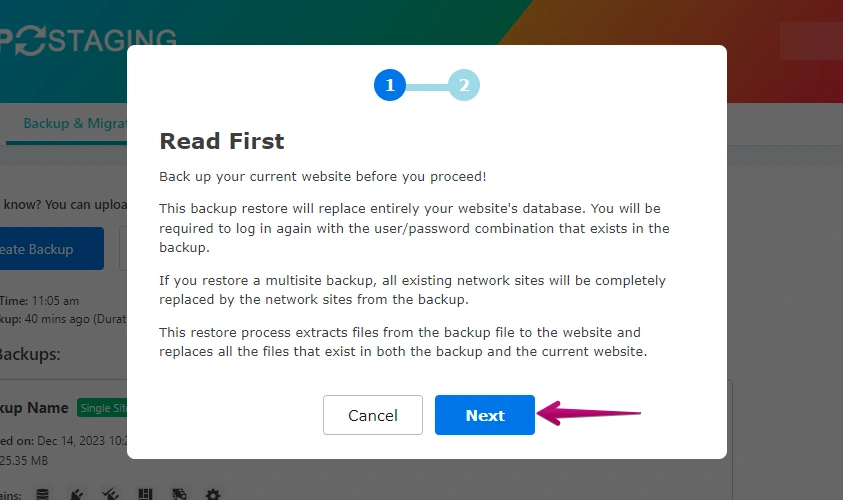
- Press the ‘Next’ button.
- Following that, click the ‘Restore’ button.
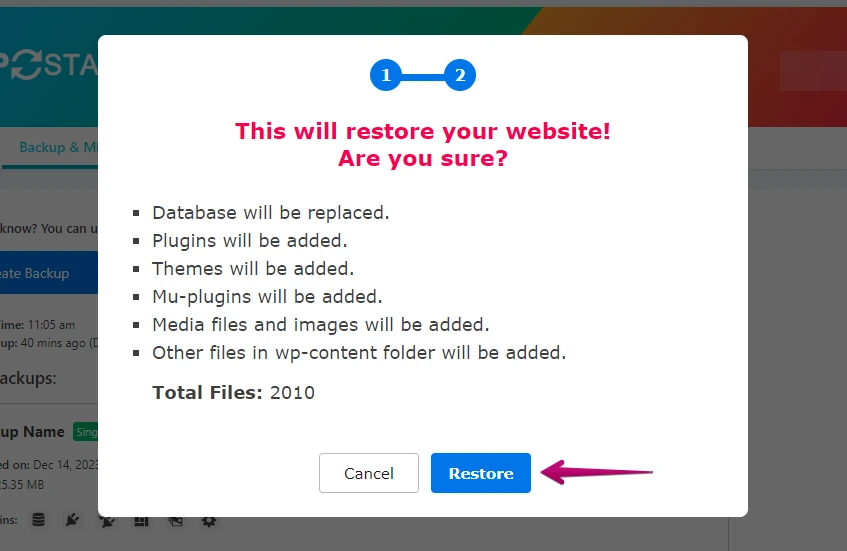
- The restoration of the backup is complete.
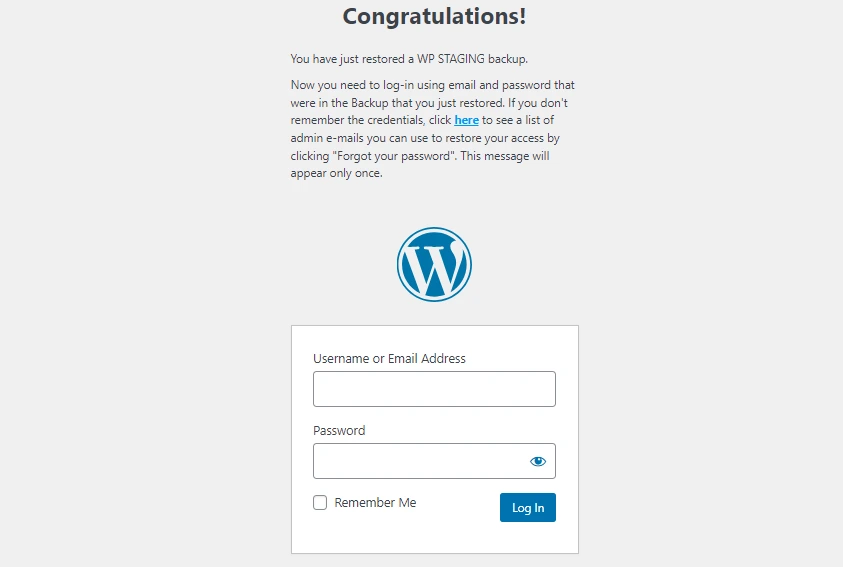
- Click the "OK" button.

- Access your WordPress website again.
Perform a thorough website test on Bluehost to verify the proper functioning of all components. Additionally, review all content for accuracy and formatting.
Conclusion
In summary, migrating to Bluehost is a strategic choice for improved website performance, security, and user experience. With advantages like flexibility, scalability, robust support, and cost-effectiveness, Bluehost empowers website owners for a more successful hosting experience. Make the proactive move to unlock these benefits and elevate your online presence.