Migrating your BuddyBoss theme staging site to the production environment can be a breeze with the right tools. The WP Staging plugin offers a straightforward and efficient way to achieve this transition.
In this step-by-step guide, we’ll walk you through the process of using the WP Staging plugin to ensure a smooth and successful deployment.
Contents
- 5 Advantages of Using Staging Sites with BuddyBoss
- Pushing Your BuddyBoss Staging Site to Production Site
- Step 1: Install and Activate WP Staging Pro
- Step 2: Backup Using WP Staging Pro
- Step 3: Create a Staging Site
- Step 4: Verify that Buddyboss functions as expected on the staging site.
- Step 5: Test and Make Changes
- Step 6: Backup Your Staging Site
- Step 7: Pushing Your Staging Site to Production Site
- Step 8: Check the Production Site Changes
- Conclusion
- Related Articles
5 Advantages of Using Staging Sites with BuddyBoss
Utilizing a staging site for BuddyBoss, or any WordPress site, brings key advantages in development, testing, and deployment. BuddyBoss, tailored for online communities, gains from this approach due to:
- Testing & Quality: The staging site ensures safe testing of BuddyBoss updates, addressing bugs and compatibility issues.
- Risk Mitigation: Staging protects the live site by securely testing configurations, preventing downtime.
- Plugin & Theme Compatibility: Staging checks BuddyBoss compatibility, avoiding user disruptions.
- Content & Design: Staging previews BuddyBoss changes, allowing feedback before going live.
- Security Testing: Staging secures updates, safeguarding user data and community interactions.
FIND THE LINK BELOW TO DOWNLOAD THE FREE VERSION FOR TESTING:
Pushing Your BuddyBoss Staging Site to Production Site
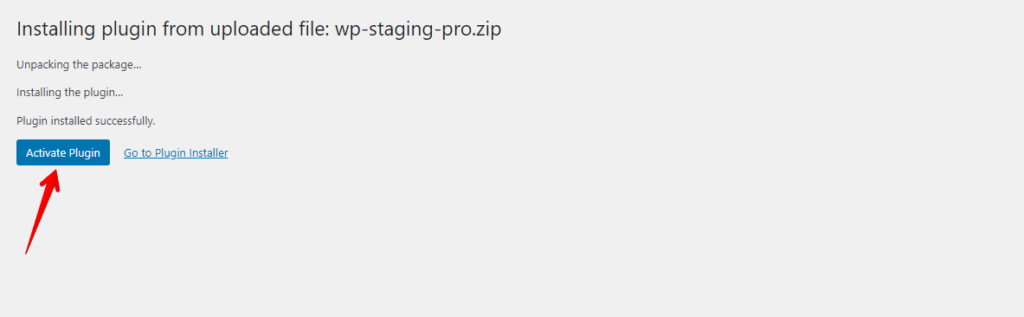
Step 1: Install and Activate WP Staging Pro
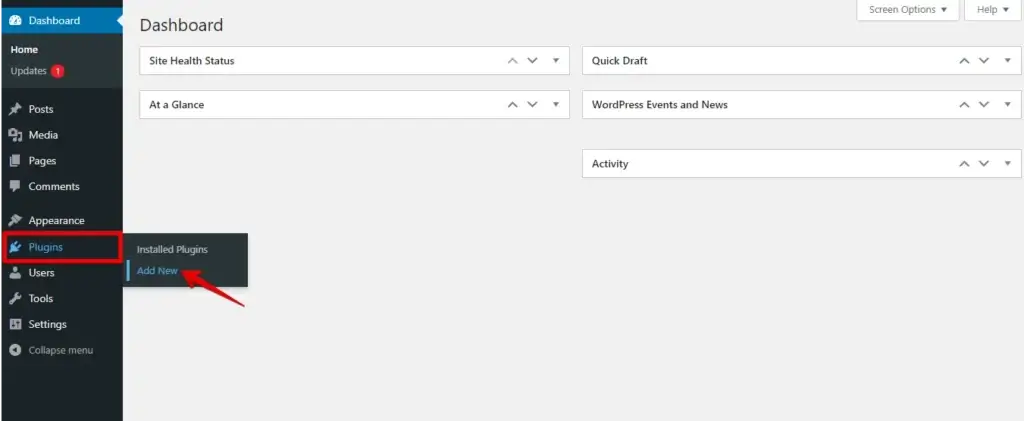
- Log in to your WordPress dashboard.
- Go to the "Plugins" section and click "Add New".
- After that, click the upload plugin button and add your "WP Staging Pro" plugin file, then click on the "Install Now" button.
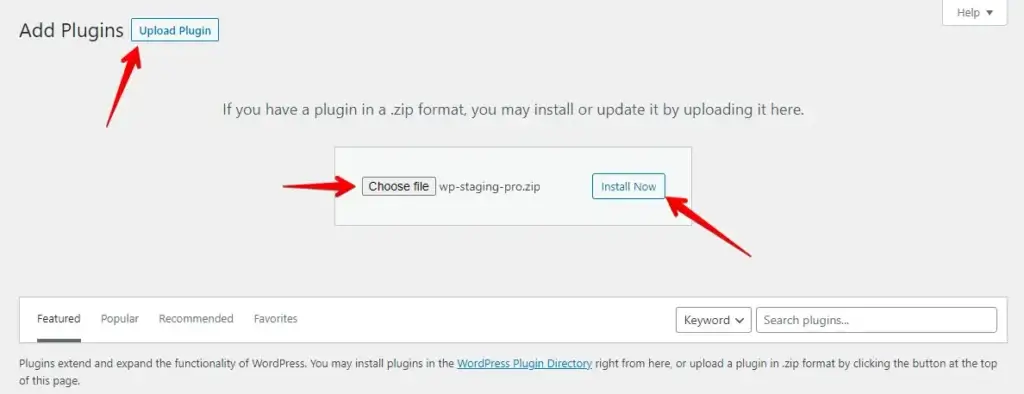
- Activate the plugin.
Step 2: Backup Using WP Staging Pro
Before beginning, create backups of your production sites through "WP Staging Pro." These backups are essential for any mishaps during the staging site creation procedure.
Here’s a step-by-step explanation of how to create a backup using WP Staging:
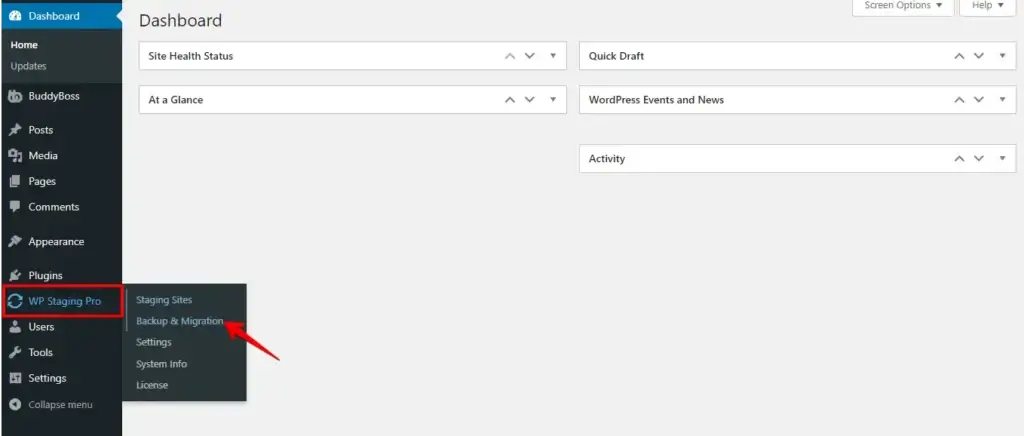
- After WP Staging Pro activation, go to your WordPress dashboard and find the "Backup & Migration" option in the WP Staging Pro.
- Now click on the "Create Backup" button.
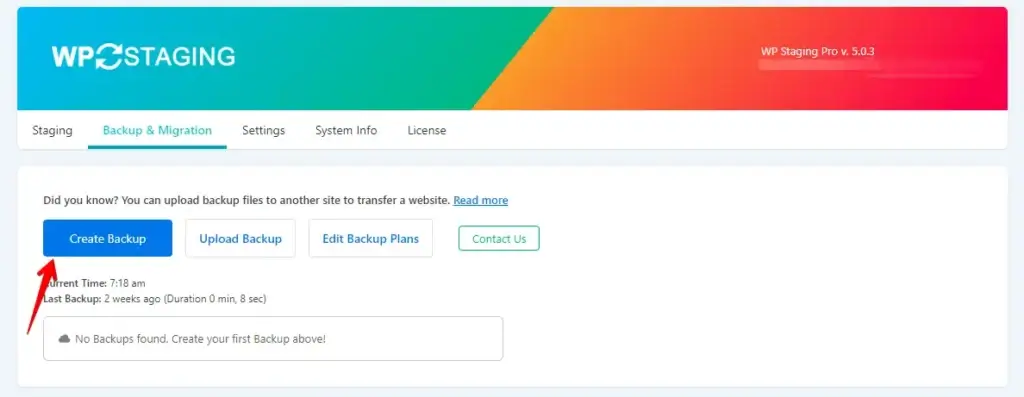
- Provide a name for the backup.
- Check the all checkbox to generate a complete backup of your website, then proceed by clicking the "Start Backup" button.

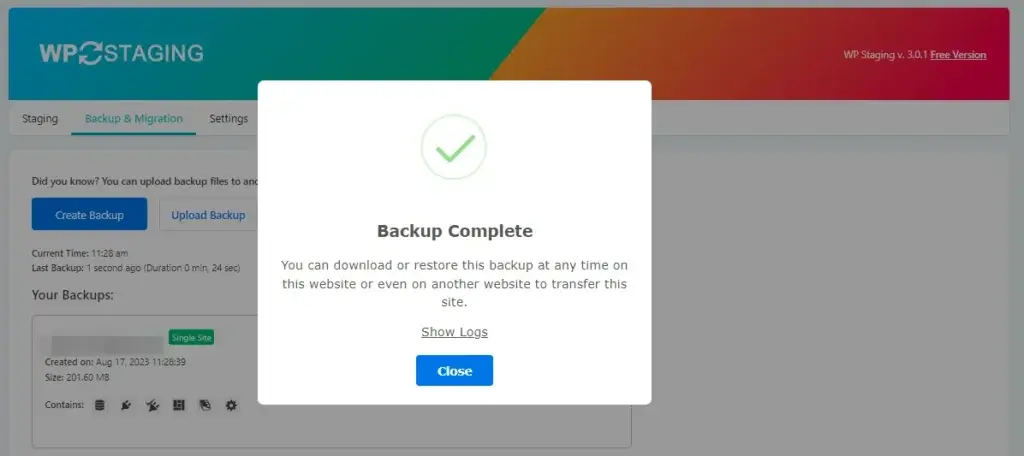
- The backup has been successfully created.
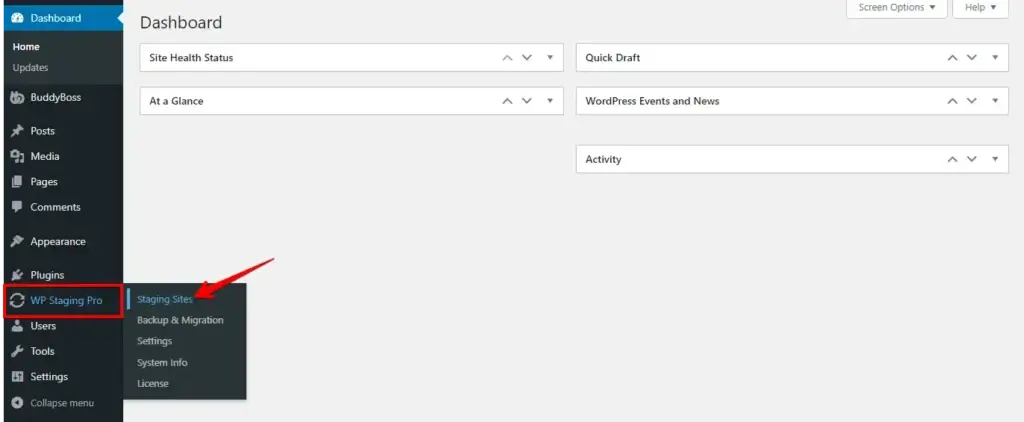
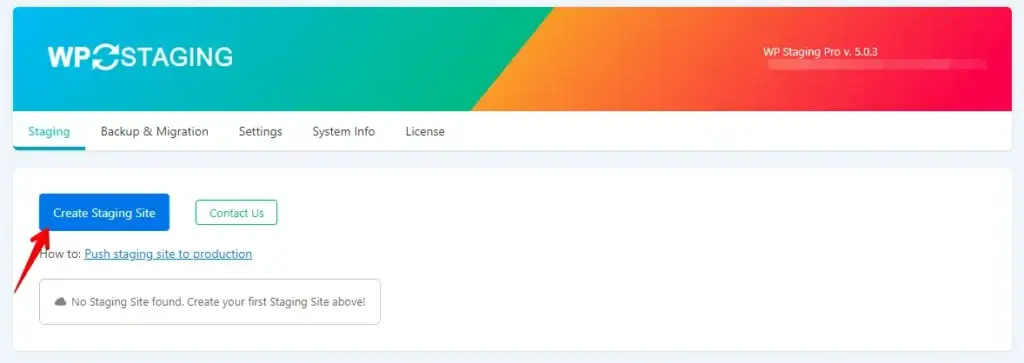
Step 3: Create a Staging Site
- Once the backup is generated, locate the WP Staging option on your dashboard’s sidebar and click the "Staging sites" tab.
- Now click on the "Create Staging Site" button.
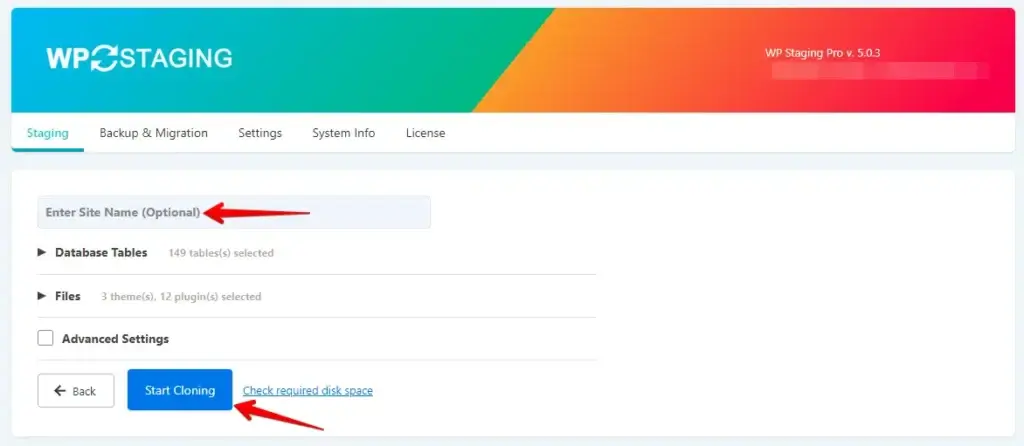
- Provide a name for the staging site and click on the "Start Cloning" button.
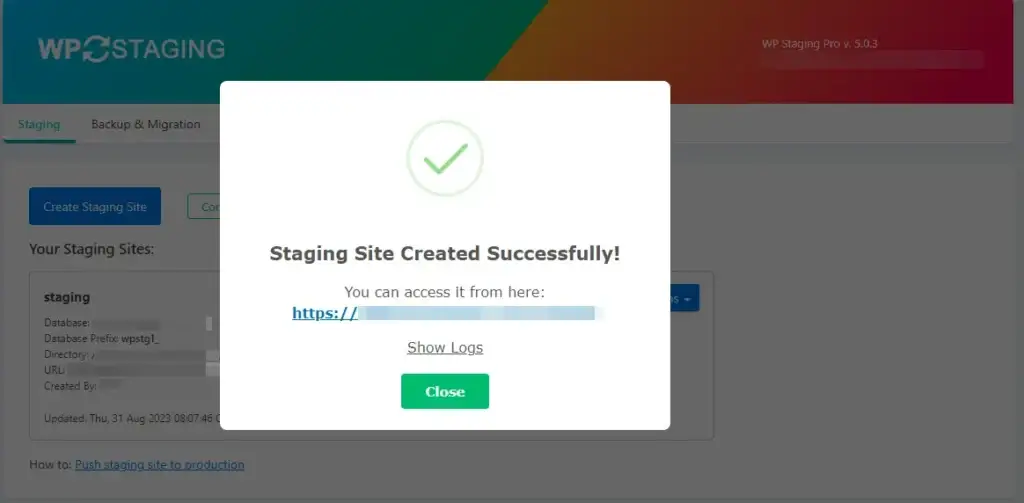
- Your staging site has been successfully created.
Step 4: Verify that Buddyboss functions as expected on the staging site.
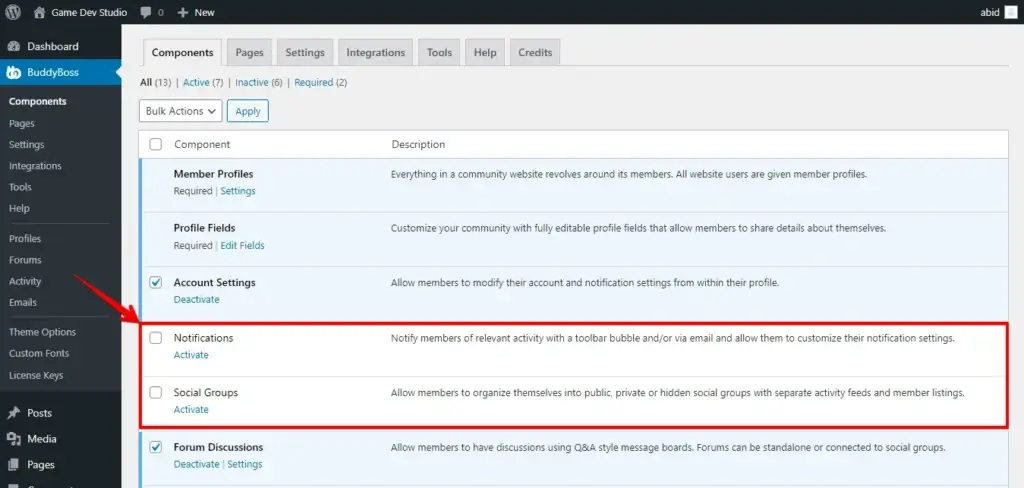
- Here is my "Production site" Component Setting.
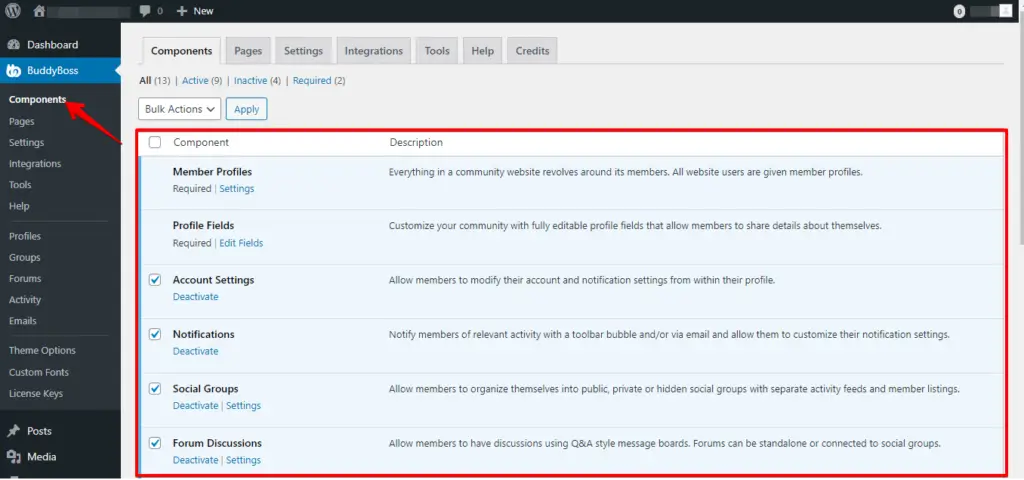
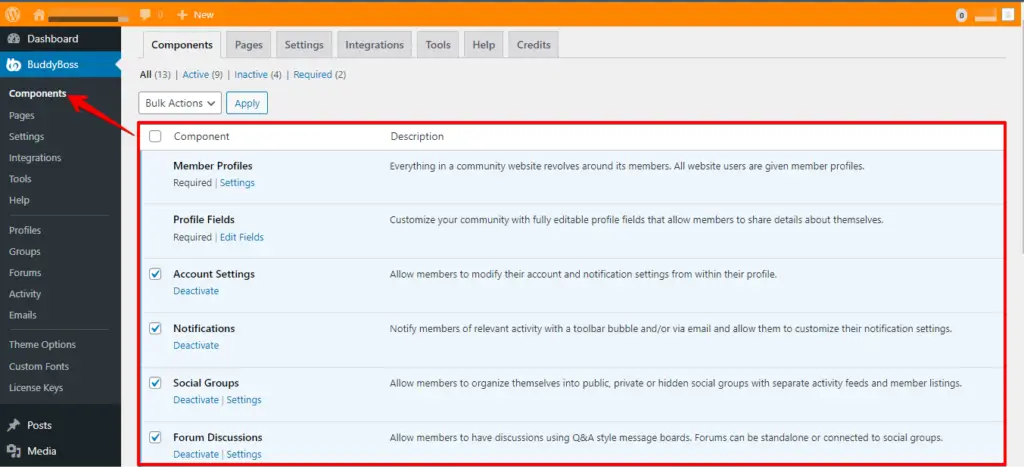
- Here is my "Staging site" Component Setting.
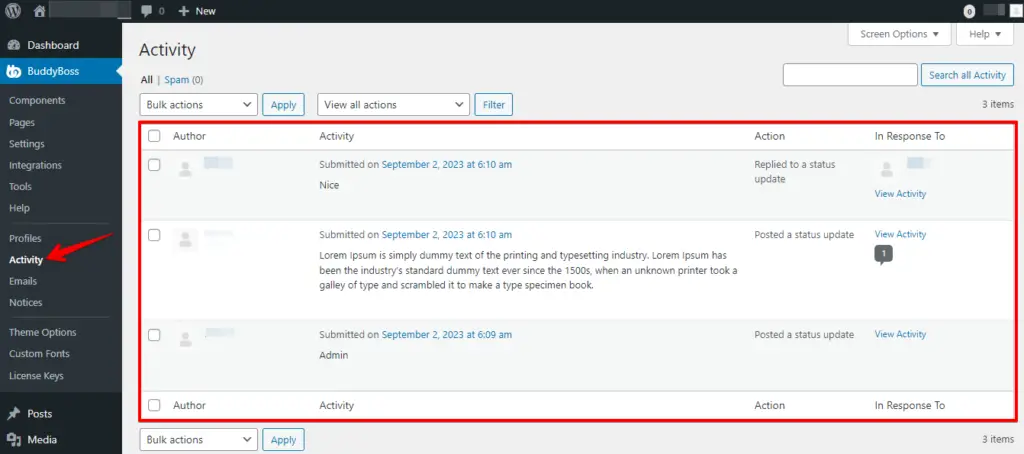
- Here are my "Production site" Activities.
- Here are my "Staging site" Activities.
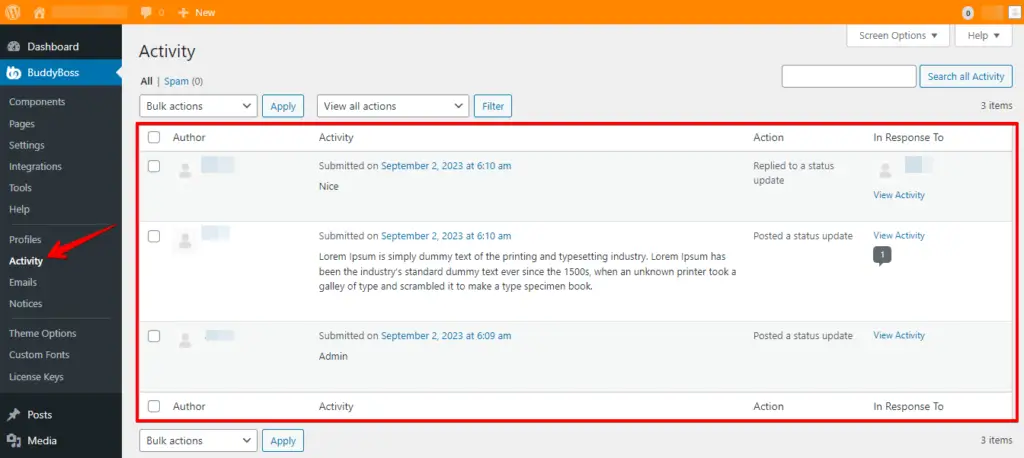
- Systematically review the settings within each tab, one at a time.
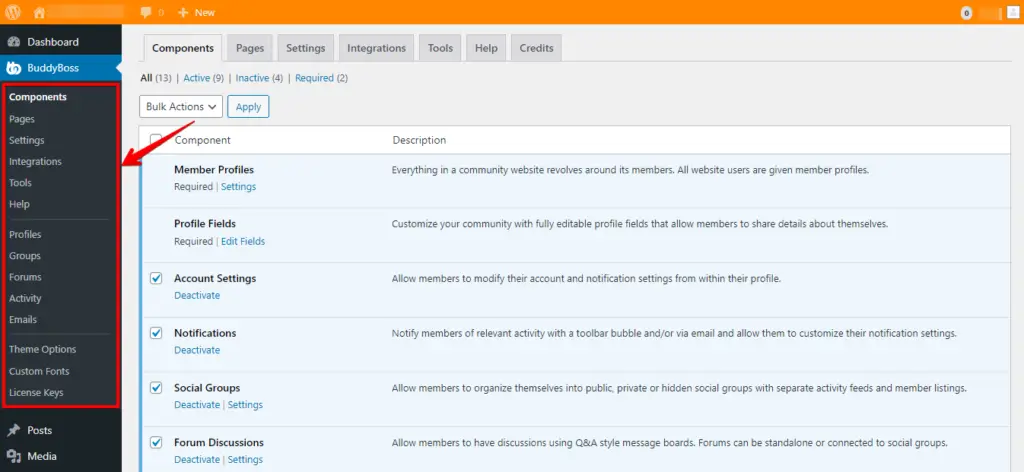
As you can observe, every word remains intact; the WP Staging plugin has effectively replicated all the data from my production site to the staging site, ensuring complete safety.
Step 5: Test and Make Changes
Your staging site has been successfully duplicated to match your production site. Feel free to test updates, plugins, themes, and any desired modifications.
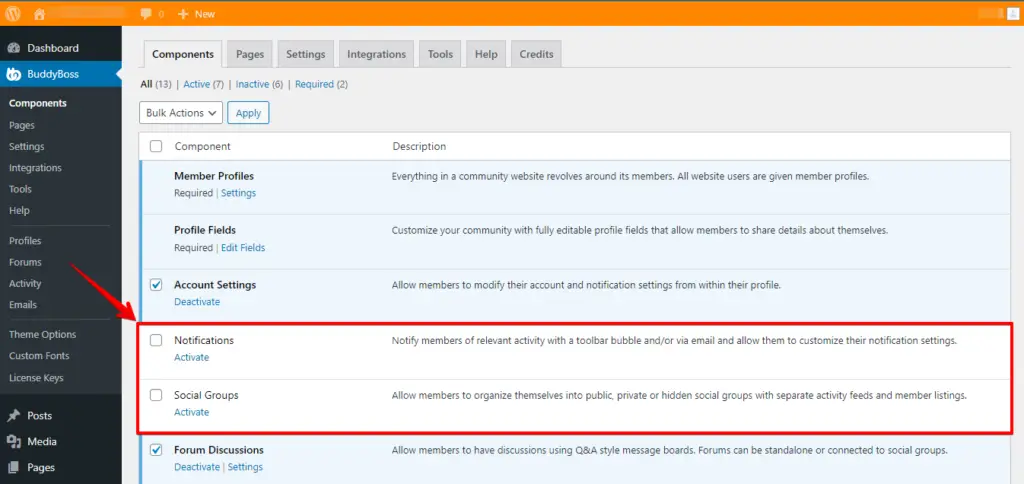
- As you can see, I’ve updated the Component setting on my staging site.
Step 6: Backup Your Staging Site
Before moving forward, take an additional backup of your Buddyboss staging site. This dual backup approach provides an extra layer of security in case any issues arise during the migration process.
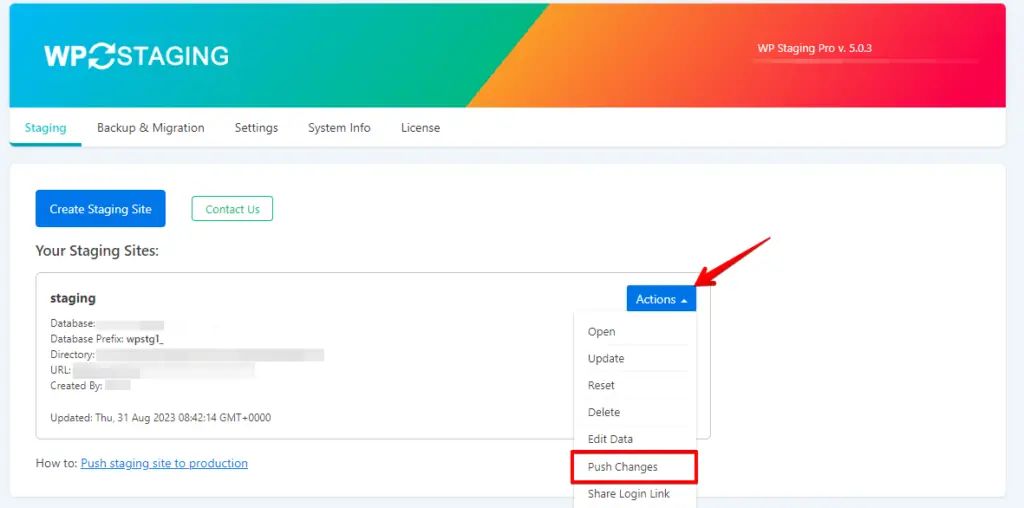
Step 7: Pushing Your Staging Site to Production Site
- Now move to your Production site and click on the Staging Sites option to locate the staging site.
- Inside the WP Staging plugin interface, you’ll encounter an "Actions" button where you can access the "Push Changes" option.
- Click on the "Push Changes" button.
- Now click on the "Confirm Push" button.
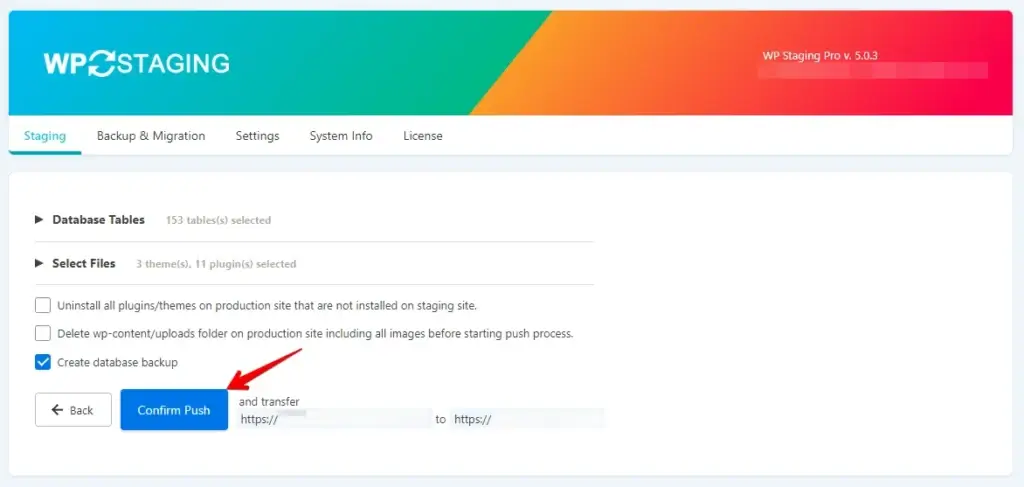
- Next, proceed to click the "Push" button.
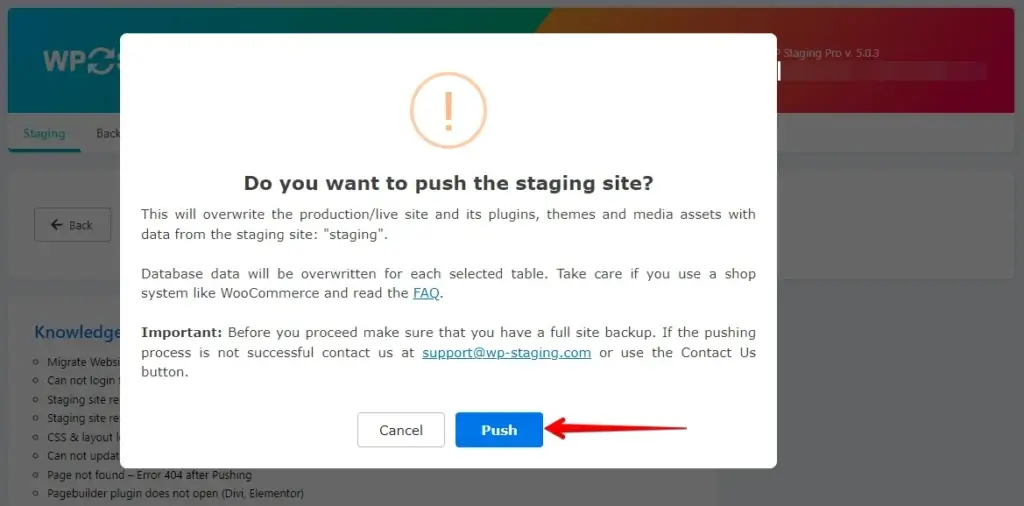
- Your staging site has been successfully pushed to your Production Site.

Step 8: Check the Production Site Changes
You can see all the updated component settings on my production site here. This is how you can safely push your Buddyboss staging site to your production site.
Conclusion
This step-by-step guide provides a meticulous path for smoothly transitioning your BuddyBoss theme staging site to production. Following these precise stages ensures a secure and controlled journey, minimizing risks and ensuring a seamless deployment.
Adhering to these steps can confidently enhance your BuddyBoss-powered online community while preserving site integrity and user experience.