In today’s fast-paced digital landscape, website migration has become critical to maintaining an online presence. If you are considering moving from Bluehost to WordPress.com, rest assured you’re not alone. This comprehensive guide will walk you through the entire process, ensuring a seamless transition without compromising your site’s functionality or SEO.
Contents
What are the reasons to transition from Bluehost to WordPress.com?
- User-Friendly Interface: WordPress.com offers a simplified platform for easy website management.
- Scalability and Performance: Ensure optimal website performance with scalable hosting solutions.
- Automated Backups and Security: Benefit from automated backups and robust security measures on WordPress.com.
- Built-in SEO Tools: Optimize your site for search engines effortlessly with integrated SEO tools.
- Diverse Theme Options: Choose from a wide range of professionally designed themes to customize your site’s appearance.
Preparing for the Website Migration
Before making any changes, creating a backup of your existing Bluehost content is crucial. This step guarantees the safeguarding of your data throughout the migration process. Here’s a guide on how to do it:
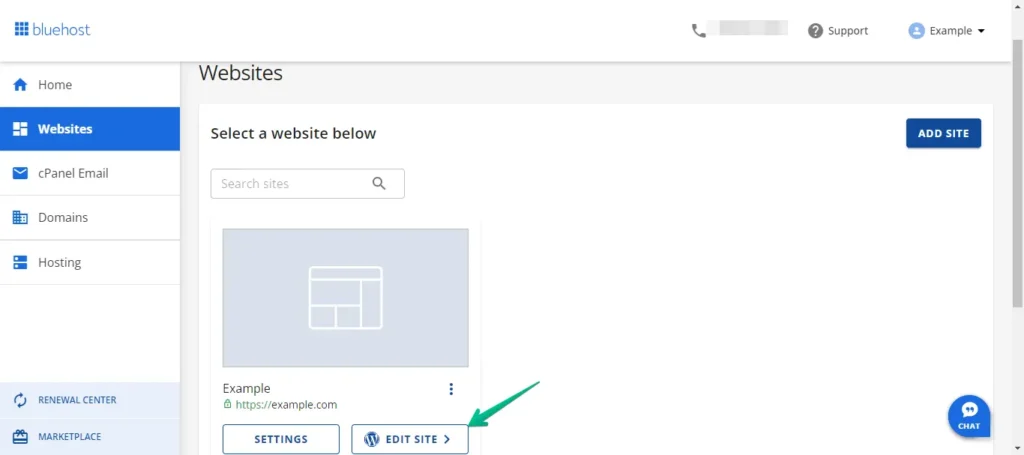
- Access your Bluehost WordPress website by logging in with your username and password or through your Bluehost admin panel.
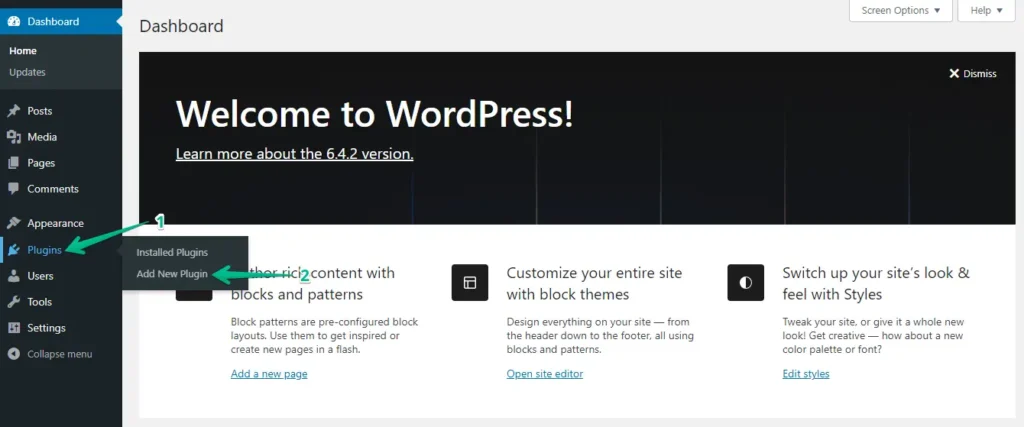
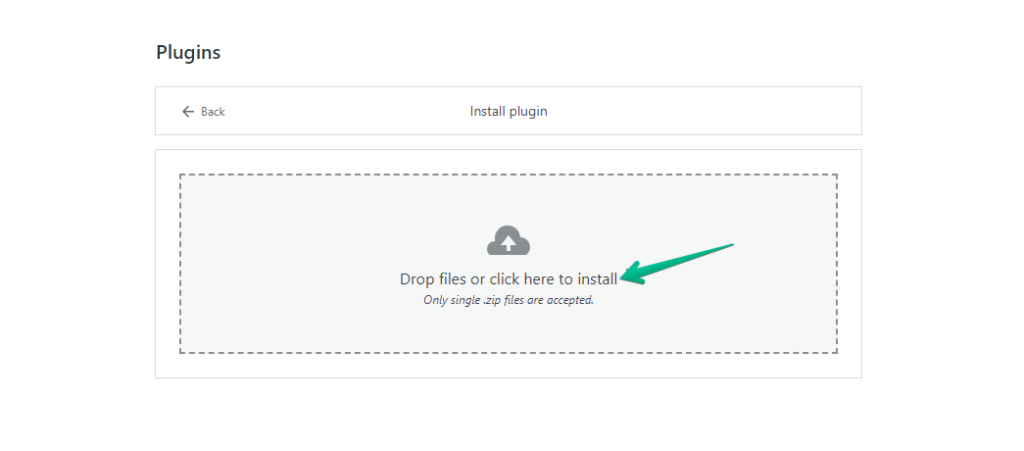
- Navigate to the "Plugins" section in the left menu and select the "Add New" button.
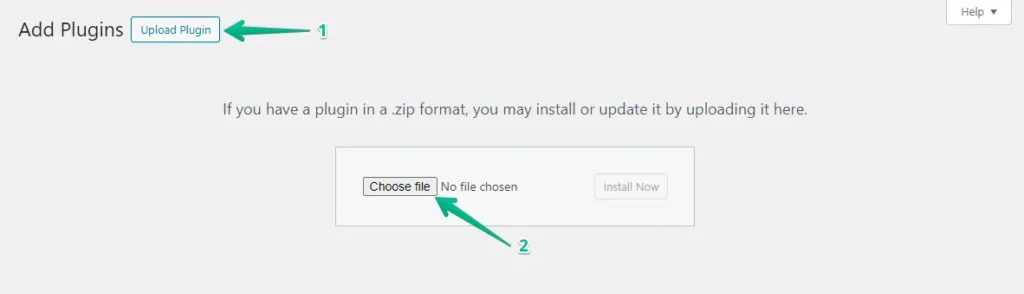
- Click the "Upload Plugin" button and then "Choose File" to upload the WP Staging | Pro plugin.
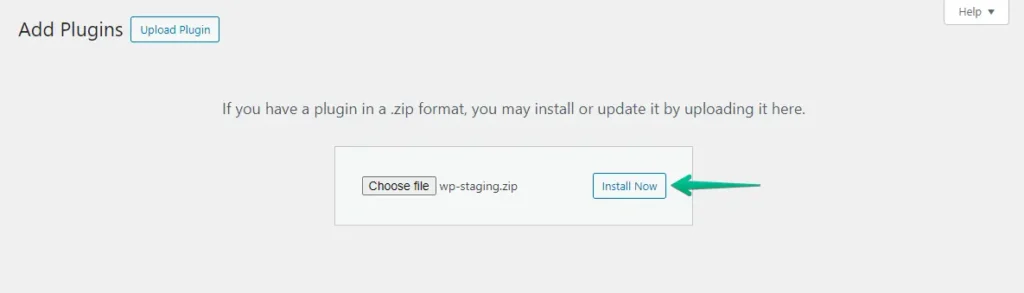
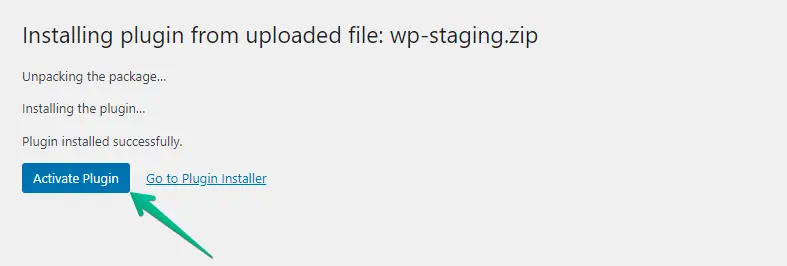
- Click the ‘Install Now’ button.
- After installing the plugin, proceed to activate it.
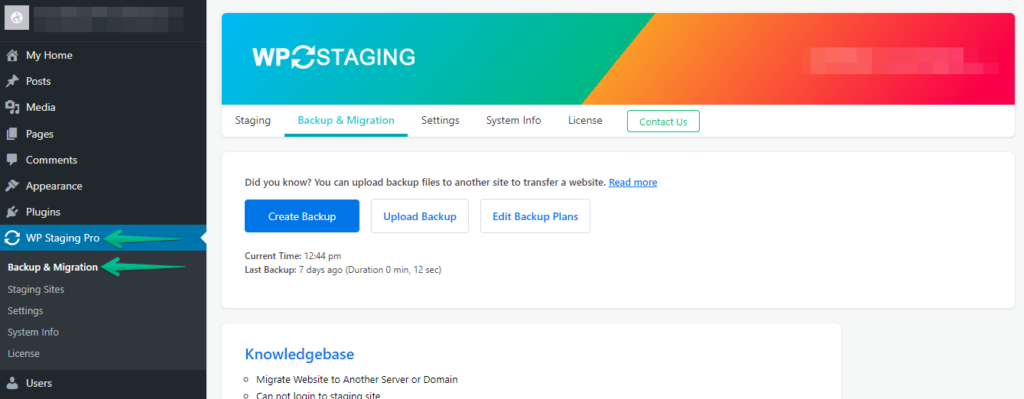
- Navigate to the menu on the left side, locate ‘WP Staging | Pro,’ and then click the ‘Backup & Migration’ option.
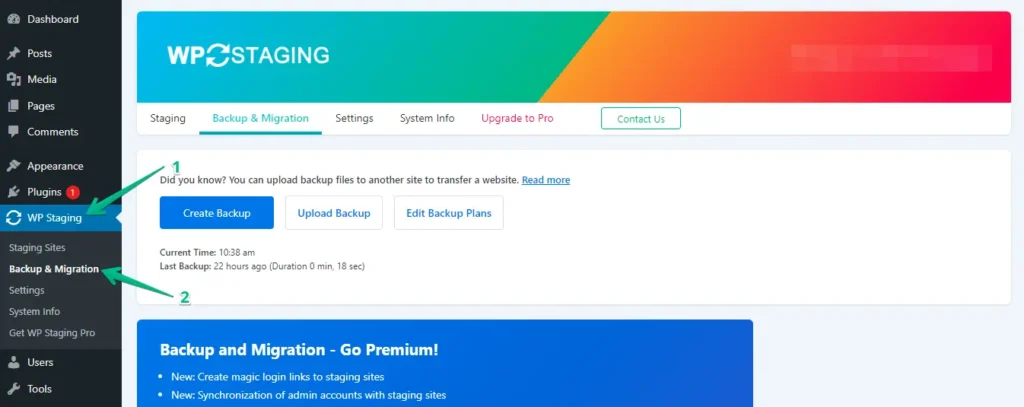
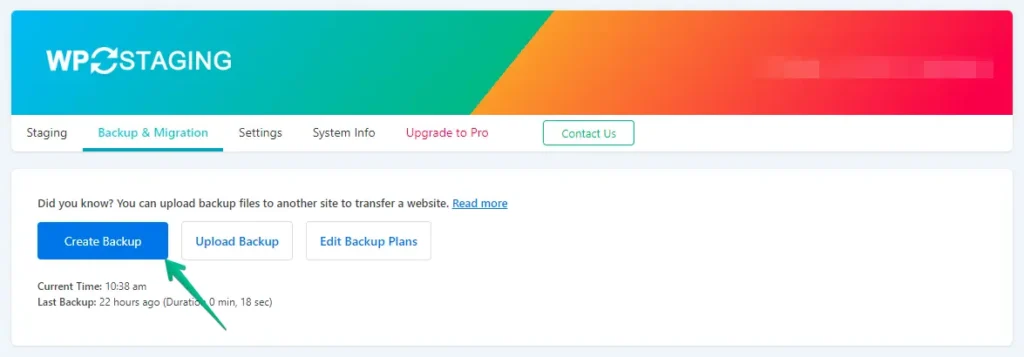
- If you don’t have a current backup, don’t worry. Simply click the "Create Backup" button to generate a new one.
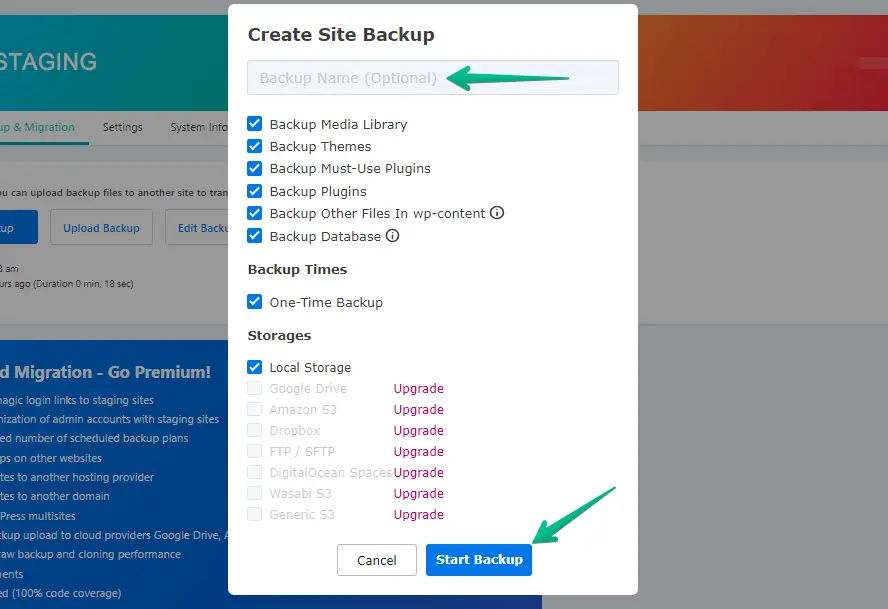
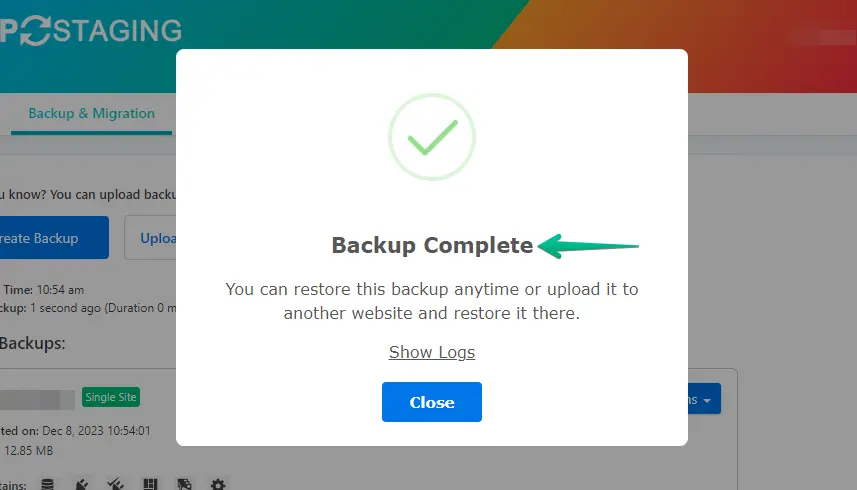
- Enter a name for your backup, and then click the "Start Backup" button.
- The backup has been successfully completed.
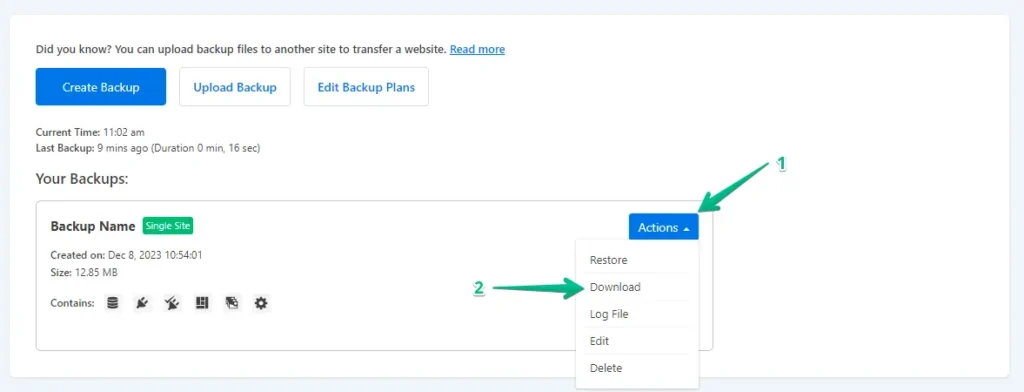
- After the backup process, you usually see a "Download" option under the "Action" button. Make sure to save this backup file securely on your computer.
The Process of Migration
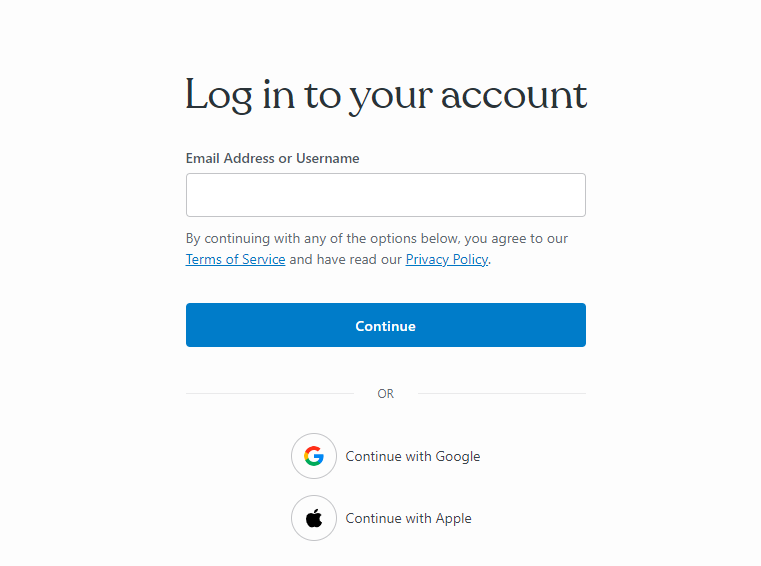
- Log in to Your WordPress.com Account
- Navigate to the "Plugins" section in the WordPress dashboard and click the "Upload" button.
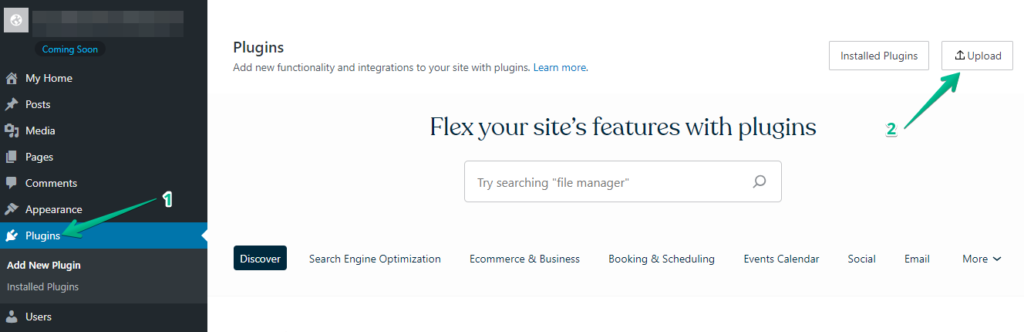
- Next, proceed to upload WP Staging Pro.
- After installation and activation, navigate to the "Backup & Migration" section in the WordPress dashboard under "WP Staging Pro."
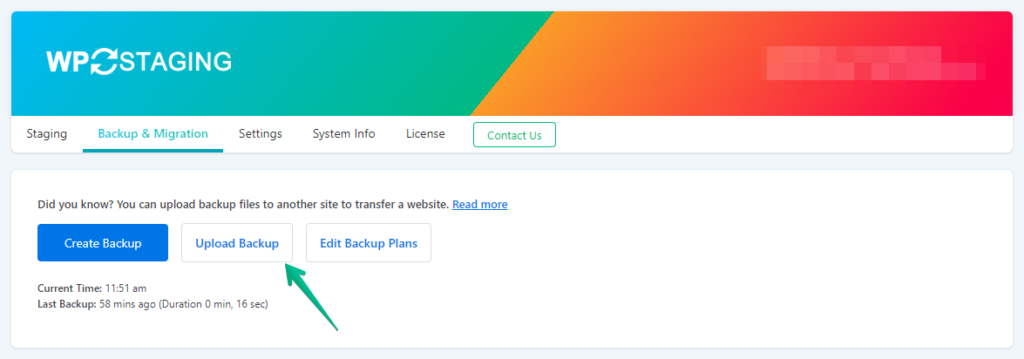
- Following that, click the ‘Upload Backup’ button.
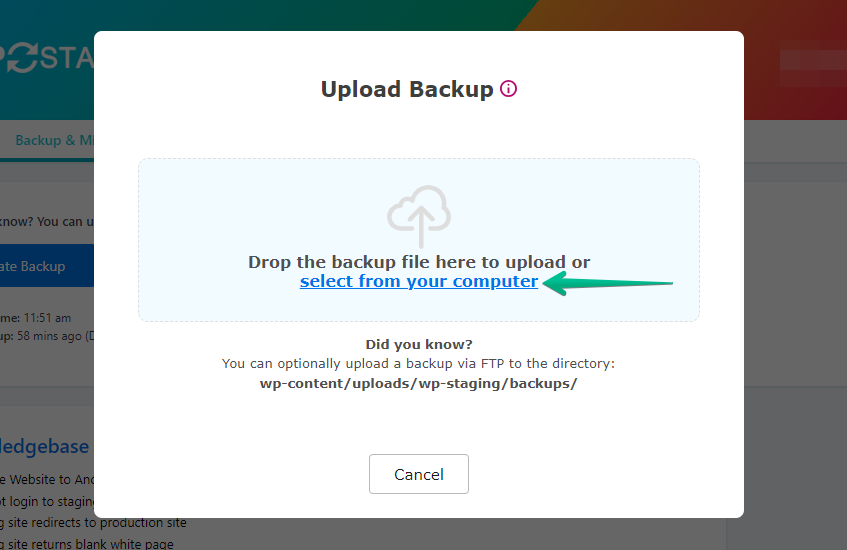
- Presently, upload the backup file exported from your Bluehost website.
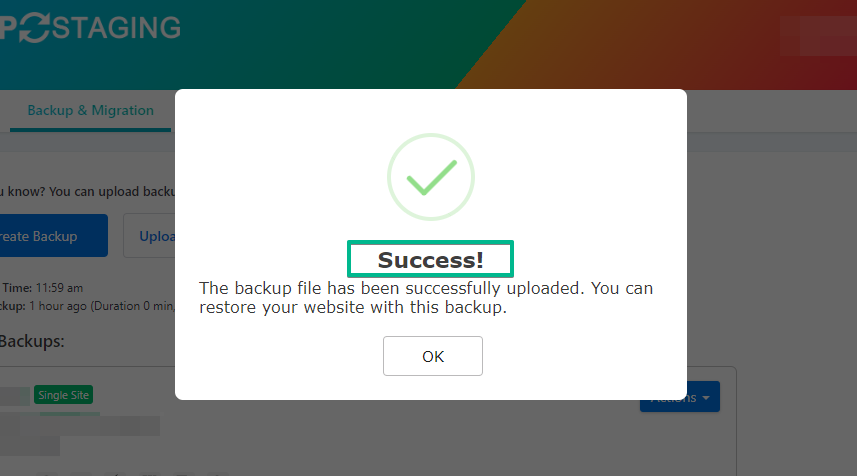
- The backup has been successfully uploaded.
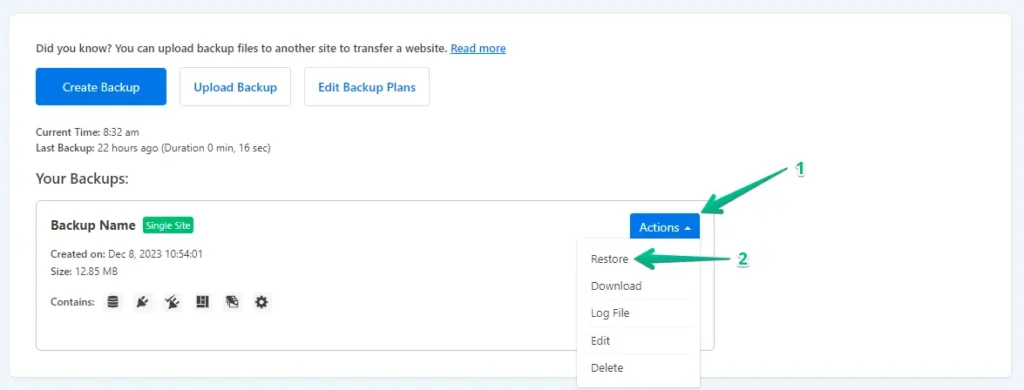
- After that, click the ‘Action’ button, and then click the ‘Restore’ option.
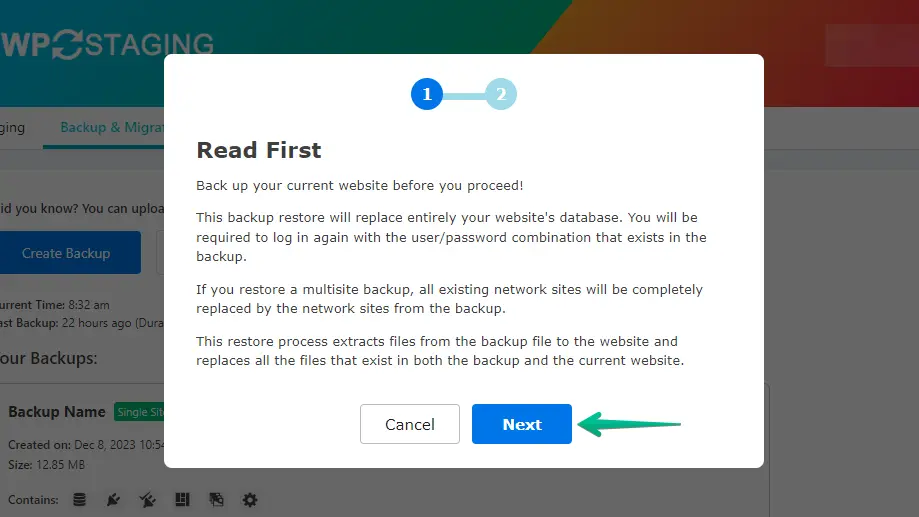
- Press the ‘Next’ button.
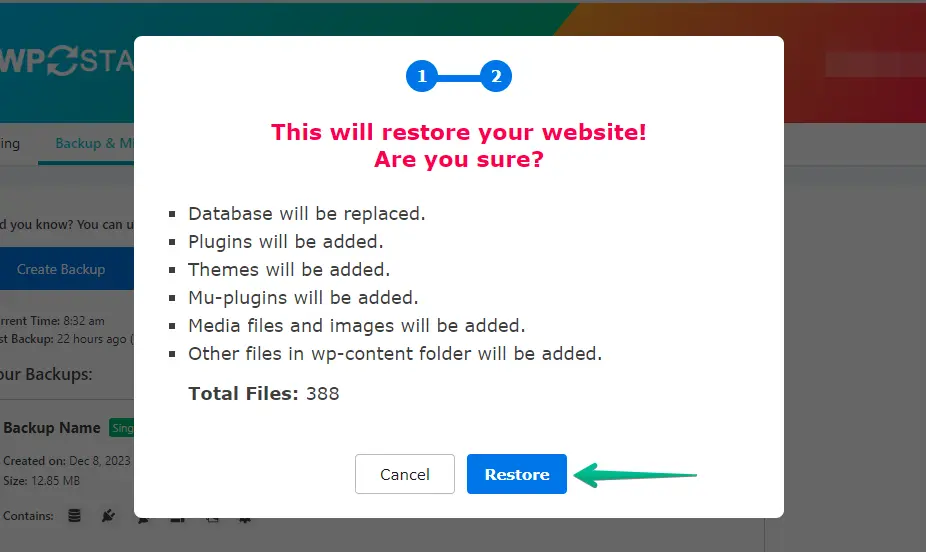
- Next, click the ‘Restore’ button.
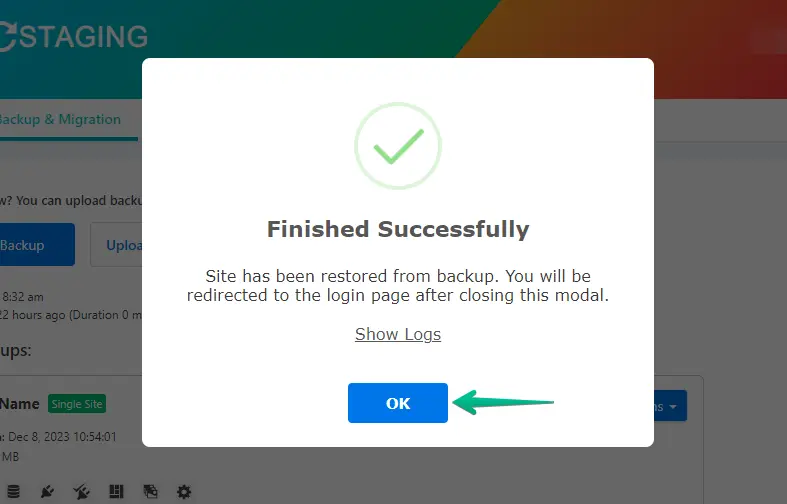
- The backup has been restored successfully.
- Click the "OK" button.
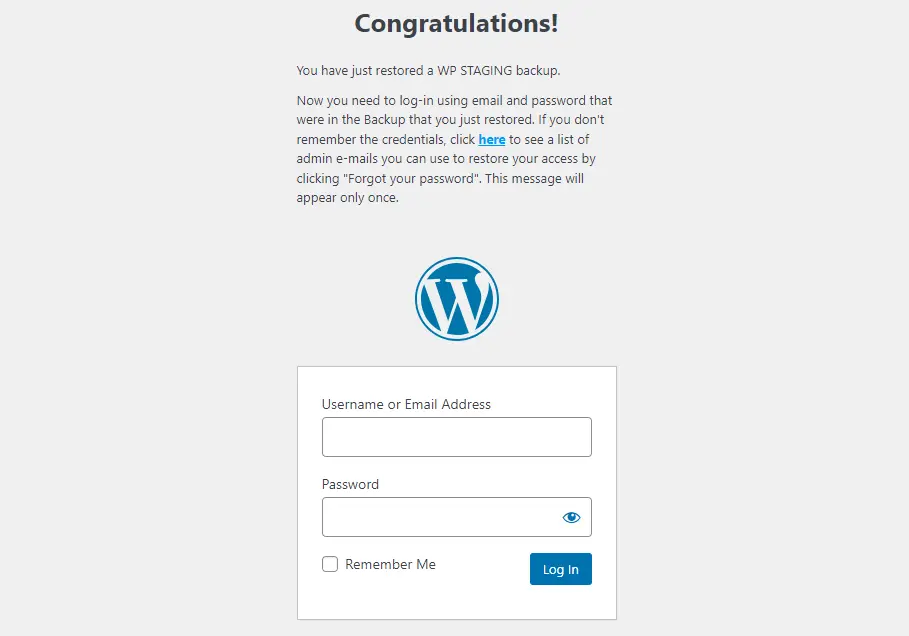
- Log in to your WordPress website again.
Perform a thorough website test on WordPress.com to ensure all components function as intended and review content for accuracy and formatting.
Conclusion
Migrating your WordPress site from Bluehost to WordPress.com can be transformative when executed meticulously. This guide has provided a step-by-step walkthrough, ensuring you maintain your site’s integrity and SEO performance throughout the transition.