Use Remote Sync to migrate sites directly between servers in minutes. → Pull a WordPress site from one server to another
This article explains how to back up and migrate your WordPress website with WP Staging Pro.
This backup feature can migrate and copy your entire WordPress website to another domain, new host, or new server, and often faster and more reliable than with any other existing plugin.
You can even use the WP Staging backup feature to migrate your staging site to a production website!
That is a very robust, high-speed feature, even for huge sites.
Contents
How to Migrate WordPress to a New Host
Check out the video below if you’d rather watch a video than read the article. It explains all the steps on how to migrate WordPress to a new host:
Create a Backup of Your WordPress Website
Important: If you want to migrate a WordPress multisite to another host that has a different domain structure, e.g. Domain versus Subdomain, you need to customize the target domains with filters. This is explained in this article!
Let’s start.
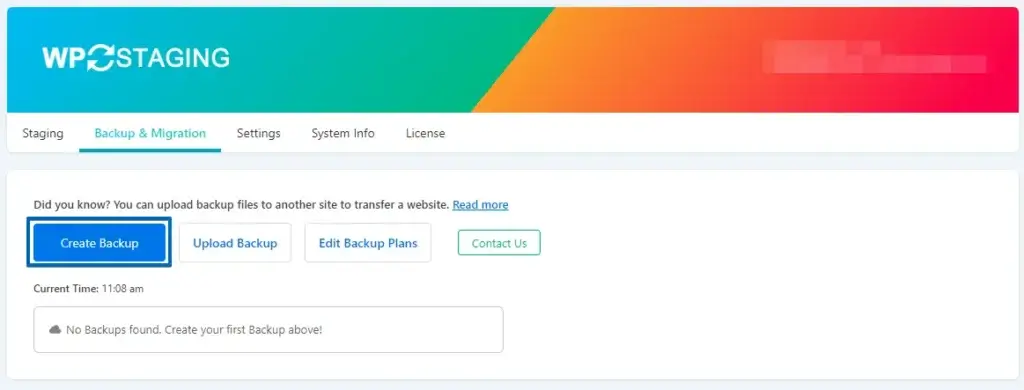
First, open the WP STAGING | PRO plugin and click the “Backup & Restore” button.

Click on “Create new Backup.“
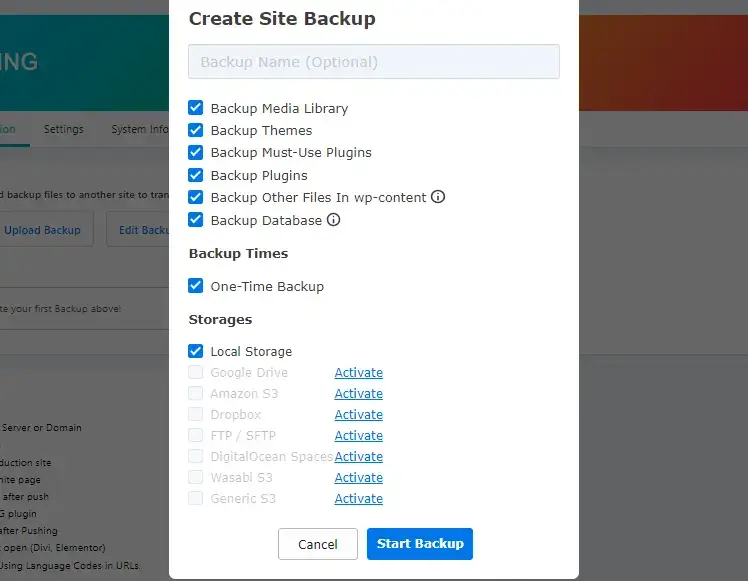
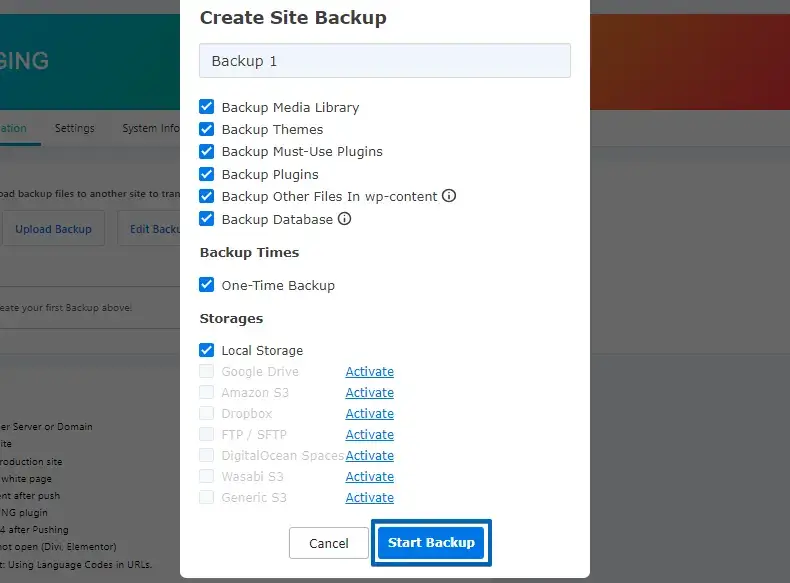
Optionally, you can set up here a name for the backup. Keep all checkboxes selected to make a full site backup.
Now click on “Start Backup.“
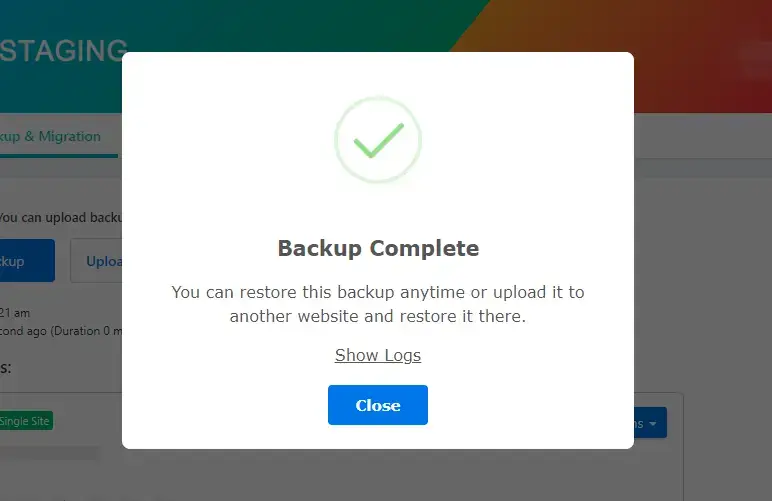
Once the backup is ready, you’ll see the message Backup Complete.
Upload the Backup File to the Remote Website
You have two options to upload the backup file to the remote destination website:
- Upload directly by using the link to the backup file. (Fastest solution)
- Downloading first and then uploading the backup to the destination server via an upload form or sFTP. (Slower, but useful if you have the backup file on your local computer)
Option 1: Upload directly by using the Backup URL
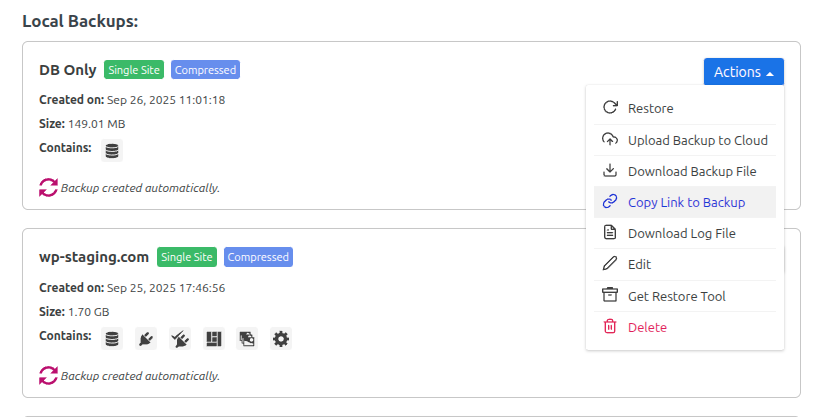
Go to WP Staging -> Backup & Migration. Select a backup and click on Actions -> Copy Link to Backup
Open WP Staging -> Backup & Migration on the destination remote server. Click on Upload Backup and paste the link to the backup file by using Ctrl+V (Win|Linux) or Cmd + V (Mac). The link contains a unique hash, making it unguessable by unauthorized parties to access it.
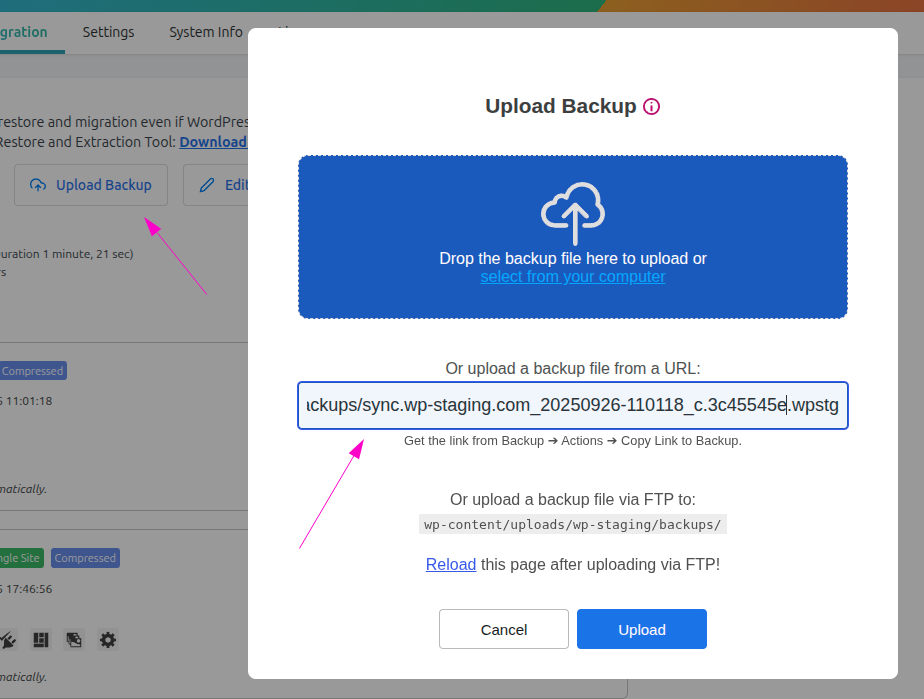
Click on Upload and the file will be transferred from the source website to the remote one.
After uploading it you can access it from the list of backups to restore that backup file in the next step.
Option 2: Download first and Upload then to the Destination Server
Click on Actions and Download.

That will download the entire website packed in one file with the extension “.wpstg.”
Upload the Backup File to the New Host
The only requirement for the next step is to have WordPress already installed on the destination host to migrate your website. That can be a new WordPress site from scratch or another website you want to make identical to the source website.
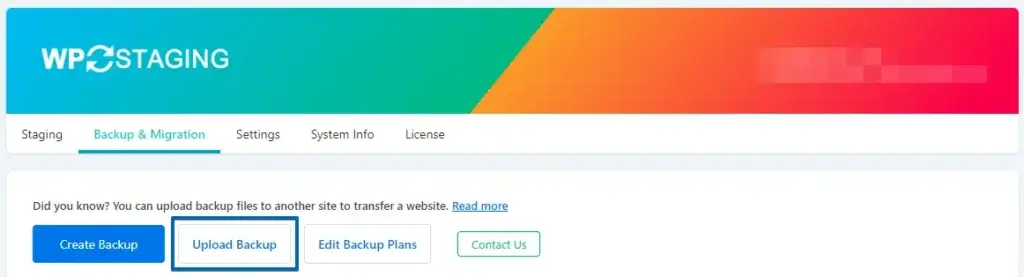
Go to WP Staging Pro and click the “Backup” menu.
Click on “Upload Backup.“
Select the backup from your local computer and upload it.
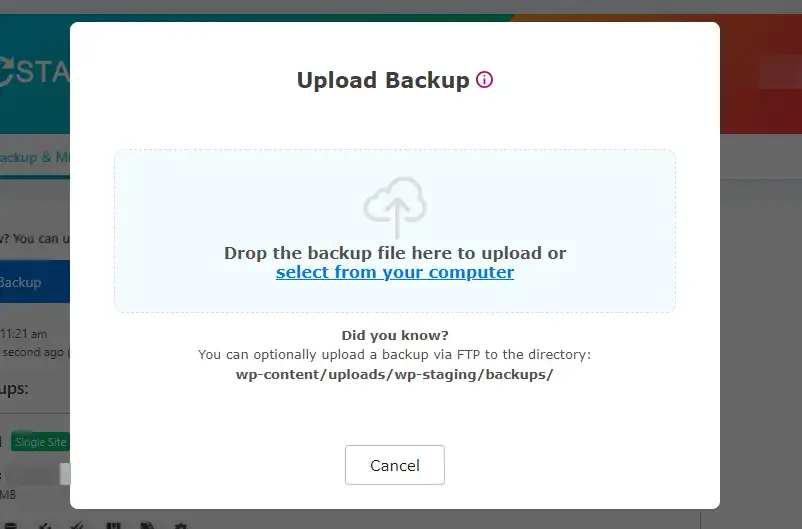
Optionally you can upload the backup file via FTP by uploading the backup to the folder
/wp-content/uploads/wp-staging/backups/
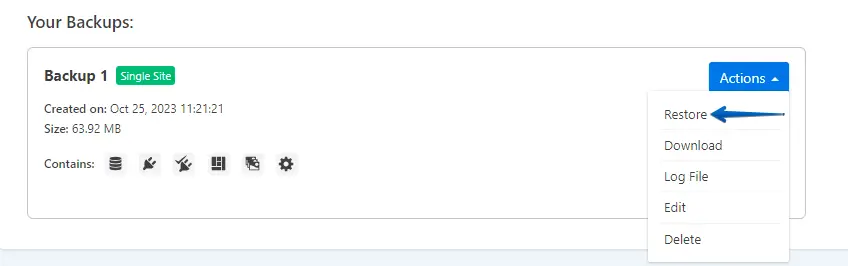
Restore the Backup File
Once the backup is uploaded, click Actions > Restore, Next, and Restore.
The restore process will take a few minutes, depending on the backup file size. Once it is ready, you will see the finished modal.
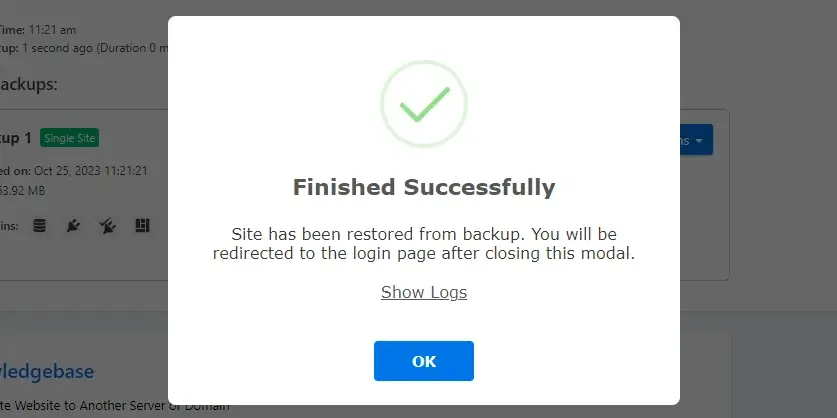
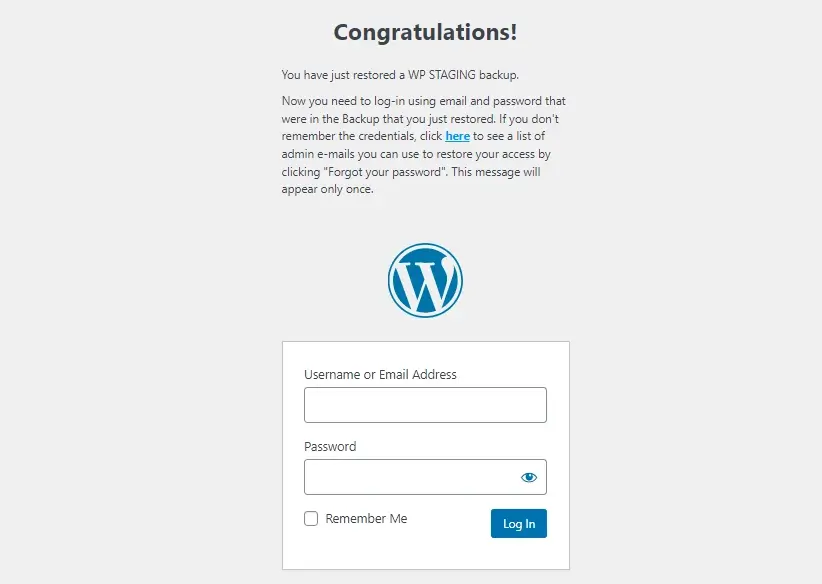
After clicking on OK, WordPress redirects you to the login screen. Enter the username and password of the source website.
That’s it. With the help of WP Staging Pro, you have migrated the entire website to another server.