Traditional backups for your WordPress website are essential, but what happens if the backup location fails? Redundancy takes data protection a step further by storing copies in separate locations.
Backing up your WordPress website on multiple locations adds an extra layer of security, ensuring your essential information remains accessible even if one location experiences issues. Consider redundancy as your ultimate protection against data loss.
Backup Locations Supported by WP Staging Pro
WP Staging Pro offers flexibility for backing up your WordPress website on different cloud storage services, such as Amazon S3, Google Drive, DigitalOcean Spaces, FTP/SFTP, Wasabi S3, Generic S3, and Dropbox. Depending on the frequency of your website updates, you can take manual or automatic backups.
| Google Drive | Google’s cloud storage solution for securely storing files, documents, and backups. |
| Amazon S3 | A highly reliable and scalable cloud storage service provided by Amazon Web Services (AWS). |
| Dropbox | A user-friendly cloud storage platform known for its ease of use and collaboration features. |
| FTP / SFTP | This term refers to any cloud storage provider that offers compatibility with Amazon S3 APIs, enabling seamless integration with various applications and services. |
| Digital Ocean Spaces | Object storage service provided by DigitalOcean, offering scalable and cost-effective storage solutions. |
| Wasabi S3 | A cloud storage service known for its affordability, speed, and reliability, compatible with Amazon S3 APIs. |
| Generic S3 | Refers to any cloud storage provider that offers compatibility with Amazon S3 APIs, enabling seamless integration with various applications and services. |
Please find a detailed guide on how you can backup your WordPress site on the above platform:
- How to Back up WordPress to Google Drive
- How to Back up WordPress to Dropbox
- How to Back up WordPress to Amazon S3
Backing Up to Multiple Locations
Here’s a step-by-step guide for using the WP Staging Pro plugin:
1. Install WP Staging Pro
- Install Plugin: Navigate to the menu on the left, click “Plugins,” and click “Add New.”
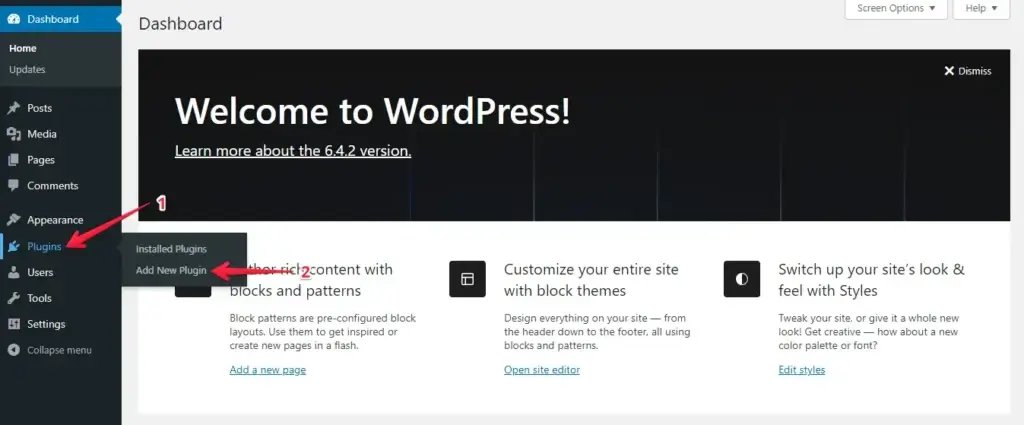
- Upload Plugin: Press the “Upload Plugin” button and click “Choose File” to upload the WP Staging Pro plugin.

- Afterward, click the ‘Install Now’ button.

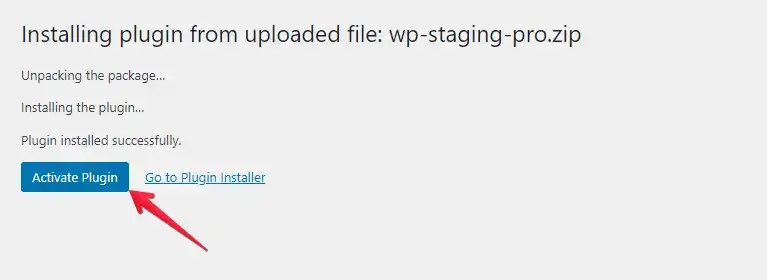
- After installing the plugin, proceed to activate it.
- Navigate to Backup Settings: You can adjust your backup in the “Backup & Migration” tab. What type do you want? You can also select items for backup (such as plugins, themes, etc.) and perform other customizations.
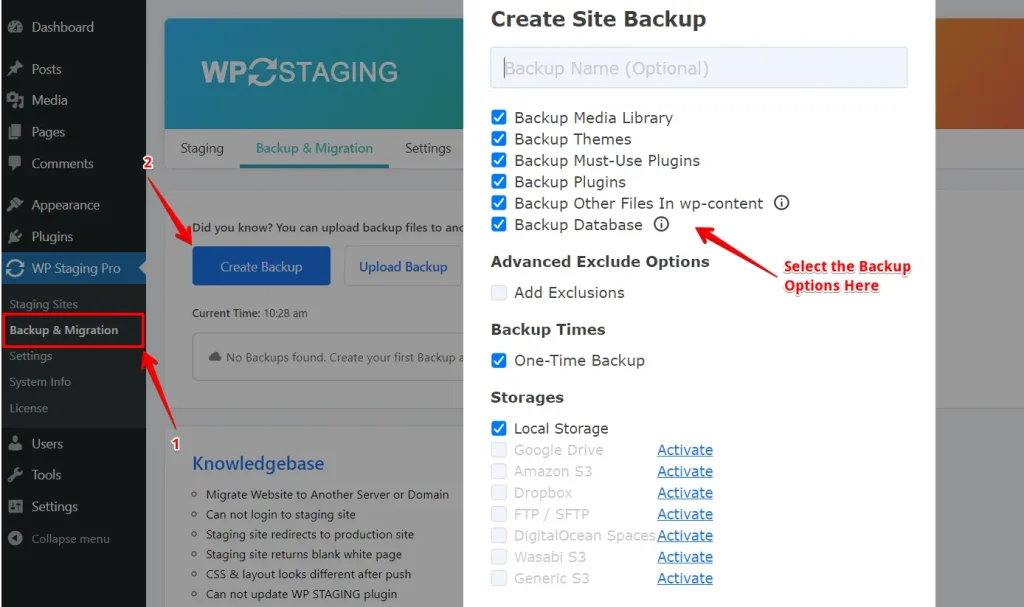
- Under the “Storages” section, select the backup locations to store your backups. You can choose multiple options.
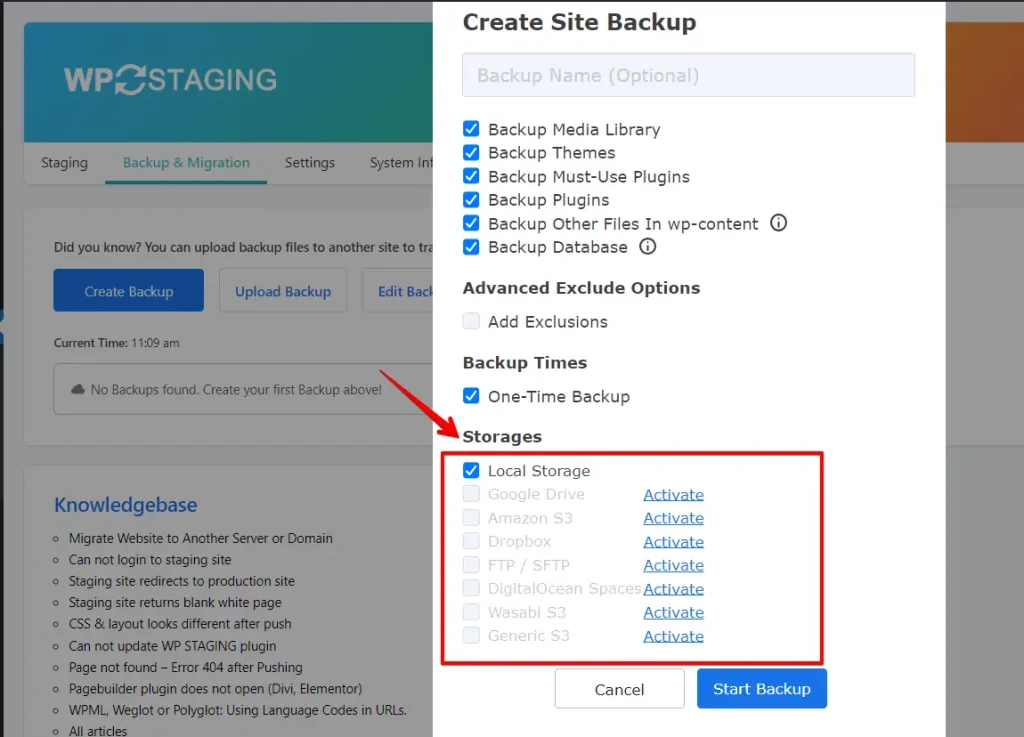
- Configure Each Backup Location for Maximum Security—Choose your preferred platform, click the active link, and configure your account settings. You can select multiple options and click “Start Backup” to begin the process.
Are You Ready to Enable Automatic Backups with WP Staging Pro?
It might be time to consider enabling automatic backups with WP Staging Pro. This powerful plugin offers a range of features to simplify the backup process and provide peace of mind, knowing that your website’s data is secure.
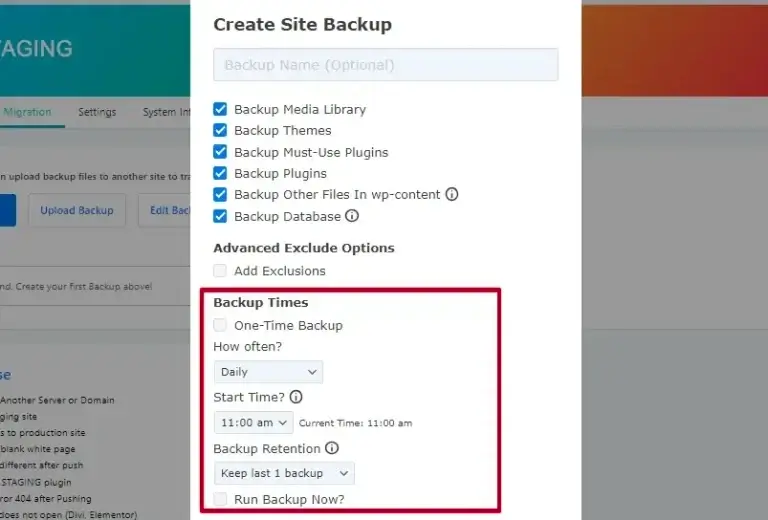
Navigate to Backup Settings. Click the “Create Backup” button, but unselect the “One-Time-Only” checkbox.
Conclusion
Securing your WordPress site with backups is essential. With a backup plan, you can avoid losing data and facing downtime. Create, store, and test backups regularly. Explore tools like WordPress plugins, cloud storage, and WP Staging for backup, staging, and accessibility.
Related Articles
- Why should you Periodically Back up your WordPress Site
- How to Back up your WordPress website Manually via CPanel
- How to Create Scheduled Backup with WP Staging Pro
- Tips to Back up WordPress Production and Staging Website
- How to Backup Website to Amazon S3 Bucket. Create Amazon S3 API Credentials
- What is the Best WordPress Backup Plugin? A Review

